canDoubleSpringBallJumpMidAir (Expert)
Using a mid-air Spring Ball jump twice during a single jump to gain even more height. This consists of a tight variant of mid-air Spring Ball jump, then turning off Spring Ball, then a second mid-air Spring Ball jump all while still climbing upwards. This is typically used underwater with HiJump, but it is technically possible in lava without HiJump or to perform more than two Spring Ball jumps in acid.
Dependencies: canTrickySpringBallJump, canDisableEquipment, canMidAirMorph, canSpringBallJumpMidAir, canTrivialMidAirMorph
Strats ()
|


Using an exact runway size of 7 tiles; use extremely precise, controlled Spring Ball bounces to cross the ocean. 7 tiles of runspeed can freely be achieved by requipping SpeedBooster after reaching the max normal run speed. Mockball down the submerged ramp and begin Spring Ball bouncing either above the water, or under water using the platforms. The final Spring Ball bounce must be on the left edge of the rightmost underwater platform. While the bounce is occuring, setup a mid-air Spring Ball Jump to escape the water and reach the door. Requires: {
"notable": "Speedy Spring Ball Bounce to the Door"
}
"canInsaneJump"
"canSpeedyJump"
"canSpringBallBounce"
"canDoubleSpringBallJumpMidAir"
"canMockball" |
|
Requires: "canSuitlessMaridia" "h_doubleSpringBallJumpWithHiJump" Collects items: 3 |
|
Requires: "canSuitlessMaridia" "h_doubleSpringBallJumpWithHiJump" Collects items: 3 |
|
Requires: "canSuitlessMaridia"
"h_doubleSpringBallJumpWithHiJump"
{
"obstaclesNotCleared": [
"A",
"B",
"C"
]
} |
From: 2
Right Door
To: 1
Left Door


Triple Spring Ball jump through the Lava Dive. Start with a Gravity jump, then delay the second jump as much as possible, and get all of the pauses close to as early as possible. Entrance condition: {
"comeInWithGMode": {
"mode": "any",
"morphed": true
}
}Requires: {
"notable": "Artificial Morph, Triple Spring Ball Jump"
}
"canTrickyGMode"
"canGravityJump"
{
"tech": "canDoubleSpringBallJumpMidAir"
}
"h_artificialMorphSpringBall"
"canInsaneJump"
{
"lavaFrames": 275
}
{
"gravitylessLavaFrames": 200
}
"h_heatedGModeOpenDifferentDoor" |
From: 2
Right Door
To: 1
Left Door
Triple Spring Ball jump through the Lava Dive. Delay the second jump as much as possible, and get all of the pauses close to as early as possible. Entrance condition: {
"comeInWithGMode": {
"mode": "any",
"morphed": true
}
}Requires: {
"notable": "Artificial Morph, Triple Spring Ball Jump"
}
"canTrickyGMode"
"h_artificialMorphDoubleSpringBallJump"
"canInsaneJump"
{
"gravitylessLavaFrames": 640
}
"h_heatedGModeOpenDifferentDoor" |
From: 4
Lava, Left Wall
To: 3
Above Lava Junction
Double springball jump out of a walljump starting from the top of the left wall Namihe. Requires: {
"notable": "HiJumpless Suitless Double Springball Jump"
}
"canSuitlessLavaDive"
"canUseEnemies"
"canDoubleSpringBallJumpMidAir"
"canSpringwall"
"canPreciseWallJump"
{
"heatFrames": 270
}
{
"gravitylessLavaFrames": 240
} |
From: 5
Lava, Center Namihe
To: 3
Above Lava Junction


Gravity jump from two platforms below the lowest-right Namihe. Double Spring Ball Jump out of the lava without HiJump. Requires: "canSuitlessLavaDive"
"canGravityJump"
"canDoubleSpringBallJumpMidAir"
{
"heatFrames": 400
}
{
"lavaFrames": 100
}
{
"gravitylessLavaFrames": 200
} |
From: 5
Lava, Center Namihe
To: 3
Above Lava Junction
Double Spring Ball Jump from below the lowest-right Namihe. Double Spring Ball Jumps are easier in Lava than in Water. Requires: "canSuitlessLavaDive"
"h_doubleSpringBallJumpWithHiJump"
{
"heatFrames": 255
}
{
"gravitylessLavaFrames": 225
} |
From: 4
Center Platform Junction
To: 3
Junction Left of Green Gate
Jump when the water level is at its lowest. Requires: "canSuitlessMaridia" "canTrickyJump" "h_doubleSpringBallJumpWithHiJump" |
|

Acid allows for more time than water to perform Spring Ball jumps. This gives just barely enough time to fit in three spring ball jumps. Requires: {
"notable": "Reverse Acid Dive"
}
{
"obstaclesNotCleared": [
"A"
]
}
"h_heatProof"
"canSuitlessLavaDive"
"h_doubleSpringBallJumpWithHiJump"
"canTrickyJump"
{
"acidFrames": 375
}
{
"or": [
"canInsaneJump",
{
"acidFrames": 450
}
]
}Unlocks doors: {"types":["super"],"requires":[]}
{"types":["missiles","powerbomb"],"requires":["never"]}Dev note: A crouch jump is not required. The leniency frames are worst-case scenario of not having enough time for the last jump, which is the most common way to fail. |
|
Requires: "canSuitlessMaridia" "h_doubleSpringBallJumpWithHiJump" |
From: 1
Bottom Left Door
To: 5
Platform Junction Near Top Left Door
Requires: "canSuitlessMaridia" "h_doubleSpringBallJumpWithHiJump" |
From: 1
Bottom Left Door
To: 5
Platform Junction Near Top Left Door
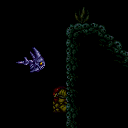
Double Spring Ball jump while artificially morphed and quickly unmorph and freeze the fish before landing on it. The required positioning of the fish is fairly precise; aim for it to be at the lowest point a few tiles from the right wall, or one tile from the right wall where Samus has more time to press against it. Down grabbing onto the fish makes this significantly easier. The fish should be frozen in one hit, this requires Plasma and Wave or a single Power Bomb hit and Plasma or Wave and Spazer. With Plasma, it is tricky to freeze the fish without killing it; avoid shooting it horizontally. The positioning of a Power Bomb, is fairly lenient, but will always hit the fish once if placed a couple tiles below the peak of a normal Spring Ball + HiJump. Entrance condition: {
"comeInWithGMode": {
"mode": "any",
"morphed": true
}
}Requires: {
"notable": "Artificial Morph, Double Spring Ball Jump onto Frozen Fish"
}
"canComplexGMode"
"h_artificialMorphDoubleSpringBallJump"
"canInsaneJump"
"canTrickyUseFrozenEnemies"
"canDownGrab"
{
"or": [
{
"and": [
"Plasma",
"Wave"
]
},
{
"and": [
"h_artificialMorphPowerBomb",
"Plasma"
]
},
{
"and": [
"h_artificialMorphPowerBomb",
"Wave",
"Spazer"
]
}
]
} |
|
Entrance condition: {
"comeInWithGMode": {
"mode": "direct",
"morphed": false
},
"comesThroughToilet": "any"
}Requires: {
"or": [
"canGravityJump",
{
"and": [
"Gravity",
{
"or": [
"canConsecutiveWallJump",
"SpaceJump",
"canLongIBJ",
{
"and": [
"HiJump",
"canWallJump"
]
},
{
"and": [
"HiJump",
"canTrickyDashJump",
"canDownGrab"
]
},
"h_maxHeightSpringBallJump",
{
"and": [
"HiJump",
"canSpringBallJumpMidAir"
]
}
]
}
]
},
{
"and": [
"Gravity",
"canUseFrozenEnemies",
{
"or": [
"canWallJump",
{
"and": [
"HiJump",
"canSpeedyJump"
]
},
"canSpringBallJumpMidAir"
]
}
]
},
"h_doubleSpringBallJumpWithHiJump",
{
"and": [
"canSuitlessMaridia",
"canTrickyUseFrozenEnemies",
"HiJump",
"canTrickySpringBallJump"
]
}
]
}Exit condition: {
"leaveWithGMode": {
"morphed": false
}
}Dev note: The h_maxHeightSpringBallJump is not a h_underwaterMaxHeightSpringBallJump, because Gravity is required. |
From: 4
Top Left Door
To: 5
Platform Junction Near Top Left Door
Double Spring Ball jump while artificially morphed and quickly unmorph and freeze the fish before landing on it. The required positioning of the fish is fairly precise; aim for it to be at the lowest point a few tiles from the right wall, or one tile from the right wall where Samus has more time to press against it. Down grabbing onto the fish makes this significantly easier. The fish should be frozen in one hit, this requires Plasma and Wave or a single Power Bomb hit and Plasma or Wave and Spazer. With Plasma, it is tricky to freeze the fish without killing it; avoid shooting it horizontally. The positioning of a Power Bomb, is fairly lenient, but will always hit the fish once if placed a couple tiles below the peak of a normal Spring Ball + HiJump. Entrance condition: {
"comeInWithGMode": {
"mode": "any",
"morphed": true
},
"comesThroughToilet": "any"
}Requires: {
"notable": "Artificial Morph, Double Spring Ball Jump onto Frozen Fish"
}
"canComplexGMode"
"h_artificialMorphDoubleSpringBallJump"
"canInsaneJump"
"canTrickyUseFrozenEnemies"
"canDownGrab"
{
"or": [
{
"and": [
"Plasma",
"Wave"
]
},
{
"and": [
"h_artificialMorphPowerBomb",
"Plasma"
]
},
{
"and": [
"h_artificialMorphPowerBomb",
"Wave",
"Spazer"
]
}
]
} |
From: 1
Bottom Door
To: 13
G-Mode Morph Junction By Middle Right Door
Entrance condition: {
"comeInWithGMode": {
"mode": "direct",
"morphed": true
},
"comesThroughToilet": "no"
}Requires: {
"or": [
{
"and": [
"Gravity",
{
"or": [
"h_artificialMorphIBJ",
{
"and": [
"h_artificialMorphSpringBall",
"HiJump"
]
},
{
"and": [
"h_artificialMorphSpringBall",
"canGravityJump"
]
}
]
}
]
},
"h_artificialMorphDoubleSpringBallJump"
]
}Clears obstacles: B |
From: 1
Bottom Door
To: 13
G-Mode Morph Junction By Middle Right Door
Entrance condition: {
"comeInWithGMode": {
"mode": "indirect",
"morphed": true
},
"comesThroughToilet": "any"
}Requires: {
"or": [
{
"and": [
"Gravity",
"h_artificialMorphIBJ"
]
},
"h_artificialMorphDoubleSpringBallJump"
]
} |
From: 2
Bottom Right Door
To: 3
Middle Right Door
Morph while descending through the door transition in order to bounce after the transition. Getting a high enough bounce requires speed in a specific range, corresponding to using about 7 tiles of runway. For the lowest speed in this range, a spring ball jump is needed to make it up; to prepare for this case, pause immediately when entering the room in order to unequip Spring Ball after the bounce. Entrance condition: {
"comeInSpinning": {
"speedBooster": "yes",
"unusableTiles": 1,
"minExtraRunSpeed": "$2.0",
"maxExtraRunSpeed": "$2.3"
}
}Requires: "canSuitlessMaridia" "canTrickyDashJump" "canTrickySpringBallBounce" "canDoubleSpringBallJumpMidAir" |
From: 2
Bottom Right Door
To: 3
Middle Right Door
Use Spring Ball to bounce after the transition. Getting a high enough bounce requires speed in a specific range, corresponding to using about 7 tiles of runway. For the lowest speed in this range, a spring ball jump is needed to make it up; to prepare for this case, pause immediately when entering the room in order to unequip Spring Ball after the bounce. Entrance condition: {
"comeInWithSpringBallBounce": {
"speedBooster": "yes",
"movementType": "any",
"remoteAndLandingMinTiles": [
[
6.4375,
0
]
]
}
}Requires: "canSuitlessMaridia" "canTrickyDashJump" "canTrickySpringBallBounce" "canDoubleSpringBallJumpMidAir" |
From: 2
Bottom Right Door
To: 13
G-Mode Morph Junction By Middle Right Door
Entrance condition: {
"comeInWithGMode": {
"mode": "direct",
"morphed": true
}
}Requires: {
"or": [
{
"and": [
"Gravity",
{
"or": [
"h_artificialMorphIBJ",
{
"and": [
"h_artificialMorphSpringBall",
"HiJump"
]
},
{
"and": [
"h_artificialMorphSpringBall",
"canGravityJump"
]
}
]
}
]
},
"h_artificialMorphDoubleSpringBallJump"
]
}Clears obstacles: B |
From: 2
Bottom Right Door
To: 13
G-Mode Morph Junction By Middle Right Door
Entrance condition: {
"comeInWithGMode": {
"mode": "indirect",
"morphed": true
}
}Requires: {
"or": [
{
"and": [
"Gravity",
"h_artificialMorphIBJ"
]
},
"h_artificialMorphDoubleSpringBallJump"
]
} |
From: 10
Direct G-Mode Morph, On Ledge Above Speed Blocks
To: 4
Top Right Door
It is required to avoid double hitting the Skultera with the Power Bomb, and to position the Crystal Flash so that the Skultera can hit Samus from above so it avoids the light orb. This is particularly precise because the fish is not global, which makes it so Samus needs to be closer to the fish when laying the Power Bomb. Samus also needs to be able to manipulate the camera, which can be difficult while morphed. Roll up the hill a bit until the Skultera is close to the wall, then move away so that it is a bit off camera. Crystal Flash while Samus is on one of the two lower sloped tiles and the Skultera is just off camera to the right, in order to lure it back to the left. This can be done with no enemy damage reduction and up to 2 E-Tanks or a 50% enemy damage reduction and no E-Tanks; a 75% reduction is not recommended and would require disabling and reenabling suits with a precise pause abuse. Requires: {
"or": [
{
"and": [
"Gravity",
"h_artificialMorphIBJ"
]
},
{
"and": [
"Gravity",
"HiJump",
"h_artificialMorphSpringBall"
]
},
{
"and": [
"h_artificialMorphSpringBall",
"canGravityJump"
]
},
"h_artificialMorphDoubleSpringBallJump"
]
}
"canCameraManip"
"h_artificialMorphComplexRModeCrystalFlashInterrupt"
{
"ammo": {
"type": "Missile",
"count": 10
}
}
{
"ammo": {
"type": "Super",
"count": 10
}
}
{
"ammo": {
"type": "PowerBomb",
"count": 3
}
}
{
"or": [
"h_partialEnemyDamageReduction",
{
"resourceAtMost": [
{
"type": "RegularEnergy",
"count": 19
}
]
},
{
"and": [
{
"resourceCapacity": [
{
"type": "RegularEnergy",
"count": 199
}
]
},
{
"resourceCapacity": [
{
"type": "ReserveEnergy",
"count": 199
}
]
}
]
}
]
}Dev note: FIXME: A 75% damage reduction method needs to be documented for if Samus only has Gravity and it provides 75% reduction. |
From: 13
G-Mode Morph Junction By Middle Right Door
To: 4
Top Right Door
Climb the room with IBJ or double Spring Ball jump. Requires: "canGMode"
"h_navigateUnderwater"
{
"or": [
{
"and": [
"h_artificialMorphIBJ",
"Gravity",
{
"or": [
"h_artificialMorphDoubleBombJump",
"h_artificialMorphStaggeredIBJ",
"canBePatient",
"h_artificialMorphPowerBomb"
]
}
]
},
"h_artificialMorphDoubleSpringBallJump"
]
} |
From: 13
G-Mode Morph Junction By Middle Right Door
To: 10
Direct G-Mode Morph, On Ledge Above Speed Blocks
This is a long climb, and getting around the fish under the speed blocks can be tricky or slow. Requires: "h_navigateUnderwater"
{
"obstaclesCleared": [
"B"
]
}
{
"or": [
{
"and": [
"Gravity",
{
"or": [
"h_artificialMorphJumpIntoIBJ",
"h_artificialMorphDoubleBombJump",
"h_artificialMorphStaggeredIBJ",
{
"and": [
"h_artificialMorphIBJ",
"canBeVeryPatient"
]
},
{
"and": [
"h_artificialMorphIBJ",
"h_artificialMorphPowerBomb"
]
},
{
"and": [
"h_artificialMorphSpringBall",
"HiJump"
]
},
{
"and": [
"h_artificialMorphSpringBall",
"canGravityJump"
]
}
]
}
]
},
"h_artificialMorphDoubleSpringBallJump"
]
}Dev note: FIXME: Some IBJ strats may need canBeVeryPatient if they can't be done before the crab is in position |
From: 13
G-Mode Morph Junction By Middle Right Door
To: 11
G-Mode, Below Speed Blocks (Overloaded PLMs)
This is a long climb, and getting around the fish under the missiles can be tricky or slow. Place bombs against the speed blocks until they are overloaded. Requires: "canComplexGMode"
{
"notable": "G-Mode Overload Speed Blocks then use Global Crab"
}
"h_navigateUnderwater"
"h_artificialMorphBombs"
{
"or": [
{
"and": [
"Gravity",
{
"or": [
"h_artificialMorphIBJ",
{
"and": [
"h_artificialMorphSpringBall",
"HiJump"
]
},
{
"and": [
"h_artificialMorphSpringBall",
"canGravityJump"
]
}
]
},
{
"or": [
"h_artificialMorphSpringBall",
"h_artificialMorphCeilingBombJump",
"canBeVeryPatient"
]
}
]
},
"h_artificialMorphDoubleSpringBallJump"
]
} |
|
Entrance condition: {
"comeInWithGMode": {
"mode": "direct",
"morphed": true
},
"comesThroughToilet": "any"
}Requires: {
"or": [
"Gravity",
"h_artificialMorphDoubleSpringBallJump",
{
"and": [
{
"not": "f_MaridiaTubeBroken"
},
"canRiskPermanentLossOfAccess"
]
}
]
}
{
"or": [
"h_artificialMorphIBJ",
{
"and": [
"HiJump",
"h_artificialMorphSpringBall"
]
},
{
"and": [
"h_artificialMorphSpringBallBombJump",
"h_artificialMorphSpringBall"
]
},
{
"and": [
"canGravityJump",
"h_artificialMorphSpringBall"
]
}
]
}Exit condition: {
"leaveWithGMode": {
"morphed": true
}
} |
From: 2
Bottom Left Door
To: 1
Top Left Door
Entrance condition: {
"comeInWithGMode": {
"mode": "any",
"morphed": true
},
"comesThroughToilet": "any"
}Requires: "h_artificialMorphDoubleSpringBallJump" |
From: 2
Bottom Left Door
To: 12
G-Mode Junction (In Morph Tunnel)
Entrance condition: {
"comeInWithGMode": {
"mode": "any",
"morphed": true
},
"comesThroughToilet": "any"
}Requires: "h_artificialMorphDoubleSpringBallJump" |
From: 4
Top Right Door
To: 4
Top Right Door

Follow the crab from the bottom right door to the top right door. Depending on the item setup, this takes 30-50 seconds. Requires: {
"or": [
{
"and": [
"Gravity",
"SpaceJump"
]
},
"canGravityJump",
{
"and": [
"Grapple",
{
"or": [
"HiJump",
"Gravity"
]
}
]
},
"h_doubleSpringBallJumpWithHiJump"
]
}Exit condition: {
"leaveWithGModeSetup": {}
}Dev note: This could be done with many other sets of item combinations, but it would be very tedious for a g-mode setup. |
|
Entrance condition: {
"comeInWithGMode": {
"mode": "direct",
"morphed": true
},
"comesThroughToilet": "any"
}Requires: {
"or": [
{
"and": [
"Gravity",
{
"or": [
"h_artificialMorphIBJ",
{
"and": [
"HiJump",
"h_artificialMorphSpringBall"
]
},
{
"and": [
"canGravityJump",
"h_artificialMorphSpringBall"
]
}
]
}
]
},
"h_artificialMorphDoubleSpringBallJump"
]
}Exit condition: {
"leaveWithGMode": {
"morphed": true
}
} |
From: 7
Lower Hills Junction
To: 10
Upper Right Ledge Junction
Start the spring ball jumps from the highest ledge on the wall. Requires: "canSuitlessMaridia" "h_doubleSpringBallJumpWithHiJump" Clears obstacles: A, B Dev note: It is possible to bring 2 crabs with double spring ball jump, but is relatively pointless. |
From: 10
Upper Right Ledge Junction
To: 4
Top Right Door
Requires: "canSuitlessMaridia" "h_doubleSpringBallJumpWithHiJump" |
From: 11
Upper Left Ledge Junction
To: 9
Platform Below Top Door
Start the spring ball jumps from the bottom of the slope. Requires: "canSuitlessMaridia" "h_doubleSpringBallJumpWithHiJump" |
From: 1
Middle Left Door
To: 7
Top Right Left Item
Use a double spring ball jump to reach the Speed blocks below the items while chaining temporary blue. Perform a spring ball jump and immediately unmorph and continue holding up, to break some of the Speed blocks while passing up through them. Leave one of the bottom Speed blocks unbroken to use as a platform. The top speed blocks will respawn; clip through them either using a snail clip with X-Ray or a Crystal Flash clip; In the case of a Crystal Flash clip, menu to Grapple before the Crystal Flash ends and mash shoot while holding down. Entrance condition: {
"comeInWithTemporaryBlue": {}
}Requires: {
"notable": "Suitless Temporary Blue To Items"
}
"canSuitlessMaridia"
"canLongChainTemporaryBlue"
{
"ammo": {
"type": "PowerBomb",
"count": 1
}
}
"h_doubleSpringBallJumpWithHiJump"
{
"or": [
"canXRayCeilingClip",
{
"and": [
"h_jumpIntoCrystalFlashClip",
"Grapple",
{
"obstaclesNotCleared": [
"R-Mode"
]
}
]
}
]
}
"canBeExtremelyPatient" |
From: 1
Middle Left Door
To: 9
Junction Below Top Door
Bomb the Power Bomb blocks below to overload PLMs, then go up through the crumble blocks to escape. Entrance condition: {
"comeInWithGMode": {
"mode": "any",
"morphed": true
}
}Requires: "h_artificialMorphBombs"
"h_navigateUnderwater"
{
"or": [
{
"and": [
"Gravity",
{
"or": [
"h_artificialMorphLongIBJ",
"h_artificialMorphJumpIntoIBJ"
]
}
]
},
{
"and": [
"canGravityJump",
"h_artificialMorphSpringBall"
]
},
{
"and": [
"HiJump",
"canSpringBallJumpMidAir"
]
},
{
"and": [
"HiJump",
"canConsecutiveWallJump",
"canPreciseWallJump"
]
},
"h_artificialMorphDoubleSpringBallJump",
{
"and": [
"Gravity",
"HiJump",
"h_artificialMorphSpringBallBombJump"
]
}
]
}Dev note: FIXME: Eventually a CF doorlock bypass should be added from this 1 or from 12 with a 1->12 option. |
From: 1
Middle Left Door
To: 10
G-Mode Morph Junction (By Bottom Left Door)
Bomb the Power Bomb blocks below to overload PLMs, then IBJ up through the crumble blocks to escape. Entrance condition: {
"comeInWithGMode": {
"mode": "any",
"morphed": true
}
}Requires: "h_artificialMorphBombs"
{
"or": [
{
"and": [
"Gravity",
{
"or": [
"h_artificialMorphLongIBJ",
"h_artificialMorphJumpIntoIBJ"
]
}
]
},
{
"and": [
"canGravityJump",
"h_artificialMorphSpringBall"
]
},
"h_artificialMorphDoubleSpringBallJump",
{
"and": [
"Gravity",
"HiJump",
"h_artificialMorphSpringBallBombJump"
]
}
]
} |
From: 1
Middle Left Door
To: 11
G-Mode Overloaded PLMs (By Bottom Left Door)

Bomb the PB blocks below to overload PLMs, then go up through the crumble blocks to escape. Entrance condition: {
"comeInWithGMode": {
"mode": "any",
"morphed": true
}
}Requires: "h_artificialMorphBombs"
"h_navigateUnderwater"
{
"or": [
"canGravityJump",
{
"and": [
"Gravity",
{
"or": [
"h_artificialMorphLongIBJ",
"h_artificialMorphJumpIntoIBJ"
]
}
]
},
{
"and": [
"HiJump",
"canSpringBallJumpMidAir"
]
},
{
"and": [
"HiJump",
"canConsecutiveWallJump",
"canPreciseWallJump"
]
},
"h_artificialMorphDoubleSpringBallJump",
{
"and": [
"Gravity",
"HiJump",
"h_artificialMorphSpringBallBombJump"
]
}
]
} |
From: 2
Bottom Left Door
To: 1
Middle Left Door
Use double spring ball jumps to reach the top-right of the room with temporary blue. To cross the two gaps at the top of the room to the left while chaining temporary blue, use spring ball jumps with HiJump disabled; in each case, perform a stationary lateral mid-air morph or a spring fling (or both); Entrance condition: {
"comeInRunning": {
"speedBooster": "yes",
"minTiles": 0.4375
}
}Requires: "h_waterGetBlueSpeed"
"HiJump"
"canLongChainTemporaryBlue"
"canBeExtremelyPatient"
"canXRayTurnaround"
"canDoubleSpringBallJumpMidAir"
"canTrickySpringBallJump"
{
"or": [
"canStationaryLateralMidAirMorph",
"canSpringFling"
]
}
"can4HighMidAirMorph" |
From: 2
Bottom Left Door
To: 1
Middle Left Door
Use double spring ball jumps to reach the top-right of the room with temporary blue. To cross the two gaps at the top of the room to the left while chaining temporary blue, use spring ball jumps with HiJump disabled; in each case, perform a stationary lateral mid-air morph or a spring fling (or both); Entrance condition: {
"comeInWithTemporaryBlue": {}
}Requires: "HiJump"
"canLongChainTemporaryBlue"
"canBeExtremelyPatient"
"canXRayTurnaround"
"canDoubleSpringBallJumpMidAir"
"canTrickySpringBallJump"
{
"or": [
"canStationaryLateralMidAirMorph",
"canSpringFling"
]
}
"can4HighMidAirMorph" |
From: 2
Bottom Left Door
To: 7
Top Right Left Item
Use a double spring ball jump to reach the Speed blocks below the items while chaining temporary blue. Perform a spring ball jump and immediately unmorph and continue holding up, to break some of the Speed blocks while passing up through them. Leave one of the bottom Speed blocks unbroken to use as a platform. The top speed blocks will respawn; clip through them either using a snail clip with X-Ray or a Crystal Flash clip; In the case of a Crystal Flash clip, menu to Grapple before the Crystal Flash ends and mash shoot while holding down. Entrance condition: {
"comeInRunning": {
"speedBooster": "yes",
"minTiles": 0.4375
}
}Requires: {
"notable": "Suitless Temporary Blue To Items"
}
"canSuitlessMaridia"
"h_waterGetBlueSpeed"
"h_doubleSpringBallJumpWithHiJump"
"canChainTemporaryBlue"
{
"or": [
"canXRayCeilingClip",
{
"and": [
"h_jumpIntoCrystalFlashClip",
"Grapple",
{
"obstaclesNotCleared": [
"R-Mode"
]
}
]
}
]
} |
From: 2
Bottom Left Door
To: 7
Top Right Left Item

Use a double spring ball jump to reach the Speed blocks below the items while chaining temporary blue. Perform a spring ball jump and immediately unmorph and continue holding up, to break some of the Speed blocks while passing up through them. Leave one of the bottom Speed blocks unbroken to use as a platform. The top speed blocks will respawn; clip through them either using a snail clip with X-Ray or a Crystal Flash clip; In the case of a Crystal Flash clip, menu to Grapple before the Crystal Flash ends and mash shoot while holding down. Entrance condition: {
"comeInWithTemporaryBlue": {}
}Requires: {
"notable": "Suitless Temporary Blue To Items"
}
"canSuitlessMaridia"
"h_doubleSpringBallJumpWithHiJump"
"canChainTemporaryBlue"
{
"or": [
"canXRayCeilingClip",
{
"and": [
"h_jumpIntoCrystalFlashClip",
"Grapple",
{
"obstaclesNotCleared": [
"R-Mode"
]
}
]
}
]
} |
|
Use a double spring ball jump to reach the top of the room with temporary blue. To cross the two gaps at the top of the room while chaining temporary blue, use spring ball jumps with HiJump disabled; in each case, perform a stationary lateral mid-air morph or a spring fling (or both); Entrance condition: {
"comeInWithTemporaryBlue": {}
}Requires: "HiJump"
"canLongChainTemporaryBlue"
"canDoubleSpringBallJumpMidAir"
"canTrickySpringBallJump"
{
"or": [
"canStationaryLateralMidAirMorph",
"canSpringFling"
]
}
"canBeVeryPatient" |
|
Use a double spring ball jump to reach the Speed blocks below the items while chaining temporary blue. Perform a spring ball jump and immediately unmorph and continue holding up, to break some of the Speed blocks while passing up through them. Leave one of the bottom Speed blocks unbroken to use as a platform. The top speed blocks will respawn; clip through them either using a snail clip with X-Ray or a Crystal Flash clip; In the case of a Crystal Flash clip, menu to Grapple before the Crystal Flash ends and mash shoot while holding down. Entrance condition: {
"comeInWithTemporaryBlue": {
"direction": "right"
},
"comesThroughToilet": "any"
}Requires: {
"notable": "Suitless Temporary Blue To Items"
}
"canSuitlessMaridia"
"canChainTemporaryBlue"
{
"ammo": {
"type": "PowerBomb",
"count": 1
}
}
"h_doubleSpringBallJumpWithHiJump"
{
"or": [
"canXRayCeilingClip",
{
"and": [
"h_jumpIntoCrystalFlashClip",
"Grapple",
{
"obstaclesNotCleared": [
"R-Mode"
]
}
]
}
]
} |
From: 6
Top Door
To: 7
Top Right Left Item
Use a double spring ball jump to reach the Speed blocks below the items while chaining temporary blue. Perform a spring ball jump and immediately unmorph and continue holding up, to break some of the Speed blocks while passing up through them. Leave one of the bottom Speed blocks unbroken to use as a platform. The top speed blocks will respawn; clip through them either using a snail clip with X-Ray. Entrance condition: {
"comeInWithTemporaryBlue": {
"direction": "left"
},
"comesThroughToilet": "any"
}Requires: {
"notable": "Suitless Temporary Blue To Items"
}
"canSuitlessMaridia"
"canChainTemporaryBlue"
"canXRayTurnaround"
{
"ammo": {
"type": "PowerBomb",
"count": 1
}
}
"h_doubleSpringBallJumpWithHiJump"
"canXRayCeilingClip" |
|


Entrance condition: {
"comeInWithGMode": {
"mode": "any",
"morphed": true
}
}Requires: {
"or": [
{
"and": [
"Gravity",
"h_artificialMorphIBJ"
]
},
"h_artificialMorphDoubleSpringBallJump"
]
} |
|

Requires: "canSuitlessMaridia" "h_doubleSpringBallJumpWithHiJump" |
From: 5
Bottom Middle Junction
To: 4
Top Right Ledge Junction

1) Crouch jump and then Spring Ball jump. 2) Bomb-Grapple-Jump using the distant Cacatac who is above the water. 3) Spring Ball jump again just as Samus exits the water. Requires: {
"notable": "HiJumpless Double Spring Ball Jump and Bomb-Grapple-Jump"
}
"canBombGrappleJump"
"canDoubleSpringBallJumpMidAir"
"h_underwaterMaxHeightSpringBallJump" |
|

Perform a double springball jump with the first jump being a bounce on the sand. Requires: "canSuitlessMaridia"
{
"or": [
"canPrepareForNextRoom",
"canPlayInSand"
]
}
"h_doubleSpringBallJumpWithHiJump" |
|
IBJ or Spring Ball Bomb Jump through two sets of Crumble Blocks. Entrance condition: {
"comeInWithGMode": {
"mode": "any",
"morphed": true
},
"comesThroughToilet": "any"
}Requires: {
"or": [
{
"and": [
"Gravity",
{
"or": [
"h_artificialMorphIBJ",
{
"and": [
"h_artificialMorphSpringBallBombJump",
"h_additionalBomb"
]
},
{
"and": [
"HiJump",
"h_artificialMorphSpringBall"
]
},
{
"and": [
"canGravityJump",
"h_artificialMorphSpringBall"
]
}
]
}
]
},
"h_artificialMorphDoubleSpringBallJump"
]
}Dev note: Without this being Morph, there is no way to escape. PLMs are already overloaded from the sand. |
From: 2
Bottom Left Door
To: 1
Top Left Door

Requires: "canSuitlessMaridia" "h_doubleSpringBallJumpWithHiJump" |
From: 2
Bottom Left Door
To: 4
Top Right Door
This requires gaining speed by running a precise distance of 7 tiles (extra run speed of $2.0 or $2.1). Immediately pause after the transition to unequip Spring Ball. Then equip Spring Ball again and perform a mid-air spring ball jump. Entrance condition: {
"comeInWithSpringBallBounce": {
"speedBooster": "yes",
"movementType": "any",
"remoteAndLandingMinTiles": [
[
6.4375,
1
]
]
}
}Requires: "canTrickyDashJump" "canDoubleSpringBallJumpMidAir" "canCrossRoomJumpIntoWater" |
Tricky Cross Room Spring Ball Bounce into Spring Ball Jump, Leave With Temporary Blue
(Extreme+)
Halfie Climb Room
From: 2
Bottom Left Door
To: 4
Top Right Door

Gaining blue speed with a precise amount of run speed (extra run speed of $2.0 or $2.1), and bounce through the transition. After the transition, press pause, unmorph, aim down, and unequip Spring Ball. Buffer a morph out of the pause. Pause again to equip Spring Ball and perform a mid-air spring ball jump, chaining temporary blue to the top of the room. Entrance condition: {
"comeInWithBlueSpringBallBounce": {
"movementType": "any",
"minExtraRunSpeed": "$2.0",
"maxExtraRunSpeed": "$2.1"
}
}Requires: "canTrickyDashJump" "canCrossRoomJumpIntoWater" "canPauseRemorphTemporaryBlue" "canDoubleSpringBallJumpMidAir" Exit condition: {
"leaveWithTemporaryBlue": {}
}Unlocks doors: {"types":["ammo"],"requires":[]} |
From: 2
Bottom Left Door
To: 1
Top Left Door


Only requires a runway of approximately 0.5 tiles in the adjacent room. SpringBall jump once on the way up, then use a Bomb to buy just enough time for a second SpringBall jump. Entrance condition: {
"comeInJumping": {
"speedBooster": "no",
"minTiles": 1
}
}Requires: "canCrossRoomJumpIntoWater" "canUnderwaterBombIntoSpringBallJump" "canDoubleSpringBallJumpMidAir" |
|


Entrance condition: {
"comeInWithGMode": {
"mode": "any",
"morphed": true
}
}Requires: {
"or": [
{
"and": [
"Gravity",
"h_artificialMorphIBJ"
]
},
"h_artificialMorphDoubleSpringBallJump"
]
} |
|

Be careful to avoid the stationary, invisible Cacatac spikes. Entrance condition: {
"comeInWithGMode": {
"mode": "any",
"morphed": true
}
}Requires: "h_artificialMorphDoubleSpringBallJump" |
From: 1
Bottom Left Door
To: 2
Top Right Door
From a crouch jump, perform a double Spring Ball jump, using a precisely timed bomb boost to propel Samus upward just long enough to get the second mid-air Spring Ball jump. Requires: "canDoubleSpringBallJumpMidAir" "canUnderwaterBombIntoSpringBallJump" |
|
Entrance condition: {
"comeInWithGMode": {
"mode": "any",
"morphed": true
}
}Requires: {
"or": [
{
"and": [
"Gravity",
{
"or": [
"h_artificialMorphLongIBJ",
{
"and": [
"h_artificialMorphIBJ",
"h_artificialMorphBombHorizontally"
]
}
]
}
]
},
{
"and": [
"h_artificialMorphDoubleSpringBallJump",
"canDownGrab"
]
},
{
"and": [
"canGravityJump",
"h_artificialMorphSpringBallBombJump"
]
}
]
} |
|

Entrance condition: {
"comeInWithGMode": {
"mode": "any",
"morphed": true
}
}Requires: {
"or": [
"Gravity",
{
"and": [
"canSuitlessMaridia",
"HiJump",
"h_artificialMorphSpringBall"
]
}
]
}
{
  "or": [
    "h_artificialMorphLongIBJ",
    {
      "and": [
        "Gravity",
        "h_artificialMorphIBJ",
        "h_artificialMorphBombHorizontally"
      ]
    },
    {
      "and": [
        "canGravityJump",
        "h_artificialMorphSpringBallBombJump",
        {
          "or": [
            "h_additionalBomb",
            {
              "tech": "canDoubleSpringBallJumpMidAir"
            }
          ]
        },
        {
          "or": [
            {
              "and": [
                "h_additionalBomb",
                "h_additionalBomb"
              ]
            },
            {
              "notable": "Left Shaft Precise Crouch Jump Down Grab"
            }
          ]
        }
      ]
    }
  ]
} |
|

Entrance condition: {
"comeInWithGMode": {
"mode": "any",
"morphed": true
}
}Requires: {
"or": [
"h_artificialMorphLongIBJ",
{
"and": [
"Gravity",
"h_artificialMorphIBJ",
"h_artificialMorphBombHorizontally"
]
},
{
"and": [
"canGravityJump",
"h_artificialMorphSpringBallBombJump",
{
"or": [
"h_additionalBomb",
{
"tech": "canDoubleSpringBallJumpMidAir"
}
]
},
{
"or": [
{
"and": [
"h_additionalBomb",
"h_additionalBomb"
]
},
{
"notable": "Left Shaft Precise Crouch Jump Down Grab"
}
]
}
]
}
]
} |
|
Avoid moving too much between the right of the Owtch and the item to avoid overloading PLMs until after touching the item. Entrance condition: {
"comeInWithGMode": {
"mode": "direct",
"morphed": true
}
}Requires: "canRemoteAcquire"
{
"or": [
{
"and": [
"Gravity",
"h_artificialMorphIBJ"
]
},
{
"and": [
"Gravity",
"h_artificialMorphSpringBallBombJump"
]
},
"h_artificialMorphDoubleSpringBallJump"
]
}Collects items: 3 |
|
Entrance condition: {
"comeInWithGMode": {
"mode": "any",
"morphed": true
},
"comesThroughToilet": "any"
}Requires: "canRemoteAcquire"
{
  "or": [
    {
      "and": [
        "Gravity",
        {
          "or": [
            "h_artificialMorphIBJ",
            "h_artificialMorphSpringBallBombJump"
          ]
        }
      ]
    },
    "h_artificialMorphDoubleSpringBallJump"
  ]
}Collects items: 3 |
|


Entrance condition: {
"comeInWithGMode": {
"mode": "any",
"morphed": true
},
"comesThroughToilet": "any"
}Requires: {
"or": [
{
"and": [
"Gravity",
{
"or": [
"h_artificialMorphIBJ",
"h_artificialMorphSpringBallBombJump"
]
}
]
},
"h_artificialMorphDoubleSpringBallJump"
]
} |