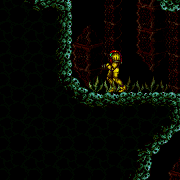
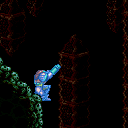
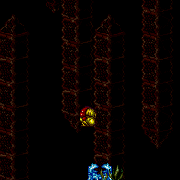
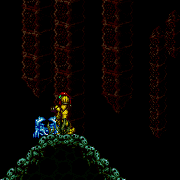
canStationaryLateralMidAirMorph (Expert)
While performing a stationary vertical jump and after the first down press, Morph with down and forward being pressed on the same frame (neither before the other). Doing this immediately gives a noticable horizontal speed boost. This is most useful underwater where acceleration is slower.
Dependencies: canMidAirMorph, canDash, canTrivialMidAirMorph, canLateralMidAirMorph
Strats ()
From: 4
Junction (Right side Pit)
To: 2
Right Door
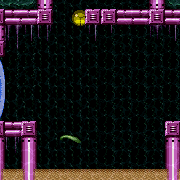
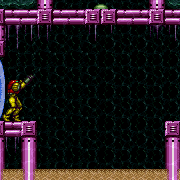
Freeze the Choot when it swings right on its jump. Quickly get on top of it by first getting onto the pillar to the left, or with a Spring Ball jump. Perform a precise spring ball jump to get to the far right ledge, while avoiding hitting the water surface. While on the ledge, stand on the raised ground to the right and jump to the surface, then space jump across the water to the left. Requires: "canTrickyUseFrozenEnemies"
"canTrickySpringBallJump"
{
"or": [
{
"and": [
"canResetFallSpeed",
"canTrickyJump"
]
},
"canStationaryLateralMidAirMorph",
"canSpringFling"
]
}
"canSpaceJumpWaterBounce"
"canWallJump" |
From: 4
Junction (Right side Pit)
To: 2
Right Door
Requires: "canSuitlessMaridia"
{
"or": [
{
"and": [
"HiJump",
"canSpringBallJumpMidAir"
]
},
{
"and": [
"HiJump",
"canTrickyUseFrozenEnemies"
]
},
{
"and": [
"canTrickyUseFrozenEnemies",
"canTrickySpringBallJump",
{
"or": [
"canResetFallSpeed",
"canStationaryLateralMidAirMorph",
"canSpringFling"
]
}
]
}
]
}
"h_storedSpark"
{
"shinespark": {
"frames": 11,
"excessFrames": 5
}
} |
From: 2
Bottom Left Door
To: 1
Top Left Doorway
Freeze one crab on the lip of the overhead opening and another on the edge of a doors platform then springballjump up. Use a Stationary Lateral Mid-Air Morph to gain enough jump height without bonking the ceiling. It is possible with a crouch jump to not need the second crab. Requires: {
"notable": "Suitless Crab Climb Superless with Spring Ball"
}
"canSuitlessMaridia"
"canTrickyJump"
"canTrickySpringBallJump"
"canTrickyUseFrozenEnemies"
"canStationaryLateralMidAirMorph"Dev note: It is possible without canStationaryLateralMidAirMorph, but very precise. |
From: 2
Bottom Right Door
To: 1
Bottom Left Door


Run into the room to gain temporary blue with a water shinecharge. Use X-ray along with HiJump and/or Spring Ball to chain it through the room. Entrance condition: {
"comeInRunning": {
"speedBooster": "yes",
"minTiles": 0.4375
}
}Requires: "canWaterShineCharge"
"canStationaryLateralMidAirMorph"
{
"or": [
{
"and": [
"HiJump",
"canTrickySpringBallJump"
]
},
{
"and": [
{
"or": [
"HiJump",
"canTrickySpringBallJump"
]
},
"canBeVeryPatient"
]
}
]
}
"canXRayTurnaround"
"canLongChainTemporaryBlue"Exit condition: {
"leaveWithTemporaryBlue": {}
}Unlocks doors: {"types":["ammo"],"requires":[]} |
From: 2
Bottom Right Door
To: 3
Top Right Door


Run into the room to gain temporary blue with a water shinecharge. Use X-ray along with HiJump to chain it through the room. Entrance condition: {
"comeInRunning": {
"speedBooster": "yes",
"minTiles": 0.4375
}
}Requires: "canWaterShineCharge"
"canStationaryLateralMidAirMorph"
"HiJump"
{
"or": [
"canBeVeryPatient",
"canTrickySpringBallJump"
]
}
"canXRayTurnaround"
"canLongChainTemporaryBlue"Exit condition: {
"leaveWithTemporaryBlue": {
"direction": "any"
}
}Unlocks doors: {"types":["ammo"],"requires":[]}Dev note: FIXME: This could be done with Spring Ball instead of HiJump; but it requires some space on either the left or right of the door in the room above, e.g. it won't work with the vanilla connection, and we would need some way to model that. |
From: 2
Bottom Right Door
To: 6
Middle Junction Near Top Left Pirate
The second jump is harder than a normal mid-air spring ball jump. Use either a stationary lateral mid air morph, to gain enough horizontal momentum, or a SpringFling to reduce Samus' fall speed as soon as it begins to build up. Shooting towards Pirates will cause them to stop in place and not fire back. Requires: "canSuitlessMaridia"
"canTrickySpringBallJump"
{
"or": [
"canStationaryLateralMidAirMorph",
"canSpringFling"
]
}
{
"or": [
"canTrickyJump",
"canDodgeWhileShooting",
{
"enemyDamage": {
"enemy": "Pink Space Pirate (standing)",
"type": "contact",
"hits": 1
}
},
{
"enemyKill": {
"enemies": [
[
"Pink Space Pirate (standing)"
]
],
"explicitWeapons": [
"Plasma"
]
}
}
]
}
{
"or": [
"canTrickyJump",
{
"enemyDamage": {
"enemy": "Pink Space Pirate (standing)",
"type": "contact",
"hits": 1
}
},
{
"enemyKill": {
"enemies": [
[
"Pink Space Pirate (standing)"
]
],
"explicitWeapons": [
"Plasma"
]
}
}
]
} |
From: 5
Platform Junction Near Top Left Door
To: 4
Top Left Door
Jump towards the door with a Springball Jump, jumping as late as possible. A Flatley style jump can position Samus over the edge of the ledge, closer to the door, allowing for an earlier Springball jump. The slight fall from a Flatley Jump helps with the Springball jump, but then Samus must unmorph to extend her hitbox to touch the transition. A Stationary Lateral MidAir Morph also helps with this jump. Unmorphing after a missed jump can return Samus to the ledge to try again. Requires: {
"notable": "Top Left Direct Jump"
}
"canSuitlessMaridia"
"canTrickySpringBallJump"
{
"or": [
"canTrickyJump",
"canStationaryLateralMidAirMorph"
]
} |
From: 6
Middle Junction Near Top Left Pirate
To: 7
Platform Below Top Right Door
Requires: "canSuitlessMaridia"
"canCarefulJump"
"canSpringBallJumpMidAir"
{
"or": [
"canTrickyJump",
"canStationaryLateralMidAirMorph",
"canSpringFling"
]
} |
|
Entrance condition: {
"comeInWithGMode": {
"mode": "direct",
"morphed": false
},
"comesThroughToilet": "no"
}Requires: {
"notable": "G-Mode Overload Speed Blocks then use Global Crab"
}
"canComplexGMode"
"h_navigateUnderwater"
{
"or": [
"canGravityJump",
{
"and": [
"Gravity",
"canWallJump"
]
},
{
"and": [
"Gravity",
"canTrickyUseFrozenEnemies",
"h_underwaterCrouchJumpDownGrab"
]
},
{
"and": [
"HiJump",
{
"or": [
{
"and": [
{
"notable": "Underwater Walljumps"
},
"canUnderwaterWallJump"
]
},
"canSpringBallJumpMidAir",
{
"and": [
"canTrickyUseFrozenEnemies",
"h_underwaterCrouchJump"
]
}
]
}
]
},
{
"and": [
"h_underwaterMaxHeightSpringBallJump",
"canTrickyUseFrozenEnemies",
"canBeVeryPatient",
{
"or": [
"canStationaryLateralMidAirMorph",
{
"ammo": {
"type": "Super",
"count": 1
}
}
]
}
]
}
]
}Clears obstacles: B |
From: 1
Bottom Door
To: 12
G-Mode Junction By Middle Right Door
Entrance condition: {
"comeInWithGMode": {
"mode": "indirect",
"morphed": false
},
"comesThroughToilet": "any"
}Requires: {
"notable": "G-Mode Overload Speed Blocks then use Global Crab"
}
"canComplexGMode"
"h_navigateUnderwater"
{
"or": [
"canGravityJump",
{
"and": [
"Gravity",
"canWallJump"
]
},
{
"and": [
"Gravity",
"canTrickyUseFrozenEnemies",
"h_underwaterCrouchJumpDownGrab"
]
},
{
"and": [
"HiJump",
{
"or": [
{
"and": [
{
"notable": "Underwater Walljumps"
},
"canUnderwaterWallJump"
]
},
"canSpringBallJumpMidAir",
{
"and": [
"canTrickyUseFrozenEnemies",
"h_underwaterCrouchJump"
]
}
]
}
]
},
{
"and": [
"h_underwaterMaxHeightSpringBallJump",
"canTrickyUseFrozenEnemies",
"canBeVeryPatient",
{
"or": [
"canStationaryLateralMidAirMorph",
{
"ammo": {
"type": "Super",
"count": 1
}
}
]
}
]
}
]
} |
From: 2
Bottom Right Door
To: 12
G-Mode Junction By Middle Right Door
Entrance condition: {
"comeInWithGMode": {
"mode": "direct",
"morphed": false
}
}Requires: {
"notable": "G-Mode Overload Speed Blocks then use Global Crab"
}
"canComplexGMode"
"h_navigateUnderwater"
{
"or": [
"canGravityJump",
{
"and": [
"Gravity",
"canWallJump"
]
},
{
"and": [
"Gravity",
"canTrickyUseFrozenEnemies",
"h_underwaterCrouchJumpDownGrab"
]
},
{
"and": [
"HiJump",
{
"or": [
{
"and": [
{
"notable": "Underwater Walljumps"
},
"canUnderwaterWallJump"
]
},
"canSpringBallJumpMidAir",
{
"and": [
"canTrickyUseFrozenEnemies",
"h_underwaterCrouchJump"
]
}
]
}
]
},
{
"and": [
"h_underwaterMaxHeightSpringBallJump",
"canTrickyUseFrozenEnemies",
"canBeVeryPatient",
{
"or": [
"canStationaryLateralMidAirMorph",
{
"ammo": {
"type": "Super",
"count": 1
}
}
]
}
]
}
]
}Clears obstacles: B |
From: 2
Bottom Right Door
To: 12
G-Mode Junction By Middle Right Door
Entrance condition: {
"comeInWithGMode": {
"mode": "indirect",
"morphed": false
}
}Requires: {
"notable": "G-Mode Overload Speed Blocks then use Global Crab"
}
"canComplexGMode"
"h_navigateUnderwater"
{
"or": [
"canGravityJump",
{
"and": [
"Gravity",
"canWallJump"
]
},
{
"and": [
"Gravity",
"canTrickyUseFrozenEnemies",
"h_underwaterCrouchJumpDownGrab"
]
},
{
"and": [
"HiJump",
{
"or": [
{
"and": [
{
"notable": "Underwater Walljumps"
},
"canUnderwaterWallJump"
]
},
"canSpringBallJumpMidAir",
{
"and": [
"canTrickyUseFrozenEnemies",
"h_underwaterCrouchJump"
]
}
]
}
]
},
{
"and": [
"h_underwaterMaxHeightSpringBallJump",
"canTrickyUseFrozenEnemies",
"canBeVeryPatient",
{
"or": [
"canStationaryLateralMidAirMorph",
{
"ammo": {
"type": "Super",
"count": 1
}
}
]
}
]
}
]
} |
From: 8
Bottom Junction
To: 3
Middle Right Door

Freeze the crab on the corner of the ledge and the fish near the wall but with enough space for Samus to fit through and jump up. Perform a stationary lateral midair morph and press against the fish to get enough height to get onto it. Requires: "canSuitlessMaridia" "h_underwaterMaxHeightSpringBallJump" "canStationaryLateralMidAirMorph" "canTrickyUseFrozenEnemies" |
From: 9
Junction Below Speed Blocks
To: 4
Top Right Door
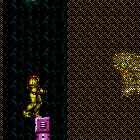
Be sure not to get the first downward moving crab on screen until Samus is in position to quickly and accurately shoot and freeze it. This is much tighter with spring ball relative to HiJump. Performing a max height spring ball jump from the frozen crab can get Samus to the next ledge. Getting to the ledge with the fish is particularly precise. Either stand at the very edge of the platform and perform a very precise max heigh spring ball jump, or stand against the left wall and and perform a slightly less tight stationary lateral morph into spring ball jump. Requires: "canSuitlessMaridia"
"canTrickyUseFrozenEnemies"
"canTrickySpringBallJump"
"canDodgeWhileShooting"
{
"or": [
"canInsaneJump",
{
"and": [
"Spazer",
"Wave"
]
},
{
"and": [
"h_underwaterMaxHeightSpringBallJump",
{
"or": [
"Wave",
"Spazer"
]
}
]
},
"Plasma"
]
}
{
"or": [
"h_underwaterMaxHeightSpringBallJump",
"canStationaryLateralMidAirMorph"
]
} |
From: 1
Top Left Door
To: 5
Top Door

If HiJump or Spring Ball is available, use a Gravity jump from the top of the island; otherwise, use the higher ledge to the left, jump slightly early to avoid getting too much jump height (to avoid bonking the ceiling Grapple blocks), and quickly do a stationary lateral mid-air morph. Entrance condition: {
"comeInShinecharging": {
"length": 1,
"openEnd": 0
}
}Requires: "canGravityJump"
"canLongChainTemporaryBlue"
{
"or": [
"HiJump",
"canTrickySpringBallJump",
{
"and": [
"canStationaryLateralMidAirMorph",
"canInsaneJump"
]
}
]
}Exit condition: {
"leaveWithTemporaryBlue": {
"direction": "right"
}
}Unlocks doors: {"types":["ammo"],"requires":[]}Dev note: FIXME: A suitless version of this could work, with HiJump + Spring Ball; but it would require leaving while morphed, which would need some space to move horizontally in the room above before landing, which we don't yet have a way to model. |
From: 2
Bottom Left Door
To: 11
Upper Left Ledge Junction
Climb the crabs on the right and use them to bring down the center crab, who is already on the highest peak. Damage down the crab while watching it loop around, then ride the crab up the left side. Freeze the crab at the top of the highest peak, stand on it to jump to the left. Use a stationary lateral mid-air morph to get enough momentum for the Spring Ball jump to reach the left ledge. Requires: "canSuitlessMaridia" "canTrickySpringBallJump" "canStationaryLateralMidAirMorph" "canTrickyUseFrozenEnemies" Dev note: Although this may go through 7 and 8, it requires starting at 2 to get the crab to move into position. |
|
Entrance condition: {
"comeInWithGMode": {
"mode": "any",
"morphed": false
}
}Requires: "Morph"
"h_navigateUnderwater"
{
"or": [
"Gravity",
"HiJump",
{
"and": [
"Grapple",
"canUseEnemies"
]
},
{
"and": [
"canSpringBallJumpMidAir",
{
"or": [
"canTrickyJump",
"canSpringFling",
"canStationaryLateralMidAirMorph",
"canTrickyUseFrozenEnemies"
]
}
]
},
{
"and": [
"canTrickyUseFrozenEnemies",
"canTrickyJump"
]
}
]
} |
|
Requires: {
"or": [
"HiJump",
{
"and": [
"canTrickySpringBallJump",
"canSuitlessMaridia",
{
"or": [
"canTrickyJump",
"canSpringFling",
"canStationaryLateralMidAirMorph"
]
}
]
}
]
}Dev note: Using a frozen crab for an easier springball jump goes from 2 to 8. |
From: 8
Higher Hill Junction
To: 11
Upper Left Ledge Junction

From a crouch jump, perform a double Spring Ball jump, using a precisely timed bomb boost to propel Samus upward just long enough to get the second mid-air Spring Ball jump. In order to cover the horizontal distance, it is necessary to do at least one of the following: 1) begin with a stationary lateral mid-air morph, 2) move slightly left before the bomb boost to get boosted horizontally, 3) perform a spring fling by pausing near the peak of the second mid-air Spring Ball jump to unequip Spring Ball. Requires: "canUnderwaterBombIntoSpringBallJump"
{
"or": [
"canStationaryLateralMidAirMorph",
"canSpringFling",
"canBombHorizontally"
]
} |
From: 2
Bottom Left Door
To: 1
Middle Left Door
Use double spring ball jumps to reach the top-right of the room with temporary blue. To cross the two gaps at the top of the room to the left while chaining temporary blue, use spring ball jumps with HiJump disabled; in each case, perform a stationary lateral mid-air morph or a spring fling (or both); Entrance condition: {
"comeInRunning": {
"speedBooster": "yes",
"minTiles": 0.4375
}
}Requires: "h_waterGetBlueSpeed"
"HiJump"
"canLongChainTemporaryBlue"
"canBeExtremelyPatient"
"canXRayTurnaround"
"canDoubleSpringBallJumpMidAir"
"canTrickySpringBallJump"
{
  "or": [
    "canStationaryLateralMidAirMorph",
    "canSpringFling"
  ]
}
"can4HighMidAirMorph" |
From: 2
Bottom Left Door
To: 1
Middle Left Door
Use double spring ball jumps to reach the top-right of the room with temporary blue. To cross the two gaps at the top of the room to the left while chaining temporary blue, use spring ball jumps with HiJump disabled; in each case, perform a stationary lateral mid-air morph or a spring fling (or both); Entrance condition: {
"comeInWithTemporaryBlue": {}
}Requires: "HiJump"
"canLongChainTemporaryBlue"
"canBeExtremelyPatient"
"canXRayTurnaround"
"canDoubleSpringBallJumpMidAir"
"canTrickySpringBallJump"
{
"or": [
"canStationaryLateralMidAirMorph",
"canSpringFling"
]
}
"can4HighMidAirMorph" |
|
Use a double spring ball jump to reach the top of the room with temporary blue. To cross the two gaps at the top of the room while chaining temporary blue, use spring ball jumps with HiJump disabled; in each case, perform a stationary lateral mid-air morph or a spring fling (or both); Entrance condition: {
"comeInWithTemporaryBlue": {}
}Requires: "HiJump"
"canLongChainTemporaryBlue"
"canDoubleSpringBallJumpMidAir"
"canTrickySpringBallJump"
{
"or": [
"canStationaryLateralMidAirMorph",
"canSpringFling"
]
}
"canBeVeryPatient" |
|
Requires either a spring fling or a stationary lateral midair morph with an unmorph to reset fall speed. Requires: "canSuitlessMaridia"
"canTrickySpringBallJump"
{
"or": [
"canSpringFling",
{
"and": [
"canStationaryLateralMidAirMorph",
"canResetFallSpeed"
]
}
]
} |
|
Stand on the edge of the sand and place a Bomb; unmorph (leaving Samus crouched), then press forward to enter the sand when the bomb flashes yellow for the second time. Once the Bomb puts Samus into a jumping pose where Samus is suspended mid-air slightly above the sand, press jump; then aim down precisely when the bomb begins to propel Samus upward. Move right to press against the wall before mid-air morphing (alternatively, a stationary lateral morph can work). There is a 2-frame window for when to enter the sand: if Samus enters the sand too early, she will sink slightly too far, resulting in not quite enough height to reach the tunnel; if Samus enters the sand too late, she will not get properly boosted by the Bomb explosion and will end up stuck in the sand. There is an 8-frame window for when to press jump, as it can be buffered during the period that the bomb begins interacting with Samus: if Samus jumps too early or late, she will get stuck in the sand. The timing for the aim-down press is frame-perfect: it must be pressed on the first frame that Samus begins being propelled upward by the bomb. if Samus aims down too early, she will get stuck in the sand; if Samus aims down too late, she will not get enough height to reach the tunnel. The timing for the jump is between 6 frames before or 1 frame after the down press. The amount of time that Samus holds forward after entering the sand is unimportant, as long as it is released before the aim-down. Requires: {
"notable": "Sand Bomb Boost (Left to Right)"
}
"canSandBombBoost"
"canInsaneJump"
{
"or": [
"can4HighMidAirMorph",
"canStationaryLateralMidAirMorph"
]
}Collects items: 5 Dev note: The timing window for when to press jump and when to aim-down is relative to the bomb explosion, independent of each other and independent of when Samus enters the sand. The timing for pressing forward (from a crouch) is 38 or 39 frames after laying the Bomb. The timing for the jump is between 51 and 58 frames after laying the Bomb. The timing for the aim-down press is 57 frames after laying the Bomb. It is also possible to stand by pressing up before entering the sand (in which case forward would be pressed 37 or 38 frames after laying the Bomb); this does not affect the size of the timing windows but introduces some more possibility for error, e.g. by the up input being eaten if Samus is still in the unmorphing animation, or by the forward input being not immediately processed if Samus is still in the standing animation. |
|
Stand on the edge of the sand and place a Power Bomb; unmorph (leaving Samus crouched), then wait a moment before pressing forward to enter the sand. On the exact frame when the Power Bomb begins to propel Samus upward, press down, and press jump on the same frame or one frame later. Move right to press against the wall before mid-air morphing (alternatively, a stationary lateral morph can work). There is a 13-frame window for when to enter the sand: if Samus enters the sand too early, she will sink slightly too far, resulting in not quite enough height to reach the tunnel; if Samus enters the sand too late, she will not get properly boosted by the Power Bomb explosion and will end up stuck in the sand. The timing for the aim-down press is frame-perfect: it must be pressed on the first frame that Samus begins being propelled upward by the Power Bomb. if Samus aims down too early, she will get stuck in the sand; if Samus aims down too late, she will not get enough height to reach the tunnel. if Samus jumps too early or late, she will get stuck in the sand. The amount of time that Samus holds forward when entering the sand should be between 2 and 11 frames. Requires: {
"notable": "Sand Bomb Boost (Left to Right)"
}
{
"tech": "canSandBombBoost"
}
"h_usePowerBomb"
"canInsaneJump"
{
"or": [
"can4HighMidAirMorph",
"canStationaryLateralMidAirMorph"
]
}Collects items: 5 Dev note: The timing window for when to press jump and when to aim-down is relative to the Power Bomb explosion, independent of each other and independent of when Samus enters the sand. The timing for pressing forward (from a crouch) is between 27 and 39 frames after laying the Power Bomb. The timing for the jump is between 56 and 57 frames after laying the Power Bomb. The timing for the aim-down press is 56 frames after laying the Power Bomb. It is also possible to stand by pressing up before entering the sand (in which case forward would be pressed 28 or 40 frames after laying the Power Bomb); this does not affect the size of the timing windows but introduces some more possibility for error, e.g. by the up input being eaten if Samus is still in the unmorphing animation, or by the forward input being not immediately processed if Samus is still in the standing animation. |
|
Chain temporary blue across the room in order to break the Speed blocks. If available, bouncing using Spring Ball can help speed this up significantly. If two Power Bombs are also available, they can be used to break the shot blocks along the way without needing to stop bouncing. Entrance condition: {
"comeInWithTemporaryBlue": {
"direction": "right"
},
"comesThroughToilet": "any"
}Requires: "canChainTemporaryBlue"
{
"or": [
"HiJump",
"canTrickySpringBallJump",
"canInsaneJump"
]
}
{
"or": [
{
"and": [
"canSpringBallBounce",
{
"or": [
{
"ammo": {
"type": "PowerBomb",
"count": 2
}
},
{
"and": [
"canLongChainTemporaryBlue",
"can4HighMidAirMorph"
]
}
]
}
]
},
{
"and": [
"canLongChainTemporaryBlue",
"canStationaryLateralMidAirMorph",
"can4HighMidAirMorph",
"canBeVeryPatient"
]
}
]
} |
From: 1
Bottom Left Door
To: 2
Right Door
Chain temporary blue across the room in order to break the Speed blocks. If available, bouncing using Spring Ball can help speed this up significantly. If two Power Bombs are also available, they can be used to break the shot blocks along the way without needing to stop bouncing. Entrance condition: {
"comeInWithTemporaryBlue": {
"direction": "left"
},
"comesThroughToilet": "any"
}Requires: "canChainTemporaryBlue"
"canXRayTurnaround"
{
"or": [
"HiJump",
"canTrickySpringBallJump",
"canInsaneJump"
]
}
{
"or": [
{
"and": [
"canSpringBallBounce",
{
"or": [
{
"ammo": {
"type": "PowerBomb",
"count": 2
}
},
{
"and": [
"canLongChainTemporaryBlue",
"can4HighMidAirMorph"
]
}
]
}
]
},
{
"and": [
"canLongChainTemporaryBlue",
"canStationaryLateralMidAirMorph",
"can4HighMidAirMorph",
"canBeVeryPatient"
]
}
]
} |
|


Chain temporary blue across the room in order to break the Speed blocks. If available, bouncing using Spring Ball can help speed this up significantly. If two Power Bombs are also available, they can be used to break the shot blocks along the way without needing to stop bouncing; the first Power Bomb must be placed at a specific time, about 1 tile to the left of the first set of Speed blocks; the second Power Bomb should be placed as early as possible after coming off cooldown. Entrance condition: {
"comeInWithTemporaryBlue": {}
}Requires: "canChainTemporaryBlue"
"canStationaryLateralMidAirMorph"
{
"or": [
{
"and": [
"canSpringBallBounce",
{
"or": [
{
"ammo": {
"type": "PowerBomb",
"count": 2
}
},
{
"and": [
"canLongChainTemporaryBlue",
"can4HighMidAirMorph"
]
}
]
}
]
},
{
"and": [
"canLongChainTemporaryBlue",
"can4HighMidAirMorph",
"canBeVeryPatient"
]
}
]
} |
From: 2
Right Door
To: 1
Bottom Left Door


Chain temporary blue across the room in order to break the Speed blocks, using Spring Ball to speed up the process. If two Power Bombs are also available, they can be used to break the shot blocks along the way without needing to stop bouncing; the first Power Bomb must be placed at a specific time, about 1 tile to the left of the first set of Speed blocks; the second Power Bomb should be placed as early as possible after coming off cooldown. Entrance condition: {
"comeInShinecharging": {
"length": 1,
"openEnd": 1
}
}Requires: "canLongChainTemporaryBlue" "canStationaryLateralMidAirMorph" "canSpringBallBounce" "canSpringBallJumpMidAir" "can4HighMidAirMorph" Exit condition: {
"leaveWithTemporaryBlue": {
"direction": "left"
}
}Unlocks doors: {"types":["ammo"],"requires":[]}Dev note: The slower version of this strat (with HiJump instead of Spring Ball) is not included; it could require too much patience, considering that the chain continues into the next room. |
From: 1
Left Door
To: 1
Left Door

Get a boost from a Bomb or Power Bomb while grappled to the top half of the turret above the door. Without HiJump, this is most easy to do by positioning as far right as possible on the ledge and performing a stationary lateral morph. Lay the Power Bomb relatively low and continue moving right for about another half a tile. turn around left while morphed, then unmorph after Samus begins to descend, to reset Samus' fall speed; hold angle-up, and wait a moment after Samus is unmorphed before using Grapple (to wait until the bomb or Power Bomb is about to explode). Press and hold down soon after the Grapple attaches. Samus will enter a 'glitched grapple hanging' state where Samus' graphics will appear corrupted while swinging with Grapple. Swing down, and hold left while approaching the door to trigger the transition. Continue holding Grapple through the door transition to initiate a teleport in the next room. Samus should be able to stand in the next room (e.g. in case this is needed for an X-Ray climb). Samus can reach the transition at horizontal position $14, or at positions $13 or $15 by pressing up at a specific time just before reaching the transition. Requires: "h_breakOneDraygonTurret"
"can4HighMidAirMorph"
"canGrappleBombHang"
"h_bombThings"
"canStationaryLateralMidAirMorph"
{
"draygonElectricityFrames": 50
}
{
"or": [
"canInsaneJump",
{
"draygonElectricityFrames": 50
}
]
}Exit condition: {
"leaveWithGrappleTeleport": {
"blockPositions": [
[
2,
18
]
]
}
}Dev note: This is technically possible to do without a stationary lateral morph, but with much greater difficulty. |
|
Requires: {
"resetRoom": {
"nodes": [
2
]
}
}
{
"or": [
{
"and": [
"Gravity",
{
"or": [
{
"and": [
"canWallJump",
{
"cycleFrames": 740
}
]
},
{
"and": [
"SpaceJump",
{
"cycleFrames": 790
}
]
},
{
"and": [
"HiJump",
"canTrickyDashJump",
{
"cycleFrames": 795
}
]
},
{
"and": [
"canSpringBallJumpMidAir",
{
"or": [
"HiJump",
"canSpringFling"
]
},
{
"cycleFrames": 920
},
"h_doubleEquipmentScreenCycleFrames"
]
},
{
"and": [
"canDiagonalBombJump",
{
"cycleFrames": 1380
}
]
}
]
}
]
},
{
"and": [
"canSuitlessMaridia",
{
"or": [
{
"and": [
"HiJump",
"canSpaceJumpWaterBounce",
"canWallJump",
{
"cycleFrames": 810
}
]
},
{
"and": [
"HiJump",
"canSpaceJumpWaterEscape",
{
"cycleFrames": 850
}
]
},
{
"and": [
"HiJump",
"h_underwaterMaxHeightSpringBallJump",
"canTrickyJump",
"canStationaryLateralMidAirMorph",
{
"cycleFrames": 1070
},
"h_doubleEquipmentScreenCycleFrames"
]
}
]
}
]
}
]
}Resets obstacles: R-Mode Farm cycle drops: 2 Cacatac |
From: 2
Right Door
To: 4
Top Right Ledge Junction
Spring Ball jump just as Samus exits the water to reach the distant ledge. To get enough horizontal distance, either use a Stationary Lateral Mid-Air Morph with a crouch jump for extra height, or spin jump out before morphing. Or Spring Ball jump part of the way over and land on a Bomb explosion to cross the rest of the distance. Requires: "canSuitlessMaridia"
"HiJump"
"h_underwaterMaxHeightSpringBallJump"
{
"or": [
"canStationaryLateralMidAirMorph",
{
"and": [
{
"tech": "canJumpIntoIBJ"
},
"canBombHorizontally"
]
}
]
}Dev note: The canCrouchJump is not required but makes the strat easier The canStationaryLateralMidAirMorph is not strictly required but better describes the difficulty. |
From: 5
Bottom Middle Junction
To: 4
Top Right Ledge Junction
When the Cacatac on the ground fires a spike, perform a Spring Ball jump to break the waterline and then hit the spike for extra height. With a blue suit, after the mid-air Spring Ball jump Samus would be invulnerable and unable to take a boost from the spike. But by unequipping Spring Ball again, it becomes possible. Requires: {
"notable": "Spring Ball Spike Boost"
}
"h_underwaterCrouchJump"
"HiJump"
"canSuitlessMaridia"
"canTrickyJump"
"canTrickySpringBallJump"
{
"or": [
"canInsaneJump",
"canStationaryLateralMidAirMorph"
]
}
{
"or": [
"canNeutralDamageBoost",
{
"and": [
"canSpringFling",
"h_midAirMorphDamageBoost"
]
}
]
}
{
"enemyDamage": {
"enemy": "Cacatac",
"type": "spike",
"hits": 2
}
}Dev note: The crouch jump is not strictly necessary but it helps significantly. |
|
Stationary lateral midair morph into a SpringBall jump just as Samus exits the water to reach the distant ledge. This can either be done from a crouch jump from the last pixel, giving an 8-frame window to jump while out of the water, or from a spin jump, which gives a 2-frame window to jump while out of the water. Samus could also start from a standing position, requiring the last pixel and only giving a 2-frame window. Requires: "canSuitlessMaridia"
"HiJump"
"canTrickyJump"
"canTrickySpringBallJump"
"canStationaryLateralMidAirMorph"
{
"or": [
"h_underwaterCrouchJump",
"canInsaneJump"
]
} |
From: 3
Bottom Right Door
To: 2
Bottom Left Door
Use temporary blue to break the speed blocks. Use stationary lateral mid-air morphs to move quickly while chaining temporary blue, in order to reach the last speed blocks before the Oums. Climb on the Oums to reach the left side of the room. Do not stand on the Oums when they begin to attack. Entrance condition: {
"comeInBlueSpinning": {
"maxExtraRunSpeed": "$3.0",
"unusableTiles": 0
}
}Requires: "canLongChainTemporaryBlue" "canStationaryLateralMidAirMorph" "can4HighMidAirMorph" "canUseEnemies" Dev note: FIXME: This strat name is not accurate since it doesn't involve a shinespark; it's only this way because it shares the reusable notable. FIXME: Carrying a flash suit can be possible while chaining temporary blue underwater here; a speedball could also be possible to avoid the need for such a long chain. |
From: 3
Bottom Right Door
To: 2
Bottom Left Door


Use temporary blue to break the speed blocks. Use stationary lateral mid-air morphs to move quickly while chaining temporary blue, in order to reach the last speed blocks before the Oums. Climb on the Oums to reach the left side of the room. Do not stand on the Oums when they begin to attack. Entrance condition: {
"comeInWithTemporaryBlue": {}
}Requires: "canLongChainTemporaryBlue" "canStationaryLateralMidAirMorph" "can4HighMidAirMorph" "canUseEnemies" |
From: 1
Left Door
To: 3
Junction Below Right Door
It is recommended to shoot the ceiling block immediately upon room entry to bring one of the Puyos down so that it will not be a problem later. Requires: "canSuitlessMaridia"
"h_underwaterMaxHeightSpringBallJump"
{
"or": [
"can4HighMidAirMorph",
"canStationaryLateralMidAirMorph",
{
"and": [
"canNeutralDamageBoost",
{
"enemyDamage": {
"enemy": "Puyo",
"type": "contact",
"hits": 2
}
}
]
}
]
} |
From: 1
Left Door
To: 3
Junction Below Right Door
It is recommended to shoot the ceiling block immediately upon room entry to bring one of the Puyos down so that it will not be a problem later. Requires: "canSuitlessMaridia"
"canTrickySpringBallJump"
"canTrickyJump"
"canJumpIntoRespawningBlock"
{
"or": [
"can4HighMidAirMorph",
"canStationaryLateralMidAirMorph"
]
} |
|

On the left side of the raised platform, jump for max height. Lateral Midair Morph for horizontal momentum, and perform the Spring Ball jump the moment before touching the sandfall. Pause again to disable Spring Ball as soon as possible. Requires: {
"notable": "Spring Ball HiJump"
}
"canSuitlessMaridia"
"HiJump"
"canTrickySpringBallJump"
"canStationaryLateralMidAirMorph"
"canSpringFling"
"canPlayInSand"
{
"or": [
{
"enemyDamage": {
"enemy": "Evir",
"type": "particle",
"hits": 1
}
},
{
"enemyKill": {
"enemies": [
[
"Evir"
]
],
"explicitWeapons": [
"Plasma",
"Super",
"PowerBomb"
]
}
},
"canTrickyDodgeEnemies",
"h_pauseAbuseMinimalReserveRefill"
]
}
{
"or": [
{
"noBlueSuit": {}
},
{
"notable": "Blue Suit Sand Walk"
}
]
} |
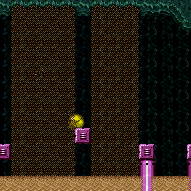
From: 4
Junction Below Sand Entrance
To: 5
Right Pillar

From the sand fall, quickly get onto the left platform to prevent the right side Evir from lowering too far. Jump on the sand to the right while freezing the Evir as high as possible. Refreeze the Evir so it is a slightly higher platform than the right pillar. Perform a spring ball jump with a stationary lateral mid-air morph from the left side of the current platform to get onto the Evir. Use a running jump off of the Evir. As a backup, it may be possible to make the Evir rise again by hitting it with a PB - place the PB in the air to avoid double hitting and killing it. Requires: {
"notable": "Suitless Bootless Evir Freeze (Center to Right)"
}
"canSuitlessMaridia"
"canTrickyUseFrozenEnemies"
"canPlayInSand"
"h_underwaterMaxHeightSpringBallJump"
"canStationaryLateralMidAirMorph" |
|
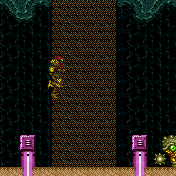

Perform multiple stationary lateral mid-air morphs, while avoiding the Evir projectiles, to cross the room. It is necessary to start the jumps from the far side of the platforms in order to gain more horizontal momentum before entering the sand falls. Falling into the sand will often result in a soft lock. It is possible to use a very precise spring fling instead of a stationary lateral mid-air morph, but it is harder. Requires: {
"notable": "Suitless Bootless Spring Ball"
}
"canSuitlessMaridia"
"canPlayInSand"
"h_underwaterMaxHeightSpringBallJump"
"canStationaryLateralMidAirMorph"
"canInsaneJump"
{
"or": [
{
"enemyKill": {
"enemies": [
[
"Evir",
"Evir"
]
],
"explicitWeapons": [
"Super",
"Missile",
"PowerBombPeriphery",
"Plasma"
]
}
},
"canTrickyDodgeEnemies"
]
} |
From: 5
Left Pillar Junction
To: 4
Below Sand Entrance
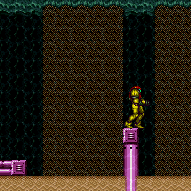
Perform multiple stationary lateral mid-air morphs, while avoiding the Evir projectiles, to cross the room. It is necessary to start the jumps from the far side of the platforms in order to gain more horizontal momentum before entering the sand falls. Falling into the sand will often result in a soft lock. Requires: {
"notable": "Suitless Bootless Spring Ball"
}
"canSuitlessMaridia"
"canPlayInSand"
"h_underwaterMaxHeightSpringBallJump"
"canStationaryLateralMidAirMorph"
"canInsaneJump" |