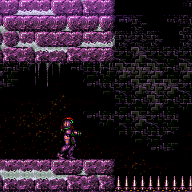
canXMode (Expert+)
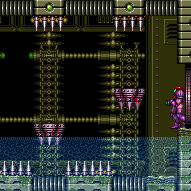
Ability to enter X-Mode using spikes by precisely unmorphing after bouncing into spikes or thorns. This can be used to run in place and gain a shinecharge. Samus must neutral bounce once while morphed before unmorphing; the bounce can be on a platform above the spikes, or on the spikes themselves if enough space is available. To build a shinecharge with X-mode, Samus must enter X-mode with dash speed; e.g. this can be done with a dashing stationary spinjump, and selecting X-Ray before landing on the spikes. Hold the dash button so that X-Ray is buffered to activate immediately after unmorphing.
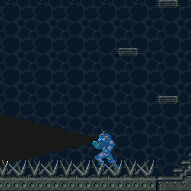
Moving into a solid tile while in X-mode will crash the game; to avoid this, hold forward while in X-mode to prevent Samus from moving forward; unintuitively, releasing forward will cause Samus to move forward. With spikes, there is a 2-frame window to unmorph after contacting the spikes; with thorns, it is usually frame-perfect.
Dev note: A flash suit can be used while in X-Mode, but any unused flash suit will be lost when X-Ray is released. Using a flash suit during X-Mode should be represented by a `useFlashSuit` immediately before `canXMode`.
Strats ()
|
Requires: "h_spikeXModeShinecharge"
{
"shineChargeFrames": 110
}Exit condition: {
"leaveShinecharged": {}
}Dev note: Two spike hits are expected per attempt (with any additional leniency hits being multiplied by this amount). |
From: 3
Bottom Left Door
To: 3
Bottom Left Door

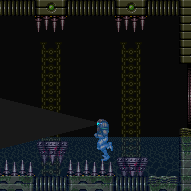
With some dash speed, bounce into the opening of the spikeway, and enter X-mode. The spike knockback will push Samus back out of the spikeway. By bouncing far enough left, it is possible to get a 2-frame window for the X-mode. By holding an angle button, it is possible turn around in X-mode without losing dash speed. Crouch to charge a shinespark, release dash to cancel X-Ray and exit out of X-Mode and hold angle until temporary blue. Requires: "canXMode"
"h_shinechargeMaxRunway"
"canChainTemporaryBlue"
{
"thornHits": 1
}
{
"or": [
{
"thornHits": "n_thornXModeLenience"
},
{
"obstaclesCleared": [
"A"
]
},
"canTrickyDodgeEnemies",
{
"enemyKill": {
"enemies": [
[
"Beetom",
"Beetom"
]
],
"excludedWeapons": [
"Bombs"
]
}
}
]
}Exit condition: {
"leaveWithTemporaryBlue": {}
} |
From: 3
Bottom Left Door
To: 3
Bottom Left Door

With some dash speed, bounce into the opening of the spikeway, and enter X-mode. The spike knockback will push Samus back out of the spikeway. By bouncing far enough left, it is possible to get a 2-frame window for the X-mode. By holding an angle button, it is possible turn around in X-mode without losing dash speed. Arm pumps can be used to get close to the ledge before shinecharging, to leave with more frames remaining. Requires: "h_XModeShinecharge"
{
"thornHits": 1
}
{
"or": [
{
"thornHits": "n_thornXModeLenience"
},
{
"obstaclesCleared": [
"A"
]
},
"canTrickyDodgeEnemies",
{
"enemyKill": {
"enemies": [
[
"Beetom",
"Beetom"
]
],
"excludedWeapons": [
"Bombs"
]
}
}
]
}
{
"shineChargeFrames": 60
}
{
"or": [
"canXModeMovement",
{
"shineChargeFrames": 15
}
]
}Exit condition: {
"leaveShinecharged": {}
} |
From: 4
Bottom Right Door
To: 4
Bottom Right Door

Requires: {
"or": [
"h_thornXModeShinecharge",
{
"and": [
"h_thornXModeShinechargeWithoutLenience",
{
"or": [
{
"obstaclesCleared": [
"A"
]
},
"canTrickyDodgeEnemies",
{
"enemyKill": {
"enemies": [
[
"Beetom"
]
],
"excludedWeapons": [
"Bombs"
]
}
}
]
}
]
}
]
}
{
"shinespark": {
"frames": 62,
"excessFrames": 0
}
}Exit condition: {
"leaveWithSpark": {}
} |
From: 7
Junction (Zebbo Farms)
To: 7
Junction (Zebbo Farms)
After entering with R-Mode, clear or trap the Beetom(s) and use any Zebbo pipe to setup Energy. Bounce into the thorns with dash speed and enter X-Mode to gain shinecharge. Timing the shinecharge and X-Ray release to happen soon after i-frames refresh avoids a second thorn hit. Then get back to the Zebbo pipe and get the blue suit. Requires: {
"obstaclesCleared": [
"R-Mode"
]
}
{
"or": [
{
"obstaclesCleared": [
"A"
]
},
{
"enemyKill": {
"enemies": [
[
"Beetom"
]
],
"excludedWeapons": [
"Bombs"
]
}
},
"canTrickyDodgeEnemies"
]
}
{
"refill": [
"Energy"
]
}
"h_thornXModeShinechargeWithoutLenience"
{
"autoReserveTrigger": {
"maxReserveEnergy": 95
}
}
"canRModeSparkInterrupt"Resets obstacles: R-Mode |
From: 1
Left Door
To: 1
Left Door
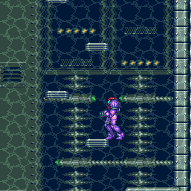
Jump into the large patch of thorns from below, bouncing on the thorns. After entering X-mode, turn around to the left while holding an angle button to maintain dash speed, then arm pump to the left to get closer to the door and avoid a third thorn hit. Requires: "canXModeMovement"
"h_XModeShinecharge"
{
"or": [
{
"thornHits": {
"mul": [
"n_thornXModeAttempts",
2
]
}
},
{
"and": [
{
"resetRoom": {
"nodes": [
1,
2
]
}
},
{
"thornHits": 2
}
]
}
]
}
{
"shineChargeFrames": 60
}Exit condition: {
"leaveShinecharged": {}
}Dev note: Assuming the room can be reset, lenience is not included because a farm is available. |
From: 1
Left Door
To: 1
Left Door


Jump into the large patch of thorns from below, bouncing on the thorns. Requires: "h_XModeShinecharge"
{
"or": [
{
"thornHits": {
"mul": [
"n_thornXModeAttempts",
3
]
}
},
{
"and": [
{
"resetRoom": {
"nodes": [
1,
2
]
}
},
{
"thornHits": 3
}
]
}
]
}
{
"shineChargeFrames": 120
}Exit condition: {
"leaveShinecharged": {}
}Dev note: Assuming the room can be reset, lenience is not included because a farm is available. |
From: 1
Top Right Door
To: 1
Top Right Door
Requires: {
"obstaclesCleared": [
"A"
]
}
"h_spikeXModeShinecharge"
{
"shineChargeFrames": 80
}Exit condition: {
"leaveShinecharged": {}
}Dev note: Two spike hits are expected per attempt (with any additional leniency hits being multiplied by this amount). |
From: 1
Left Door
To: 1
Left Door
Kill the hoppers. Use Spike X-Mode to gain shine charge, then use manual reserve and pause abuse on the spikes to interrupt the shinespark. Requires: {
"obstaclesCleared": [
"R-Mode"
]
}
{
"obstaclesCleared": [
"A"
]
}
{
"or": [
{
"and": [
"h_CrystalFlashForReserveEnergy",
"h_usePowerBomb",
"canOffScreenMovement"
]
},
{
"and": [
"h_RModeCanRefillReserves",
{
"resourceMissingAtMost": [
{
"type": "Missile",
"count": 0
}
]
},
{
"resourceMissingAtMost": [
{
"type": "Super",
"count": 0
}
]
},
{
"or": [
{
"and": [
"canBeLucky",
{
"partialRefill": {
"type": "ReserveEnergy",
"limit": 5
}
}
]
},
{
"and": [
"canBeVeryLucky",
{
"partialRefill": {
"type": "ReserveEnergy",
"limit": 20
}
}
]
}
]
}
]
}
]
}
"h_destroyBombWalls"
"h_spikeXModeShinecharge"
"canBeVeryPatient"
"canPauseAbuse"
{
"autoReserveTrigger": {}
}
"canRModeSparkInterrupt"Resets obstacles: R-Mode, C |
|


A very precise bounce is needed in order to enter X-mode with dash speed. Neutral knockback or a damage boost can be used to reach the door more quickly. Requires: {
"obstaclesCleared": [
"A"
]
}
"h_destroyBombWalls"
"h_spikeXModeShinecharge"
"canBeVeryPatient"
{
"shineChargeFrames": 110
}Exit condition: {
"leaveShinecharged": {}
} |
|

A one frame dash jump will give Samus 4 pixels of leniency for the bounce position, two frames is pixel perfect and more than two frames it doesn't work. Samus will jump approximately two tiles higher with a one frame jump compared to a two frame jump. Requires: {
"or": [
"Wave",
{
"obstaclesCleared": [
"B"
]
}
]
}
{
"obstaclesCleared": [
"A"
]
}
{
"obstaclesNotCleared": [
"C"
]
}
"h_spikeXModeShinecharge"
"canBeVeryPatient"
{
"shinespark": {
"frames": 16
}
}Clears obstacles: B Resets obstacles: C |
|
While in X-mode on the thorns, Samus' will be flashing as i-frames periodically refresh; by timing the shinecharge and X-Ray release to happen soon after i-frames refresh, a second thorn hit can be avoided. Requires: "Gravity"
{
"enemyKill": {
"enemies": [
[
"Yapping Maw"
]
],
"explicitWeapons": [
"Super"
]
}
}
"h_thornXModeShinecharge"
"h_thornXModeFramePerfectExtraLeniency"
{
"shineChargeFrames": 75
}Exit condition: {
"leaveShinecharged": {}
} |
|
While in X-mode on the thorns, Samus' will be flashing as i-frames periodically refresh; by timing the shinecharge and X-Ray release to happen soon after i-frames refresh, a second thorn hit can be avoided. Requires: "Gravity"
{
"enemyKill": {
"enemies": [
[
"Yapping Maw"
]
],
"explicitWeapons": [
"Super"
]
}
}
"h_thornXModeShinecharge"
"h_thornXModeFramePerfectExtraLeniency"
{
"shineChargeFrames": 65
}Exit condition: {
"leaveShinecharged": {}
} |
|

Use X-mode to gain a shinecharge on the right side of the room, and use it to spark across to the left side of the room. Bumping a solid tile before activating X-Mode will remove dash state, preventing shinecharging. Requires: "canXMode"
{
"spikeHits": 2
}
"h_shinechargeMaxRunway"
"canShinechargeMovementTricky"
{
"shinespark": {
"frames": 105,
"excessFrames": 6
}
}Dev note: Omitting leniency spikeHits, since the firefleas provide an opportunity to farm after a failed attempt. |
|
Requires: "h_spikeXModeShinecharge"
{
"shineChargeFrames": 95
}Exit condition: {
"leaveShinecharged": {}
} |
From: 2
Right Door
To: 2
Right Door


Farm no more than one fireflea: Samus sprite and spike tiles are darkened by the Fireflea effect during R-Mode. Enter Spike X-Mode in the spike pit and shinecharge, then jump into another fireflea to interrupt. Entrance condition: {
"comeInWithRMode": {}
}Requires: {
"obstaclesCleared": [
"R-Mode"
]
}
{
"or": [
"h_CrystalFlashForReserveEnergy",
{
"and": [
"h_RModeCanRefillReserves",
{
"resourceMissingAtMost": [
{
"type": "PowerBomb",
"count": 0
}
]
},
{
"partialRefill": {
"type": "ReserveEnergy",
"limit": 40
}
}
]
}
]
}
"canBeVeryPatient"
"canXMode"
"h_XModeSpikeHit"
"h_shinechargeMaxRunway"
"canShinechargeMovement"
{
"autoReserveTrigger": {}
}
"canRModeSparkInterrupt"Resets obstacles: R-Mode |
From: 3
Safe Block in the Middle of the Room
To: 1
Left Door
Use the spikes in the center of the room to gain a shinecharge with X-Mode. Then arm pump until Samus reaches the middle Yapping Maw. Exit X-mode, gain run speed, and use Space Jump to reach the door. Requires: {
"obstaclesCleared": [
"A"
]
}
"SpaceJump"
"h_spikeXModeShinecharge"
"canUseIFrames"
"canShinechargeMovementTricky"
{
"shineChargeFrames": 160
}Exit condition: {
"leaveShinecharged": {}
}Unlocks doors: {"types":["ammo"],"requires":[],"useImplicitRequires":false}Dev note: Unlocking the door is free since obstacle A being cleared implies it was already unlocked earlier if needed. |
From: 3
Safe Block in the Middle of the Room
To: 1
Left Door
Use the spikes in the center of the room to gain a shinecharge with X-Mode. Then arm pump until Samus reaches the middle Yapping Maw. Exit X-mode, gain run speed, and jump toward the door and shinespark out. Requires: {
"obstaclesCleared": [
"A"
]
}
"h_spikeXModeShinecharge"
"canUseIFrames"
{
"shinespark": {
"frames": 20,
"excessFrames": 0
}
}Exit condition: {
"leaveWithSpark": {}
}Unlocks doors: {"types":["ammo"],"requires":[],"useImplicitRequires":false}Dev note: Unlocking the door is free since obstacle A being cleared implies it was already unlocked earlier if needed. |
From: 3
Safe Block in the Middle of the Room
To: 1
Left Door


Enter X-mode facing left and release forward to allow Samus to walk to the left. Samus' progress can be tracked using the mini-map. When Samus begins to scroll across the screen, this indicates the camera has locked on the left side of the room. At this point (or slightly before), hold forward again to stop Samus' movement. Spin jump and release X-Ray to exit X-mode and jump onto the platform. Requires: "canXMode" "h_XModeSpikeHit" |
|
While in X-mode on the thorns, Samus' will be flashing as i-frames periodically refresh; by timing the shinecharge and X-Ray release to happen soon after i-frames refresh, a second thorn hit can be avoided. Requires: "Gravity"
"h_thornXModeShinecharge"
"h_thornXModeFramePerfectExtraLeniency"
{
"shineChargeFrames": 145
}Exit condition: {
"leaveShinecharged": {}
} |
|
While in X-mode on the thorns, Samus' will be flashing as i-frames periodically refresh; by timing the shinecharge and X-Ray release to happen soon after i-frames refresh, a second thorn hit can be avoided. Requires: "Gravity"
"h_thornXModeShinecharge"
"h_thornXModeFramePerfectExtraLeniency"
{
"shineChargeFrames": 70
}Exit condition: {
"leaveShinecharged": {}
} |
From: 1
Left Door
To: 1
Left Door
Use thorns next to the Zeb pipe for Spike X-Mode and gain shinecharge. You can then get hit by the Zeb for the interrupt. Entrance condition: {
"comeInWithRMode": {}
}Requires: {
"refill": [
"Energy"
]
}
"canXMode"
{
"thornHits": 2
}
"h_shinechargeMaxRunway"
{
"autoReserveTrigger": {
"maxReserveEnergy": 95
}
}
"canRModeSparkInterrupt" |
|


A very precise bounce is needed in order to enter X-mode with dash speed. Requires: "h_thornXModeShinecharge"
{
"shineChargeFrames": 110
}Exit condition: {
"leaveShinecharged": {}
}Dev note: Two thorn hits are expected. Lenience is not included because there is a farm available. |
From: 2
Top Right Door
To: 1
Left Door
Use thorns for Spike X-Mode and gain shinecharge. Entrance condition: {
"comeInWithRMode": {}
}Requires: {
"refill": [
"Energy"
]
}
"canXMode"
{
"thornHits": 2
}
"h_shinechargeMaxRunway"
{
"autoReserveTrigger": {
"maxReserveEnergy": 95
}
}
"canRModeSparkInterrupt" |
From: 3
Bottom Right Door
To: 1
Left Door


Use thorns for Spike X-Mode and gain shinecharge. Entrance condition: {
"comeInWithRMode": {}
}Requires: {
"refill": [
"Energy"
]
}
"canXMode"
{
"thornHits": 2
}
"h_shinechargeMaxRunway"
{
"autoReserveTrigger": {
"maxReserveEnergy": 95
}
}
"canRModeSparkInterrupt" |
From: 3
Bottom Right Door
To: 3
Bottom Right Door
A very precise bounce is needed in order to enter X-mode with dash speed. Requires: "h_thornXModeShinecharge"
{
"shineChargeFrames": 155
}Exit condition: {
"leaveShinecharged": {}
}Dev note: Two thorn hits are expected. Lenience is not included because there is a farm available. |
From: 1
Left Door
To: 1
Left Door
Crystal Flash upon entering the room, then use the thorns to damage down and perform Spike X-Mode. Once shinecharge is gained, get Kraid to charge or spit at Samus and use that for R-Mode interrupt. Entrance condition: {
"comeInWithRMode": {}
}Requires: {
"not": "f_DefeatedKraid"
}
"canRiskPermanentLossOfAccess"
"h_CrystalFlashForReserveEnergy"
"h_thornXModeShinecharge"
{
"autoReserveTrigger": {
"maxReserveEnergy": 95
}
}
"canRModeSparkInterrupt"Clears obstacles: door_1 Dev note: In randomizers that do not initially lock the boss door, the player can escape once blue suit is gained. |
From: 1
Left Door
To: 1
Left Door
Force Kraid to stand up and farm his nails for energy, then perform a Spike X-Mode on the thorns to get shinecharge. Get interrupted by Kraid for blue suit. You will be forced to defeat Kraid afterward. Entrance condition: {
"comeInWithRMode": {}
}Requires: {
"not": "f_DefeatedKraid"
}
"canRiskPermanentLossOfAccess"
{
"or": [
"canBeVeryPatient",
{
"disableEquipment": "ETank"
}
]
}
{
"refill": [
"Energy"
]
}
{
"or": [
"Charge",
{
"ammo": {
"type": "Missile",
"count": 2
}
},
{
"ammo": {
"type": "Super",
"count": 1
}
}
]
}
{
"or": [
"HiJump",
"canWallJump",
"SpaceJump",
"canSpringBallJumpMidAir",
{
"and": [
"canDodgeWhileShooting",
{
"or": [
"canCarefulJump",
"h_crouchJumpDownGrab"
]
}
]
}
]
}
"h_thornXModeShinecharge"
{
"autoReserveTrigger": {
"maxReserveEnergy": 95
}
}
"canRModeSparkInterrupt"Clears obstacles: f_DefeatedKraid, door_1 Sets flags: f_DefeatedKraid |
From: 1
Left Door
To: 1
Left Door
If Kraid is alive, use X-mode on the thorns to gain blue speed. Hold an angle button to turn around while retaining blue. If needed, arm pump to get close to the ledge without touching it. While in X-mode on the thorns, Samus' will be flashing as i-frames periodically refresh; by timing the shinecharge and X-Ray release to happen soon after i-frames refresh, a second thorn hit can be avoided. Requires: "h_thornXModeShinecharge"
{
"or": [
{
"canShineCharge": {
"usedTiles": 22,
"openEnd": 0
}
},
{
"and": [
{
"not": "f_DefeatedKraid"
},
"canRiskPermanentLossOfAccess"
]
}
]
}
{
"shineChargeFrames": 45
}
{
"or": [
"canBeVeryPatient",
{
"and": [
"h_XModeThornHit",
{
"shineChargeFrames": 20
}
]
}
]
}Exit condition: {
"leaveShinecharged": {}
}Dev note: If Kraid is alive, leaving with a horizontal damage boost is also possible, but not easy to model. |
From: 2
Right Door
To: 1
Left Door
You can crystal flash for early setup, then bounce between thorns and Kraid to setup. Alternatively, force Kraid to stand up and farm his nails for energy. Then perform a Spike X-Mode on the thorns to get shinecharge. Get interrupted by Kraid for blue suit. After gaining blue suit you can proceed to defeat Kraid. Entrance condition: {
"comeInWithRMode": {}
}Requires: {
"not": "f_DefeatedKraid"
}
"canRiskPermanentLossOfAccess"
{
"or": [
{
"thornHits": 1
},
{
"and": [
{
"or": [
"canPrepareForNextRoom",
"h_KraidCameraFix"
]
},
"SpaceJump"
]
}
]
}
{
"or": [
"h_CrystalFlashForReserveEnergy",
{
"and": [
{
"or": [
"canBeVeryPatient",
{
"disableEquipment": "ETank"
}
]
},
{
"refill": [
"Energy"
]
},
{
"or": [
"Charge",
{
"ammo": {
"type": "Missile",
"count": 2
}
},
{
"ammo": {
"type": "Super",
"count": 1
}
}
]
}
]
}
]
}
{
"or": [
"HiJump",
"canWallJump",
"SpaceJump",
"canSpringBallJumpMidAir",
{
"and": [
"canDodgeWhileShooting",
{
"or": [
"canCarefulJump",
"h_crouchJumpDownGrab"
]
}
]
}
]
}
"canXMode"
"h_XModeThornHit"
"h_shinechargeMaxRunway"
{
"autoReserveTrigger": {
"maxReserveEnergy": 95
}
}
"canRModeSparkInterrupt"Clears obstacles: f_DefeatedKraid, door_2 Sets flags: f_DefeatedKraid |
From: 2
Right Door
To: 2
Right Door
If Kraid is alive, use X-mode on the thorns to gain blue speed. Hold an angle button to turn around while retaining blue. If needed, arm pump to get close to the ledge without touching it. While in X-mode on the thorns, Samus' will be flashing as i-frames periodically refresh; by timing the shinecharge and X-Ray release to happen soon after i-frames refresh, a second thorn hit can be avoided. Requires: "h_KraidCameraFix"
"h_thornXModeShinecharge"
"h_thornXModeFramePerfectExtraLeniency"
{
"or": [
{
"canShineCharge": {
"usedTiles": 22,
"openEnd": 0
}
},
{
"and": [
{
"not": "f_DefeatedKraid"
},
"canRiskPermanentLossOfAccess"
]
}
]
}
{
"shineChargeFrames": 45
}
{
"or": [
"canBeVeryPatient",
{
"and": [
"h_XModeThornHit",
{
"shineChargeFrames": 20
}
]
}
]
}Exit condition: {
"leaveShinecharged": {}
}Dev note: If Kraid is alive, leaving with a horizontal damage boost is also possible, but not easy to model. |
|
Requires: "h_spikeXModeShinecharge"
{
"shinespark": {
"frames": 4,
"excessFrames": 2
}
} |
|
Requires: "h_spikeXModeShinecharge"
"canWallJump"
{
"heatFrames": 540
}
{
"shinespark": {
"frames": 5
}
}Exit condition: {
"leaveWithSpark": {}
}Dev note: Two spike hits are expected per attempt (with any additional leniency hits being multiplied by this amount). |
|
Requires: "h_spikeXModeShinecharge"
{
"or": [
{
"and": [
{
"heatFrames": 480
},
{
"shineChargeFrames": 140
},
"HiJump"
]
},
{
"and": [
{
"heatFrames": 540
},
"canWallJump",
"canShinechargeMovementTricky",
{
"shineChargeFrames": 160
}
]
}
]
}Exit condition: {
"leaveShinecharged": {}
}Dev note: Two spike hits are expected per attempt (with any additional leniency hits being multiplied by this amount). |
|
A short hop from the door can bounce on the crumbles. Just be careful of being pushed back onto the crumble blocks by the spikes. Requires: "h_spikeXModeShinecharge"
"canTrickyJump"
{
"heatFrames": 400
}
{
"shinespark": {
"frames": 12,
"excessFrames": 4
}
}Dev note: Two spike hits are expected per attempt (with any additional leniency hits being multiplied by this amount). |
|

A short hop from the ledge can bounce on the crumbles and into the spikes. Just be careful of being pushed back onto the crumble blocks by the spikes. Requires: "h_spikeXModeShinecharge"
"canTrickyJump"
"canUseIFrames"
{
"heatFrames": 480
}
{
"shinespark": {
"frames": 11,
"excessFrames": 4
}
}Dev note: Two spike hits are expected per attempt (with any additional leniency hits being multiplied by this amount). |
|
Enter X-mode in the spikes near the door. Release forward to make Samus move forward at a rate of 1 pixel per frame. After passing the third Yapping Maw, when Samus appears to move forward, this is the indication that the camera scroll has locked against the opposite side of the room, which is a good cue for when to stop, by holding forward again. To avoid taking another spike hit, press jump, then release dash to exit X-mode while jumping. Requires: "Gravity"
"canXMode"
"h_XModeSpikeHit"
{
"heatFrames": 200
}
{
"lavaFrames": 15
} |
|
Enter X-mode in the spikes near the door. Release forward to make Samus move forward at a rate of 1 pixel per frame. After passing the third Yapping Maw, when Samus appears to move forward, this is the indication that the camera scroll has locked against the opposite side of the room, which is a good cue for when to stop, by holding forward again. To avoid taking another spike hit, press jump, then release dash to exit X-mode while jumping. Requires: "Gravity"
"canXMode"
"h_XModeSpikeHit"
{
"heatFrames": 200
}
{
"lavaFrames": 15
} |
From: 1
Left Door
To: 1
Left Door
Ride the Tripper across to the center platform. Farm the right-side Tripper. Enter X-Mode on the spike and shinecharge, then use heat damage to interrupt. Ride the Tripper back to the left door before farming it on the way out. Entrance condition: {
"comeInWithRMode": {}
}Requires: "h_heatProof"
"Morph"
"h_RModeCanRefillReserves"
{
"enemyKill": {
"enemies": [
[
"Tripper"
]
]
}
}
{
"resourceMissingAtMost": [
{
"type": "Missile",
"count": 0
}
]
}
{
"or": [
{
"partialRefill": {
"type": "ReserveEnergy",
"limit": 5
}
},
{
"and": [
{
"or": [
"h_lavaProof",
"Grapple",
{
"and": [
"canWallJump",
{
"or": [
"Super",
"Ice"
]
}
]
},
"SpaceJump"
]
},
{
"partialRefill": {
"type": "ReserveEnergy",
"limit": 20
}
},
{
"or": [
{
"enemyKill": {
"enemies": [
[
"Tripper"
]
]
}
},
"canBeLucky"
]
}
]
}
]
}
"canBeVeryPatient"
"canXMode"
"h_XModeSpikeHit"
"h_shinechargeMaxRunway"
{
"disableEquipment": "Varia"
}
{
"disableEquipment": "Gravity"
}
{
"autoReserveTrigger": {}
}
"canRModePauseAbuseSparkInterrupt" |
From: 1
Left Door
To: 2
Right Door
Ride the Tripper across to the center platform, then farm it for energy. Enter X-Mode on the spike and shinecharge, then use heat damage to interrupt. Ride the second tripper to the opposite door - farm it on the way out if needed. Entrance condition: {
"comeInWithRMode": {}
}Requires: "h_heatProof"
"Morph"
"h_RModeCanRefillReserves"
{
"enemyKill": {
"enemies": [
[
"Tripper"
]
]
}
}
{
"resourceMissingAtMost": [
{
"type": "Missile",
"count": 0
}
]
}
{
"or": [
{
"partialRefill": {
"type": "ReserveEnergy",
"limit": 5
}
},
{
"and": [
{
"or": [
"h_lavaProof",
"Grapple",
{
"and": [
"canWallJump",
{
"or": [
"Super",
"Ice"
]
}
]
},
"SpaceJump"
]
},
{
"partialRefill": {
"type": "ReserveEnergy",
"limit": 20
}
},
{
"or": [
{
"enemyKill": {
"enemies": [
[
"Tripper"
]
]
}
},
"canBeLucky"
]
}
]
}
]
}
"canBeVeryPatient"
"canXMode"
"h_XModeSpikeHit"
"h_shinechargeMaxRunway"
{
"disableEquipment": "Varia"
}
{
"disableEquipment": "Gravity"
}
{
"autoReserveTrigger": {}
}
"canRModePauseAbuseSparkInterrupt"Exit condition: {
"leaveNormally": {}
}Unlocks doors: {"nodeId":2,"types":["ammo"],"requires":[]} |
From: 2
Right Door
To: 1
Left Door
Ride the Tripper across to the center platform, then farm it for energy. Enter X-Mode on the spike and shinecharge, then use heat damage to interrupt. Ride the second tripper to the opposite door - farm it on the way out if needed. Entrance condition: {
"comeInWithRMode": {}
}Requires: "h_heatProof"
"Morph"
"h_RModeCanRefillReserves"
{
"enemyKill": {
"enemies": [
[
"Tripper"
]
]
}
}
{
"resourceMissingAtMost": [
{
"type": "Missile",
"count": 0
}
]
}
{
"or": [
{
"partialRefill": {
"type": "ReserveEnergy",
"limit": 5
}
},
{
"and": [
{
"or": [
"h_lavaProof",
"Grapple",
{
"and": [
"canWallJump",
{
"or": [
"Super",
"Ice"
]
}
]
},
"SpaceJump"
]
},
{
"partialRefill": {
"type": "ReserveEnergy",
"limit": 20
}
},
{
"or": [
{
"enemyKill": {
"enemies": [
[
"Tripper"
]
]
}
},
"canBeLucky"
]
}
]
}
]
}
"canBeVeryPatient"
"canXMode"
"h_XModeSpikeHit"
"h_shinechargeMaxRunway"
{
"disableEquipment": "Varia"
}
{
"disableEquipment": "Gravity"
}
{
"autoReserveTrigger": {}
}
"canRModePauseAbuseSparkInterrupt"Exit condition: {
"leaveNormally": {}
}Unlocks doors: {"nodeId":1,"types":["ammo"],"requires":[]} |
From: 2
Right Door
To: 2
Right Door
Ride the Tripper across to the center platform. Farm the left Tripper for energy. Enter X-Mode on the spike and shinecharge, then use heat damage to interrupt. Ride the Tripper back to the right door before farming it on the way out. Entrance condition: {
"comeInWithRMode": {}
}Requires: "h_heatProof"
"Morph"
"h_RModeCanRefillReserves"
{
"enemyKill": {
"enemies": [
[
"Tripper"
]
]
}
}
{
"resourceMissingAtMost": [
{
"type": "Missile",
"count": 0
}
]
}
{
"or": [
{
"partialRefill": {
"type": "ReserveEnergy",
"limit": 5
}
},
{
"and": [
{
"or": [
"h_lavaProof",
"Grapple",
{
"and": [
"canWallJump",
{
"or": [
"Super",
"Ice"
]
}
]
},
"SpaceJump"
]
},
{
"partialRefill": {
"type": "ReserveEnergy",
"limit": 20
}
},
{
"enemyKill": {
"enemies": [
[
"Tripper"
]
]
}
}
]
}
]
}
"canBeVeryPatient"
"canXMode"
"h_XModeSpikeHit"
"h_shinechargeMaxRunway"
{
"disableEquipment": "Varia"
}
{
"disableEquipment": "Gravity"
}
{
"autoReserveTrigger": {}
}
"canRModePauseAbuseSparkInterrupt" |
From: 4
Firefleas Item
To: 7
Fireflea Statue's Claw Junction


After armpumping for a while Samus will start to move forwards again, when this happens armpump to move forward one tile Requires: "h_spikeXModeShinecharge"
{
"shinespark": {
"frames": 14,
"excessFrames": 9
}
} |
From: 5
Firefleas Bottom Left Platform Junction
To: 7
Fireflea Statue's Claw Junction
Requires: "h_spikeXModeShinecharge"
{
"shinespark": {
"frames": 14,
"excessFrames": 9
}
} |
From: 3
Bottom Horizontal Door
To: 3
Bottom Horizontal Door
Clear the Alcoon then bounce into the spike patch. Requires: "h_spikeXModeShinecharge"
{
"or": [
{
"and": [
{
"enemyKill": {
"enemies": [
[
"Alcoon"
]
],
"explicitWeapons": [
"Plasma",
"Wave+Spazer",
"ScrewAttack",
"Missile",
"Super"
]
}
},
{
"heatFrames": 420
}
]
},
{
"and": [
{
"enemyKill": {
"enemies": [
[
"Alcoon"
]
],
"explicitWeapons": [
"Spazer",
"Wave",
"PseudoScrew",
"PowerBomb"
]
}
},
{
"heatFrames": 530
}
]
},
{
"and": [
{
"enemyKill": {
"enemies": [
[
"Alcoon"
]
],
"explicitWeapons": [
"PowerBeam"
]
}
},
{
"heatFrames": 620
}
]
}
]
}
{
"shineChargeFrames": 90
}Exit condition: {
"leaveShinecharged": {}
}Dev note: Two spike hits are expected per attempt (with any additional leniency hits being multiplied by this amount). |
From: 4
Junction Above Bomb Blocks
To: 2
Bottom Left Door


Starting from approximately the center of the floating platform, run and jump to the left, and perform a lateral mid-air morph to hit the spike from below (landing on the Namihe) and enter X-mode. Hold an angle button to turn around to the right while retaining dash speed. Arm pump a tile or two to the right, so that the Namihe is no longer below Samus. Gain a shinecharge and continue holding down while exiting X-mode to obtain temporary blue, and use it to break the bomb blocks below while falling through them. Requires: {
"notable": "X-Mode Temporary Blue"
}
"canLateralMidAirMorph"
"canXMode"
"h_XModeSpikeHit"
"h_shinechargeMaxRunway"
"canTemporaryBlue"
{
"heatFrames": 290
} |
From: 4
Junction Above Bomb Blocks
To: 4
Junction Above Bomb Blocks
Farm Pirates for energy on the way down. Jump-morph toward the Namihe below the spike and enter Spike X-Mode to shinecharge. Use the Namihe's fireball to interrupt. Requires: {
"obstaclesCleared": [
"R-Mode"
]
}
{
"notable": "X-Mode Temporary Blue"
}
"h_heatProof"
{
"enemyKill": {
"enemies": [
[
"Yellow Space Pirate (standing)"
],
[
"Yellow Space Pirate (standing)"
],
[
"Yellow Space Pirate (standing)"
]
]
}
}
{
"partialRefill": {
"type": "ReserveEnergy",
"limit": 20
}
}
"canLateralMidAirMorph"
"canXMode"
"h_XModeSpikeHit"
"h_shinechargeMaxRunway"
{
"autoReserveTrigger": {
"maxReserveEnergy": 95
}
}
"canRModeSparkInterrupt"Resets obstacles: R-Mode |
From: 2
Middle Left Door
To: 1
Top Left Door

Arm pump slowly after the Chozo statue comes on screen, when the camera locks and Samus starts to move again, armpump only 3 or 4 more times to clear the last spike and avoid an extra spike hit. Requires: {
"doorUnlockedAtNode": 2
}
"canXMode"
"h_XModeSpikeHit"
"h_shinechargeMaxRunway"
"canShinechargeMovement"
{
  "shinespark": {
    "frames": 1,
    "excessFrames": 1
  }
}
"canShinesparkSlopeClip"
"canXRayClimb"
{
  "or": [
    {
      "getBlueSpeed": {
        "usedTiles": 16,
        "steepDownTiles": 4,
        "openEnd": 0
      }
    },
    "can4HighMidAirMorph"
  ]
}
Exit condition: {
"leaveNormally": {}
}Unlocks doors: {"types":["ammo"],"requires":[]}Dev note: The leaveNormally is to ensure it won't be required to do the Speed block moondance blind up there. |
From: 2
Middle Left Door
To: 2
Middle Left Door
Requires: "h_spikeXModeShinecharge"
{
"or": [
"can4HighMidAirMorph",
"h_XModeSpikeHit"
]
}
"canUseIFrames"
{
"shineChargeFrames": 65
}Exit condition: {
"leaveShinecharged": {}
}Dev note: At least two spike hits are expected per attempt (with any additional leniency hits being multiplied by this amount). |
From: 2
Middle Left Door
To: 2
Middle Left Door
Crystal Flash, enter X-Mode on the spikes and shinecharge. Use the spikes to pause abuse and interrupt shinespark. Entrance condition: {
"comeInWithRMode": {}
}Requires: "f_DefeatedPhantoon"
"canBeVeryLucky"
"h_CrystalFlashForReserveEnergy"
"h_usePowerBomb"
"canOffScreenMovement"
"canXMode"
{
"spikeHits": 1
}
"h_XModeSpikeHit"
"h_shinechargeMaxRunway"
{
"autoReserveTrigger": {}
}
{
"spikeHits": 2
}
"canRModePauseAbuseSparkInterrupt"Dev note: canBeVeryLucky added for difficulty placement. |
From: 2
Middle Left Door
To: 3
Bottom Left Door

Samus's shinecharge frames are paused while riding the Bowling Chozo. Requires: "f_DefeatedPhantoon"
{
"doorUnlockedAtNode": 2
}
"canXMode"
"h_XModeSpikeHit"
"h_shinechargeMaxRunway"
"canShinechargeMovement"
{
"shineChargeFrames": 145
}Exit condition: {
"leaveShinecharged": {}
}Sets flags: f_UsedBowlingStatue Unlocks doors: {"types":["super"],"requires":[]}
{"types":["missiles","powerbomb"],"requires":["never"]} |
|

Move in X-Mode until the Chozo Statue becomes visible and then jump before releasing X-Ray. Requires: "canXMode" "h_XModeSpikeHit" |
From: 2
Middle Left Door
To: 6
Bowling Chozo Statue
Crystal Flash and use another Power Bomb, then enter X-Mode on the spikes. Arm pump towards the statue and shinecharge once Samus appears to move into the border between the second and third spike Exit X-Mode, then jump back toward the spikes to pause abuse and interrupt shinespark, using a damage boost back toward the statue to get off of them. Entrance condition: {
"comeInWithRMode": {}
}Requires: "f_DefeatedPhantoon"
"canBeVeryLucky"
"h_CrystalFlashForReserveEnergy"
"h_usePowerBomb"
"canOffScreenMovement"
"canXMode"
"h_XModeSpikeHit"
"h_shinechargeMaxRunway"
{
"autoReserveTrigger": {}
}
"canHorizontalDamageBoost"
"canRModePauseAbuseSparkInterrupt"Dev note: canBeVeryLucky added for difficulty placement. |
From: 6
Bowling Chozo Statue
To: 1
Top Left Door


Use X-mode to gain a shinecharge near the Chozo statue. Jump onto the Chozo statue, press against the wall, and shinespark into it to clip in, then X-Ray climb up. A second spike hit can be avoided by holding an angle button to turn around while in X-mode; arm pump to move out of the spikes before activating the shinecharge and exiting X-mode. Requires: "canXMode"
"h_XModeSpikeHit"
"h_shinechargeMaxRunway"
"canShinechargeMovement"
{
"shinespark": {
"frames": 1,
"excessFrames": 1
}
}
"canShinesparkSlopeClip"
"canXRayClimb"
{
"or": [
{
"getBlueSpeed": {
"usedTiles": 16,
"steepDownTiles": 4,
"openEnd": 0
}
},
"can4HighMidAirMorph"
]
}Exit condition: {
"leaveNormally": {}
}Unlocks doors: {"types":["ammo"],"requires":[]}Dev note: The leaveNormally is to ensure it won't be required to do the Speed block moondance blind up there. |
|

Jumping from the door and bouncing on the platform enemy works pretty well. Requires: "f_DefeatedPhantoon"
"Gravity"
"h_spikeXModeShinecharge"
{
"shineChargeFrames": 100
}Exit condition: {
"leaveShinecharged": {}
}Dev note: Two spike hits are expected per attempt (with any additional leniency hits being multiplied by this amount). |
From: 1
Left Door
To: 1
Left Door
Crystal Flash and enter X-Mode using the spikes. Shinecharge, then windup under a Kzan to interrupt. Entrance condition: {
"comeInWithRMode": {}
}Requires: "f_DefeatedPhantoon"
"Gravity"
"canBeVeryPatient"
"h_CrystalFlashForReserveEnergy"
"h_spikeXModeShinecharge"
{
"autoReserveTrigger": {}
}
"canRModeSparkInterrupt" |
|
Jumping from the door and bouncing on the platform enemy works pretty well. Requires: "f_DefeatedPhantoon"
"Gravity"
"h_spikeXModeShinecharge"
{
"shineChargeFrames": 100
}Exit condition: {
"leaveShinecharged": {}
}Dev note: Two spike hits are expected per attempt (with any additional leniency hits being multiplied by this amount). |
From: 2
Right Door
To: 2
Right Door
Crystal Flash and enter X-Mode using the spikes. Shinecharge, then windup under a Kzan to interrupt. Entrance condition: {
"comeInWithRMode": {}
}Requires: "f_DefeatedPhantoon"
"Gravity"
"canBeVeryPatient"
"h_CrystalFlashForReserveEnergy"
"h_spikeXModeShinecharge"
{
"autoReserveTrigger": {}
}
"canRModeSparkInterrupt" |
From: 1
Right Door
To: 1
Right Door
Power Off: Crystal Flash, enter X-Mode using the bottom spikes and shinecharge, then pause abuse from the spikes to interrupt. Power On: Crystal Flash or farm Skultera. Enter X-Mode using the bottom spikes and shinecharge, then pause abuse from the spikes to interrupt. Entrance condition: {
"comeInWithRMode": {}
}Requires: {
"or": [
"Gravity",
{
"and": [
{
"not": "f_DefeatedPhantoon"
},
"canRiskPermanentLossOfAccess"
]
}
]
}
{
"or": [
"h_CrystalFlashForReserveEnergy",
{
"and": [
"f_DefeatedPhantoon",
"h_RModeCanRefillReserves",
"canBeLucky",
{
"resourceMissingAtMost": [
{
"type": "Missile",
"count": 0
}
]
},
{
"or": [
{
"partialRefill": {
"type": "ReserveEnergy",
"limit": 5
}
},
{
"and": [
{
"partialRefill": {
"type": "ReserveEnergy",
"limit": 20
}
},
"canBeVeryLucky"
]
}
]
}
]
}
]
}
"canBeVeryPatient"
"h_thornXModeShinecharge"
"h_thornXModeFramePerfectExtraLeniency"
{
"autoReserveTrigger": {}
}
"canRModePauseAbuseSparkInterrupt" |
From: 1
Right Door
To: 1
Right Door
Requires: "h_thornXModeShinecharge"
"h_thornXModeFramePerfectExtraLeniency"
"SpaceJump"
"HiJump"
"canShinechargeMovementComplex"
{
"shinespark": {
"frames": 21,
"excessFrames": 0
}
}
{
"or": [
"Gravity",
{
"and": [
{
"not": "f_DefeatedPhantoon"
},
"canRiskPermanentLossOfAccess"
]
}
]
}Exit condition: {
"leaveWithSpark": {}
}Dev note: Two thorn hits are expected per attempt (with any additional leniency hits being multiplied by this amount). FIXME: There is likely a fast wall jump climb strat with more spark frames. |
|

Arm pump until samus starts to move again. If the power is on, regular platforming can be used instead. Requires: "h_thornXModeShinecharge"
{
"shinespark": {
"frames": 19,
"excessFrames": 4
}
} |
From: 1
Left Door
To: 1
Left Door
Farm the door Mochtroid and the one in the water. Jump over the sand pit and freeze the third Mochtroid. Climb using this Mochtroid up to the spike, then bounce off the Mochtroid and enter X-Mode. Arm-pump to move Samus off the spike tile (watch the Mochtroid). Shinecharge, release X-Ray, and start moving left as Samus falls back toward the sand. While falling, disable Ice Beam to force the Mochtroid to unfreeze and get grabbed by it while jumping out of the sand. Shinespark windup just before the Mochtroid drain hits to interrurpt. If Samus must land back in the sand, be sure to be moving horizontally to land on top of the sand rather than sinking into it. Entrance condition: {
"comeInWithRMode": {}
}Requires: "canTrickyUseFrozenEnemies"
{
"or": [
{
"enemyKill": {
"enemies": [
[
"Mochtroid",
"Mochtroid"
]
],
"excludedWeapons": [
"PowerBeam",
"Ice",
"Bombs"
]
}
},
"canInsaneJump"
]
}
"canPlayInSand"
{
"or": [
{
"and": [
"h_CrystalFlashForReserveEnergy",
"h_usePowerBomb",
"canOffScreenMovement"
]
},
{
"and": [
"h_RModeCanRefillReserves",
{
"partialRefill": {
"type": "ReserveEnergy",
"limit": 40
}
}
]
}
]
}
"canBeVeryPatient"
"canXMode"
"h_XModeSpikeHit"
"h_shinechargeMaxRunway"
{
"disableEquipment": "Ice"
}
{
"autoReserveTrigger": {
"maxReserveEnergy": 63
}
}
"canRModeSparkInterrupt"
{
"or": [
"Grapple",
{
"and": [
"Gravity",
"canWallJump"
]
}
]
} |
From: 2
Bottom Right Door
To: 2
Bottom Right Door
Farm the door Mochtroid and the one in the water. Lure one of the next pair of Mochtroids toward the spike and freeze it. Climb using this Mochtroid up to the spike, then bounce off the Mochtroid and enter X-Mode. Arm-pump to move Samus off the spike tile (watch the Mochtroid). Shinecharge, release X-Ray, and start moving toward the Mochtroid as Samus falls back toward the sand. While falling, disable Ice Beam to force the Mochtroid to unfreeze and get grabbed by it while jumping out of the sand. Shinespark windup just before the Mochtroid drain hits to interrurpt. If Samus must land back in the sand, be sure to be moving horizontally to land on top of the sand rather than sinking into it. Entrance condition: {
"comeInWithRMode": {}
}Requires: "canTrickyUseFrozenEnemies"
"canPlayInSand"
{
"or": [
{
"and": [
"h_CrystalFlashForReserveEnergy",
"h_usePowerBomb",
"canOffScreenMovement"
]
},
{
"and": [
"h_RModeCanRefillReserves",
{
"partialRefill": {
"type": "ReserveEnergy",
"limit": 40
}
}
]
}
]
}
"canBeVeryPatient"
"canXMode"
"h_XModeSpikeHit"
"h_shinechargeMaxRunway"
{
"disableEquipment": "Ice"
}
{
"autoReserveTrigger": {
"maxReserveEnergy": 63
}
}
"canRModeSparkInterrupt"
{
"or": [
"Grapple",
{
"and": [
"Gravity",
"canWallJump"
]
}
]
} |
From: 3
Top Right Door
To: 3
Top Right Door
Farm the door Mochtroid and the one in the water. Lure one of the next pair of Mochtroids toward the spike and freeze it. Climb using this Mochtroid up to the spike, then bounce off the Mochtroid and enter X-Mode. Arm-pump to move Samus off the spike tile (watch the Mochtroid). Shinecharge, release X-Ray, and start moving toward the Mochtroid as Samus falls back toward the sand. While falling, disable Ice Beam to force the Mochtroid to unfreeze and get grabbed by it while jumping out of the sand. Shinespark windup just before the Mochtroid drain hits to interrurpt. If Samus must land back in the sand, be sure to be moving horizontally to land on top of the sand rather than sinking into it. Entrance condition: {
"comeInWithRMode": {}
}Requires: "canTrickyUseFrozenEnemies"
"canPlayInSand"
{
"or": [
{
"and": [
"h_CrystalFlashForReserveEnergy",
"h_usePowerBomb",
"canOffScreenMovement"
]
},
{
"and": [
"h_RModeCanRefillReserves",
{
"partialRefill": {
"type": "ReserveEnergy",
"limit": 40
}
}
]
}
]
}
"canBeVeryPatient"
"canXMode"
"h_XModeSpikeHit"
"h_shinechargeMaxRunway"
{
"disableEquipment": "Ice"
}
{
"autoReserveTrigger": {
"maxReserveEnergy": 63
}
}
"canRModeSparkInterrupt"
{
"or": [
"Grapple",
{
"and": [
"Gravity",
"canWallJump"
]
}
]
} |
|
Requires: "canShinechargeMovementComplex"
"h_spikeXModeShinecharge"
{
"or": [
"h_XModeSpikeHit",
"canStationarySpinJump",
"canTrickyJump"
]
}
"Gravity"
{
"or": [
{
"and": [
"HiJump",
"SpaceJump",
{
"shineChargeFrames": 130
}
]
},
{
"and": [
"HiJump",
"canPreciseWallJump",
{
"shineChargeFrames": 160
}
]
},
{
"and": [
"SpaceJump",
"canPreciseWallJump",
{
"shineChargeFrames": 160
}
]
}
]
}Exit condition: {
"leaveShinecharged": {}
}Dev note: Two spike hits are expected per attempt (with any additional leniency hits being multiplied by this amount). |
|
Requires: "h_spikeXModeShinecharge"
"canShinechargeMovementTricky"
"canTrickyJump"
"Gravity"
{
"or": [
{
"and": [
"HiJump",
"canTrickyDashJump"
]
},
{
"and": [
"canFastWallJumpClimb",
"canPreciseWallJump"
]
},
{
"and": [
"SpaceJump",
"canInsaneJump",
{
"shinespark": {
"frames": 3
}
}
]
}
]
}
{
"shinespark": {
"frames": 5
}
}Exit condition: {
"leaveWithSpark": {}
}Dev note: Two spike hits are expected per attempt (with any additional leniency hits being multiplied by this amount). |
From: 2
Right Door
To: 2
Right Door
Crystal Flash at the door, and enter X-Mode on the spikes and shinecharge. Pause abuse on the spikes to interrupt. Let the damage push Samus into the wall to avoid multiple spike hits after gaining blue suit. Requires: {
"obstaclesCleared": [
"R-Mode"
]
}
"Gravity"
"h_CrystalFlashForReserveEnergy"
"h_usePowerBomb"
"canOffScreenMovement"
"canBeVeryPatient"
"canXMode"
"h_XModeSpikeHit"
"h_shinechargeMaxRunway"
{
"autoReserveTrigger": {}
}
"canRModePauseAbuseSparkInterrupt"
{
"spikeHits": 1
}Resets obstacles: R-Mode |
|
Requires: "h_spikeXModeShinecharge"
{
"or": [
"h_XModeSpikeHit",
"canStationarySpinJump"
]
}
"Gravity"
"canShinechargeMovementComplex"
{
"shineChargeFrames": 65
}Exit condition: {
"leaveShinecharged": {}
}Dev note: Two spike hits are expected per attempt (with any additional leniency hits being multiplied by this amount). |
|

Requires: "Gravity"
"h_spikeXModeShinecharge"
{
"or": [
"h_XModeSpikeHit",
"canStationarySpinJump"
]
}
{
"shinespark": {
"frames": 25,
"excessFrames": 5
}
}Dev note: Two spike hits are expected per attempt (with any additional leniency hits being multiplied by this amount). |
From: 3
Junction Left of Morph Tunnel
To: 1
Left Door


Requires: "Gravity"
"h_spikeXModeShinecharge"
{
"shinespark": {
"frames": 12,
"excessFrames": 4
}
} |
From: 4
Top Right Ledge Junction
To: 4
Top Right Ledge Junction


Farm the Cacatac, jump to the left dry platform, and jump into the spike pit to enter X-Mode and shinecharge. Use the other Cacatac to interrupt. Requires: {
"obstaclesCleared": [
"R-Mode"
]
}
{
"or": [
{
"and": [
"h_CrystalFlashForReserveEnergy",
"h_usePowerBomb",
"canOffScreenMovement"
]
},
{
"and": [
"h_RModeCanRefillReserves",
{
"or": [
{
"resourceMissingAtMost": [
{
"type": "Super",
"count": 0
}
]
},
{
"and": [
{
"resourceMissingAtMost": [
{
"type": "Super",
"count": 4
}
]
},
"Gravity"
]
}
]
},
{
"partialRefill": {
"type": "ReserveEnergy",
"limit": 40
}
}
]
}
]
}
"canBeVeryPatient"
"canXMode"
"h_XModeSpikeHit"
"h_shinechargeMaxRunway"
{
"autoReserveTrigger": {}
}
"canRModeSparkInterrupt"Resets obstacles: R-Mode |
From: 5
Bottom Middle Junction
To: 4
Top Right Ledge Junction

Requires: "Gravity"
"h_spikeXModeShinecharge"
{
"shinespark": {
"frames": 17,
"excessFrames": 12
}
} |
From: 2
Right Door
To: 3
Mother Brain
Upon entering, freeze all the Rinkas and Crystal Flash away from turret paths. Bounce off of a frozen Rinka and onto the corner of Mother Brain's pedestal (which acts as a spike) to enter Spike X-Mode. Gain shinecharge, then use any Rinka to interrupt. Entrance condition: {
"comeInWithRMode": {}
}Requires: "h_AllMotherBrainBarriersCleared"
"h_CrystalFlashForReserveEnergy"
{
"or": [
"f_KilledZebetites1",
{
"obstaclesCleared": [
"f_KilledZebetites1"
]
}
]
}
{
"or": [
"f_KilledZebetites2",
{
"obstaclesCleared": [
"f_KilledZebetites2"
]
}
]
}
{
"or": [
"f_KilledZebetites3",
{
"obstaclesCleared": [
"f_KilledZebetites3"
]
}
]
}
{
"or": [
"f_KilledZebetites4",
{
"obstaclesCleared": [
"f_KilledZebetites4"
]
}
]
}
"Morph"
"canTrickyUseFrozenEnemies"
{
"notable": "Mother Brain Pedestal XMode"
}
"canXMode"
{
"spikeHits": 1
}
"h_shinechargeMaxRunway"
{
"autoReserveTrigger": {
"maxReserveEnergy": 95
}
}
"canRModeSparkInterrupt" |