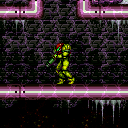
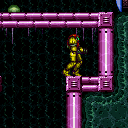
canHighPixelCeilingClip (Extreme+)
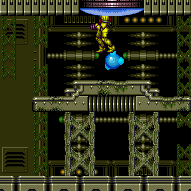
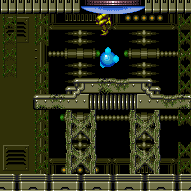
Setting up an enemy positioning to perform a pixel precise ceiling clip, typically with a frozen enemy. This requires a 20 pixel gap between the enemy and ceiling, the same number of pixels as Samus' hitbox when in the aim down pose. To get on top of the enemy, either perform a very precise down grab onto it, down back onto it after unmorphing, or use a neutral damage boost to remain inside of the enemy then jump and aim down to land on it. If Samus is not standing, press forward or up to stand, then jump through. There are few examples where this is necessary, which include: extremely tight spaces where an enemy cannot be positioned lower for an easier clip, underwater without Gravity, or in many locations while preserving a flash suit.
Dependencies: canDownGrab, canUseEnemies, canCarefulJump, canTrickyJump, canCeilingClip
Dev note: This tech is not required for uses with trivial positioning, such as the Botwoon Hallway Mochtroid Ice Clip.
Strats ()
|


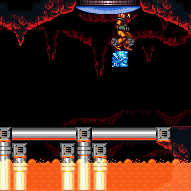
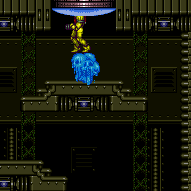
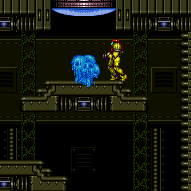
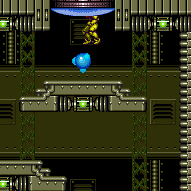
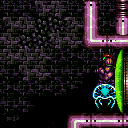
Shoot a Super as a Sciser crawls near the top door, then freeze it mid-air and use it to clip up past the door shell. This requires knocking off the Sciser frame-pefrectly, then freezing it frame-perfectly in position. The Super should knock off the crab when it is barely centered on the slope, 2 pixels away from the edge of the doorframe. Because of the shot firing rate, it can help to crouch and shoot the Super to the side to give it a bit more time to knock the crab off. Requires: {
"ammo": {
"type": "Super",
"count": 1
}
}
"h_highPixelIceClip"Bypasses door shell: true |
From: 3
Bottom Left Door
To: 2
Top Right Door
Jump and freeze the Beetom at a pixel perfect location in order to jump through the crumble blocks. The pixel is nearly the highest possible position with HiJump disabled, from the left ledge. After positioning the Beetom, get on top of it with a tight down grab, while refreezing it if necessary. Jump through the crumble blocks then down grab again to get to the top area. Two Beetom hits are assumed, but with failed attempts it could take more, possibly requiring leaving the Beetom and going back to the right to farm. Requires: {
"notable": "Beetom Clip (High Pixel, Preserve Flash Suit)"
}
{
"noBlueSuit": {}
}
"h_highPixelIceClip"
"Morph"
{
"enemyDamage": {
"enemy": "Beetom",
"type": "contact",
"hits": 2
}
}
{
"or": [
"canWallJump",
"HiJump",
"SpaceJump",
{
"enemyDamage": {
"enemy": "Beetom",
"type": "contact",
"hits": 2
}
}
]
}Dev note: Morph is required to lure a Beetom. Morphless tunnel crawl should not be required. |
From: 13
Below Power Bomb Blocks - Main Junction
To: 12
Above Power Bomb Blocks - Main Junction


Freeze the wall crawler at a precise location in order to jump through the Power Bomb Blocks. The pixel window is larger and higher with Morph and an X-Ray Stand Up. Requires: "h_iceClip"
{
"obstaclesNotCleared": [
"B"
]
} |
From: 13
Below Power Bomb Blocks - Main Junction
To: 14
Right Etecoon Shaft - Wall Jump Checkpoint
Break the bomb block at the bottom right of the main shaft. Bring a Zeela down to the bottom of the room. Morph inside the tunnel, take a Zeela hit, then jump, aim down, and shoot to freeze the Zeela as it starts to move up and while Samus is close to landing. Jump and aim down to get on top of the Zeela. If the Zeela is precisely positioned exactly 12 pixels above the ground, you can press up to make Samus stand; Otherwise, if you have X-ray, then the Zeela should be frozen lower, and you can morph and unmorph and use X-ray to force Samus to stand up; in this case there is a 6-pixel window over which it works, with the Zeela being between 4 and 9 pixels above the ground. In either case, after standing up on top of the Zeela, jump and aim down to break the crumble block. Then, before the crumble respawns, morph and use Spring Ball (if available) to jump back up and into the tunnel; without Spring Ball, a quick mid-air morph also works but is more difficult. Note that it is possible to remain morphed partially on top of the crumble block to break it and let the Zeela move to the right shaft. Requires: {
"notable": "Bottom Ice Clip"
}
{
"or": [
"h_bombThings",
{
"haveBlueSuit": {}
}
]
}
{
"noBlueSuit": {}
}
"h_bombThings"
{
"enemyDamage": {
"enemy": "Zeela",
"type": "contact",
"hits": 1
}
}
"canTrickyJump"
{
"or": [
"h_XRayMorphIceClip",
{
"and": [
"h_highPixelIceClip",
"canInsaneJump",
"canBeVeryPatient"
]
}
]
}
{
"or": [
"h_useSpringBall",
{
"and": [
"can4HighMidAirMorph",
"canInsaneJump"
]
}
]
}
{
"or": [
"canBePatient",
{
"obstaclesNotCleared": [
"A"
]
}
]
}Clears obstacles: B Dev note: The mid-air morph is tighter than a normal can4HighMidAirMorph and you may only get one chance at it before having to reset the room. FIXME: canBeVeryPatient requirement is for difficulty (assumed large number of attempts required); a more specific tech could be used if one existed. FIXME: It might be possible to use two Zeelas to wall ice clip and X-ray climb to the door transition(s) above. FIXME: It is possible to use a blue suit to break the first block. It might be possible to do the whole strat with a blue suit. |
From: 13
Central Junction
To: 5
Left Side - Door Blocked by Crumble Blocks
Raise a Zeb to be just below the crumble blocks and blindly freeze it to set up an ice clip to reach the Power Bomb room exit door. Get a bug from the pipe to spawn facing left and freeze it while moving to the ledge below the Wave Gate Room door. While crouched, a spazer or wave beam shot will shoot through the floor in front of Samus. Shoot then immediately jump so that the bug can be frozen at a pixel perfect height, which is higher than where it would typically be frozen (when not needing to preserve a flash suit). Once frozen, wait for the bug to thaw, then blindly follow it to the left without letting it go off camera, which would cause it to despawn. Refreeze it below the crumble blocks, perform a very precise ledge grab onto it, then jump through the crumble block to reach the door, all while carefully avoiding losing the flash suit. Requires: {
"notable": "Blind Zeb Ice Clip (Preserve Flash Suit)"
}
"canTrickyWallJump"
"canCameraManip"
"canOffScreenMovement"
{
"or": [
"Wave",
"Spazer"
]
}
"canInsaneJump"
"h_highPixelIceClip" |
From: 3
Right Vertical Door
To: 3
Right Vertical Door
Freeze a Zeela at a precise distance below the door in order to jump up and clip through the door shell. The pixel window is larger and higher with Morph and an X-Ray stand-up. Requires: {
"obstaclesCleared": [
"A"
]
}
"h_iceClip"Bypasses door shell: true Dev note: FIXME: This could use an obstacle, so that it can be broken other ways, such as with screw or a speed ball. |
|
Freeze the wall crawler at a precise location in order to jump through the Power Bomb Blocks. The pixel window is larger and higher with Morph and an X-Ray Stand Up. Requires: "h_iceClip" |
|
Jump next to the Gamet farm until one is at the correct height, which is just over one tile above Samus. Lure it to the right and use it to ice clip through the top door shell. Avoid killing any of the Gamets or they will all stop spawning. With bad positioning, move the Gamets off camera to try again; ice can help get around them. Also, be careful to avoid touching the invisible, stationary projectiles that the Dragons shoot. Entrance condition: {
"comeInWithGMode": {
"mode": "any",
"morphed": false
}
}Requires: "canComplexGMode"
{
"or": [
"h_preciseIceClip",
"h_highPixelIceClip"
]
}Exit condition: {
"leaveWithGMode": {
"morphed": false
}
}Bypasses door shell: true |
|
Jump next to the Gamet farm until one is at the correct height, which is just over one tile above Samus. Lure it to the right and use it to ice clip through the top door shell. Avoid killing any of the Gamets or they will all stop spawning. With bad positioning, move the Gamets off camera to try again; ice can help get around them. Also, be careful to avoid touching the invisible, stationary projectiles that the Dragons shoot. Entrance condition: {
"comeInWithGMode": {
"mode": "indirect",
"morphed": false
},
"comesThroughToilet": "any"
}Requires: "canComplexGMode"
{
"or": [
"h_preciseIceClip",
"h_highPixelIceClip"
]
}Exit condition: {
"leaveWithGMode": {
"morphed": false
}
}Bypasses door shell: true Dev note: This is only for indirect G-Mode, because it is trivial while in direct, and would use a different strat. |
|
Bring a Gamet from the farm and freeze it at a precise distance below the door in order to crouch-jump up and clip through the door shell. The pixel window is larger and higher with Morph and an X-Ray stand-up, in which case a standing jump is used. Requires: {
"or": [
"canDash",
"h_heatProof"
]
}
{
"heatFrames": 560
}
"h_iceClip"Bypasses door shell: true Dev note: FIXME: This could be done dashless without heat protection. |
From: 2
Right Vertical Door
To: 2
Right Vertical Door
It can help to moonwalk towards a Mella that has never been on screen, so that it starts swooping immediately as it first enters the screen. This will make it so that when Samus is below it, it will always swoop and go up slightly compared to the previous swoop. Once it is close to the right height, move away so it stops swooping, freeze it and quickly try the clip, if it doesn't work, quickly leave and try again. Entrance condition: {
"comeInWithGMode": {
"mode": "indirect",
"morphed": false
},
"comesThroughToilet": "any"
}Requires: "canComplexGMode"
"canManipulateMellas"
{
"or": [
"h_preciseIceClip",
"h_highPixelIceClip"
]
}
"canInsaneJump"
{
"or": [
"Morph",
"canTrickyGMode",
{
"enemyDamage": {
"enemy": "Mella",
"type": "contact",
"hits": 1
}
}
]
}Exit condition: {
"leaveWithGMode": {
"morphed": false
}
}Bypasses door shell: true Dev note: This is only for indirect G-Mode, because it is trivial while in direct, and would use a different strat. |
From: 2
Right Vertical Door
To: 2
Right Vertical Door
Freeze a Mella at a precise distance below the door in order to crouch-jump up and clip through the door shell. The pixel window is larger and higher with Morph and an X-Ray stand-up, in which case a standing jump is used. It can help to moonwalk towards a Mella that has never been on screen, so that it starts swooping immediately as it first enters the screen. This will make it so that when Samus is below it, it will always swoop and go up slightly compared to the previous swoop. Once it is close to the right height, move away so it stops swooping, freeze it and quickly try the clip, if it doesn't work, quickly leave and try again. Requires: "canManipulateMellas"
"h_iceClip"
{
"or": [
"Morph",
"canInsaneJump",
{
"enemyDamage": {
"enemy": "Mella",
"type": "contact",
"hits": 1
}
}
]
}Bypasses door shell: true |
From: 6
G-Mode Morph Junction (At Speed Blocks)
To: 2
Right Vertical Door
It can help to moonwalk towards a Mella that has never been on screen, so that it starts swooping immediately as it first enters the screen. This will make it so that when Samus is below it, it will always swoop and go up slightly compared to the previous swoop. Once it is close to the right height, move away so it stops swooping, freeze it and quickly try the clip, if it doesn't work, quickly leave and try again. Requires: "canComplexGMode"
"canManipulateMellas"
{
"or": [
"h_preciseIceClip",
"h_highPixelIceClip"
]
}
{
"or": [
"Morph",
"canInsaneJump",
{
"enemyDamage": {
"enemy": "Mella",
"type": "contact",
"hits": 1
}
}
]
}Exit condition: {
"leaveWithGMode": {
"morphed": false
}
}Bypasses door shell: true |
|


Freeze an Atomic at a precise distance below the door in order to jump up and clip through the door shell. Freezing it while it is moving horizontally and Samus is standing works as a trivial setup. Be careful to avoid the Workrobot's invisible, stationary lasers. Entrance condition: {
"comeInWithGMode": {
"mode": "any",
"morphed": false
}
}Requires: "canComplexGMode"
"f_DefeatedPhantoon"
{
"or": [
"h_preciseIceClip",
"h_highPixelIceClip"
]
}Exit condition: {
"leaveWithGMode": {
"morphed": false
}
}Bypasses door shell: true |
|
Freeze an Atomic at a precise distance below the door in order to jump up and clip through the door shell. Freezing it while it is moving horizontally and Samus is standing works as a trivial setup. Requires: "f_DefeatedPhantoon" "h_iceClip" Bypasses door shell: true |
|
Freeze an Atomic at a precise distance below the door in order to jump up and clip through the door shell. Freezing it while it is moving horizontally and Samus is standing works as a trivial setup. Entrance condition: {
"comeInWithGMode": {
"mode": "indirect",
"morphed": false
},
"comesThroughToilet": "any"
}Requires: "canComplexGMode"
"f_DefeatedPhantoon"
{
"or": [
"h_preciseIceClip",
"h_highPixelIceClip"
]
}Exit condition: {
"leaveWithGMode": {
"morphed": false
}
}Bypasses door shell: true Dev note: This is only for indirect G-Mode, because it is trivial while in direct, and would use a different strat. |
From: 1
Top Door
To: 1
Top Door
Freeze an Atomic at a precise distance below the door in order to crouch-jump up and clip through the door shell. Freezing it while it is moving horizontally and Samus is standing works as a trivial setup. If Phantoon is not defeated, stand on the stairs so that Samus is just a few pixels lower, then freeze the Covern low in its cycle. Alternatively, freeze it high then perform a tight down grab to get onto it for a pixel perfect clip. Requires: "h_iceClip" Bypasses door shell: true |
From: 1
Top Door
To: 1
Top Door
Freeze an Atomic or Covern at a precise distance below the door in order to jump up and clip through the door shell. If Phantoon is defeated, it is possible to lure the Atomic from below the shot blocks by placing a Power Bomb. Freezing it while it is moving horizontally and Samus is standing works as a trivial setup. If Phantoon is not defeated, stand on the stairs so that Samus is just a few pixels lower, then freeze the Covern low in its cycle. Alternatively, freeze it high then perform a tight down grab to get onto it for a pixel perfect clip. Entrance condition: {
"comeInWithGMode": {
"mode": "indirect",
"morphed": true
},
"comesThroughToilet": "any"
}Requires: "canComplexGMode"
{
"or": [
"h_artificialMorphPowerBomb",
{
"and": [
{
"not": "f_DefeatedPhantoon"
},
"canRiskPermanentLossOfAccess"
]
}
]
}
{
"or": [
"h_preciseIceClip",
"h_highPixelIceClip"
]
}Exit condition: {
"leaveWithGMode": {
"morphed": false
}
}Bypasses door shell: true Dev note: This is only for indirect G-Mode, because it is trivial while in direct, and would use a different strat. FIXME: If Phantoon is not defeated, this does not require Morph or artificial morph. |
|
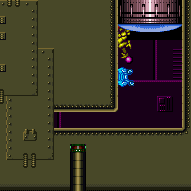
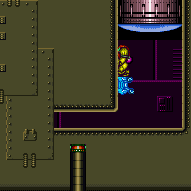
Freeze a crab at a very precise position in order to clip through the center Morph tunnel without a way to see. Use a frozen crab on the opposite wall in order to better time the crab being used for clipping and as a way to climb on top of it. Ice Beam on its own has a high chance of hitting a wall instead of the crab; straight vertical shots can help. Gravity has a 2 pixel clip window while Suitless there is only 1 pixel up higher which requires a precise down grab to get onto the crab. Requires: {
"notable": "Ice Clip"
}
"h_navigateUnderwater"
"canOffScreenMovement"
{
"or": [
{
"and": [
"Gravity",
"h_preciseIceClip"
]
},
{
"and": [
"HiJump",
"h_highPixelIceClip",
"canBeVeryPatient",
{
"or": [
"HiJump",
"Gravity"
]
},
"h_trickyToCarryFlashSuit"
]
}
]
}Dev note: FIXME: It is possible to crab climb with nothing but ice and walljumps. |
From: 2
Bottom Left Door
To: 1
Middle Left Door

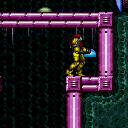
Position the snail low on the ceiling so that Samus can get onto it. Wait for another snail and position it on the high pixel without using x-ray. Ceiling clip then use the flash suit while in the crouched pose that Samus is already in to spark vertically and clip through the next block. Changing pose will make it so Samus is no longer able to spark. If Samus has a blue suit, after standing up on the snail, crouch to gain a shinecharge, then press forward to stand again; continuing to hold forward while jumping allows Samus to clip through without activating the spark. Requires: {
"notable": "High Pixel Suitless Bootless Snail Clip, Use Stored Spark"
}
"canHighPixelCeilingClip"
"h_storedSpark"
{
"shinespark": {
"frames": 15,
"excessFrames": 13
}
} |
From: 2
Bottom Left Door
To: 1
Middle Left Door
Position the snail on the high pixel without using x-ray. Ceiling clip then use the stored spark while in the crouched pose that Samus is already in to spark vertically and clip through the next block. Changing pose will make it so Samus is no longer able to spark. If Samus has a blue suit, after standing up on the snail, crouch to gain a shinecharge, then press forward to stand again; continuing to hold forward while jumping allows Samus to clip through without activating the spark. Requires: "HiJump"
"canHighPixelCeilingClip"
"h_storedSpark"
{
"shinespark": {
"frames": 15,
"excessFrames": 13
}
} |
|


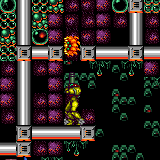
Sparking up right from a snail can save some Energy. With very little Energy, spark up the center of the speed blocks to clear both sides, then snail clip through the last one. It may be helpful to turn around before sparking so the snail doesn't hit Samus. Requires: "canUseEnemies"
"h_storedSpark"
{
"or": [
{
"shinespark": {
"frames": 13,
"excessFrames": 4
}
},
{
"and": [
{
"shinespark": {
"frames": 13,
"excessFrames": 10
}
},
{
"or": [
"canHighPixelCeilingClip",
{
"and": [
"Gravity",
"canPreciseCeilingClip"
]
},
{
"and": [
"Gravity",
"canXRayCeilingClip"
]
}
]
}
]
}
]
} |
From: 12
G-Mode Junction (By Bottom Left Door)
To: 11
G-Mode Overloaded PLMs (By Bottom Left Door)


Use two snails to moonfall down through the pipe to the section below. The snails should be easy to align, with one on the floor and another on a ceiling 4 tiles higher. Slide off or shoot the lower snail after Samus has enough fall speed in order to avoid taking a snail hit. There is a small set of frames between these two, in which Samus will fall out of bounds. With Gravity, there is approximately a 5 second fall, with a 15 frame window. Suitless, there is approximately a 17 second fall, with almost a full second window - this is approximately 8 sets of bubbles out of Samus' arm. With blue suit no timing is necessary, with or without Gravity. Samus will clip automatically once enough fall speed is reached without taking damage, killing the bottom yard. Clip down on the right side of the room without luring the snail underneath, or clip down in the center of the room with Spring Ball or Gravity and Space Jump and carefully cross the sand. Stand partially on the sand's edge to quickly overload PLMs, then go to the right and set up a pixel-precise high ceiling snail clip first try. Requires: "canTrickyGMode"
"h_navigateUnderwater"
"canEnemyStuckMoonfall"
{
"or": [
"canFreeFallClip",
{
"enemyDamage": {
"enemy": "Yard",
"type": "contact",
"hits": 1
}
},
{
"haveBlueSuit": {}
}
]
}
"canHighPixelCeilingClip"
{
"or": [
"canBeVeryPatient",
"h_useSpringBall",
{
"and": [
"Gravity",
"SpaceJump"
]
}
]
}Dev note: It is possible to try multiple times with Gravity+Space+patience by moving the snail around the bottom of the room. It is also possible to use the gentle slopes in the middle of the room for a larger window ceiling clip, but the snails behave unusually on slopes and it ends up not really being easier. |
From: 2
Bottom Right Door
To: 2
Bottom Right Door
Crouch and freeze a Mochtroid to clip into the space behind the grapple blocks. Jump and tap grapple while aiming diagonally to be pushed into the wall just the right amount. Samus should be one tile below the grapple blocks and fully in the wall. Too short a tap and the next grapple will not work, too long and Samus will be stuck in the wall. Grapple diagonally again to be pushed into the transition. Requires: {
"notable": "Frozen Mochtroid Grapple Clip Door Lock Skip"
}
{
"or": [
{
"and": [
"Gravity",
"canUseFrozenEnemies",
"canCrouchJump",
"canCeilingClip"
]
},
{
"and": [
"h_XRayMorphIceClip",
"h_complexToCarryBlueSuit"
]
},
{
"and": [
"h_highPixelIceClip",
"h_trickyToCarryBlueSuit"
]
}
]
}
"canGrappleClip"Bypasses door shell: true Dev note: The 2-3 pixel window is trivial to get by crouching, the high pixel clip is easier here than normal, as no precise down grab is needed. The canCrouchJump is not a h_underwaterCrouchJump, because Gravity is required. |
|


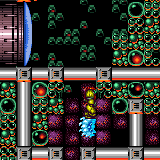
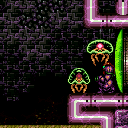
To get a crab at the top of the room, use a Super to knock off the central crab and use Ice to climb it to the top of the room. Shoot a Super as the crab crawls on the side of the blocks near the top door, then freeze it mid-air pixel perfectly. Perform a tight down grab to get onto it then jump through the door shell. Knocking the crab off while it is on the the door or ceiling will not work. Entrance condition: {
"comeInWithGMode": {
"mode": "any",
"morphed": false
}
}Requires: {
"notable": "Crab High Pixel Ice Clip Door Lock Skip"
}
"canTrickyGMode"
{
"ammo": {
"type": "Super",
"count": 2
}
}
"h_highPixelIceClip"Exit condition: {
"leaveWithGMode": {
"morphed": false
}
}Bypasses door shell: true |
|
Use the lower global crab to high pixel ice clip through the shot block. Freeze the crab pixel perfectly, then get onto it with a tight down grab. To get a crab at the top of the room, use a Super to knock off the central crab and use Ice to climb it to the top of the room. Shoot a Super as the crab crawls near the top door, then freeze it mid-air and use it to clip up past the door shell. Samus must shoot the Super while the crab is on a block next to the door, not on the door itself. Entrance condition: {
"comeInWithGMode": {
"mode": "any",
"morphed": false
}
}Requires: {
"notable": "Crab Ice Clip Door Lock Skip"
}
"canTrickyGMode"
"Gravity"
"h_highPixelIceClip"
{
"ammo": {
"type": "Super",
"count": 2
}
}
"h_preciseIceClip"Exit condition: {
"leaveWithGMode": {
"morphed": false
}
}Bypasses door shell: true Dev note: This is a separate strat from the double high-pixel variant, as the first high-pixel clip is fairly lenient with free retries, unlike the top one. |
|
Use the lower global crab to high pixel ice clip through the shot block. Freeze the crab pixel perfectly, then get onto it with a tight down grab. To get a crab at the top of the room, use a Super to knock off the central crab and use Ice to climb it to the top of the room. Shoot a Super as the crab crawls on the side of the blocks near the top door, then freeze it mid-air pixel perfectly. Perform another tight down grab to get onto it then jump through the door shell. Knocking the crab off while it is on the the door or ceiling will not work. Entrance condition: {
"comeInWithGMode": {
"mode": "any",
"morphed": false
}
}Requires: {
"notable": "Crab High Pixel Ice Clip Door Lock Skip"
}
"canTrickyGMode"
{
"ammo": {
"type": "Super",
"count": 2
}
}
"h_highPixelIceClip"Exit condition: {
"leaveWithGMode": {
"morphed": false
}
}Bypasses door shell: true |
|
To get a crab at the top of the room, use a Super to knock off the central crab, because the shot blocks cannot be broken to bring a lower crab. Shoot a Super as the crab crawls on the side of the blocks near the top door, then freeze it mid-air pixel perfectly. Perform a tight down grab to get onto it then jump through the door shell. Knocking the crab off while it is on the the door or ceiling will not work. Entrance condition: {
"comeInWithGMode": {
"mode": "indirect",
"morphed": false
},
"comesThroughToilet": "any"
}Requires: {
"notable": "Crab High Pixel Ice Clip Door Lock Skip"
}
"canTrickyGMode"
{
"ammo": {
"type": "Super",
"count": 2
}
}
"h_highPixelIceClip"Exit condition: {
"leaveWithGMode": {
"morphed": false
}
}Bypasses door shell: true Dev note: This is only for indirect G-Mode, because it is trivial while in direct, and would use a different strat. |
From: 4
Platform Below Top Door
To: 3
Top Door


To get a crab at the top of the room, either use a Super to knock off the central crab, or bring the bottom global crab by breaking the shot block in the middle of the room and using Ice to climb it to the top of the room. Shoot a Super as the crab crawls on the side of the blocks near the top door, then freeze it mid-air pixel perfectly. Perform a tight down grab to get onto it then jump through the door shell. Knocking the crab off while it is on the the door or ceiling will not work. Requires: {
"notable": "Crab High Pixel Ice Clip Door Lock Skip"
}
{
"or": [
{
"ammo": {
"type": "Super",
"count": 1
}
},
{
"notable": "Ice Only Crab Climb"
},
"Gravity",
"HiJump",
"canTrickySpringBallJump"
]
}
{
  "ammo": {
    "type": "Super",
    "count": 1
  }
}
"h_highPixelIceClip"
Bypasses door shell: true |
|
Positioning the Puyo requires it to perform a big jump then start falling with a frame perfect freeze. One possible setup stands on the left tile of the right side and lets the puyo jump up taking a contact hit. Then so long as the puyo isn't on the very edge, it will do a big jump. Clip onto the puyo by doing an aim down jump and switching to a forward diagonal at the right time. Requires: {
"notable": "Suitless Puyo Clip"
}
"canSuitlessMaridia"
"h_highPixelIceClip"
{
"noBlueSuit": {}
}
{
"enemyDamage": {
"enemy": "Puyo",
"type": "contact",
"hits": 2
}
}
{
"or": [
{
"enemyDamage": {
"enemy": "Puyo",
"type": "contact",
"hits": 6
}
},
{
"and": [
"canBePatient",
{
"resetRoom": {
"nodes": [
1
]
}
}
]
}
]
}
{
"or": [
{
"enemyDamage": {
"enemy": "Puyo",
"type": "contact",
"hits": 1
}
},
"Wave",
"canPreciseGrapple"
]
}Dev note: 1 hit per attempt, 7 for leniency, which is reduced if Samus can reset the room and farm the Puyos. FIXME: leniencies should be moved to helpers or some central location. FIXME: There is a normalized setup which can be described and most or all of the leniency can be removed. |