canBeVeryLucky (Insane+)
Executing a strat that has a high chance to fail due to random elements such as enemy drops. This is used where failure is unforgiving and may result in a death or slow process to reattempt.
Dependencies: canBeLucky
Strats ()
|


Kill all three Boyons for energy, or Crystal Flash. If you need to freeze Boyons for extra runway, disable Ice Beam to force them to unfreeze so you can interrupt spark. If you end up killing all four Boyons, you can also dip in the acid for the spark interrupt. Entrance condition: {
"comeInWithRMode": {}
}Requires: {
"or": [
"h_CrystalFlashForReserveEnergy",
{
"and": [
"h_RModeCanRefillReserves",
{
"resourceMissingAtMost": [
{
"type": "Missile",
"count": 0
}
]
},
{
"enemyKill": {
"enemies": [
[
"Boyon",
"Boyon",
"Boyon"
]
],
"excludedWeapons": [
"PseudoScrew"
]
}
},
{
"or": [
{
"and": [
"canBeLucky",
{
"partialRefill": {
"type": "ReserveEnergy",
"limit": 5
}
}
]
},
{
"and": [
"canBeVeryLucky",
{
"partialRefill": {
"type": "ReserveEnergy",
"limit": 20
}
}
]
}
]
}
]
}
]
}
{
"or": [
{
"canShineCharge": {
"usedTiles": 25,
"openEnd": 0
}
},
{
"and": [
"canTrivialUseFrozenEnemies",
{
"canShineCharge": {
"usedTiles": 31,
"openEnd": 0
}
},
{
"disableEquipment": "Ice"
}
]
}
]
}
{
"autoReserveTrigger": {}
}
"canRModeSparkInterrupt"Clears obstacles: A |
|

If you come from the upper section, use the Zeb Farm to fill up. Otherwise you have one Skultera or the Ripper 2 availble for reserve farming, or else Crystal Flash. Run underwater for the shinecharge and jump into the second Skultera's path to interrupt. Requires: {
"obstaclesCleared": [
"R-Mode"
]
}
{
"or": [
{
"resourceMissingAtMost": [
{
"type": "ReserveEnergy",
"count": 0
}
]
},
"h_CrystalFlashForReserveEnergy",
{
"and": [
"h_RModeCanRefillReserves",
{
"resourceMissingAtMost": [
{
"type": "Missile",
"count": 0
}
]
},
{
"or": [
{
"and": [
"canBePatient",
{
"partialRefill": {
"type": "ReserveEnergy",
"limit": 5
}
}
]
},
{
"and": [
{
"or": [
"canBeVeryLucky",
{
"and": [
{
"enemyKill": {
"enemies": [
[
"Ripper 2 (green)"
]
],
"excludedWeapons": [
"Super"
]
}
},
{
"resourceMissingAtMost": [
{
"type": "Super",
"count": 0
}
]
}
]
}
]
},
{
"partialRefill": {
"type": "ReserveEnergy",
"limit": 20
}
}
]
}
]
}
]
}
]
}
"Gravity"
"h_shinechargeMaxRunway"
{
"autoReserveTrigger": {
"maxReserveEnergy": 95
}
}
"canRModeSparkInterrupt"Resets obstacles: R-Mode Dev note: FIXME: Needs to track kill of the Ripper 2 in case this makes door #4 inaccessible. |
|

Due to R-Mode Entry, getting hit by the Sidehopper can only be avoided by a quick Screw Attack after releasing the X-Ray Scope. You can attempt to farm the two ground Sidehoppers for Reserve Energy. Otherwise, you must use a Crystal Flash. Leave the ceiling Sidehopper alive to clear the runway for a shortcharge. Initiate the shinespark in midair so that Samus is in the path to be hit. Entrance condition: {
"comeInWithRMode": {}
}Requires: "h_ZebesIsAwake"
{
"or": [
"ScrewAttack",
{
"and": [
{
"enemyDamage": {
"enemy": "Sidehopper",
"type": "contact",
"hits": 1
}
},
{
"enemyKill": {
"enemies": [
[
"Sidehopper",
"Sidehopper"
]
],
"explicitWeapons": [
"Missile",
"Super",
"PowerBomb",
"Plasma"
]
}
}
]
}
]
}
{
"or": [
"h_CrystalFlashForReserveEnergy",
{
"and": [
"h_RModeCanRefillReserves",
{
"or": [
{
"and": [
{
"resourceMissingAtMost": [
{
"type": "Missile",
"count": 0
}
]
},
{
"resourceMissingAtMost": [
{
"type": "Super",
"count": 0
}
]
}
]
},
"canBeVeryLucky"
]
},
"canBeLucky",
{
"partialRefill": {
"type": "ReserveEnergy",
"limit": 20
}
}
]
}
]
}
"canTrickyDodgeEnemies"
{
"canShineCharge": {
"usedTiles": 25,
"openEnd": 0
}
}
{
"autoReserveTrigger": {
"maxReserveEnergy": 95
}
}
"canRModeSparkInterrupt"Clears obstacles: C Dev note: FIXME: More equipment combinations can work. |
|
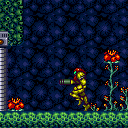
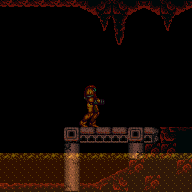
The hoppers have a poor energy drop rate. The rightmost two can be killed easily for two chances at a drop, otherwise a Crystal Flash must be used to get reserves. Entrance condition: {
"comeInWithRMode": {}
}Requires: "h_ZebesIsAwake"
{
"or": [
"h_CrystalFlashForReserveEnergy",
{
"and": [
"h_usePowerBomb",
"h_RModeCanRefillReserves",
{
"or": [
{
"and": [
{
"resourceMissingAtMost": [
{
"type": "Missile",
"count": 0
}
]
},
{
"resourceMissingAtMost": [
{
"type": "Super",
"count": 0
}
]
}
]
},
"canBeVeryLucky"
]
},
"canBeLucky",
{
"partialRefill": {
"type": "ReserveEnergy",
"limit": 20
}
}
]
}
]
}
{
"or": [
{
"and": [
{
"getBlueSpeed": {
"usedTiles": 21,
"openEnd": 1
}
},
"canSpeedball"
]
},
"h_bombThings"
]
}
{
"canShineCharge": {
"usedTiles": 21,
"openEnd": 1
}
}
{
"autoReserveTrigger": {
"maxReserveEnergy": 95
}
}
"canRModeSparkInterrupt"Clears obstacles: A, B, C |
|
Requires: "h_blueGateGlitch" Clears obstacles: B |
|


Open the gate (Wave Beam or gate glitch) and clear the Small Sidehoppers for a runway. Use respawning Geegas for energy. Entrance condition: {
"comeInWithRMode": {}
}Requires: {
"or": [
"Wave",
"h_blueGateGlitch",
{
"and": [
{
"notable": "Grapple Gate Glitch"
},
"canPreciseGrapple",
"h_speedJump",
"canTrickyJump"
]
}
]
}
{
"refill": [
"Energy"
]
}
{
"canShineCharge": {
"usedTiles": 30,
"openEnd": 0
}
}
{
"autoReserveTrigger": {}
}
"canRModeSparkInterrupt"Clears obstacles: B |
From: 4
Top Left Junction
To: 4
Top Left Junction
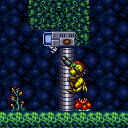
Kill both Sidehoppers for energy, or else Crystal Flash (kill both Sidehoppers anyway so you have the runway free). Use the spikes for pause-abuse interrupt. Requires: {
"obstaclesCleared": [
"R-Mode"
]
}
{
"obstaclesCleared": [
"A"
]
}
{
"or": [
"h_CrystalFlashForReserveEnergy",
{
"and": [
"h_RModeCanRefillReserves",
{
"resourceMissingAtMost": [
{
"type": "Missile",
"count": 0
}
]
},
{
"resourceMissingAtMost": [
{
"type": "Super",
"count": 0
}
]
},
{
"or": [
{
"and": [
"canBeLucky",
{
"partialRefill": {
"type": "ReserveEnergy",
"limit": 5
}
}
]
},
{
"and": [
"canBeVeryLucky",
{
"partialRefill": {
"type": "ReserveEnergy",
"limit": 20
}
}
]
}
]
}
]
}
]
}
{
"or": [
{
"canShineCharge": {
"usedTiles": 16,
"openEnd": 0
}
},
{
"and": [
{
"spikeHits": 1
},
"canUseIFrames",
{
"canShineCharge": {
"usedTiles": 23,
"openEnd": 0
}
}
]
}
]
}
{
"autoReserveTrigger": {}
}
"canRModePauseAbuseSparkInterrupt"Resets obstacles: R-Mode |
From: 1
Left Door
To: 1
Left Door
Kill the hoppers. Use Spike X-Mode to gain shine charge, then use manual reserve and pause abuse on the spikes to interrupt the shinespark. Requires: {
"obstaclesCleared": [
"R-Mode"
]
}
{
"obstaclesCleared": [
"A"
]
}
{
"or": [
{
"and": [
"h_CrystalFlashForReserveEnergy",
"h_usePowerBomb",
"canOffScreenMovement"
]
},
{
"and": [
"h_RModeCanRefillReserves",
{
"resourceMissingAtMost": [
{
"type": "Missile",
"count": 0
}
]
},
{
"resourceMissingAtMost": [
{
"type": "Super",
"count": 0
}
]
},
{
"or": [
{
"and": [
"canBeLucky",
{
"partialRefill": {
"type": "ReserveEnergy",
"limit": 5
}
}
]
},
{
"and": [
"canBeVeryLucky",
{
"partialRefill": {
"type": "ReserveEnergy",
"limit": 20
}
}
]
}
]
}
]
}
]
}
"h_destroyBombWalls"
"h_spikeXModeShinecharge"
"canBeVeryPatient"
"canPauseAbuse"
{
"autoReserveTrigger": {}
}
"canRModeSparkInterrupt"Resets obstacles: R-Mode, C |
|


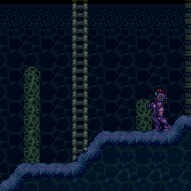
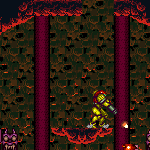
Four Boyons to farm have a poor chance of providing reserve energy. Once you have it, damage down to 20/10/5 energy and jump into the plant with forward moement for shinecharge. Jump high above a Boyon and interrupt, or use the thorns and pause abuse. Entrance condition: {
"comeInWithRMode": {}
}Requires: {
"or": [
"h_CrystalFlashForReserveEnergy",
{
"and": [
{
"enemyKill": {
"enemies": [
[
"Boyon",
"Boyon",
"Boyon"
]
]
}
},
"h_RModeCanRefillReserves",
{
"resourceMissingAtMost": [
{
"type": "Missile",
"count": 0
}
]
},
{
"or": [
{
"and": [
"canBeLucky",
{
"partialRefill": {
"type": "ReserveEnergy",
"limit": 5
}
}
]
},
{
"and": [
"canBeVeryLucky",
{
"partialRefill": {
"type": "ReserveEnergy",
"limit": 20
}
}
]
}
]
}
]
}
]
}
"canSamusEaterStandUp"
{
"samusEaterCycles": 1
}
"h_shinechargeMaxRunway"
{
"autoReserveTrigger": {
"maxReserveEnergy": 95
}
}
"canRModeSparkInterrupt" |
|
Freeze the Beetom and use it as a platform to climb the room without wall jumps. This can be done with well-timed Flatley jumps on top of the frozen Beetom, by turning around and spin jumping just as it unfreezes. This can be made easier (at the cost of some additional Beetom hits) with a pause-buffer method: Press pause, and begin a turn-around just before the pause hits; unequip Ice to immediately unfreeze the Beetom; unpause and press jump quickly after control resumes, but without buffering the input. For the top two jumps, it is possible to reduce the risk of damage by freezing the Beetom against the wall: in case of a failure due to an early (e.g. buffered) jump, the Beetom may stay stuck wiggling in the wall, and then it can be refrozen without needing to take damage to reposition it. Requires: {
"notable": "Frozen Beetom Ice Climb"
}
{
"noBlueSuit": {}
}
"canTrickyUseFrozenEnemies"
"canFlatleyJump"
{
"or": [
{
"enemyDamage": {
"enemy": "Beetom",
"type": "contact",
"hits": 9
}
},
{
"and": [
"canBeVeryPatient",
{
"enemyDamage": {
"enemy": "Beetom",
"type": "contact",
"hits": 4
}
}
]
},
{
"and": [
"canBeVeryLucky",
{
"enemyDamage": {
"enemy": "Beetom",
"type": "contact",
"hits": 1
}
},
{
"refill": [
"Energy"
]
}
]
}
]
} |
|
Charge a spark along the bottom of the room and use it to spark through the right side door. Requires opening the door and shutter first. Requires: "canShinechargeMovementComplex"
"HiJump"
{
"or": [
"SpaceJump",
"Grapple"
]
}
{
"or": [
{
"obstaclesCleared": [
"A"
]
},
"Wave",
{
"and": [
"h_heatedBlueGateGlitch",
{
"heatFrames": 60
}
]
}
]
}
{
"or": [
{
"and": [
"canTrickyDashJump",
"canWallJump"
]
},
"SpaceJump"
]
}
{
"canShineCharge": {
"usedTiles": 28,
"gentleUpTiles": 3,
"gentleDownTiles": 3,
"openEnd": 0
}
}
{
"heatFrames": 780
}
{
"shinespark": {
"frames": 57,
"excessFrames": 0
}
}Exit condition: {
"leaveWithSpark": {}
}Dev note: A hero shot variation of this strat might be possible, starting from a node to the left; if nothing else it could be done with a shortcharge on the 12-tile platform to the left. |
|
Requires: {
"heatFrames": 250
}
"h_heatedBlueGateGlitch"
{
"or": [
"canDash",
{
"heatFrames": 85
}
]
}Clears obstacles: A |
|


Requires: "Morph"
{
"heatFrames": 260
}
"h_heatedBlueGateGlitch"Clears obstacles: A |
From: 5
Middle Junction (Ledge Right of Morph Tunnel)
To: 2
Middle Left Door
Requires: "Morph"
{
"heatFrames": 150
}
"h_heatedBlueGateGlitch"
{
"or": [
"canDash",
{
"heatFrames": 65
}
]
}Clears obstacles: A |
From: 5
Middle Junction (Ledge Right of Morph Tunnel)
To: 2
Middle Left Door
Requires: "canDash"
"Morph"
{
"heatFrames": 150
}
"h_heatedBlueGateGlitch"Exit condition: {
"leaveWithRunway": {
"length": 11,
"openEnd": 0,
"gentleDownTiles": 4
}
}Unlocks doors: {"types":["missiles"],"requires":[{"heatFrames":90}]}
{"types":["super"],"requires":[]}
{"types":["powerbomb"],"requires":[{"heatFrames":110}]} |
From: 5
Bottom Floating Platform Junction
To: 5
Bottom Floating Platform Junction


Requires: {
"heatFrames": 135
}
"h_heatedBlueGateGlitch"Clears obstacles: A |
From: 5
Bottom Floating Platform Junction
To: 5
Bottom Floating Platform Junction

Farm before, during, and after the gate glitch in order to open the gate without wasting ammo or Energy. Requires: {
"notable": "Gate Glitch With Farming"
}
{
"heatFrames": 300
}
"h_gateGlitch"
{
"or": [
{
"ammo": {
"type": "Missile",
"count": 1
}
},
{
"ammo": {
"type": "Super",
"count": 1
}
}
]
}
{
"or": [
"h_heatResistant",
"canTrickyJump",
{
"resourceCapacity": [
{
"type": "RegularEnergy",
"count": 199
}
]
}
]
}Clears obstacles: A Dev note: There is still some leniency built in, so that perfect execution is not required, but Samus ends without losing resources. Without leniency, this can be done with about 235 heatFrames. |
|


Build up 34 tiles worth of run speed and jump into the door on the last frame. Hold angle up through the transition but also aim down to duck below the ceiling until Samus is past it. Fire the Super Missile frame perfectly to open the gate. Entrance condition: {
"comeInRunning": {
"speedBooster": "yes",
"minTiles": 34
}
}Requires: {
"notable": "High Speed Gate Glitch"
}
"h_speedJump"
"h_heatedGreenGateGlitch"
{
"ammo": {
"type": "Super",
"count": 1
}
}
"canInsaneJump"
{
"noFlashSuit": {}
}Clears obstacles: A Dev note: 1 extra tile is added so that you can jump into the door, simplifying the inputs a bit. |
From: 9
Right of Crumble Bridge, Left of Main Shaft Speed Blocks
To: 2
Far Left Door
Kill the two pirates while in health bomb range, to force Energy drops. It is possible to jump over the second pirate to then fight it on solid ground. Samus needs a large Energy drop with 75% damage reduction, or both large Energy drops otherwise. Cross the speed blocks by tanking a pirate laser hit and boosting up. Requires: "canDash"
"h_heatProof"
{
"or": [
"h_hasBeamUpgrade",
{
"ammo": {
"type": "Missile",
"count": 2
}
},
{
"ammo": {
"type": "Super",
"count": 2
}
},
"ScrewAttack"
]
}
{
"resourceAtMost": [
{
"type": "Energy",
"count": 29
}
]
}
"h_partialEnemyDamageReduction"
{
"or": [
"h_fullEnemyDamageReduction",
"canBeVeryLucky"
]
}
"canMidAirMorph"
"canNeutralDamageBoost" |
|
Requires: {
"or": [
"h_greenGateGlitch",
{
"obstaclesCleared": [
"A"
]
}
]
}Clears obstacles: A |
|
Requires: {
"or": [
"h_heatedGreenGateGlitch",
{
"obstaclesCleared": [
"A"
]
}
]
}
{
"enemyDamage": {
"enemy": "Ripper 2 (red)",
"type": "contact",
"hits": 2
}
}Exit condition: {
"leaveWithRunway": {
"length": 29,
"openEnd": 1
}
} |
|

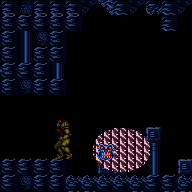
You can Crystal Flash first, then open the gate, dodge the bottom most rippers that come across the platform, and pick up their Super drops when they hit the light orb. Alternatively, open the gate first, farm the bottom two Rippers with Power Bombs or Screw Attack to get your Supers back and Crystal Flash afterwards. The runway is now clear to shinecharge. Alternatively, you can farm with Screw Attack or Power Bombs. Kill the bottom two Rippers first, then the one bouncing between platforms. Keep the third Ripper from the top alive for the best interrupt. With high reserve energy, take the interrupt close to the right door and with the Ripper moving right - it will not come back in time to hit you again. Once you have blue suit, you cannot kill any more Rippers with Screw Attack, but you are still invulnerable to contact hits. Entrance condition: {
"comeInWithRMode": {}
}Requires: "h_heatedGreenGateGlitch"
{
"or": [
{
"and": [
{
"or": [
{
"resourceAvailable": [
{
"type": "Super",
"count": 10
}
]
},
{
"and": [
{
"resourceAvailable": [
{
"type": "Super",
"count": 8
}
]
},
{
"resourceAvailable": [
{
"type": "Energy",
"count": 51
}
]
},
{
"or": [
"ScrewAttack",
{
"enemyKill": {
"enemies": [
[
"Ripper 2 (red)",
"Ripper 2 (red)"
]
],
"explicitWeapons": [
"PowerBomb"
]
}
}
]
},
{
"heatFrames": 600
},
{
"partialRefill": {
"type": "Super",
"limit": 10
}
}
]
}
]
},
"h_heatedCrystalFlashForReserveEnergy"
]
},
{
"and": [
{
"or": [
"ScrewAttack",
{
"enemyKill": {
"enemies": [
[
"Ripper 2 (red)",
"Ripper 2 (red)"
],
[
"Ripper 2 (red)"
]
],
"explicitWeapons": [
"PowerBomb"
]
}
}
]
},
"h_heatProof",
"h_RModeCanRefillReserves",
{
"resourceMissingAtMost": [
{
"type": "Super",
"count": 2
}
]
},
{
"partialRefill": {
"type": "ReserveEnergy",
"limit": 60
}
}
]
},
{
"and": [
{
"or": [
"ScrewAttack",
{
"enemyKill": {
"enemies": [
[
"Ripper 2 (red)"
]
],
"explicitWeapons": [
"PowerBomb"
]
}
}
]
},
"h_heatProof",
"h_RModeCanRefillReserves",
{
"resourceMissingAtMost": [
{
"type": "Super",
"count": 4
}
]
},
{
"partialRefill": {
"type": "ReserveEnergy",
"limit": 20
}
}
]
}
]
}
{
"canShineCharge": {
"usedTiles": 28,
"openEnd": 0
}
}
{
"autoReserveTrigger": {}
}
{
"or": [
{
"and": [
"h_heatProof",
{
"autoReserveTrigger": {}
},
"canRModeSparkInterrupt"
]
},
"h_heatTriggerRModeSparkInterrupt"
]
}Clears obstacles: A, B |
|
Requires: {
"or": [
"h_heatedGreenGateGlitch",
{
"obstaclesCleared": [
"A"
]
}
]
}
{
"heatFrames": 50
}
{
"or": [
"canDash",
{
"heatFrames": 15
}
]
}Clears obstacles: A Dev note: FIXME: A strat could be added that runs into the room and shoots directly at the gate, instead of stopping in front of it. |
From: 9
Junction Below Crumble Blocks, Set Up to Clip
To: 2
Top Right Door


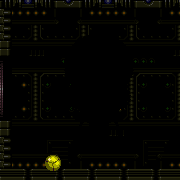
Breaking only the left side bomb blocks makes it easier for the Multiviola to enter a pattern where it will pass through the top shot block. The Multiviola needs to go through the crumble blocks moving to the right, if it goes through moving left it won't clear the shot blocks. If all the bomb blocks are broken, standing on the right side of the crumbles will allow the Multiviola to pass through the top shot block. Requires: {
"notable": "Multiviola Ice Clip"
}
"canBePatient"
"canTrickyGMode"
"h_heatProof"
{
"or": [
{
"and": [
"h_XRayMorphIceClip",
{
"or": [
"ScrewAttack",
"h_bombThings",
{
"obstaclesCleared": [
"B"
]
}
]
}
]
},
{
"and": [
"h_preciseIceClip",
{
"enemyDamage": {
"enemy": "Multiviola",
"type": "contact",
"hits": 1
}
},
{
"or": [
"ScrewAttack",
{
"obstaclesCleared": [
"B"
]
},
{
"and": [
"canTrickyCarryFlashSuit",
"canBeVeryLucky",
{
"useFlashSuit": {}
},
{
"shinespark": {
"frames": 11,
"excessFrames": 5
}
}
]
}
]
}
]
}
]
}Exit condition: {
"leaveWithGModeSetup": {}
}Unlocks doors: {"types":["ammo"],"requires":[]}Dev note: FIXME: This is possible with a flash suit but the flash suit needs a setup. This either needs a way that breaks both left crumble blocks or gets lucky getting the Multiviola up. |
From: 2
Middle Left Door
To: 2
Middle Left Door
Crystal Flash, enter X-Mode on the spikes and shinecharge. Use the spikes to pause abuse and interrupt shinespark. Entrance condition: {
"comeInWithRMode": {}
}Requires: "f_DefeatedPhantoon"
"canBeVeryLucky"
"h_CrystalFlashForReserveEnergy"
"h_usePowerBomb"
"canOffScreenMovement"
"canXMode"
{
"spikeHits": 1
}
"h_XModeSpikeHit"
"h_shinechargeMaxRunway"
{
"autoReserveTrigger": {}
}
{
"spikeHits": 2
}
"canRModePauseAbuseSparkInterrupt"Dev note: canBeVeryLucky added for difficulty placement. |
From: 2
Middle Left Door
To: 6
Bowling Chozo Statue
Crystal Flash and use another Power Bomb, then enter X-Mode on the spikes. Arm pump towards the statue and shinecharge once Samus appears to move into the border between the second and third spike Exit X-Mode, then jump back toward the spikes to pause abuse and interrupt shinespark, using a damage boost back toward the statue to get off of them. Entrance condition: {
"comeInWithRMode": {}
}Requires: "f_DefeatedPhantoon"
"canBeVeryLucky"
"h_CrystalFlashForReserveEnergy"
"h_usePowerBomb"
"canOffScreenMovement"
"canXMode"
"h_XModeSpikeHit"
"h_shinechargeMaxRunway"
{
"autoReserveTrigger": {}
}
"canHorizontalDamageBoost"
"canRModePauseAbuseSparkInterrupt"Dev note: canBeVeryLucky added for difficulty placement. |
From: 1
Left Door
To: 1
Left Door

Phantoon will place stationary, invisible flames, which need to be avoided while starting to Crystal Flash. Crystal Flash and have Phantoon spawn on top of Samus to trigger reserves. Requires a lot of luck. Entrance condition: {
"comeInWithGMode": {
"mode": "direct",
"morphed": true
}
}Requires: {
"not": "f_DefeatedPhantoon"
}
"canRiskPermanentLossOfAccess"
"canBeVeryLucky"
"h_artificialMorphComplexRModeCrystalFlashInterrupt"
{
"ammo": {
"type": "Missile",
"count": 10
}
}
{
"ammo": {
"type": "Super",
"count": 10
}
}
{
"ammo": {
"type": "PowerBomb",
"count": 10
}
}Clears obstacles: door_1 |
|
Farm the flames to fill up on energy. Shinecharge and use a flame hit to interrupt. Entrance condition: {
"comeInWithRMode": {}
}Requires: {
"not": "f_DefeatedPhantoon"
}
"canRiskPermanentLossOfAccess"
"canBeVeryLucky"
{
"or": [
"Charge",
{
"resourceCapacity": [
{
"type": "Missile",
"count": 2
}
]
},
{
"and": [
{
"resourceCapacity": [
{
"type": "Super",
"count": 1
}
]
},
"ScrewAttack"
]
}
]
}
{
"refill": [
"Energy"
]
}
{
"canShineCharge": {
"usedTiles": 12,
"openEnd": 0
}
}
{
"autoReserveTrigger": {
"maxReserveEnergy": 95
}
}
"canRModeSparkInterrupt"Clears obstacles: door_1 |
From: 1
Right Door
To: 1
Right Door
Power Off: Crystal Flash, enter X-Mode using the bottom spikes and shinecharge, then pause abuse from the spikes to interrupt. Power On: Crystal Flash or farm Skultera. Enter X-Mode using the bottom spikes and shinecharge, then pause abuse from the spikes to interrupt. Entrance condition: {
"comeInWithRMode": {}
}Requires: {
"or": [
"Gravity",
{
"and": [
{
"not": "f_DefeatedPhantoon"
},
"canRiskPermanentLossOfAccess"
]
}
]
}
{
"or": [
"h_CrystalFlashForReserveEnergy",
{
"and": [
"f_DefeatedPhantoon",
"h_RModeCanRefillReserves",
"canBeLucky",
{
"resourceMissingAtMost": [
{
"type": "Missile",
"count": 0
}
]
},
{
"or": [
{
"partialRefill": {
"type": "ReserveEnergy",
"limit": 5
}
},
{
"and": [
{
"partialRefill": {
"type": "ReserveEnergy",
"limit": 20
}
},
"canBeVeryLucky"
]
}
]
}
]
}
]
}
"canBeVeryPatient"
"h_thornXModeShinecharge"
"h_thornXModeFramePerfectExtraLeniency"
{
"autoReserveTrigger": {}
}
"canRModePauseAbuseSparkInterrupt" |
|


Requires: "Gravity"
{
  "or": [
    "h_greenGateGlitch",
    {
      "obstaclesCleared": [
        "A"
      ]
    }
  ]
}
Clears obstacles: A |
|

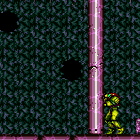
Wait for the one pattern (bottom->right) where Botwoon's head passes through the dividing barrier briefly. The extent Botwoon's head passes through the wall varies ranging from almost no damage window up to enough time for 2 missiles. By jumping there is a doppler effect allowing up to 2 more missiles to hit Botwoon. The fight can be sped up by Gate Glitching through the wall and landing lucky hits throughout the fight. Requires: {
"notable": "Back-Side Super Only Fight"
}
"h_navigateUnderwater"
{
"ammo": {
"type": "Missile",
"count": 30
}
}
{
"or": [
"canBeExtremelyPatient",
{
"and": [
"canBeVeryPatient",
"canBeVeryLucky",
"canGateGlitch",
{
"noFlashSuit": {}
},
{
"ammo": {
"type": "Missile",
"count": 30
}
}
]
}
]
}
{
"or": [
"canInsaneJump",
{
"and": [
"Gravity",
"canTrickyJump"
]
},
{
"enemyDamage": {
"enemy": "Botwoon 1",
"type": "acid",
"hits": 6
}
}
]
}
{
"ammo": {
"type": "Missile",
"count": 10
}
}Clears obstacles: f_DefeatedBotwoon Sets flags: f_DefeatedBotwoon Dev note: It is much easier to miss with missiles, so 10 leniency missiles are added. |
From: 5
Junction Below Left Item
To: 3
Top Left Item

Use HiJump to reach the water line, wait to morph until fully out of the water, place a Power Bomb at the correct height, and use it to boost just high enough to collect the item. Do not place the Power Bomb at the maximum possible height, but a little lower where it will bounce Samus higher. Requires: {
"notable": "Suitless HiJump Perfect Bomb Boost"
}
"HiJump"
"h_underwaterCrouchJump"
"canBombJumpWaterEscape"
{
"or": [
"canBeVeryLucky",
{
"ammo": {
"type": "PowerBomb",
"count": 8
}
}
]
} |
From: 1
Top Door
To: 2
Right Door
At the bottom of the room, Crystal Flash below a wall pirate to have it walk into Samus. The pirate will randomly walk up and down and wall, but if it sees Samus and jumps across, it will start climbing up the left wall or down the right wall. With a lot of luck, the pirate will sometimes climb down and hit Samus before it goes off camera. Be sure to avoid any stationary, invisible lasers that they might place. Entrance condition: {
"comeInWithGMode": {
"mode": "direct",
"morphed": true
},
"comesThroughToilet": "no"
}Requires: {
"or": [
"h_artificialMorphMovement",
"canBeVeryLucky"
]
}
"h_artificialMorphComplexRModeCrystalFlashInterrupt"
{
"ammo": {
"type": "Missile",
"count": 10
}
} |