canBlueSuitGModeSetup (Extreme)


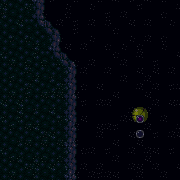
Ability to setup R-mode or G-mode while carrying a blue suit. In order to take damage from an enemy while having a blue suit, Samus needs to not have momentum. Entering a transition without momentum is done by positioning exactly 1 pixel from the transition. X-Ray can be used to slow down the process of positioning, stopping time to prevent the enemy from reaching Samus before she is in position.
When morphed, a blue suit does not protect Samus from enemy damage in some scenarios, such as falling off a ledge, after a neutral bounce from a large fall, or after getting boosted by a bomb (while rising or falling). However, Samus is protected while jumping with Spring Ball, so using a short hop to fall onto enemies is often helpful.
Dependencies: canCarryBlueSuit
Strats ()
|
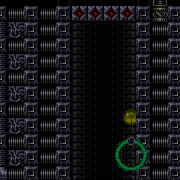
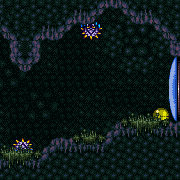
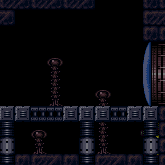
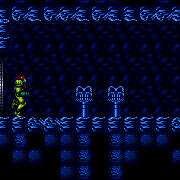
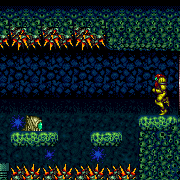
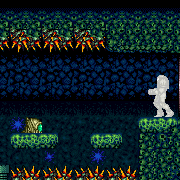
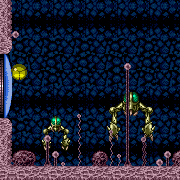
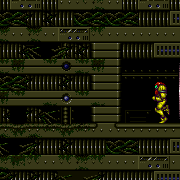
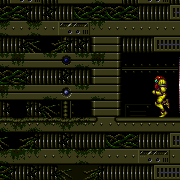
Using a blue suit and IBJ to get from to bottom to the top of Climb without unmorphing. Precise timing and enemy manipulations are required to reach the top without taking a hit, because the pirates will kill Samus if they touch her while midair from a bomb boost. Use the lowest part of the room to manipulate the pirates and overload their stationary, invisible lasers, which takes 18 shots, then climb the center of the room. Let a pirate walk down to see Samus, then when it is jumping back and forth above her, place a bomb when it is in the center of the room and use it to double bomb jump to an upper wide platform. When the pirate jumps again, be moving horizontally when it gets to Samus to kill it. Entrance condition: {
"comeInWithGMode": {
"mode": "any",
"morphed": true
}
}Requires: {
"notable": "G-Mode Morph Blue Suit IBJ to Top"
}
"h_blueSuitGMode"
"canTrickyGMode"
"h_artificialMorphIBJ"
"canBeVeryPatient" |
From: 1
Top Left Door
To: 5
Bottom Junction (Right of Boyons)
Move through the item to overload PLMs, then go down through the speed blocks and exit G-mode to collect the item. Note that if the item has already been collected, Samus can overload PLMs with Grapple. With Morph and Grapple, quickly grapple to then release grapple on the grapple blocks a few times until they stop working. Be careful not to fall into the spikes. Entrance condition: {
"comeInWithGMode": {
"mode": "direct",
"morphed": false
}
}Requires: "Morph"
"SpaceJump"
"canRemoteAcquire"
{
"or": [
"h_blueSuitGMode",
{
"and": [
{
"itemNotCollectedAtNode": 3
},
"canRiskPermanentLossOfAccess"
]
},
{
"and": [
"Grapple",
"canTrickyJump"
]
}
]
}Collects items: 3 |
|

Ascend with a long IBJ, then go through the speed blocks to the item. The Boyons can be killed with bombs or 3 Power Bombs, or Samus can jump through them with Spring Ball, which is easy as long as she doesn't stop jumping. Note that Samus can not bomb boost through the Boyons while blue. Entrance condition: {
"comeInWithGMode": {
"mode": "any",
"morphed": true
}
}Requires: "h_blueSuitGMode"
"h_artificialMorphLongIBJ"
"canBePatient"
{
"or": [
"canBeVeryPatient",
{
"and": [
{
"ammo": {
"type": "PowerBomb",
"count": 3
}
},
"canDoubleBombJump"
]
},
{
"and": [
"h_artificialMorphSpringBall",
"canDoubleBombJump"
]
}
]
} |
From: 2
Bottom Left Door
To: 4
Top Junction (Right of Spikes)
Ascend with a long IBJ, then go through the speed blocks to the item. The Boyons can be killed with bombs or 3 Power Bombs, or Samus can jump through them with Spring Ball, which is easy as long as she doesn't stop jumping. Note that Samus can not bomb boost through the Boyons while blue. Entrance condition: {
"comeInWithGMode": {
"mode": "any",
"morphed": true
}
}Requires: "h_blueSuitGMode"
"h_artificialMorphLongIBJ"
"canBePatient"
"canComplexGMode"
"canRemoteAcquire"
{
"or": [
"canBeVeryPatient",
{
"and": [
{
"ammo": {
"type": "PowerBomb",
"count": 3
}
},
"canDoubleBombJump"
]
},
{
"and": [
"h_artificialMorphSpringBall",
"canDoubleBombJump"
]
}
]
}Collects items: 3 Dev note: FIXME: It would be possible to remote acquire to the left after using spring into ceiling bomb jump, but it would require restructuring the room, a long CIBJ, and canBeExtremelyPatient. |
From: 2
Bottom Left Door
To: 4
Top Junction (Right of Spikes)
Ascend with a long IBJ, then go through the speed blocks and through the morph tunnel. The Boyons can be killed with bombs or 3 Power Bombs, or Samus can jump through them with Spring Ball, which is easy as long as she doesn't stop jumping. Note that Samus can not bomb boost through the Boyons while blue. Entrance condition: {
"comeInWithGMode": {
"mode": "any",
"morphed": true
}
}Requires: "h_blueSuitGMode"
"h_artificialMorphLongIBJ"
"canBePatient"
{
"or": [
"canBeVeryPatient",
{
"and": [
{
"ammo": {
"type": "PowerBomb",
"count": 3
}
},
"canDoubleBombJump"
]
},
{
"and": [
"h_artificialMorphSpringBall",
"canDoubleBombJump"
]
}
]
}Dev note: There is not a ceiling bomb jump strat from here, because it would be easier to just have X-Ray climbed the room. |
|

Entrance condition: {
"comeInWithGMode": {
"mode": "any",
"morphed": true
}
}Requires: "h_blueSuitGMode" |
|

Entrance condition: {
"comeInWithGMode": {
"mode": "any",
"morphed": true
}
}Requires: "h_blueSuitGMode" |
From: 4
Bottom Right Door
To: 3
Top Right Door

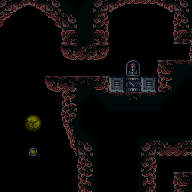
Refill at the ship then return and X-Ray climb up 3 screens. Entrance condition: {
"comeInWithGMode": {
"mode": "direct",
"morphed": false
}
}Requires: "canComplexGMode"
"canGModeXRayClimb"
{
"or": [
"canWallJump",
"HiJump",
"canSpringBallJumpMidAir",
"h_getBlueSpeedMaxRunway",
"ScrewAttack",
"h_blueSuitGMode"
]
}
{
"refill": [
"Energy",
"Missile",
"Super",
"PowerBomb"
]
}
"canLongXRayClimb"
"canBePatient" |
From: 4
Bottom Right Door
To: 3
Top Right Door


Enter with G-mode direct, refill at the ship and return. Back up to between 1 and 6 pixels from the door transition, and activate X-ray to get very deep stuck in the door. Climb up 3 screens, and perform a turnaround buffered spin-jump away from the door to trigger the transition, bypassing any lock on the door. Entrance condition: {
"comeInWithGMode": {
"mode": "direct",
"morphed": false
}
}Requires: "canComplexGMode"
"canGModeXRayClimb"
{
"or": [
"canWallJump",
"HiJump",
"canSpringBallJumpMidAir",
"h_getBlueSpeedMaxRunway",
"ScrewAttack",
"h_blueSuitGMode"
]
}
{
"refill": [
"Energy",
"Missile",
"Super",
"PowerBomb"
]
}
"canLongXRayClimb"
"canBePatient"Bypasses door shell: true |
|
Entrance condition: {
"comeInWithGMode": {
"mode": "any",
"morphed": true
}
}Requires: {
"or": [
"h_artificialMorphMovement",
"h_blueSuitGMode"
]
}Dev note: There is currently no logical purpose to using a blue suit without artificial morph movement here, but it could be useful later, e.g. to unlock a Power Bomb door in the bottom left. |
From: 8
G-Mode Morph Junction (Ship)
To: 1
Top Left Door

IBJ up to the top left of the room. Use X-Ray to cancel G-mode, then fall with a blue suit to break the bomb blocks. Requires: "h_blueSuitGMode" "h_artificialMorphLongIBJ" |
From: 4
Top Right Door
To: 5
Alcatraz Door

Roll through the bomb blocks. If Zebes is awake, Samus can roll through the Geemers as well. Entrance condition: {
"comeInWithGMode": {
"mode": "any",
"morphed": true
}
}Requires: "h_blueSuitGMode" |
From: 2
Right Door
To: 4
Middle Junction (Left of Morph Tunnel)

Enter with artificial morph, and use a blue suit to fall into the morph tunnel, unmorph at the correct spot and quickly jump out before the acid touches Samus. Exit G-mode to fix the camera. Entrance condition: {
"comeInWithGMode": {
"mode": "any",
"morphed": true
}
}Requires: "h_blueSuitGMode" "canOffScreenMovement" |
From: 3
Bottom Left Door
To: 10
G-Mode Morph Junction (Middle Right Door)
Use Spring Ball to climb the room. Without HiJump, Spring Ball Bomb Jump to get to the first ledge. Entrance condition: {
"comeInWithGMode": {
"mode": "any",
"morphed": true
}
}Requires: "h_blueSuitGMode"
"h_artificialMorphSpringBall"
{
"or": [
"HiJump",
"h_artificialMorphSpringBallBombJump"
]
} |
From: 4
Bottom Right Door
To: 2
Middle Right Door
Enter with G-mode direct and kill the bottom Pirate. Back up to between 1 and 6 pixels from the door transition, and activate X-ray to get very deep stuck in the door. Climb up 2 screens, and perform a turnaround buffered spin-jump away from the door to trigger the transition, bypassing any lock on the door. Entrance condition: {
"comeInWithGMode": {
"mode": "direct",
"morphed": false
}
}Requires: "canGModeXRayClimb"
"canLongXRayClimb"
{
"or": [
{
"enemyKill": {
"enemies": [
[
"Green Space Pirate (standing)"
]
]
}
},
"h_blueSuitGMode"
]
}Bypasses door shell: true |
From: 4
Bottom Right Door
To: 10
G-Mode Morph Junction (Middle Right Door)
Use Spring Ball to climb the room. Without HiJump, Spring Ball Bomb Jump to get to the first ledge. Entrance condition: {
"comeInWithGMode": {
"mode": "any",
"morphed": true
}
}Requires: "h_blueSuitGMode"
"h_artificialMorphSpringBall"
{
"or": [
"HiJump",
"h_artificialMorphSpringBallBombJump"
]
} |
From: 1
Bottom Left Door
To: 5
G-Mode Morph Junction (Bottom)
It is possible to roll off of the ledge and avoid the Geemers, but it is somewhat tight and the timing is likely earlier than expected. Entrance condition: {
"comeInWithGMode": {
"mode": "indirect",
"morphed": true
}
}Requires: {
"or": [
"h_ZebesNotAwake",
"Morph",
"h_artificialMorphSpringBall",
"h_artificialMorphBombThings",
"canTrickyDodgeEnemies",
"h_blueSuitGMode",
{
"enemyDamage": {
"enemy": "Geemer (blue)",
"type": "contact",
"hits": 1
}
}
]
}Dev note: It may be possible to come in indirect and still have enough i-frames to get through the Geemers, but Samus may be coming from a doorless room like Crateria Tube. This is not easy to model and isn't worth doing, because the player will almost certainly canTrickyDodgeEnemies enabled before enabling canArtificialMorph. |
From: 1
Bottom Left Door
To: 6
G-Mode Morph Junction Direct (Bottom)

It is possible to roll off of the ledge over the Geemers, but it is somewhat tight and the timing is likely earlier than expected.. Alternatively, it is possible to roll of the ledge go through the Geemers before Samus' i-frames expire. Entrance condition: {
"comeInWithGMode": {
"mode": "direct",
"morphed": true
}
}Requires: {
"or": [
"h_ZebesNotAwake",
"Morph",
"h_artificialMorphSpringBall",
"h_artificialMorphBombThings",
"canTrickyDodgeEnemies",
"h_blueSuitGMode",
{
"enemyDamage": {
"enemy": "Geemer (blue)",
"type": "contact",
"hits": 1
}
}
]
} |
From: 2
Top Left Door
To: 5
G-Mode Morph Junction (Bottom)

Use a blue suit to pass through the bomb block. Overload PLMs using the scroll PLMs in the shaft, to pass through the crumble block. Entrance condition: {
"comeInWithGMode": {
"mode": "any",
"morphed": true
}
}Requires: "h_blueSuitGMode"
{
"or": [
"h_artificialMorphSpringBall",
"h_artificialMorphBombThings"
]
}Clears obstacles: A Dev note: Power Bombs do not work as a movement option, because they make the bomb block solid. We don't track direct vs. indirect state here: since PLMs will be overloaded, remote acquiring the item would not be an option anyway. Flashing lights are not a concern because the cameras will be off without Morph, and with Morph there would be no purpose to the G-mode here. Samus can jump after exiting G-mode to fix the camera. There are no strats that require any off-screen precision that start from 5 except going back up, which is pointless. |
From: 1
Left Door
To: 1
Left Door


Enter with direct G-mode artificial morph, and hold right to roll through the bomb blocks using a blue suit. Touch the item, and return to the left side of the room before exiting G-mode to collect the item. Entrance condition: {
"comeInWithGMode": {
"mode": "direct",
"morphed": true
}
}Requires: "h_blueSuitGMode"
{
"or": [
"h_artificialMorphSpringBall",
"h_artificialMorphIBJ",
"h_artificialMorphPowerBomb"
]
}
"canRemoteAcquire"Clears obstacles: A, C Collects items: 5 |
|

Tank the Sidehopper hits or kill them after a single hit by quickly placing a Power Bomb. It is also possible to kill the Sidehoppers with a very fast Screw Attack, if Samus has Morph Ball. Overload the PLMs by rolling through the camera scroll blocks which are 4 tiles to the right of the stair by the door. Roll under the last Sidehopper and through the bomb blocks. Entrance condition: {
"comeInWithGMode": {
"mode": "direct",
"morphed": true
}
}Requires: {
"or": [
"canComplexGMode",
{
"enemyDamage": {
"enemy": "Sidehopper",
"type": "contact",
"hits": 2
}
},
{
"and": [
"h_artificialMorphPowerBomb",
{
"or": [
"canTrickyDodgeEnemies",
{
"enemyDamage": {
"enemy": "Sidehopper",
"type": "contact",
"hits": 1
}
}
]
}
]
},
{
"and": [
"Morph",
"ScrewAttack"
]
},
"h_blueSuitGMode"
]
} |
From: 1
Left Door
To: 5
Left Item
Tank the Sidehopper hits or kill them after a single hit by quickly placing a Power Bomb. It is also possible to kill the Sidehoppers with a very fast Screw Attack, if Samus has Morph Ball. Overload the PLMs by rolling through the camera scroll blocks which are 4 tiles to the right of the stair by the door. Roll under the last Sidehopper and through the bomb blocks. Place a Power Bomb next to the right wall then quickly exit G-mode before it explodes to destroy the blocks. Entrance condition: {
"comeInWithGMode": {
"mode": "direct",
"morphed": true
}
}Requires: {
"or": [
"canComplexGMode",
{
"enemyDamage": {
"enemy": "Sidehopper",
"type": "contact",
"hits": 2
}
},
{
"and": [
"h_artificialMorphPowerBomb",
{
"or": [
"canTrickyDodgeEnemies",
{
"enemyDamage": {
"enemy": "Sidehopper",
"type": "contact",
"hits": 1
}
}
]
}
]
},
"h_blueSuitGMode"
]
}
"h_artificialMorphPowerBomb"
{
"or": [
"h_artificialMorphMovement",
"h_additionalBomb"
]
}Clears obstacles: B |
|
Entrance condition: {
"comeInWithGMode": {
"mode": "any",
"morphed": true
}
}Requires: "h_blueSuitGMode" Clears obstacles: A, C |
From: 1
Left Door
To: 5
Left Item
Place a Power Bomb next to the right wall then quickly exit G-mode before it explodes to destroy the blocks. Entrance condition: {
"comeInWithGMode": {
"mode": "any",
"morphed": true
}
}Requires: "h_blueSuitGMode"
"h_artificialMorphPowerBomb"
{
"or": [
"h_artificialMorphMovement",
"h_additionalBomb"
]
}Clears obstacles: A, B, C |
|
Cross the room then lure and kill the two floor Sidehoppers using the morph tunnel. With the ceiling Sidehopper in the top right corner, quickly roll to the left next to the stair. It is required to avoid double hitting the Sidehopper with the Power Bomb or it will die. Place a Power Bomb, Wait a second, then roll to the right to lure the hopper and quickly return and Crystal Flash. Waiting briefly will prevent the hopper from coming too soon and getting double hit. Entrance condition: {
"comeInWithRMode": {}
}Requires: "h_ZebesIsAwake"
"h_usePowerBomb"
{
"or": [
"h_bombThings",
{
"and": [
{
"getBlueSpeed": {
"usedTiles": 21,
"openEnd": 1
}
},
"canSpeedball"
]
},
"h_blueSuitGMode"
]
}
"canComplexRModeCrystalFlashInterrupt"
{
"ammo": {
"type": "Missile",
"count": 10
}
}
{
"or": [
"h_partialEnemyDamageReduction",
{
"resourceAtMost": [
{
"type": "RegularEnergy",
"count": 19
}
]
},
{
"and": [
{
"resourceCapacity": [
{
"type": "RegularEnergy",
"count": 199
}
]
},
{
"resourceCapacity": [
{
"type": "ReserveEnergy",
"count": 199
}
]
}
]
}
]
}
{
"obstaclesCleared": [
"A",
"B",
"C"
]
} |
|

Entrance condition: {
"comeInWithGMode": {
"mode": "any",
"morphed": true
}
}Requires: "h_blueSuitGMode" "h_artificialMorphMovement" |
|

Entrance condition: {
"comeInWithGMode": {
"mode": "any",
"morphed": true
}
}Requires: "h_blueSuitGMode" "h_artificialMorphMovement" |
Direct G-Mode Morph with Blue Suit, Power Bomb the Item, Collect Item and Return
(Extreme)
Etecoon Energy Tank Room
From: 4
Bottom Right Door
To: 3
Bottom Left Door
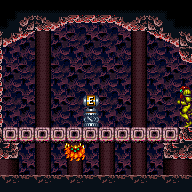
Cross the room while killing the Beetoms, then use two precisely positioned Power Bombs to overload PLMs. Place the Power Bombs at the same height as the tile above the door. This ends up being the max height Samus can jump and place it while at the very bottom of the room, with a midair morph or artificially morphed Spring Ball jump. Because PLMs are overloaded, Samus needs to exit G-mode at the item to collect it before returning through the crumble blocks. Entrance condition: {
"comeInWithGMode": {
"mode": "direct",
"morphed": true
}
}Requires: "h_blueSuitGMode"
"canPowerBombItemOverloadPLMs"
"canComplexGMode"
{
"itemNotCollectedAtNode": 5
}
{
"or": [
"Morph",
"h_artificialMorphSpringBall"
]
}
{
"ammo": {
"type": "PowerBomb",
"count": 2
}
}
{
"or": [
"canWallJump",
"SpaceJump",
{
"and": [
"HiJump",
"canSpringBallJumpMidAir"
]
},
"h_artificialMorphLongIBJ",
{
"and": [
{
"blueSuitShinecharge": {}
},
{
"or": [
{
"shinespark": {
"frames": 13,
"excessFrames": 3
}
},
{
"and": [
"HiJump",
{
"shinespark": {
"frames": 9,
"excessFrames": 3
}
}
]
}
]
}
]
}
]
}Clears obstacles: A Collects items: 5 Dev note: This does not require canRiskPermanentLossOfAccess if Samus returns through the crumble blocks. FIXME: This could include a Crystal Flash before shinesparking. |
From: 4
Bottom Right Door
To: 3
Bottom Left Door
Samus is only able to kill enemies with blue suit while moving and not falling. With bombs as the only movement option, Samus should only touch the enemies while grounded and moving horizontally. Entrance condition: {
"comeInWithGMode": {
"mode": "any",
"morphed": true
}
}Requires: "h_blueSuitGMode"
{
"or": [
"h_artificialMorphSpringBall",
{
"and": [
"h_artificialMorphBombs",
"canTrickyDodgeEnemies"
]
}
]
}Clears obstacles: A |
From: 4
Bottom Right Door
To: 5
Top Item

Samus is only able to kill enemies with blue suit while moving and not falling. With bombs as the only movement option, Samus should only touch the enemies while grounded and moving horizontally. After crossing the spikeway, use two precisely positioned Power Bombs to overload PLMs. Place the Power Bombs at the same height as the tile above the door. This ends up being the max height Samus can jump and place it while at the very bottom of the room, with a midair morph or artificially morphed Spring Ball jump. Entrance condition: {
"comeInWithGMode": {
"mode": "direct",
"morphed": true
}
}Requires: "h_blueSuitGMode"
"canPowerBombItemOverloadPLMs"
{
"itemNotCollectedAtNode": 5
}
"canRiskPermanentLossOfAccess"
{
"or": [
"Morph",
"h_artificialMorphSpringBall",
"h_artificialMorphIBJ"
]
}
{
"ammo": {
"type": "PowerBomb",
"count": 2
}
}
{
"or": [
"canWallJump",
"SpaceJump",
{
"and": [
"HiJump",
"canSpringBallJumpMidAir"
]
},
"h_artificialMorphLongIBJ",
{
"and": [
{
"blueSuitShinecharge": {}
},
{
"or": [
{
"shinespark": {
"frames": 13,
"excessFrames": 3
}
},
{
"and": [
"HiJump",
{
"shinespark": {
"frames": 9,
"excessFrames": 3
}
}
]
}
]
}
]
}
]
}Clears obstacles: A Dev note: This requires canRiskPermanentLossOfAccess unless Samus returns through the crumble blocks. FIXME: This could include a Crystal Flash before shinesparking. |
From: 4
Bottom Right Door
To: 5
Top Item

Samus is only able to kill enemies with blue suit while moving and not falling. With bombs as the only movement option, Samus should only touch the enemies while grounded and moving horizontally. After crossing the spikeway, bomb the bottom of the crumble blocks to overload PLMs and go through. Entrance condition: {
"comeInWithGMode": {
"mode": "any",
"morphed": true
}
}Requires: "h_blueSuitGMode"
"h_artificialMorphLongIBJ"
{
"or": [
"canBeVeryPatient",
"h_artificialMorphCeilingBombJump",
{
"and": [
"canBePatient",
"h_artificialMorphSpringBall",
"HiJump"
]
},
{
"and": [
"canBePatient",
"Morph",
{
"or": [
"HiJump",
"canWallJump"
]
}
]
}
]
}Clears obstacles: A |
From: 9
Right Etecoon Shaft - Top Left Door
To: 12
Above Power Bomb Blocks - Main Junction
Fall down to the Morph tunnel and roll through the bomb block. Roll through the camera scroll blocks in the tunnel a few times to overload PLMs before continuing and touching the crumble block. Carefully climb the shaft with an IBJ. Note that the camera moves to the left once getting high enough, making this harder. Land on the top block, place a Power Bomb, then quickly exit G-mode before it explodes to break the blocks above. Entrance condition: {
"comeInWithGMode": {
"mode": "any",
"morphed": true
}
}Requires: "h_blueSuitGMode" "h_artificialMorphLongIBJ" "h_artificialMorphPowerBomb" "canBePatient" "canOffScreenMovement" "canTrickyGMode" Clears obstacles: A |
From: 9
Right Etecoon Shaft - Top Left Door
To: 13
Below Power Bomb Blocks - Main Junction
Fall down to the Morph tunnel and roll through the bomb block. Roll through the camera scroll blocks in the tunnel a few times to overload PLMs before continuing and touching the crumble block. Entrance condition: {
"comeInWithGMode": {
"mode": "any",
"morphed": true
}
}Requires: "h_blueSuitGMode" |
From: 10
Right Etecoon Shaft - Bottom Left Door
To: 12
Above Power Bomb Blocks - Main Junction
IBJ up and roll through the bomb block; be sure not to bomb it or it will remain solid. Roll through the camera scroll blocks in the tunnel a few times to overload PLMs before continuing and touching the crumble block. Carefully climb the shaft with an IBJ. Note that the camera moves to the left once getting high enough, making this harder. Land on the top block, place a Power Bomb, then quickly exit G-mode before it explodes to break the blocks above. Entrance condition: {
"comeInWithGMode": {
"mode": "any",
"morphed": true
}
}Requires: "h_blueSuitGMode" "h_artificialMorphLongIBJ" "h_artificialMorphPowerBomb" "canBePatient" "canOffScreenMovement" "canTrickyGMode" Clears obstacles: A |
From: 10
Right Etecoon Shaft - Bottom Left Door
To: 13
Below Power Bomb Blocks - Main Junction
IBJ up and roll through the bomb block; be sure not to bomb it or it will remain solid. Roll through the camera scroll blocks in the tunnel a few times to overload PLMs before continuing and touching the crumble block. Entrance condition: {
"comeInWithGMode": {
"mode": "any",
"morphed": true
}
}Requires: "h_blueSuitGMode" "h_artificialMorphLongIBJ" |
From: 1
Top Left Door
To: 2
Top Right Door
Kill the first bug by rolling into it as it swoops down at Samus. Wait for the next pipe's bug to spawn before rolling off. IBJ into the pipe, touch the item, roll out of the pipe, then get to the top right door before exiting G-mode and obtaining the item. Kill the lower bug by bombing underneath the pipe and placing a bomb at the peak of the boost. Note that Samus is vulnerable to damage while being boosted from a bomb. Entrance condition: {
"comeInWithGMode": {
"mode": "any",
"morphed": true
}
}Requires: "h_blueSuitGMode" "canRemoteAcquire" "h_artificialMorphIBJ" "canTrickyDodgeEnemies" Collects items: 4 Dev note: With other item combinations, another strat will be used instead. |
From: 2
Top Right Door
To: 2
Top Right Door
Kill the first bug by rolling into it as it swoops down at Samus. Wait for the next pipe's bug to spawn before rolling off. IBJ into the pipe, touch the item, roll out of the pipe, then get to the top right door before exiting G-mode and obtaining the item. Kill the lower bug by bombing underneath the pipe and placing a bomb at the peak of the boost. Note that Samus is vulnerable to damage while being boosted from a bomb. Entrance condition: {
"comeInWithGMode": {
"mode": "any",
"morphed": true
}
}Requires: "h_blueSuitGMode" "canRemoteAcquire" "h_artificialMorphIBJ" "canTrickyDodgeEnemies" Collects items: 4 Dev note: With other item combinations, another strat will be used instead. |
From: 3
Bottom Right Door
To: 4
Item (Through the Pipe)
Climb the room while safely killing the enemies by rolling into them. With Bombs alone, it is possible to kill the bugs in lower bug spawners by bombing underneath the pipe and placing a bomb at the peak of the boost. Note that Samus is vulnerable to damage while being boosted from a bomb. Entrance condition: {
"comeInWithGMode": {
"mode": "indirect",
"morphed": true
}
}Requires: "h_blueSuitGMode"
{
"or": [
"h_artificialMorphIBJ",
"h_artificialMorphSpringBallBombJump",
{
"and": [
"HiJump",
"h_artificialMorphSpringFling"
]
}
]
}Dev note: With other item combinations, another strat will be used instead. |
From: 1
Left Side - Top Door
To: 16
Direct G-Mode Morph (Top Item, Above Hopper Pit)
Roll directly through the bomb block on entry without rolling much in the morph tunnel to overload PLMs as little as possible. Entrance condition: {
"comeInWithGMode": {
"mode": "direct",
"morphed": false
}
}Requires: "h_blueSuitGMode"
"Morph"
{
"or": [
"SpaceJump",
"canWallJump",
{
"and": [
"HiJump",
"canSpeedyJump"
]
},
{
"and": [
"HiJump",
"canSpringBallJumpMidAir"
]
},
"canTrickyUseFrozenEnemies",
{
"and": [
"canDash",
"canTrickyJump",
"canHorizontalDamageBoost",
{
"enemyDamage": {
"enemy": "Zeb",
"type": "contact",
"hits": 1
}
}
]
},
{
"and": [
{
"or": [
{
"canShineCharge": {
"usedTiles": 24,
"openEnd": 1
}
},
{
"blueSuitShinecharge": {}
}
]
},
{
"shinespark": {
"frames": 9,
"excessFrames": 3
}
}
]
}
]
} |
From: 6
Right Side - Top Middle Door
To: 12
Bottom Chozo Item
Entrance condition: {
"comeInWithGMode": {
"mode": "any",
"morphed": true
}
}Requires: "h_blueSuitGMode" Clears obstacles: D Dev note: This is only useful if the item is Morph, because otherwise there is no way out. |
From: 8
Right Side - Bottom Door
To: 12
Bottom Chozo Item
Entrance condition: {
"comeInWithGMode": {
"mode": "any",
"morphed": true
}
}Requires: "h_blueSuitGMode" "h_artificialMorphMovement" Clears obstacles: D Dev note: This is only useful if the item is Morph, because otherwise there is no way out. |
From: 15
G-Mode Morph Junction (Middle Right)
To: 12
Bottom Chozo Item

Requires: "h_blueSuitGMode" Clears obstacles: D Dev note: This is only useful if the item is Morph, because otherwise there is no way out. |
From: 3
Right Door
To: 2
Bottom Left Door

Using Speed Booster, run through and break the bomb wall to free the global Zeela. Break the speed blocks just before the Zeela gets to them in order for it to go down to the bottom half of the room. The speed blocks respawn very quickly, so this requires very precise timing or temporary blue. Normally, it takes the Zeela a minimum of 2 minutes to setup, but a super can make it fall down the shaft, saving 30 seconds. It may be easiest to knock the Zeela from the ceiling directly into the hole, saving another 30 seconds: Shoot a well-timed Super diagonally at the ground just before breaking the speed blocks. Requires: {
"notable": "G-Mode Setup - Lure the Zeela Down Below"
}
"canComplexGMode"
"canBePatient"
{
"or": [
{
"and": [
"h_getBlueSpeedMaxRunway",
{
"or": [
"canTemporaryBlue",
"canTrickyGMode",
{
"ammo": {
"type": "Super",
"count": 1
}
}
]
}
]
},
"h_blueSuitGMode"
]
}Exit condition: {
"leaveWithGModeSetup": {}
}Unlocks doors: {"types":["ammo"],"requires":[]} |
From: 1
Left Door
To: 1
Left Door
Entrance condition: {
"comeInWithGMode": {
"mode": "indirect",
"morphed": false
}
}Requires: "h_blueSuitGMode" Clears obstacles: A, B, C |
From: 1
Left Door
To: 2
Right Door

Samus will take a hopper hit on entry if she rolls into the room, as she is vulnerable in the falling state. It is possible to enter the room jumping with Spring Ball to avoid the hit. Entrance condition: {
"comeInWithGMode": {
"mode": "indirect",
"morphed": true
}
}Requires: "h_blueSuitGMode"
"h_artificialMorphLongIBJ"
{
"or": [
"h_artificialMorphSpringBall",
{
"enemyDamage": {
"enemy": "Sm. Sidehopper",
"type": "contact",
"hits": 1
}
}
]
}Clears obstacles: A, B |
From: 1
Left Door
To: 3
Top Junction
Samus will have i-frames on entry and can roll around to kill the hoppers. Entrance condition: {
"comeInWithGMode": {
"mode": "direct",
"morphed": true
}
}Requires: "h_blueSuitGMode" "h_artificialMorphLongIBJ" Clears obstacles: A |
From: 1
Left Door
To: 3
Top Junction
Samus will take a hopper hit on entry if she rolls into the room, as she is vulnerable in the falling state. It is possible to enter the room jumping with Spring Ball to avoid the hit. Entrance condition: {
"comeInWithGMode": {
"mode": "indirect",
"morphed": true
}
}Requires: "h_blueSuitGMode"
"h_artificialMorphLongIBJ"
{
"or": [
"h_artificialMorphSpringBall",
{
"enemyDamage": {
"enemy": "Sm. Sidehopper",
"type": "contact",
"hits": 1
}
}
]
}Clears obstacles: A, B, C |
From: 3
Right Vertical Door
To: 2
Bottom Left Door
Wiggle back and forth in the camera scroll block to overload PLMs; it is the right-most tile within the morph tunnel. Be careful because of the global off screen Zeela on the left that can hit Samus. After PLMs are certainly overloaded, Place a Power Bomb to kill the Zeela before going to the left. Alternatively, with a blue suit, simply roll to the left before the Zeela gets there or kill it with blue. Unmorph and exit G-Mode then move back and forth to fix the camera. Entrance condition: {
"comeInWithGMode": {
"mode": "any",
"morphed": true
},
"comesThroughToilet": "any"
}Requires: "h_blueSuitGMode" |
From: 4
Left Side - Bottom Door
To: 9
Main Junction
Entrance condition: {
"comeInWithGMode": {
"mode": "any",
"morphed": true
}
}Requires: "h_blueSuitGMode"
{
"or": [
"h_artificialMorphIBJ",
"h_artificialMorphSpringBall"
]
} |
From: 1
Left Door
To: 1
Left Door

A Blue Suit allows Samus to pass through the morph tunnel bomb blocks without overloading PLMS and be able to collect the right item. With Hi-Jump and SpringBall or IBJ, reach the top left item, quickly roll through it and the morph tunnel to reach the right item. After returning to the door, exiting G-Mode will collect both Items. Entrance condition: {
"comeInWithGMode": {
"mode": "direct",
"morphed": true
}
}Requires: "h_blueSuitGMode"
{
"or": [
"h_artificialMorphIBJ",
{
"and": [
"HiJump",
"h_artificialMorphSpringBall"
]
}
]
}
"canRemoteAcquire"Collects items: 3, 4 |
From: 2
Right Door
To: 1
Left Door
IBJ or SpringBall jump into the morph tunnel and quickly roll thorough to avoid overloading PLMS and making remote acquisition impossible. Touch the item, and continue to the left side of the room before exiting G-mode to collect the item. Entrance condition: {
"comeInWithGMode": {
"mode": "direct",
"morphed": true
}
}Requires: "h_blueSuitGMode"
{
"or": [
"h_artificialMorphSpringBall",
"h_artificialMorphIBJ"
]
}
"canRemoteAcquire"Collects items: 4 |
From: 2
Right Door
To: 2
Right Door

Avoid the right item if it is uncollected as it will overload PLMS if touched too many times in G-Mode. Either IBJ or SpringBall jump into the morph tunnel and quickly roll thorough to avoid overloading PLMS. The camera will not follow Samus through the tunnel so the collection is done blind. Due to the effects of Blue Suit, right direction must be pressed after the bomb explodes when returning. Entrance condition: {
"comeInWithGMode": {
"mode": "direct",
"morphed": true
}
}Requires: "h_blueSuitGMode"
{
"or": [
"h_artificialMorphSpringBall",
"h_artificialMorphIBJ"
]
}
"canRemoteAcquire"Collects items: 4 |
From: 2
Top Door
To: 3
Right Door

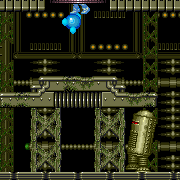
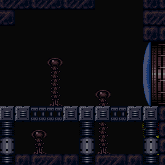
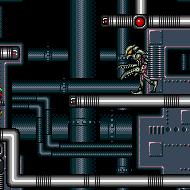
On room entry, kill the Atomics with blue suit without falling off of the platform. Wait for the Workrobot to pass, then roll off to the right of it while avoiding any stationary, invisible lasers. Be sure to watch and listen for where the robots are placing their lasers; they occupy a 24x24 pixel space and are typically placed with only 1-2 tiles of space between them. Fall without any horizontal movement to decrease the chance of touching a laser. Note that the majority of the lasers that the workrobots place only deal 4 damage and can be tanked with a suit's damage reduction or an immobile entrance. Entrance condition: {
"comeInWithGMode": {
"mode": "any",
"morphed": true
},
"comesThroughToilet": "any"
}Requires: "h_blueSuitGMode"
"canComplexGMode"
"f_DefeatedPhantoon"
{
"or": [
"canInsaneJump",
{
"enemyDamage": {
"enemy": "Workrobot",
"type": "ring-side",
"hits": 1
}
}
]
} |
From: 6
Bottom Right Door
To: 3
Bottom Left Door

Entrance condition: {
"comeInWithGMode": {
"mode": "any",
"morphed": true
}
}Requires: "h_blueSuitGMode" Clears obstacles: A |
From: 6
Bottom Right Door
To: 8
Item

Roll through the bomb blocks then exit g-mode and travel to the item and back while off screen. If a Spring Ball bomb jump off of a Power Bomb is the only way up, first overload PLMs using the camera scroll block in front of the bottom bomb block or the top block will remain solid. Entrance condition: {
"comeInWithGMode": {
"mode": "any",
"morphed": true
}
}Requires: "h_blueSuitGMode"
{
"or": [
"h_artificialMorphIBJ",
"h_artificialMorphSpringBallBombJump",
{
"and": [
"h_artificialMorphSpringBall",
"HiJump"
]
}
]
}
{
"or": [
{
"and": [
"canOffScreenMovement",
"canTrickyGMode"
]
},
{
"and": [
{
"not": "f_DefeatedPhantoon"
},
"canRiskPermanentLossOfAccess"
]
}
]
}Clears obstacles: A Dev note: This is only useful if the item is Morph. |
|

Roll through the pirates then IBJ or spring ball bomb jump to avoid the wall jump. Entrance condition: {
"comeInWithGMode": {
"mode": "any",
"morphed": true
}
}Requires: "h_blueSuitGMode"
{
"or": [
"h_artificialMorphIBJ",
"h_artificialMorphSpringBallBombJump"
]
} |