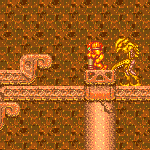
canHitbox (Hard)

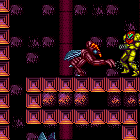
The ability to move through some enemies undamaged by timing a hit on them. This can be done with a Plasma shot, a well timed Power Bomb explosion, or a normal shot against Metal Pirates.
Strats ()
|
Requires: "h_ZebesIsAwake"
"canPrepareForNextRoom"
{
"resetRoom": {
"nodes": [
1
]
}
}
{
"or": [
{
"and": [
"Plasma",
"Charge",
{
"cycleFrames": 270
}
]
},
{
"and": [
"ScrewAttack",
{
"cycleFrames": 250
}
]
},
{
"and": [
"Plasma",
"Wave",
"canTrickyDodgeEnemies",
{
"cycleFrames": 300
}
]
},
{
"and": [
"h_PlasmaHitbox",
{
"cycleFrames": 360
}
]
},
{
"and": [
{
"haveBlueSuit": {}
},
{
"cycleFrames": 330
}
]
},
{
"and": [
"Morph",
"canTrickyDodgeEnemies",
{
"or": [
{
"and": [
"Wave",
"Spazer",
{
"cycleFrames": 600
}
]
},
{
"and": [
"Wave",
{
"cycleFrames": 840
}
]
},
{
"and": [
"Spazer",
"Ice",
{
"cycleFrames": 840
}
]
},
{
"and": [
"Spazer",
{
"cycleFrames": 960
}
]
},
{
"and": [
"Ice",
{
"cycleFrames": 1560
}
]
},
{
"and": [
"canBePatient",
{
"cycleFrames": 2320
}
]
}
]
}
]
}
]
}Clears obstacles: C Resets obstacles: A, B Farm cycle drops: 3 Sidehopper |
From: 1
Left Door
To: 1
Left Door
Bounce on the Power Bomb, then quickly kill the remaining Sidehopper with a strong beam, ammo, or pseudo-screw. If Samus has a weak beam, use the bomb to boost to the right to get the Sidehopper to jump to the right, then morph under it while killing it. Entrance condition: {
"comeInJumping": {
"speedBooster": "any",
"minTiles": 0.4375
}
}Requires: "canPrepareForNextRoom"
{
"tech": "canJumpIntoIBJ"
}
"canResetFallSpeed"
"h_usePowerBomb"
"canHitbox"
{
"or": [
"canPseudoScrew",
"Plasma",
{
"ammo": {
"type": "Missile",
"count": 2
}
},
{
"ammo": {
"type": "Super",
"count": 1
}
},
{
"and": [
"Ice",
"Wave"
]
},
{
"and": [
"Ice",
"Spazer"
]
},
{
"and": [
"Wave",
"Spazer"
]
},
{
"and": [
"canTrickyJump",
{
"tech": "canBombHorizontally"
}
]
}
]
}Dev note: This is significantly easier than a typical canUnmorphBombBoost, so it is instead modeled with canJumpIntoIBJ and canResetFallSpeed. |
|
Requires: "canPrepareForNextRoom"
{
"resetRoom": {
"nodes": [
1
]
}
}
{
"or": [
{
"and": [
"canDash",
"ScrewAttack",
{
"cycleFrames": 130
}
]
},
{
"and": [
{
"haveBlueSuit": {}
},
{
"cycleFrames": 140
}
]
},
{
"and": [
"h_PlasmaHitbox",
{
"cycleFrames": 170
}
]
}
]
}Clears obstacles: A Resets obstacles: B, C, R-Mode Farm cycle drops: 1 Sidehopper, 2 Sm. Sidehopper |
From: 1
Right Door
To: 2
Chozo Item

Traverse the room with a small number of Power Bombs. If the Chozo item is still there, it is best to exit G-Mode before the final Power Bomb goes off to ensure that PLMs aren't overloaded. This strat can be done easily with 7 Power Bombs. Simply kill all of the Boyons before progressing. The final Power Bomb needs to be placed on the second to last floating platform or later to break the wall. Samus can use one Power Bomb and a Boyon hit to get from the door to the second platform, or from the second to fourth platform. Alternatively, when next to the Boyons, place a Power Bomb while the Boyon is low, slightly after the peak of the jump, hitbox through the Boyons. If the Boyons are killed, Samus can horizontally boost far enough to skip a platform. Samus can cross the room with any of the following: 7 PB; 6 PB and a horizontal boost; 5 PB and hitboxing the first Boyons; 5 PB and damage from the first Boyons; 4 PB and damage from the first Boyons and hitboxing the second; 3 PB and hitting both sets of Boyons. Note that if Samus falls into a Samus Eater, she will often be teleported into it when exiting G-Mode. Entrance condition: {
"comeInWithGMode": {
"mode": "any",
"morphed": true
}
}Requires: "h_artificialMorphPowerBomb"
{
"or": [
{
"ammo": {
"type": "PowerBomb",
"count": 6
}
},
{
"and": [
{
"ammo": {
"type": "PowerBomb",
"count": 4
}
},
"h_artificialMorphBombHorizontally"
]
},
{
"and": [
{
"ammo": {
"type": "PowerBomb",
"count": 4
}
},
"canInsaneJump",
"canHitbox"
]
},
{
"and": [
{
"ammo": {
"type": "PowerBomb",
"count": 3
}
},
"h_artificialMorphBombHorizontally",
{
"enemyDamage": {
"enemy": "Boyon",
"type": "contact",
"hits": 1
}
}
]
},
{
"and": [
{
"ammo": {
"type": "PowerBomb",
"count": 2
}
},
"h_artificialMorphBombHorizontally",
{
"enemyDamage": {
"enemy": "Boyon",
"type": "contact",
"hits": 1
}
},
"canInsaneJump",
"canHitbox"
]
},
{
"and": [
{
"ammo": {
"type": "PowerBomb",
"count": 2
}
},
{
"enemyDamage": {
"enemy": "Boyon",
"type": "contact",
"hits": 2
}
}
]
}
]
}Clears obstacles: A, B |
|
Requires: "canDash"
{
"or": [
{
"heatFrames": 130
},
{
"and": [
{
"enemyKill": {
"enemies": [
[
"Alcoon"
]
],
"explicitWeapons": [
"ScrewAttack",
"Missile",
"Super",
"Wave+Plasma"
]
}
},
{
"heatFrames": 125
}
]
},
{
"and": [
"h_PlasmaHitbox",
{
"heatFrames": 125
}
]
}
]
}Unlocks doors: {"types":["missiles"],"requires":[{"heatFrames":20}]}
{"types":["powerbomb"],"requires":[{"heatFrames":20}]} |
From: 6
Left Shaft - Top Junction
To: 4
Left Shaft - Top Right Door
Requires: "canDash"
{
"or": [
{
"heatFrames": 115
},
{
"and": [
{
"enemyKill": {
"enemies": [
[
"Alcoon"
]
],
"explicitWeapons": [
"ScrewAttack",
"Missile",
"Super",
"Wave+Plasma"
]
}
},
{
"heatFrames": 110
}
]
},
{
"and": [
"h_PlasmaHitbox",
{
"heatFrames": 110
}
]
}
]
}Exit condition: {
"leaveWithRunway": {
"length": 4,
"openEnd": 1
}
}Unlocks doors: {"types":["missiles"],"requires":[{"heatFrames":20}]}
{"types":["super"],"requires":[]}
{"types":["powerbomb"],"requires":[{"heatFrames":20}]} |
|
Requires: "canDash"
{
"or": [
{
"heatFrames": 145
},
{
"and": [
{
"enemyKill": {
"enemies": [
[
"Alcoon"
]
],
"explicitWeapons": [
"ScrewAttack",
"Missile",
"Super",
"Wave+Plasma"
]
}
},
{
"heatFrames": 140
}
]
},
{
"and": [
"h_PlasmaHitbox",
{
"heatFrames": 140
}
]
}
]
} |
From: 7
Left Shaft - Middle Junction
To: 3
Left Shaft - Middle Right Door
Requires: "canDash"
{
"or": [
"canCarefulJump",
{
"enemyDamage": {
"enemy": "Multiviola",
"type": "contact",
"hits": 1
}
}
]
}
{
"or": [
"canDodgeWhileShooting",
"Wave",
"Spazer",
"Plasma",
"ScrewAttack",
{
"ammo": {
"type": "Missile",
"count": 1
}
},
{
"ammo": {
"type": "Super",
"count": 1
}
},
{
"enemyDamage": {
"enemy": "Alcoon",
"type": "fireball",
"hits": 1
}
}
]
}
{
"or": [
{
"heatFrames": 130
},
{
"and": [
{
"enemyKill": {
"enemies": [
[
"Alcoon"
]
],
"explicitWeapons": [
"ScrewAttack",
"Missile",
"Super",
"Wave+Plasma"
]
}
},
{
"heatFrames": 125
}
]
},
{
"and": [
"h_PlasmaHitbox",
{
"heatFrames": 125
}
]
}
]
}Unlocks doors: {"types":["missiles"],"requires":[{"heatFrames":20}]}
{"types":["powerbomb"],"requires":[{"heatFrames":10}]} |
From: 7
Left Shaft - Middle Junction
To: 3
Left Shaft - Middle Right Door
Requires: "canDash"
{
"or": [
"canCarefulJump",
{
"enemyDamage": {
"enemy": "Multiviola",
"type": "contact",
"hits": 1
}
}
]
}
{
"or": [
"canDodgeWhileShooting",
"Wave",
"Spazer",
"Plasma",
"ScrewAttack",
{
"ammo": {
"type": "Missile",
"count": 1
}
},
{
"ammo": {
"type": "Super",
"count": 1
}
},
{
"enemyDamage": {
"enemy": "Alcoon",
"type": "fireball",
"hits": 1
}
}
]
}
{
"or": [
{
"heatFrames": 110
},
{
"and": [
{
"enemyKill": {
"enemies": [
[
"Alcoon"
]
],
"explicitWeapons": [
"ScrewAttack",
"Missile",
"Super",
"Wave+Plasma"
]
}
},
{
"heatFrames": 100
}
]
},
{
"and": [
"h_PlasmaHitbox",
{
"heatFrames": 100
}
]
}
]
}Exit condition: {
"leaveWithRunway": {
"length": 4,
"openEnd": 1
}
}Unlocks doors: {"types":["missiles"],"requires":[{"heatFrames":65}]}
{"types":["super"],"requires":[]}
{"types":["powerbomb"],"requires":[{"heatFrames":30}]} |
|
Requires: "canDash"
{
"or": [
{
"heatFrames": 160
},
{
"and": [
{
"enemyKill": {
"enemies": [
[
"Multiviola",
"Alcoon"
]
],
"explicitWeapons": [
"ScrewAttack",
"Wave+Plasma"
]
}
},
{
"heatFrames": 145
}
]
},
{
"and": [
{
"enemyKill": {
"enemies": [
[
"Multiviola"
]
],
"explicitWeapons": [
"Missile",
"Super",
"Plasma"
]
}
},
{
"heatFrames": 150
}
]
},
{
"and": [
"h_PlasmaHitbox",
{
"heatFrames": 145
}
]
}
]
}Dev note: This includes time to wait for the Multiviola to move out of the way (if it can't be quickly killed), as will normally be a problem when entering through the upper doors (node 1 or 4). |
From: 8
Left Shaft - Bottom Junction
To: 2
Left Shaft - Bottom Right Door
Requires: "canDash"
{
"or": [
"canDodgeWhileShooting",
"Wave",
"Spazer",
"Plasma",
"ScrewAttack",
{
"ammo": {
"type": "Missile",
"count": 1
}
},
{
"ammo": {
"type": "Super",
"count": 1
}
},
{
"enemyDamage": {
"enemy": "Alcoon",
"type": "fireball",
"hits": 1
}
}
]
}
{
"or": [
{
"heatFrames": 115
},
{
"and": [
{
"enemyKill": {
"enemies": [
[
"Alcoon"
]
],
"explicitWeapons": [
"ScrewAttack",
"Missile",
"Super",
"Wave+Plasma"
]
}
},
{
"heatFrames": 110
}
]
},
{
"and": [
"h_PlasmaHitbox",
{
"heatFrames": 110
}
]
}
]
}Unlocks doors: {"types":["missiles"],"requires":[{"heatFrames":30}]}
{"types":["powerbomb"],"requires":[{"heatFrames":10}]} |
From: 2
Far Left Door
To: 4
Bottom Right Door


Use Morph (and either Spring Ball, Bombs, or Power Bombs) to navigate the space above the first set of Speed blocks. Either kill or carefully jump over the Pirates; their hitbox is much smaller when they are not looking around. Then use a flash suit to shinespark through the second set of Speed blocks. Requires: "canTrickyJump"
{
"heatFrames": 855
}
{
"or": [
{
"and": [
"canLateralMidAirMorph",
"canTrickyDodgeEnemies",
{
"heatFrames": 120
}
]
},
{
"enemyKill": {
"enemies": [
[
"Red Space Pirate (standing)"
],
[
"Red Space Pirate (standing)"
]
],
"explicitWeapons": [
"Missile",
"Super",
"ScrewAttack"
]
}
},
"h_PlasmaHitbox"
]
}
{
"or": [
"h_useSpringBall",
{
"and": [
"h_bombThings",
{
"heatFrames": 120
}
]
}
]
}
{
"useFlashSuit": {}
}
{
"or": [
{
"and": [
"h_heatProof",
{
"shinespark": {
"frames": 55,
"excessFrames": 16
}
}
]
},
{
"shinespark": {
"frames": 55,
"excessFrames": 5
}
}
]
}
{
"heatFrames": 105
}Dev note: This strat is only useful with heat protection; otherwise it would be better to spark from left of the bridge. |
From: 5
Bottom Junction Right of Morph Tunnel
To: 2
Bottom Right Door


Requires: "canDash"
"h_PlasmaHitbox"
"canInsaneJump"
{
"heatFrames": 190
} |
From: 2
Right Door
To: 5
Below Left Door Junction

Begin running from the top of the second slope and jump at the bottom of the third slope, bonking the large stalagtite in the ceiling. Kill the first pirate with Screw Attack (or ahead of time with Charge+Plasma), and pass through the second pirate using a charged plasma shot. Enter the acid while aiming down to shrink Samus' hitbox. This strat works with all combinations of movement items and suits. Requires: "canDash"
{
"notable": "Reverse Acid Dive"
}
{
"notable": "Reverse Thread the Needle"
}
{
"obstaclesNotCleared": [
"A"
]
}
"canInsaneJump"
"canSuitlessLavaDive"
"Charge"
"Plasma"
"canHitbox"
{
"or": [
"ScrewAttack",
{
"heatFrames": 210
}
]
}
{
"heatFrames": 330
}
{
"acidFrames": 210
} |
From: 7
Junction By Lower Alcoons (Left of Spike Pits)
To: 3
Bottom Horizontal Door
Kill the Alcoon without stopping. Requires: "canDash"
"canDodgeWhileShooting"
{
"or": [
{
"enemyKill": {
"enemies": [
[
"Alcoon"
]
],
"explicitWeapons": [
"Missile",
"Super",
"Wave+Plasma",
"PseudoScrew",
"ScrewAttack",
"Charge+Wave+Spazer",
"Shinespark"
]
}
},
{
"and": [
"Plasma",
"canHitbox"
]
}
]
}
{
"heatFrames": 110
} |
From: 1
Left Door
To: 1
Left Door


Requires: {
"heatFrames": 280
}
"canTrickyJump"
{
"or": [
{
"obstaclesCleared": [
"A"
]
},
{
"and": [
"canHitbox",
"canTrickyDodgeEnemies"
]
}
]
}Exit condition: {
"leaveWithSidePlatform": {
"height": 3,
"runway": {
"length": 40,
"openEnd": 0
},
"obstruction": [
3,
2
]
}
}Dev note: Max extra run speed $6.8. |
|
Requires: "canDash"
"canHitbox"
{
"heatFrames": 200
} |
|


FIXME: Shorter runway shinecharges could be added from 3. Requires: "h_shinechargeMaxRunway"
"canShinechargeMovement"
{
"or": [
"canHitbox",
{
"obstaclesCleared": [
"A"
]
}
]
}
{
"heatFrames": 180
}
{
"shineChargeFrames": 60
}Exit condition: {
"leaveShinecharged": {}
}Unlocks doors: {"types":["missiles"],"requires":[{"obstaclesCleared":["A"]},{"heatFrames":180}]}
{"types":["super"],"requires":[]}
{"types":["powerbomb"],"requires":[{"obstaclesCleared":["A"]},{"heatFrames":150}]} |
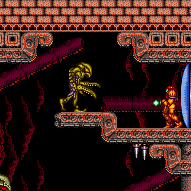
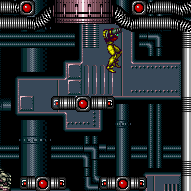
From: 1
Left Door
To: 3
Metal Pirates Junction
Kill both pirates with ammo or beams. Collect their drops and use heat to interrupt. Or kill and farm one pirate, then hitbox the other and interrupt from it before killing it with ammo or beams. Blue suit doesn't damage the pirates, but keeps Samus invulnerable while moving. Entrance condition: {
"comeInWithRMode": {}
}Requires: {
"heatFrames": 125
}
{
"or": [
{
"and": [
"Charge",
"Plasma",
"canDodgeWhileShooting",
"canTrickyJump",
{
"or": [
{
"and": [
"Ice",
{
"heatFrames": 700
}
]
},
{
"and": [
"Wave",
{
"heatFrames": 700
}
]
},
{
"and": [
"canInsaneJump",
"Ice",
{
"heatFrames": 520
}
]
},
{
"and": [
"canInsaneJump",
"Wave",
{
"heatFrames": 520
}
]
},
{
"and": [
"Ice",
"Wave",
{
"heatFrames": 400
}
]
},
{
"heatFrames": 950
},
{
"and": [
"canInsaneJump",
{
"heatFrames": 700
}
]
},
{
"and": [
"canXRayWaitForIFrames",
{
"heatFrames": 420
}
]
}
]
}
]
},
{
"and": [
"Charge",
"Spazer",
"canDodgeWhileShooting",
{
"or": [
{
"heatFrames": 4400
},
{
"and": [
"Ice",
{
"heatFrames": 3000
}
]
},
{
"and": [
"Wave",
{
"heatFrames": 2650
}
]
},
"Ice",
"Wave",
{
"heatFrames": 1750
}
]
}
]
},
{
"and": [
"Plasma",
"canDodgeWhileShooting",
{
"heatFrames": 2000
}
]
},
{
"and": [
"h_heatProof",
"canDodgeWhileShooting",
{
"or": [
{
"and": [
"Charge",
"Wave"
]
},
{
"and": [
"Charge",
"Ice",
"canBePatient"
]
},
{
"and": [
"canBeVeryPatient",
{
"or": [
"Charge",
"Spazer"
]
}
]
}
]
}
]
},
{
"and": [
"canDodgeWhileShooting",
{
"enemyKill": {
"enemies": [
[
"Space Pirate (fighting)",
"Space Pirate (fighting)"
]
],
"explicitWeapons": [
"Super"
]
}
},
{
"heatFrames": 450
}
]
},
{
"and": [
"canDodgeWhileShooting",
{
"enemyKill": {
"enemies": [
[
"Space Pirate (fighting)",
"Space Pirate (fighting)"
]
],
"explicitWeapons": [
"Missile"
]
}
},
{
"heatFrames": 2700
}
]
}
]
}
{
"or": [
"h_heatedCrystalFlashForReserveEnergy",
{
"and": [
"h_RModeCanRefillReserves",
{
"or": [
{
"and": [
{
"resourceMissingAtMost": [
{
"type": "Super",
"count": 0
}
]
},
{
"partialRefill": {
"type": "ReserveEnergy",
"limit": 240
}
}
]
},
{
"partialRefill": {
"type": "ReserveEnergy",
"limit": 120
}
}
]
}
]
},
{
"and": [
{
"disableEquipment": "ETank"
},
{
"or": [
{
"and": [
{
"resourceMissingAtMost": [
{
"type": "Super",
"count": 0
}
]
},
{
"partialRefill": {
"type": "ReserveEnergy",
"limit": 140
}
}
]
},
{
"partialRefill": {
"type": "ReserveEnergy",
"limit": 20
}
}
]
}
]
}
]
}
"h_shinechargeMaxRunway"
{
"disableEquipment": "Varia"
}
{
"disableEquipment": "Gravity"
}
{
"or": [
{
"and": [
"canHitbox",
{
"autoReserveTrigger": {
"maxReserveEnergy": 95
}
},
"canRModeSparkInterrupt"
]
},
{
"and": [
"canReserveTriggerBufferXRay",
{
"autoReserveTrigger": {
"implicitHeatFrames": "no"
}
},
"canRModeSparkInterrupt",
{
"suitlessHeatFrames": 32
}
]
},
{
"and": [
"h_heatProof",
{
"autoReserveTrigger": {}
},
"canRModePauseAbuseSparkInterrupt"
]
},
{
"and": [
{
"autoReserveTrigger": {
"implicitHeatFrames": "suitless"
}
},
"canRModeSparkInterrupt",
{
"suitlessHeatFrames": 32
}
]
}
]
}Clears obstacles: A, door_1 |
From: 1
Left Door
To: 3
Metal Pirates Junction
Shoot the Pirate twice to force it to block instead of kicking or shooting towards the door. Requires: "canDash"
"canHitbox"
"canInsaneJump"
{
"heatFrames": 100
} |
From: 1
Left Door
To: 3
Metal Pirates Junction
If you can't kill the pirates, you can Crystal Flash, then run through with timed shots to get the shinecharge. Once shinecharged, let a pirate jump at you to interrupt. After spark interrupt, you'll need a way to leave the room. Entrance condition: {
"comeInWithRMode": {}
}Requires: "h_heatedCrystalFlashForReserveEnergy"
"canHitbox"
{
"heatFrames": 180
}
"h_shinechargeMaxRunway"
{
"autoReserveTrigger": {
"maxReserveEnergy": 95
}
}
"canRModeSparkInterrupt"Clears obstacles: door_1 |
From: 1
Left Door
To: 3
Metal Pirates Junction
Use the Echoes created by shinesparking to defeat the Metal Pirates. This involves Shineparking into a precise point while also turning the Pirates vulnerable as the echoes reach them. Requires: {
"notable": "Speed Echoes Kill"
}
{
"obstaclesNotCleared": [
"A"
]
}
"canUseSpeedEchoes"
"canHitbox"
{
"canShineCharge": {
"usedTiles": 38,
"openEnd": 2
}
}
{
"or": [
{
"canShineCharge": {
"usedTiles": 23,
"openEnd": 2
}
},
{
"heatFrames": 60
}
]
}
{
"or": [
{
"and": [
"HiJump",
{
"shinespark": {
"frames": 1
}
},
{
"shinespark": {
"frames": 1
}
}
]
},
{
"and": [
"canTrickyJump",
{
"shinespark": {
"frames": 9
}
},
{
"shinespark": {
"frames": 9
}
}
]
}
]
}
{
"or": [
{
"heatFramesWithEnergyDrops": {
"frames": 630,
"drops": [
{
"enemy": "Space Pirate (fighting)",
"count": 12
}
]
}
},
{
"and": [
"canFarmWhileShooting",
{
"heatFramesWithEnergyDrops": {
"frames": 360,
"drops": [
{
"enemy": "Space Pirate (fighting)",
"count": 6
}
]
}
},
{
"heatFramesWithEnergyDrops": {
"frames": 270,
"drops": [
{
"enemy": "Space Pirate (fighting)",
"count": 6
}
]
}
}
]
}
]
}
{
"partialRefill": {
"type": "Energy",
"limit": 99
}
}
{
"partialRefill": {
"type": "Super",
"limit": 1
}
}Clears obstacles: A Dev note: FIXME: It's possible to activate a spark on the ground at 27 energy and collect drops in time. The canFarmWhileShooting presumes spawning the drops on the ground where they can be collected while charging the next shinespark. |
From: 1
Left Door
To: 3
Metal Pirates Junction


Kill both pirates with speed echoes. Collect their drops and use the heat to interrupt. Entrance condition: {
"comeInWithRMode": {}
}Requires: {
"notable": "Speed Echoes Kill"
}
"canUseSpeedEchoes"
"canHitbox"
{
"canShineCharge": {
"usedTiles": 38,
"openEnd": 2
}
}
{
"or": [
{
"canShineCharge": {
"usedTiles": 23,
"openEnd": 2
}
},
{
"heatFrames": 60
}
]
}
{
"or": [
{
"and": [
"HiJump",
{
"shinespark": {
"frames": 1
}
}
]
},
{
"shinespark": {
"frames": 9
}
}
]
}
{
"heatFrames": 630
}
{
"or": [
"h_heatedCrystalFlashForReserveEnergy",
{
"and": [
"h_RModeCanRefillReserves",
{
"or": [
{
"and": [
{
"resourceMissingAtMost": [
{
"type": "Super",
"count": 0
}
]
},
{
"partialRefill": {
"type": "ReserveEnergy",
"limit": 240
}
}
]
},
{
"partialRefill": {
"type": "ReserveEnergy",
"limit": 120
}
}
]
}
]
},
{
"and": [
{
"disableEquipment": "ETank"
},
{
"or": [
{
"and": [
{
"resourceMissingAtMost": [
{
"type": "Super",
"count": 0
}
]
},
{
"partialRefill": {
"type": "ReserveEnergy",
"limit": 140
}
}
]
},
{
"partialRefill": {
"type": "ReserveEnergy",
"limit": 20
}
}
]
}
]
}
]
}
"h_shinechargeMaxRunway"
{
"disableEquipment": "Varia"
}
{
"disableEquipment": "Gravity"
}
{
"or": [
{
"and": [
"canReserveTriggerBufferXRay",
{
"autoReserveTrigger": {
"implicitHeatFrames": "no"
}
},
"canRModeSparkInterrupt",
{
"suitlessHeatFrames": 32
}
]
},
{
"and": [
"h_heatProof",
{
"autoReserveTrigger": {}
},
"canRModePauseAbuseSparkInterrupt"
]
},
{
"and": [
{
"autoReserveTrigger": {
"implicitHeatFrames": "suitless"
}
},
"canRModeSparkInterrupt",
{
"suitlessHeatFrames": 32
}
]
}
]
}Clears obstacles: A, door_1 |
|
Requires: "canDash"
"canHitbox"
{
"heatFrames": 200
} |
|


FIXME: Shorter runway shinecharges could be added from 3. Requires: "h_shinechargeMaxRunway"
"canShinechargeMovement"
{
"or": [
"canHitbox",
{
"obstaclesCleared": [
"A"
]
}
]
}
{
"heatFrames": 180
}
{
"shineChargeFrames": 60
}Exit condition: {
"leaveShinecharged": {}
}Unlocks doors: {"types":["missiles"],"requires":[{"obstaclesCleared":["A"]},{"heatFrames":180}]}
{"types":["super"],"requires":[]}
{"types":["powerbomb"],"requires":[{"obstaclesCleared":["A"]},{"heatFrames":150}]} |
From: 2
Right Door
To: 2
Right Door


Requires: {
"heatFrames": 280
}
"canTrickyJump"
{
"or": [
{
"obstaclesCleared": [
"A"
]
},
{
"and": [
"canHitbox",
"canTrickyDodgeEnemies"
]
}
]
}Exit condition: {
"leaveWithSidePlatform": {
"height": 3,
"runway": {
"length": 40,
"openEnd": 0
},
"obstruction": [
3,
2
]
}
}Dev note: Max extra run speed $6.8. |
From: 2
Right Door
To: 3
Metal Pirates Junction
Kill both pirates with ammo or beams. Collect their drops and use heat to interrupt. Or kill and farm one pirate, then hitbox the other and interrupt from it before killing it with ammo or beams. Blue suit doesn't damage the pirates, but keeps Samus invulnerable while moving. Entrance condition: {
"comeInWithRMode": {}
}Requires: {
"heatFrames": 125
}
{
"or": [
{
"and": [
"Charge",
"Plasma",
"canDodgeWhileShooting",
{
"or": [
{
"and": [
"Ice",
{
"heatFrames": 700
}
]
},
{
"and": [
"Wave",
{
"heatFrames": 700
}
]
},
{
"and": [
"Ice",
"Wave",
{
"heatFrames": 450
}
]
},
{
"heatFrames": 950
},
{
"and": [
"canXRayWaitForIFrames",
{
"heatFrames": 420
}
]
},
{
"and": [
"Ice",
"Wave",
"canTrickyJump",
{
"heatFrames": 400
}
]
},
{
"and": [
"Ice",
"canInsaneJump",
{
"heatFrames": 520
}
]
},
{
"and": [
"Wave",
"canInsaneJump",
{
"heatFrames": 520
}
]
},
{
"and": [
"canInsaneJump",
{
"heatFrames": 700
}
]
}
]
}
]
},
{
"and": [
"h_heatProof",
"canDodgeWhileShooting",
{
"or": [
"Plasma",
{
"and": [
"Charge",
"Wave"
]
},
{
"and": [
"Charge",
"Spazer",
"Ice",
"Wave"
]
},
{
"and": [
"Charge",
"Spazer",
"canBePatient"
]
},
{
"and": [
"Charge",
"Ice",
"canBePatient"
]
},
{
"and": [
"canBeVeryPatient",
{
"or": [
"Charge",
"Spazer"
]
}
]
},
{
"enemyKill": {
"enemies": [
[
"Space Pirate (fighting)",
"Space Pirate (fighting)"
]
],
"explicitWeapons": [
"Missile"
]
}
}
]
}
]
},
{
"and": [
"canDodgeWhileShooting",
{
"enemyKill": {
"enemies": [
[
"Space Pirate (fighting)",
"Space Pirate (fighting)"
]
],
"explicitWeapons": [
"Super"
]
}
},
{
"heatFrames": 450
}
]
}
]
}
{
"or": [
"h_heatedCrystalFlashForReserveEnergy",
{
"and": [
"h_RModeCanRefillReserves",
{
"or": [
{
"and": [
{
"resourceMissingAtMost": [
{
"type": "Super",
"count": 0
}
]
},
{
"partialRefill": {
"type": "ReserveEnergy",
"limit": 240
}
}
]
},
{
"partialRefill": {
"type": "ReserveEnergy",
"limit": 120
}
}
]
}
]
},
{
"and": [
{
"disableEquipment": "ETank"
},
{
"or": [
{
"and": [
{
"resourceMissingAtMost": [
{
"type": "Super",
"count": 0
}
]
},
{
"partialRefill": {
"type": "ReserveEnergy",
"limit": 140
}
}
]
},
{
"partialRefill": {
"type": "ReserveEnergy",
"limit": 20
}
}
]
}
]
}
]
}
{
"heatFrames": 90
}
"h_shinechargeMaxRunway"
{
"or": [
{
"and": [
"canHitbox",
{
"autoReserveTrigger": {}
},
"canRModeSparkInterrupt"
]
},
"h_heatTriggerRModeSparkInterrupt"
]
}Clears obstacles: A, door_2 |
From: 2
Right Door
To: 3
Metal Pirates Junction
Shoot the Pirate twice to force it to block instead of kicking or shooting towards the door. Requires: "canDash"
"canHitbox"
"canInsaneJump"
{
"heatFrames": 100
} |
From: 2
Right Door
To: 3
Metal Pirates Junction
If you can't kill the pirates, you can Crystal Flash, then run through with timed shots to get the shinecharge. Once shinecharged, let a pirate jump at you to interrupt. After spark interrupt, you'll need a way to leave the room. Entrance condition: {
"comeInWithRMode": {}
}Requires: "h_heatedCrystalFlashForReserveEnergy"
"canHitbox"
{
"heatFrames": 180
}
"h_shinechargeMaxRunway"
{
"autoReserveTrigger": {}
}
"canRModeSparkInterrupt"Clears obstacles: door_2 |
From: 2
Right Door
To: 3
Metal Pirates Junction
Use the Echoes created by shinesparking to defeat the Metal Pirates. This involves Shineparking into a precise point while also turning the Pirates vulnerable as the echoes reach them. Requires: {
"notable": "Speed Echoes Kill"
}
{
"obstaclesNotCleared": [
"A"
]
}
"canUseSpeedEchoes"
"canHitbox"
{
"canShineCharge": {
"usedTiles": 38,
"openEnd": 2
}
}
{
"or": [
{
"canShineCharge": {
"usedTiles": 23,
"openEnd": 2
}
},
{
"heatFrames": 60
}
]
}
{
"or": [
{
"and": [
"HiJump",
{
"shinespark": {
"frames": 1
}
},
{
"shinespark": {
"frames": 1
}
}
]
},
{
"and": [
"canTrickyJump",
{
"shinespark": {
"frames": 9
}
},
{
"shinespark": {
"frames": 9
}
}
]
}
]
}
{
"or": [
{
"heatFramesWithEnergyDrops": {
"frames": 630,
"drops": [
{
"enemy": "Space Pirate (fighting)",
"count": 12
}
]
}
},
{
"and": [
"canFarmWhileShooting",
{
"heatFramesWithEnergyDrops": {
"frames": 360,
"drops": [
{
"enemy": "Space Pirate (fighting)",
"count": 6
}
]
}
},
{
"heatFramesWithEnergyDrops": {
"frames": 270,
"drops": [
{
"enemy": "Space Pirate (fighting)",
"count": 6
}
]
}
}
]
}
]
}
{
"partialRefill": {
"type": "Energy",
"limit": 99
}
}
{
"partialRefill": {
"type": "Super",
"limit": 1
}
}Clears obstacles: A Dev note: FIXME: It's possible to activate a spark on the ground at 27 energy and collect drops in time. The canFarmWhileShooting presumes spawning the drops on the ground where they can be collected while charging the next shinespark. |
From: 2
Right Door
To: 3
Metal Pirates Junction


Kill both pirates with speed echoes. Collect their drops and use the heat to interrupt. Entrance condition: {
"comeInWithRMode": {}
}Requires: {
"notable": "Speed Echoes Kill"
}
"canUseSpeedEchoes"
"canHitbox"
{
"canShineCharge": {
"usedTiles": 38,
"openEnd": 2
}
}
{
"or": [
{
"canShineCharge": {
"usedTiles": 23,
"openEnd": 2
}
},
{
"heatFrames": 60
}
]
}
{
"or": [
{
"and": [
"HiJump",
{
"shinespark": {
"frames": 1
}
}
]
},
{
"shinespark": {
"frames": 9
}
}
]
}
{
"heatFrames": 630
}
{
"or": [
"h_heatedCrystalFlashForReserveEnergy",
{
"and": [
"h_RModeCanRefillReserves",
{
"or": [
{
"and": [
{
"resourceMissingAtMost": [
{
"type": "Super",
"count": 0
}
]
},
{
"partialRefill": {
"type": "ReserveEnergy",
"limit": 240
}
}
]
},
{
"partialRefill": {
"type": "ReserveEnergy",
"limit": 120
}
}
]
}
]
},
{
"and": [
{
"disableEquipment": "ETank"
},
{
"or": [
{
"and": [
{
"resourceMissingAtMost": [
{
"type": "Super",
"count": 0
}
]
},
{
"partialRefill": {
"type": "ReserveEnergy",
"limit": 140
}
}
]
},
{
"partialRefill": {
"type": "ReserveEnergy",
"limit": 20
}
}
]
}
]
}
]
}
"h_shinechargeMaxRunway"
"h_heatTriggerRModeSparkInterrupt"Clears obstacles: A, door_2 |
From: 3
Metal Pirates Junction
To: 3
Metal Pirates Junction
Requires: {
"or": [
"canHitbox",
{
"obstaclesCleared": [
"A"
]
}
]
}
"h_shinechargeMaxRunway"
"h_heatedCrystalSpark" |
From: 3
Metal Pirates Junction
To: 3
Metal Pirates Junction
Use the Echoes created by shinesparking to defeat the Metal Pirates. This involves shineparking into a precise point while also turning the Pirates vulnerable as the echoes reach them. Requires: {
"notable": "Speed Echoes Kill"
}
"h_heatProof"
{
"resetRoom": {
"nodes": [
1,
2
]
}
}
"canFarmWhileShooting"
"canUseSpeedEchoes"
"canHitbox"
{
"canShineCharge": {
"usedTiles": 38,
"openEnd": 2
}
}
{
"shinespark": {
"frames": 9
}
}
{
"cycleFrames": 730
}Clears obstacles: A Farm cycle drops: 2 Space Pirate (fighting) |
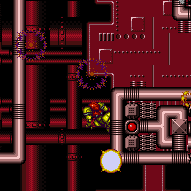
From: 1
Bottom Left Door
To: 6
Bottom Right Corner Junction
Time Plasma shots so that Samus can run through the first two Dessgeegas and gain blue speed. Shooting into the floor can give more control over the enemy i-frames. Requires: "canDodgeWhileShooting"
"Plasma"
"canHitbox"
"h_getBlueSpeedMaxRunway"
{
"heatFrames": 145
}Clears obstacles: C, E, F |
From: 1
Bottom Left Door
To: 6
Bottom Right Corner Junction


Due to X-Ray beam cooldown, Screw Attack is the only way to avoid a Multiviola hit on entry. Clear the runway. If that was enough to get reserve energy, you can use the final Dessgeega to interrupt, otherwise carry the shinecharge into the first Multiviola box, or use a heat interrupt. Entrance condition: {
"comeInWithRMode": {}
}Requires: {
"or": [
{
"and": [
{
"enemyDamage": {
"enemy": "Multiviola",
"type": "contact",
"hits": 1
}
},
{
"heatFrames": 40
}
]
},
{
"and": [
{
"enemyKill": {
"enemies": [
[
"Multiviola"
]
],
"explicitWeapons": [
"ScrewAttack"
]
}
},
{
"heatFrames": 30
}
]
}
]
}
{
"or": [
{
"and": [
"canDodgeWhileShooting",
"Plasma",
"canHitbox",
"h_getBlueSpeedMaxRunway"
]
},
{
"and": [
"canDodgeWhileShooting",
"Charge",
"Ice",
"Wave",
"Spazer",
{
"heatFrames": 1080
}
]
},
{
"and": [
{
"enemyKill": {
"enemies": [
[
"Dessgeega",
"Dessgeega",
"Dessgeega",
"Multiviola",
"Multiviola"
]
],
"explicitWeapons": [
"Missile"
]
}
},
{
"heatFrames": 480
}
]
},
{
"and": [
{
"enemyKill": {
"enemies": [
[
"Dessgeega",
"Dessgeega",
"Dessgeega",
"Multiviola",
"Multiviola"
]
],
"explicitWeapons": [
"Super"
]
}
},
{
"heatFrames": 380
}
]
},
{
"and": [
"ScrewAttack",
{
"heatFrames": 230
}
]
}
]
}
{
"or": [
"h_heatedCrystalFlashForReserveEnergy",
{
"and": [
"h_heatProof",
"h_RModeCanRefillReserves",
{
"resourceMissingAtMost": [
{
"type": "Missile",
"count": 0
}
]
},
{
"partialRefill": {
"type": "ReserveEnergy",
"limit": 20
}
}
]
}
]
}
"h_shinechargeMaxRunway"
{
"autoReserveTrigger": {
"maxReserveEnergy": 95
}
}
"canRModeSparkInterrupt"Clears obstacles: C, E, F Dev note: FIXME: Room needs movement/heatframe counts to enter the Multiviola boxes from below and return. |
From: 3
Middle Right Door
To: 7
Middle Right Door With Bottom Kihunter Cleared
Immediately move left to the end of the runway to prevent the Kihunter from descending. Use Plasma to run or jump through the Kihunter. Requires: "h_PlasmaHitbox"
"canTrickyJump"
{
"heatFrames": 10
}
{
"or": [
"canInsaneJump",
{
"heatFrames": 60
}
]
} |
From: 5
Top Junction Between Doors
To: 7
Middle Right Door With Bottom Kihunter Cleared
Use Plasma to run through Kihunters instead of waiting. Requires: "canDash"
"canHitbox"
"Plasma"
{
"or": [
"canDownBack",
{
"and": [
"canCarefulJump",
{
"heatFrames": 50
}
]
},
{
"heatFrames": 130
}
]
}
{
"heatFrames": 410
} |
From: 2
Bottom Left Door
To: 4
Junction Above Bomb Blocks


Jump with some run speed to place the power bomb high enough to break the bomb blocks. During the explosion, jump through the left wall pirate and precisely walljump to reach the upper area. Requires: {
"notable": "New Route with HiJump, Speed, and PowerBombs"
}
"HiJump"
"canSpeedyJump"
"canPreciseWallJump"
"canTrickyDodgeEnemies"
"h_usePowerBomb"
"canTrivialMidAirMorph"
"canHitbox"
{
"heatFrames": 360
}
{
"or": [
"h_heatResistant",
"canPauseAbuse",
{
"resourceCapacity": [
{
"type": "RegularEnergy",
"count": 149
}
]
}
]
}Clears obstacles: A Dev note: With Reserves only, canPauseAbuse is used as a proxy for pause abuse or optimal reserve management and character movement. |
From: 2
Bottom Left Door
To: 4
Junction Above Bomb Blocks
Avoid the bottom Pirates and jump high enough to break the bomb blocks with a power bomb. During the explosion, climb the right wall passing through any Pirates and use a movement item to reach the top. Requires: {
"notable": "Power Bombs and a Jump Assist"
}
"canDash"
"canHitbox"
"h_usePowerBomb"
"canTrivialMidAirMorph"
{
"or": [
{
"and": [
"SpaceJump",
"canPreciseWallJump",
{
"heatFrames": 490
}
]
},
{
"and": [
"HiJump",
"canSpeedyJump",
"SpaceJump",
{
"heatFrames": 420
}
]
},
{
"and": [
"canSpringwall",
{
"heatFrames": 490
}
]
},
{
"and": [
"HiJump",
"canPreciseWallJump",
"canInsaneJump",
{
"heatFrames": 470
}
]
},
{
"and": [
"HiJump",
"canSpeedyJump",
"canTrickySpringBallJump",
"canInsaneJump",
{
"heatFrames": 410
}
]
},
{
"and": [
"HiJump",
"SpaceJump",
"canInsaneJump",
{
"heatFrames": 600
}
]
}
]
}
{
"or": [
"h_heatResistant",
"canPauseAbuse",
{
"resourceCapacity": [
{
"type": "RegularEnergy",
"count": 149
}
]
}
]
}Clears obstacles: A Dev note: With Reserves only, canPauseAbuse is used as a proxy for pause abuse or optimal reserve management and character movement. |
From: 3
Top Right Door
To: 2
Bottom Left Door
Get to the bomb blocks while morphed, use a Power Bomb, then exit G-mode and drop to the bottom of the room. It is possible to go through the top pirate while it is being hit by a Power Bomb explosion, otherwise it is possible to jump over it with Morph or Spring Ball. With Bombs, it is possible but tricky to IBJ over the pirate or Bomb it many times to kill it without it placing any of its stationary, invisible lasers. Note that the pirate will not turn towards Samus and place a laser if it is moving its head back and forth. Entrance condition: {
"comeInWithGMode": {
"mode": "any",
"morphed": true
}
}Requires: "h_heatedGMode"
"h_artificialMorphPowerBomb"
{
"or": [
{
"and": [
"h_artificialMorphPowerBomb",
"canHitbox"
]
},
"canLateralMidAirMorph",
"h_artificialMorphSpringBall",
{
"and": [
"canTrickyGMode",
"h_artificialMorphIBJ"
]
},
{
"and": [
"Morph",
{
"or": [
"Charge",
{
"ammo": {
"type": "Super",
"count": 3
}
},
{
"ammo": {
"type": "Missile",
"count": 9
}
},
{
"enemyDamage": {
"enemy": "Yellow Space Pirate (standing)",
"type": "contact",
"hits": 1
}
}
]
}
]
},
{
"and": [
"h_artificialMorphBombs",
{
"enemyDamage": {
"enemy": "Yellow Space Pirate (standing)",
"type": "contact",
"hits": 1
}
}
]
}
]
}
{
"heatFrames": 160
}Clears obstacles: A |
From: 3
Top Right Door
To: 5
Junction Below Top Pirate
Requires: "canDash"
"canHitbox"
{
"or": [
{
"and": [
"h_usePowerBomb",
{
"heatFrames": 175
}
]
},
{
"and": [
"canDodgeWhileShooting",
"Charge",
"Plasma",
{
"heatFrames": 125
}
]
}
]
} |
|
Requires: "canHitbox"
"h_usePowerBomb"
{
"heatFrames": 280
}Unlocks doors: {"nodeId":3,"types":["powerbomb"],"requires":[],"useImplicitRequires":false} |
|
Requires: "canHitbox"
"h_usePowerBomb"
{
"heatFrames": 180
}Unlocks doors: {"types":["powerbomb"],"requires":[],"useImplicitRequires":false} |
From: 1
Top Left Door
To: 4
Junction Above Bomb Block
Requires: "h_PlasmaHitbox"
"canDash"
{
"heatFrames": 480
}Dev note: FIXME: this includes waiting for the acid cycle (in case of needing to go right). Otherwise it could be done with 320 heat frames. |
From: 4
Junction Above Bomb Block
To: 1
Top Left Door

Wait for the Kihunters to move away from where Samus will jump up. This may mean Hitboxing through the middle Kihunter multiple times. Requires: "canDash"
"h_PlasmaHitbox"
"canTrickyDodgeEnemies"
{
"or": [
"canInsaneJump",
{
"enemyDamage": {
"enemy": "Kihunter (red)",
"type": "contact",
"hits": 1
}
}
]
}
{
"or": [
{
"and": [
"canWallJump",
{
"heatFrames": 410
}
]
},
{
"and": [
"h_crouchJumpDownGrab",
{
"heatFrames": 460
}
]
},
{
"and": [
"HiJump",
{
"heatFrames": 360
}
]
},
{
"and": [
"SpaceJump",
"canInsaneJump",
{
"heatFrames": 490
}
]
}
]
}
{
"or": [
"canBeLucky",
{
"heatFrames": 130
}
]
}
{
"or": [
"Wave",
{
"heatFrames": 40
}
]
}Clears obstacles: A, B |
|
Requires: "h_usePowerBomb"
{
"or": [
{
"enemyDamage": {
"enemy": "Dessgeega",
"type": "contact",
"hits": 1
}
},
{
"and": [
"canHitbox",
"canTrickyJump"
]
},
{
"haveBlueSuit": {}
}
]
}
{
"heatFrames": 240
}Clears obstacles: A, B |
From: 4
Junction Right of Power Bomb Blocks
To: 6
Junction Left of Power Bomb Blocks
Requires: {
"obstaclesCleared": [
"D"
]
}
"canDash"
"canDodgeWhileShooting"
"Morph"
{
"ammo": {
"type": "PowerBomb",
"count": 2
}
}
{
"or": [
"canHitbox",
{
"ammo": {
"type": "PowerBomb",
"count": 1
}
}
]
}
{
"heatFrames": 420
}Clears obstacles: A, B, C |
From: 4
Junction Right of Power Bomb Blocks
To: 7
Junction Left of Morph Tunnel
Requires: "canDash"
{
"heatFrames": 120
}
"canHitbox"
"Plasma" |
From: 4
Junction Right of Power Bomb Blocks
To: 7
Junction Left of Morph Tunnel
Requires: "canDash"
{
"heatFrames": 150
}
"canHitbox"
"h_usePowerBomb"Clears obstacles: A, B |
From: 5
Junction Below Shot Block
To: 4
Junction Right of Power Bomb Blocks
Requires: "Morph"
{
"ammo": {
"type": "PowerBomb",
"count": 5
}
}
"canDodgeWhileShooting"
{
"or": [
"canHitbox",
{
"enemyDamage": {
"enemy": "Dessgeega",
"type": "contact",
"hits": 1
}
}
]
}
{
"heatFrames": 1080
}Clears obstacles: A, B, C, D |
From: 6
Junction Left of Power Bomb Blocks
To: 5
Junction Below Shot Block
Requires: "h_usePowerBomb"
"canHitbox"
{
"heatFrames": 240
}Clears obstacles: A, B |
From: 7
Junction Left of Morph Tunnel
To: 4
Junction Right of Power Bomb Blocks
Let the right hopper jump twice towards Samus. At the start of the second jump, jump above where the ground Dessgeega can jump but below where the ceiling enemy can reach. Mockball below the third hopper. Requires: "Morph"
{
"or": [
"canTrickyJump",
{
"and": [
"h_usePowerBomb",
"canCarefulJump",
"canHitbox"
]
}
]
}
"canMockball"
{
"heatFrames": 210
}Dev note: FIXME: The Power Bomb from breaking the tunnel bomb block could be used for this strat. |
From: 2
Bottom Right Door
To: 3
Middle Right Door

Run with enough speed to jump (after the transition) to reach the far left ledge. Either kill or Kago through the Fish enemy. At slightly higher run speeds, Samus can jump from the bottom of the slope and avoid the fish. Entrance condition: {
"comeInRunning": {
"speedBooster": "yes",
"minTiles": 7
}
}Requires: "HiJump"
"canSpeedyJump"
"canCrossRoomJumpIntoWater"
"canTrickyJump"
"canDodgeWhileShooting"
{
"or": [
{
"ammo": {
"type": "Super",
"count": 1
}
},
{
"and": [
"Charge",
"Plasma"
]
},
{
"and": [
"Plasma",
"canHitbox"
]
},
{
"and": [
"canKago",
"canLateralMidAirMorph",
{
"or": [
{
"enemyDamage": {
"enemy": "Skultera",
"type": "contact",
"hits": 1
}
},
"h_pauseAbuseMinimalReserveRefill"
]
}
]
}
]
} |
|
Run with 7 tiles (no openend) of speed to jump (after the transition) to reach the far left ledge. Either kill or Kago through the Fish enemy. Entrance condition: {
"comeInRunning": {
"speedBooster": "yes",
"minTiles": 6.4375
}
}Requires: "canCrossRoomJumpIntoWater"
"canTrickyDashJump"
"canDodgeWhileShooting"
{
"or": [
{
"and": [
{
"ammo": {
"type": "Super",
"count": 1
}
},
"canDownGrab"
]
},
{
"and": [
"Charge",
"Plasma",
"canDownGrab"
]
},
{
"and": [
"Plasma",
"canHitbox",
"canDownGrab"
]
},
"canTrickyDodgeEnemies"
]
} |
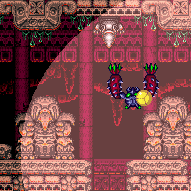
|
Group all of the Metroids by hitting the first Rinka with a Power Bomb. Once grouped, use two more Power Bombs to finish them off. Requires: {
"enemyKill": {
"enemies": [
[
"Metroid",
"Metroid",
"Metroid",
"Metroid"
]
],
"explicitWeapons": [
"PowerBomb"
]
}
}
"canMetroidAvoid"
"canHitbox"
{
"or": [
{
"ammo": {
"type": "PowerBomb",
"count": 1
}
},
"canInsaneJump",
{
"metroidFrames": 100
}
]
}Clears obstacles: A, B, f_KilledMetroidRoom1 Sets flags: f_KilledMetroidRoom1 |
From: 2
Bottom Door
To: 1
Top Left Door
Move to the left side of the lowest section and jump morph before placing the Power Bomb to kill all three Metroids. Then Kill all three Metroids with Power Bombs while avoiding damage. Requires: {
"notable": "Bottom Metroid Avoid"
}
{
"enemyKill": {
"enemies": [
[
"Metroid",
"Metroid",
"Metroid"
]
],
"explicitWeapons": [
"PowerBomb"
]
}
}
"canMetroidAvoid"
"canHitbox"
{
"or": [
"can4HighMidAirMorph",
"canInsaneJump"
]
}Clears obstacles: f_KilledMetroidRoom4 Sets flags: f_KilledMetroidRoom4 |
From: 1
Top Door
To: 2
Right Door
Entrance condition: {
"comeInShinecharged": {},
"comesThroughToilet": "any"
}Requires: {
"shineChargeFrames": 95
}
{
"or": [
{
"ammo": {
"type": "Super",
"count": 1
}
},
{
"and": [
"Plasma",
"Wave"
]
},
{
"and": [
"Plasma",
"canHitbox"
]
}
]
}
"canShinechargeMovementTricky"
{
"shinespark": {
"frames": 2,
"excessFrames": 0
}
}Exit condition: {
"leaveWithSpark": {}
}Unlocks doors: {"types":["ammo"],"requires":["never"]} |
From: 1
Left Door
To: 2
Right Door
IBJ or spring ball bomb jump to avoid the wall jump. Using a total of 3 Power Bombs will allow Samus to roll through the bottom four pirates. Entrance condition: {
"comeInWithGMode": {
"mode": "any",
"morphed": true
}
}Requires: {
"or": [
"h_artificialMorphIBJ",
"h_artificialMorphSpringBallBombJump"
]
}
"h_artificialMorphPowerBomb"
"h_artificialMorphPowerBomb"
"h_artificialMorphPowerBomb"
"canHitbox" |
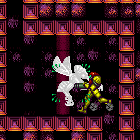
|
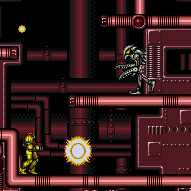
Safely kill the first pirate, then walk through the rest while taking damage or by using Plasma Beam. It is possible to get through the lower three pirates with a single hit while using i-frames to prevent a second hit. Either go below the pirates and use the camera to manipulate them to be closer together, or arm-pump or horizontal damage boost to get through them fast enough. Requires: {
"or": [
"HiJump",
"canWallJump",
"SpaceJump",
"canIBJ",
"canSpringBallJumpMidAir"
]
}
{
"or": [
{
"enemyDamage": {
"enemy": "Tourian Space Pirate (all)",
"type": "contact",
"hits": 3
}
},
{
"and": [
"Plasma",
"canHitbox"
]
},
{
"and": [
"canUseIFrames",
{
"enemyDamage": {
"enemy": "Tourian Space Pirate (all)",
"type": "contact",
"hits": 2
}
},
{
"or": [
"canCameraManip",
"canHorizontalDamageBoost"
]
},
"canTrickyJump"
]
}
]
} |
|
Run through the pirates while taking damage or by using Plasma Beam. It is possible to get through the lower three pirates with a single hit while using i-frames to prevent a second hit. Either wait above until the pirates are a bit closer together and then run through, or arm-pump or horizontal damage boost to get through them fast enough. Requires: {
"or": [
{
"enemyDamage": {
"enemy": "Tourian Space Pirate (all)",
"type": "contact",
"hits": 4
}
},
{
"and": [
"Plasma",
"canHitbox"
]
},
{
"and": [
"canUseIFrames",
{
"enemyDamage": {
"enemy": "Tourian Space Pirate (all)",
"type": "contact",
"hits": 3
}
},
{
"or": [
"canCameraManip",
"canHorizontalDamageBoost"
]
}
]
}
]
} |
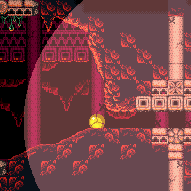
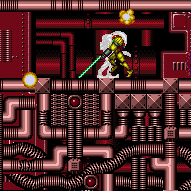
From: 3
Bottom of Shaft
To: 1
Left Door
Climbing the shaft with Space Jump is slower than other methods, so it is necessary to move quickly in order to minimize acid damage. With each Space Jump, release jump early rather than doing a full-height jump, in order to be able to Space Jump again more quickly. After reaching the top, fall down on the right side to land on the platform above the door. Then press against the left wall and pass through the last Pirate while firing a Plasma shot down to open the door; with precise timing, damage from the Pirate can be avoided by hitboxing through it. Hold left to land directly in the doorway. If done quickly enough, it is possible to avoid any acid damage. Requires: {
"notable": "Bootless Walljumpless Space Jump"
}
"canPreciseSpaceJump"
"canTrickyJump"
"Plasma"
{
"or": [
{
"enemyDamage": {
"enemy": "Tourian Space Pirate (all)",
"type": "contact",
"hits": 1
}
},
{
"and": [
"canHitbox",
"canInsaneJump"
]
}
]
}Exit condition: {
"leaveNormally": {}
}Unlocks doors: {"types":["ammo"],"requires":["never"]}Dev note: The leaveNormally exit condition is to prevent use of implicit door unlock strats, since unlocking the door would probably require some acid damage; FIXME: refine the door unlock requirements. FIXME: leave with runway could be ok here, though in most cases you could just reset the room, so it doesn't matter much. |