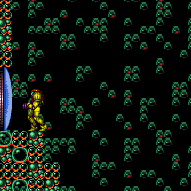
canSpringwall (Very Hard)

A mid-air Spring Ball jump that starts with a wall jump to gain more height. It often benefits from the momentum change when equipping Spring Ball while morphed and moving horizontally after a WallJump.
Dependencies: canWallJumpInstantMorph, canMidAirMorph, canDisableEquipment, canSpringBallJumpMidAir, canTrivialMidAirMorph, canTrickySpringBallJump
Strats ()
From: 2
Right Door
To: 3
Safe Block in the Middle of the Room


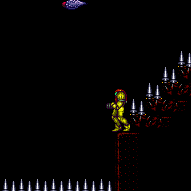
Crouch jump and Spring Ball near the peak of the jump to hit the side of the spikes and boost up onto them. This is also possible with a springwall, or from standing on the spikes to avoid the crouch jump. With a very precise spring ball jump, it can also be done without a crouch jump. Requires: {
"noBlueSuit": {}
}
{
"or": [
"h_trickySpringwall",
{
"and": [
"h_maxHeightSpringBallJump",
"canNeutralDamageBoost"
]
},
{
"and": [
"canInsaneJump",
"canTrickySpringBallJump",
"canNeutralDamageBoost"
]
},
{
"and": [
{
"spikeHits": 1
},
"canTrickySpringBallJump",
"canTrickyJump",
"canNeutralDamageBoost"
]
}
]
}
{
"spikeHits": 1
} |
From: 4
Small Ledge Below Left Door
To: 1
Left Door
Requires: "h_SpringwallOverSpikes"
{
"or": [
{
"spikeHits": 1
},
{
"and": [
"canDash",
"canInsaneJump"
]
}
]
}
{
"or": [
{
"noBlueSuit": {}
},
"canBlueSuitSpikeJump"
]
} |
From: 7
Junction (Bottom of Room)
To: 6
Junction (Above Bottom Rippers)
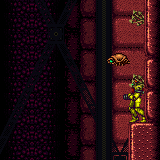
Requires: "canTrickySpringBallJump"
{
"or": [
"canConsecutiveWallJump",
"HiJump",
{
"and": [
"canTrickyJump",
"canLateralMidAirMorph",
"canResetFallSpeed",
{
"or": [
{
"ammo": {
"type": "PowerBomb",
"count": 1
}
},
{
"ammo": {
"type": "Super",
"count": 1
}
},
{
"enemyDamage": {
"enemy": "Ripper",
"type": "contact",
"hits": 1
}
},
"canTrickyDodgeEnemies"
]
}
]
},
"canSpringFling"
]
}
{
"or": [
"canTrickyJump",
"canLateralMidAirMorph",
"canSpringwall"
]
} |
|
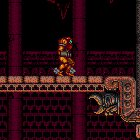
Kill the Rippers then wall jump up. Requires: {
"noBlueSuit": {}
}
"canConsecutiveWallJump"
"canPreciseWallJump"
"h_midAirShootUp"
{
"or": [
"canTrickyWallJump",
"canSpringwall",
"HiJump"
]
}
{
"obstaclesCleared": [
"B"
]
}Dev note: With these tech, it's not hard to get up |
|
Requires: "canSpringwall" |
|


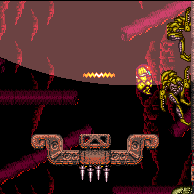
Wall jump off of the Upper-Left Namihe and then Spring Ball jump up and out of the Lava. Pausing early in order to get more horizontal distance by equiping Spring Ball may help. Entrance condition: {
"comeInWithGMode": {
"mode": "any",
"morphed": false
}
}Requires: {
"notable": "HiJump"
}
"Gravity"
"canSpringwall"
"HiJump"
"canUseEnemies"
{
"lavaFrames": 390
}
{
"or": [
{
"and": [
"canDash",
{
"disableEquipment": "SpeedBooster"
}
]
},
{
"lavaFrames": 150
}
]
}
"h_heatedGModeOpenDifferentDoor"Dev note: This strat is not useful unless Samus has lava proof but not heat proof. Otherwise, the non-G-mode variant can be used. FIXME: These lava frames are lenient, they are what it would take without Gravity (the non-G-mode variant also doesnt account for Gravity). |
|
Wall jump off of the upper-left Namihe and then Spring Ball jump up and out of the lava. Delay the pause until in position to perform the Spring Ball jump because lava physics will reduce Samus' horizontal momentum. It may help to also delay the Morph. Requires: {
"notable": "HiJump"
}
{
"or": [
"h_lavaProof",
"canSuitlessLavaDive"
]
}
"canSpringwall"
"HiJump"
"canUseEnemies"
{
"heatFrames": 195
}
{
"lavaFrames": 180
}Dev note: Works with or without Gravity This Springwall is easier than regular SpringWalls because the lava slows down the required inputs. |
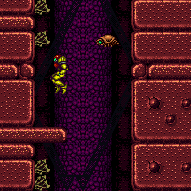
From: 4
Lava, Left Wall
To: 3
Above Lava Junction
Double springball jump out of a walljump starting from the top of the left wall Namihe. Requires: {
"notable": "HiJumpless Suitless Double Springball Jump"
}
"canSuitlessLavaDive"
"canUseEnemies"
"canDoubleSpringBallJumpMidAir"
"canSpringwall"
"canPreciseWallJump"
{
"heatFrames": 270
}
{
"gravitylessLavaFrames": 240
} |
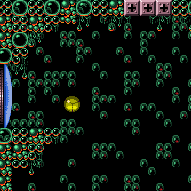
|


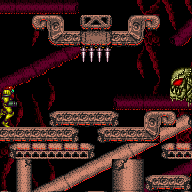
Carefully swing between the Rippers at the top of the room to the item. The last two swings are the hardest Morphing and unmorphing to reset Samus's fall speed can help give a bit more time to position the Rippers. It can help to Grapple the same Ripper again to get it in a better position. Position the third Ripper far to the right then fling to the fourth, which is far to the right and very close to the ceiling. Moving the fourth Ripper to the right a bit can also help in order to make the last fling less precise. Be careful not to fling directly into the ceiling, as it is easy to hit the uneven surface and fall. If Samus falls, it may be helpful to reset the room. Requires: {
"notable": "Indiana Jones Grapple (With Retries)"
}
"canUseEnemies"
"canPreciseGrapple"
"h_midAirShootUp"
{
"or": [
{
"and": [
"canInsaneJump",
"h_trickyToCarryFlashSuit"
]
},
{
"enemyDamage": {
"enemy": "Ripper 2 (green)",
"type": "contact",
"hits": 4
}
}
]
}
{
"or": [
{
"and": [
"HiJump",
"canSpringBallJumpMidAir"
]
},
{
"and": [
"canSpeedyJump",
"HiJump",
"canTrickyWallJump"
]
},
"h_trickySpringwall"
]
} |
|

Requires: "h_trickySpringwall" |
|
A particularly precise springwall. Aim the walljump at the bottom of the second sloped wall fixture, where it looks like you cant jump off of. Optimize pause timing, use an instant morph, and get a max height springball jump. A delayed wall jump helps. Requires: {
"notable": "Springwall"
}
"HiJump"
"h_trickySpringwall"
"canPreciseWallJump"
"can3HighWallMidAirMorph" |
|


Use a Crystal Flash to refill reserve energy. If Golden Torizo is alive, perform the Crystal Flash in the left corner of the room; otherwise it can be done near the door. Then use heat damage to trigger an R-mode forced standup near the crumble blocks with upward momentum, in order to clip up through them. Several different combinations of items and techniques can make this possible: 1) Space Jump, with a mid-air morph (not required but makes it easier), 2) HiJump and a mid-air Spring Ball jump, most easily by equipping both HiJump and SpringBall during the pause, 3) A walljump into Spring Ball jump, equipping Spring Ball soon after the wall jump into order to gain horizontal speed before the mid-air jump. 4) HiJump and Speedbooster, running and jumping into a mid-air morph, In every case, precise timing is needed to be in the correct location when reserves trigger, just below the crumbles but without bonking them. Having less upward momentum can provide more lenience for timing the forced standup clip, though if Samus' momentum is not enough to make it onto the ledge then a crumble jump may also be required. Entrance condition: {
"comeInWithRMode": {}
}Requires: {
"notable": "R-Mode Forced Standup Clip"
}
"canRModeStandupClip"
{
"or": [
{
"or": [
"f_DefeatedGoldenTorizo",
{
"obstaclesCleared": [
"f_DefeatedGoldenTorizo"
]
}
]
},
{
"heatFrames": 100
}
]
}
"h_heatedCrystalFlash"
{
"or": [
{
"and": [
"SpaceJump",
"can4HighMidAirMorph"
]
},
{
"and": [
"HiJump",
"canSpringBallJumpMidAir"
]
},
{
"and": [
"HiJump",
"canSpeedyJump",
"canMidAirMorph",
"canCrumbleJump"
]
},
{
"and": [
"h_trickySpringwall",
"canCrumbleJump"
]
}
]
}
{
"resourceCapacity": [
{
"type": "RegularEnergy",
"count": 99
}
]
}
{
"autoReserveTrigger": {}
}
{
"heatFrames": 100
}Clears obstacles: door_2 Dev note: FIXME: A variant of this strat could go to the item node instead of the door, possibly with slightly different heat frames at the end. FIXME: As an alternative to doing a Crystal Flash, Golden Torizo could be used as a farm, with canRiskPermanentLossOfAccess. |
|
Uses a Springwall to put a bomb on the left corner bomb block, then a second one to get in there. Then clears the rest of the bomb blocks normally. It winds up costing less heat frames than IBJ, if you fall. Requires: "h_useMorphBombs"
"h_heatedSpringwall"
{
"heatFrames": 630
} |
From: 1
Bottom Left Door
To: 3
Top Right Door
Enter the room in Direct G-mode, with the item uncollected. Shoot the Chozo ball to overload PLMs then climb the room. Entrance condition: {
"comeInWithGMode": {
"mode": "direct",
"morphed": false
}
}Requires: {
"itemNotCollectedAtNode": 4
}
"canRiskPermanentLossOfAccess"
{
"or": [
"SpaceJump",
"canSpringwall"
]
}
"h_heatedGModeOpenDifferentDoor" |
|
Entrance condition: {
"comeInWithGMode": {
"mode": "any",
"morphed": false
}
}Requires: {
"or": [
"SpaceJump",
"canSpringwall"
]
}
{
"haveBlueSuit": {}
}
"h_heatedGModeOpenDifferentDoor"Clears obstacles: A, B |
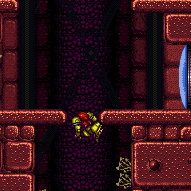
From: 2
Middle Right Door
To: 2
Middle Right Door
Use a wall jump into spring ball jump to break one of the bomb blocks above. Then land back in the doorway. Requires: "canSpringwall"
"h_useMorphBombs"
{
"heatFrames": 190
}Clears obstacles: A |
|
Use a blue suit to pass through the bomb blocks and exit G-mode above. Entrance condition: {
"comeInWithGMode": {
"mode": "any",
"morphed": false
}
}Requires: {
"haveBlueSuit": {}
}
{
"or": [
"SpaceJump",
"canSpringwall"
]
}
"h_heatedGModeOpenDifferentDoor"Clears obstacles: A |
|
Requires: {
"or": [
{
"obstaclesCleared": [
"A"
]
},
{
"haveBlueSuit": {}
}
]
}
"canSpringwall"
{
"heatFrames": 170
} |
|

Requires: {
"or": [
{
"obstaclesCleared": [
"A"
]
},
{
"haveBlueSuit": {}
}
]
}
"h_heatedSpringwall"
{
"heatFrames": 200
} |
From: 5
Junction Above Bottom Blocks
To: 5
Junction Above Bottom Blocks


Use a Springwall to get up to the bomb blocks, to break them with a bomb. Requires: "h_useMorphBombs"
"h_heatedSpringwall"
{
"heatFrames": 220
}Clears obstacles: A |
From: 4
Junction Below Bomb Blocks
To: 2
Top Right Door

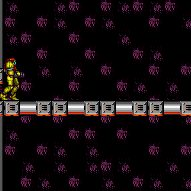
This is possible by jumping on the crumble blocks into a mid-air spring ball jump, or by avoiding them. The crumbles can be avoided by starting with either an air ball, a 3 tile high mid-air morph, or a low spring wall. These are generally safer, as bouncing on the crumble blocks with Spring Ball is trivial. Requires: {
"obstaclesCleared": [
"B"
]
}
"canDash"
"canTrickySpringBallJump"
{
"heatFrames": 250
}
{
"or": [
{
"and": [
"can4HighMidAirMorph",
"canSpringFling"
]
},
{
"and": [
"canLateralMidAirMorph",
"canTrickyJump"
]
},
"canCrumbleJump",
{
"and": [
"h_trickySpringwall",
"canPreciseWallJump"
]
}
]
} |
|
Hit the shot blocks at the top of the room with a Power Bomb or Wave before exiting G-mode to save some heat damage. Kill the pirate while it's in its head turning phase to prevent it from placing any stationary, invisible lasers. Entrance condition: {
"comeInWithGMode": {
"mode": "any",
"morphed": false
}
}Requires: "h_heatedGMode"
{
"or": [
"ScrewAttack",
{
"haveBlueSuit": {}
}
]
}
{
"or": [
"SpaceJump",
{
"and": [
"Charge",
"Plasma",
"canTrickyUseFrozenEnemies",
"HiJump",
{
"or": [
"canWallJump",
"canTrickyDodgeEnemies"
]
}
]
},
{
"and": [
{
"haveBlueSuit": {}
},
{
"or": [
{
"and": [
"HiJump",
"canPreciseWallJump"
]
},
"canSpringwall",
"canLongIBJ"
]
}
]
}
]
}
{
"or": [
"Wave",
"h_usePowerBomb",
{
"heatFrames": 40
}
]
}
{
"or": [
"HiJump",
"canWallJump",
{
"heatFrames": 20
}
]
}
{
"heatFrames": 120
}Clears obstacles: A |
|

It is possible to kill the pirate at the top of the room and use a pause abuse on G-mode exit to collect its drops. This requires getting somewhat lucky, as there is approximately a 70% chance that the pirate will give a large energy drop (small is not enough). To do this, climb the room very quickly, before shots are overloaded - HiJump or wall jumps help, but are not required. It is also possible to wait for the shots to be overloaded and then exit G-mode, pause abuse, and kill the pirate before the pause triggers, but this is generally harder. Entrance condition: {
"comeInWithGMode": {
"mode": "any",
"morphed": false
}
}Requires: {
"or": [
"ScrewAttack",
{
"haveBlueSuit": {}
}
]
}
{
"or": [
"SpaceJump",
{
"and": [
"Charge",
"Plasma",
"canTrickyUseFrozenEnemies",
"HiJump",
{
"or": [
"canWallJump",
"canTrickyDodgeEnemies"
]
}
]
},
{
"and": [
{
"haveBlueSuit": {}
},
{
"or": [
{
"and": [
"HiJump",
"canPreciseWallJump"
]
},
"canSpringwall",
"canLongIBJ"
]
}
]
}
]
}
{
"or": [
"h_heatedGModeOpenDifferentDoor",
{
"and": [
"h_heatedGModePauseAbuse",
"canInsaneJump",
"canComplexGMode"
]
}
]
}Clears obstacles: A |
From: 2
Bottom Left Door
To: 4
Junction Above Bomb Blocks
Avoid the bottom Pirates and jump high enough to break the bomb blocks with a power bomb. During the explosion, climb the right wall passing through any Pirates and use a movement item to reach the top. Requires: {
"notable": "Power Bombs and a Jump Assist"
}
"canDash"
"canHitbox"
"h_usePowerBomb"
"canTrivialMidAirMorph"
{
"or": [
{
"and": [
"SpaceJump",
"canPreciseWallJump",
{
"heatFrames": 490
}
]
},
{
"and": [
"HiJump",
"canSpeedyJump",
"SpaceJump",
{
"heatFrames": 420
}
]
},
{
"and": [
"canSpringwall",
{
"heatFrames": 490
}
]
},
{
"and": [
"HiJump",
"canPreciseWallJump",
"canInsaneJump",
{
"heatFrames": 470
}
]
},
{
"and": [
"HiJump",
"canSpeedyJump",
"canTrickySpringBallJump",
"canInsaneJump",
{
"heatFrames": 410
}
]
},
{
"and": [
"HiJump",
"SpaceJump",
"canInsaneJump",
{
"heatFrames": 600
}
]
}
]
}
{
"or": [
"h_heatResistant",
"canPauseAbuse",
{
"resourceCapacity": [
{
"type": "RegularEnergy",
"count": 149
}
]
}
]
}Clears obstacles: A Dev note: With Reserves only, canPauseAbuse is used as a proxy for pause abuse or optimal reserve management and character movement. |
From: 6
Bottom Platform Junction With Pirates Killed
To: 4
Junction Above Bomb Blocks

Requires: "h_heatedSpringwall"
"canConsecutiveWallJump"
{
"heatFrames": 220
}
{
"or": [
{
"obstaclesCleared": [
"A"
]
},
{
"haveBlueSuit": {}
}
]
}Clears obstacles: A |
From: 6
Bottom Platform Junction With Pirates Killed
To: 6
Bottom Platform Junction With Pirates Killed
Requires: "canMidAirMorph"
"h_useMorphBombs"
{
"or": [
{
"and": [
"HiJump",
"SpaceJump",
"canConsecutiveWallJump",
{
"heatFrames": 440
}
]
},
{
"and": [
"SpaceJump",
"HiJump",
{
"heatFrames": 540
}
]
},
{
"and": [
"SpaceJump",
"canConsecutiveWallJump",
{
"heatFrames": 520
}
]
},
{
"and": [
"SpaceJump",
{
"heatFrames": 730
}
]
},
{
"and": [
"h_heatedSpringwall",
{
"heatFrames": 480
}
]
},
{
"and": [
"canLongIBJ",
"canBePatient",
{
"heatFrames": 4000
}
]
},
{
"and": [
"canLongIBJ",
"canJumpIntoIBJ",
{
"heatFrames": 2500
}
]
},
{
"and": [
"canJumpIntoIBJ",
"canDoubleBombJump",
{
"heatFrames": 1400
}
]
}
]
}Clears obstacles: A |
From: 6
Bottom Platform Junction With Pirates Killed
To: 6
Bottom Platform Junction With Pirates Killed
First use HiJump and wall jumps to break the leftmost set of bomb blocks on the bottom layer. Then use one of many movement options to break the next bomb blocks above. Requires: "canMidAirMorph"
"h_useMorphBombs"
"HiJump"
"canWallJump"
{
"heatFrames": 200
}
{
"or": [
{
"and": [
"SpaceJump",
{
"heatFrames": 235
}
]
},
{
"and": [
"h_heatedSpringwall",
{
"heatFrames": 210
}
]
},
{
"and": [
"canLongIBJ",
{
"heatFrames": 2000
}
]
},
{
"and": [
"canJumpIntoIBJ",
{
"heatFrames": 1250
}
]
},
{
"and": [
"canJumpIntoIBJ",
"canDoubleBombJump",
{
"heatFrames": 630
}
]
}
]
}Clears obstacles: A |
|
Requires: "canSpringwall" "canResetFallSpeed" |
|
Requires: "canSpringwall" "canSpringFling" Clears obstacles: B |
|
It is possible to springwall to grab the item, and then morph and reset fall speed again after entering the water suitless to land safely on the left ledge. Requires: "canSpringwall" "canResetFallSpeed" |
|

Entrance condition: {
"comeInNormally": {}
}Requires: "Gravity" "canSpringwall" Clears obstacles: door_1 Dev note: The turret cannot be broken. |
|
Requires: {
"resetRoom": {
"nodes": [
1
]
}
}
{
"or": [
{
"and": [
"Gravity",
{
"or": [
{
"and": [
"HiJump",
"canSpeedyJump",
"canTrickyJump",
{
"cycleFrames": 300
}
]
},
{
"and": [
"HiJump",
"canWallJump",
{
"cycleFrames": 310
}
]
},
{
"and": [
"SpaceJump",
{
"cycleFrames": 360
}
]
},
{
"and": [
"canTrickyWallJump",
{
"cycleFrames": 380
}
]
},
{
"and": [
"canSpringBallJumpMidAir",
{
"or": [
"HiJump",
"canSpringwall",
{
"and": [
"canTrickySpringBallJump",
"canTrickyJump"
]
}
]
},
{
"cycleFrames": 340
},
"h_doubleEquipmentScreenCycleFrames"
]
},
{
"and": [
"canDoubleBombJump",
{
"cycleFrames": 830
}
]
}
]
}
]
},
{
"and": [
"canSuitlessMaridia",
{
"or": [
{
"and": [
"HiJump",
"canTrickyJump",
"canMidairWiggle",
"canTrickyWallJump",
{
"cycleFrames": 360
}
]
},
{
"and": [
"HiJump",
"canSpaceJumpWaterBounce",
"canWallJump",
{
"cycleFrames": 390
}
]
},
{
"and": [
"HiJump",
"canSpaceJumpWaterEscape",
{
"cycleFrames": 430
}
]
},
{
"and": [
{
"notable": "Suitless Bootless Space Jump"
},
"canSpaceJumpWaterBounce",
"canWallJump",
{
"cycleFrames": 440
}
]
},
{
"and": [
"HiJump",
"canTrickySpringBallJump",
{
"or": [
"canTrickyJump",
"canFlatleyJump"
]
},
{
"cycleFrames": 360
},
"h_doubleEquipmentScreenCycleFrames"
]
}
]
}
]
}
]
}Resets obstacles: R-Mode Farm cycle drops: 1 Cacatac |
From: 3
Junction Left of Morph Tunnel
To: 1
Left Door
Requires: "Gravity"
{
"or": [
"canSpringwall",
{
"and": [
"HiJump",
"canSpringBallJumpMidAir"
]
}
]
} |
|
Requires: {
"resetRoom": {
"nodes": [
1
]
}
}
{
"or": [
"canDash",
{
"cycleFrames": 100
}
]
}
{
"or": [
{
"and": [
"HiJump",
"SpaceJump",
{
"cycleFrames": 930
}
]
},
{
"and": [
"HiJump",
"canTrickyWallJump",
{
"cycleFrames": 960
}
]
},
{
"and": [
"SpaceJump",
{
"cycleFrames": 1220
}
]
},
{
"and": [
"canSpringwall",
{
"cycleFrames": 1035
},
"h_doubleEquipmentScreenCycleFrames"
]
},
{
"and": [
"HiJump",
"canSpringBallJumpMidAir",
{
"cycleFrames": 910
},
"h_doubleEquipmentScreenCycleFrames"
]
},
{
"and": [
"canDoubleBombJump",
{
"or": [
"canWallJump",
"h_crouchJumpDownGrab"
]
},
{
"cycleFrames": 1410
}
]
},
{
"and": [
"canDoubleBombJump",
{
"cycleFrames": 1560
}
]
}
]
}
{
"or": [
"ScrewAttack",
{
"haveBlueSuit": {}
},
"Plasma"
]
}Resets obstacles: A, B, C Farm cycle drops: 4 Pink Space Pirate (standing), 2 Pink Space Pirate (wall) Dev note: FIXME: Add option to kill the Pirates with speed echoes, and possibly to get back up with a shinespark. |
|
Requires: "canSpringwall"
{
"or": [
"canDodgeWhileShooting",
{
"obstaclesCleared": [
"B"
]
}
]
} |