canControlShinesparkEnd (Expert+)
The ability to control where a shinespark ends, by starting with a certain amount of energy.
Dependencies: canShinespark
Strats ()
From: 1
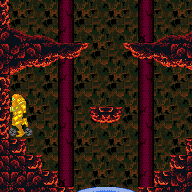
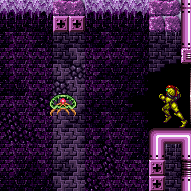
Right Door
To: 3
Dry Platform Junction


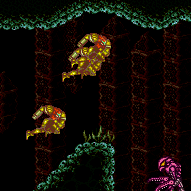
Requires a precise shinespark end or Gravity to destroy the speedblocks without killing the Skultera Entrance condition: {
"comeInWithRMode": {}
}Requires: "h_RModeCanRefillReserves"
{
"resourceMissingAtMost": [
{
"type": "PowerBomb",
"count": 0
}
]
}
{
"or": [
"Gravity",
{
"and": [
{
"or": [
"canPreciseWallJump",
"SpaceJump",
{
"and": [
"Ice",
{
"ammo": {
"type": "Super",
"count": 1
}
}
]
}
]
},
"canControlShinesparkEnd",
{
"canShineCharge": {
"usedTiles": 31,
"openEnd": 1
}
},
{
"shinespark": {
"frames": 30
}
}
]
}
]
}
{
"canShineCharge": {
"usedTiles": 31,
"openEnd": 1
}
}
"h_RModeKnockbackSpark" |
|
Spark left through the speed blocks, then run to the right and back to get speed to go through the rest. If performing the spark with low energy, there is a risk of ending the spark above the spikes or in front of the Pirate; to be safe, assuming Samus has heat protection and begins sparking about 3 tiles from the Speed blocks, start with between 72 and 87 energy or at least 105 energy; with a buffered crumble jump to the right, up to 93 energy can work. Entrance condition: {
"comeInShinecharged": {},
"comesThroughToilet": "any"
}Requires: {
"shineChargeFrames": 35
}
{
"notable": "Reverse Spark"
}
"canShinechargeMovement"
"canHorizontalShinespark"
{
"or": [
{
"shinespark": {
"frames": 87,
"excessFrames": 10
}
},
{
"and": [
"h_heatProof",
"canControlShinesparkEnd",
{
"shinespark": {
"frames": 87,
"excessFrames": 44
}
}
]
}
]
}
{
"heatFrames": 675
}
{
"or": [
"h_speedDash",
{
"and": [
"h_speedButSlow",
{
"heatFrames": 270
}
]
}
]
}
"h_getBlueSpeedMaxRunway"
{
"or": [
"canSpeedball",
{
"heatFrames": 15
}
]
}Clears obstacles: A Dev note: FIXME: This should be split into 3->9 and 9->2 strats. |
|


Enter the room with between 93 and 102 energy and quickly mid-air spark to the left through the Speed blocks. After the shinespark ends, run left and press pause before reaching zero energy, tanking the Pirate hit while at zero energy. Refill some energy (at least 11), and continue running to the left, using i-frames to pass through the next Pirate. Continue to pause abuse several more times. Arm pumping may be used but is not required and has little benefit; in any case, arm pumping should not be used until beginning to run through the Speed blocks, otherwise Samus will not obtain blue speed in time and will bonk into them. Entrance condition: {
"comeInShinecharged": {},
"comesThroughToilet": "any"
}Requires: {
"shineChargeFrames": 35
}
{
"notable": "Reverse Spark With Pause Abuse"
}
"canShinechargeMovementTricky"
"canTrickyJump"
"canControlShinesparkEnd"
"canPauseAbuse"
{
"resourceAvailable": [
{
"type": "RegularEnergy",
"count": 93
}
]
}
{
"shinespark": {
"frames": 0,
"excessFrames": 0
}
}
{
"resourceConsumed": [
{
"type": "ReserveEnergy",
"count": 61
}
]
}
"h_speedDash"
"h_getBlueSpeedMaxRunway"
{
"or": [
"canPreciseReserveRefill",
{
"resourceConsumed": [
{
"type": "ReserveEnergy",
"count": 15
}
]
}
]
}
{
"resourceAtMost": [
{
"type": "RegularEnergy",
"count": 1
}
]
}
{
"heatFrames": 0
}Clears obstacles: A Dev note: The zero shinespark requirement is to satisfy the tests, by marking that the shinecharge is used; the actual shinespark energy usage is accounted for in the resourceConsumed. This could possibly be rewritten to express the energy usage in the normal way. We don't include a `h_ShinesparksCostEnergy` requirement here, because even if shinesparks don't cost energy, it is still possible to use heat damage to make the shinespark stop in the correct place. FIXME: the regular energy required could be reduced in that case. FIXME: This should be split into 3->9 and 9->2 strats. FIXME: A h_speedButSlow variant could be added. |
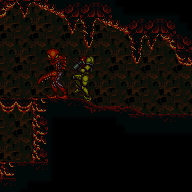
From: 4
Bottom Right Door
To: 2
Far Left Door

Spark left through the speed blocks, then run to the right and back to get speed to go through the rest. If performing the spark with low energy, there is a risk of ending the spark above the spikes or in front of the Pirate; to be safe, assuming Samus has heat protection, begin the shinespark at the Speed blocks with between 68 and 84 energy, or at least 101 energy; with a buffered crumble jump to the right, up to 89 energy can work. Entrance condition: {
"comeInShinecharged": {}
}Requires: {
"shineChargeFrames": 85
}
{
"notable": "Reverse Spark"
}
"canShinechargeMovement"
"canHorizontalShinespark"
{
"or": [
{
"shinespark": {
"frames": 84,
"excessFrames": 10
}
},
{
"and": [
"h_heatProof",
"canControlShinesparkEnd",
{
"shinespark": {
"frames": 84,
"excessFrames": 45
}
}
]
}
]
}
{
"heatFrames": 715
}
{
"or": [
"h_speedDash",
{
"and": [
"h_speedButSlow",
{
"heatFrames": 270
}
]
}
]
}
"h_getBlueSpeedMaxRunway"
{
"or": [
"canSpeedball",
{
"heatFrames": 15
}
]
}Clears obstacles: A |
|


Spark left through the speed blocks, then run to the right and back to get speed to go through the rest. If performing the spark with low energy, there is a risk of ending the spark above the spikes or in front of the Pirate; to be safe, assuming Samus has heat protection, begin the shinespark at the door (in either this or the other room) with between 81 and 96 energy, or at least 113 energy; with a buffered crumble jump to the right, up to 102 energy can work. Entrance condition: {
"comeInWithSpark": {
"position": "bottom"
}
}Requires: {
"notable": "Reverse Spark"
}
{
"or": [
{
"shinespark": {
"frames": 94,
"excessFrames": 10
}
},
{
"and": [
"h_heatProof",
"canControlShinesparkEnd",
{
"shinespark": {
"frames": 94,
"excessFrames": 42
}
}
]
}
]
}
"h_getBlueSpeedMaxRunway"
{
"heatFrames": 650
}
{
"or": [
"h_speedDash",
{
"and": [
"h_speedButSlow",
{
"heatFrames": 270
}
]
}
]
}Clears obstacles: A Dev note: FIXME: This should be split into 4->9 and 9->2 strats. |
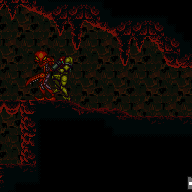
From: 4
Bottom Right Door
To: 2
Far Left Door
Start a shinespark on the other side of the door with between 94 and 103 energy. After the shinespark ends, run left and press pause before reaching zero energy, tanking the Pirate hit while at zero energy. Refill some energy (at least 11), and continue running to the left, using i-frames to pass through the next Pirate. Continue to pause abuse several more times. Arm pumping may be used but is not required and has little benefit; in any case, arm pumping should not be used until beginning to run through the Speed blocks, otherwise Samus will not obtain blue speed in time and will bonk into them. Entrance condition: {
"comeInWithSpark": {
"position": "bottom"
}
}Requires: {
"notable": "Reverse Spark With Pause Abuse"
}
"canShinechargeMovementTricky"
"canTrickyJump"
"canControlShinesparkEnd"
"canPauseAbuse"
{
"resourceAvailable": [
{
"type": "RegularEnergy",
"count": 94
}
]
}
{
"shinespark": {
"frames": 0,
"excessFrames": 0
}
}
{
"resourceConsumed": [
{
"type": "ReserveEnergy",
"count": 61
}
]
}
"h_speedDash"
"h_getBlueSpeedMaxRunway"
{
"or": [
"canPreciseReserveRefill",
{
"resourceConsumed": [
{
"type": "ReserveEnergy",
"count": 15
}
]
}
]
}
{
"resourceAtMost": [
{
"type": "RegularEnergy",
"count": 1
}
]
}
{
"heatFrames": 0
}Clears obstacles: A Dev note: The zero shinespark requirement is to satisfy the tests, by marking that the shinecharge is used; the actual shinespark energy usage is accounted for in the resourceConsumed. This could possibly be rewritten to express the energy usage in the normal way. We don't include a `h_ShinesparksCostEnergy` requirement here, because even if shinesparks don't cost energy, it is still possible to use heat damage to make the shinespark stop in the correct place. FIXME: the regular energy required could be reduced in that case. FIXME: This should be split into 4->9 and 9->2 strats. FIXME: A h_speedButSlow variant could be added. |
|


Use a stored spark (flash suit or blue suit) to spark left through the Speed blocks. If Speed Booster is available, run to the right and back to get blue speed to go through the rest of the Speed blocks. Otherwise use Morph with either Spring Ball, Bombs, or Power Bombs to navigate above them. If performing the spark with low energy, there is a risk of ending the spark above the spikes or in front of the Pirate; to be safe, assuming Samus has heat protection, begin the shinespark at the door (in either this or the other room) with between 81 and 96 energy, or at least 113 energy; with a buffered crumble jump to the right, up to 102 energy can work. Requires: {
"notable": "Reverse Spark"
}
"h_storedSpark"
{
"or": [
{
"shinespark": {
"frames": 94,
"excessFrames": 10
}
},
{
"and": [
"h_heatProof",
"canControlShinesparkEnd",
{
"shinespark": {
"frames": 84,
"excessFrames": 45
}
}
]
}
]
}
{
"or": [
{
"and": [
"h_getBlueSpeedMaxRunway",
{
"heatFrames": 650
},
{
"or": [
"h_speedDash",
{
"and": [
"h_speedButSlow",
{
"heatFrames": 270
}
]
}
]
}
]
},
{
"and": [
"h_useSpringBall",
"canTrickyDodgeEnemies",
{
"heatFrames": 1120
}
]
},
{
"and": [
"h_bombThings",
"canTrickyDodgeEnemies",
{
"heatFrames": 1140
}
]
}
]
}Clears obstacles: A Dev note: FIXME: This should be split into 4->9 and 9->2 strats. |
|


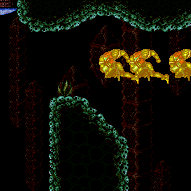
Either jump over a Cacatac or tank a spike hit. Perform a mid-air spark through the speed blocks. Then run to the right and back to get speed to go through the rest. If performing the spark with low energy, there is a risk of ending the spark above the spikes or in front of the Pirate; to be safe, assuming Samus has heat protection, begin the shinespark with between 73 and 88 energy, or at least 106 energy; with a buffered crumble jump to the right, up to 94 energy can work. Entrance condition: {
"comeInShinecharging": {
"length": 5,
"openEnd": 1
}
}Requires: {
"notable": "Reverse Spark"
}
"canShinechargeMovementTricky"
"canTrickyJump"
{
"or": [
{
"enemyDamage": {
"enemy": "Cacatac",
"type": "spike",
"hits": 1
}
},
"canBePatient"
]
}
{
"or": [
{
"shinespark": {
"frames": 88,
"excessFrames": 11
}
},
{
"and": [
"h_heatProof",
"canControlShinesparkEnd",
{
"shinespark": {
"frames": 88,
"excessFrames": 44
}
}
]
}
]
}
{
"heatFrames": 825
}
{
"or": [
"h_speedDash",
{
"and": [
"h_speedButSlow",
{
"heatFrames": 270
}
]
}
]
}
"h_getBlueSpeedMaxRunway"
{
"or": [
"canSpeedball",
{
"heatFrames": 15
}
]
}Clears obstacles: A Dev note: The canBePatient represents retrying until RNG works out to be able to jump over one of the Cacatacs without taking a hit. There is a possibility of getting a lucky drop from one of the two Pirates; but since it is low probability, we don't model it. The speedball exit is technically not a valid way to leave normally (e.g. in case the next room is heated and Samus needs to jump); but if necessary, it is possible to unmorph near the transition. FIXME: This should be split into 5->9 and 9->2 strats. |
From: 5
Top Right Door
To: 2
Far Left Door
Either jump over a Cacatac, tank a spike hit, or farm it if possible. While preparing to spark left through the speed blocks, press pause so that the pause hits during the shinespark wind-up Using reserves, try to refill to exactly 84 energy, the minimum amount needed to reliably break through the Speed blocks (assuming no heat protection). Hold jump and left while unpausing, to buffer activating the horizontal shinespark. After the shinespark ends, run left and press pause before reaching zero energy, tanking the Pirate hit while at zero energy. Refill to between about 11 and 13 energy, and continue running to the left, using i-frames to pass through the next Pirate. Continue to pause abuse 4 more times, trying to refill to between 11 and 13 energy each time except for the last. Arm pumping may be used but is not required and has little benefit; in any case, arm pumping should not be used until beginning to run through the Speed blocks, otherwise Samus will not obtain blue speed in time and will bonk into them. Entrance condition: {
"comeInShinecharging": {
"length": 5,
"openEnd": 1
}
}Requires: {
"notable": "Reverse Spark With Pause Abuse"
}
"canShinechargeMovementTricky"
"canTrickyJump"
"canControlShinesparkEnd"
"canPauseAbuse"
{
"resourceAvailable": [
{
"type": "RegularEnergy",
"count": 99
}
]
}
{
"shinespark": {
"frames": 0,
"excessFrames": 0
}
}
{
"resourceConsumed": [
{
"type": "ReserveEnergy",
"count": 80
}
]
}
"h_speedDash"
"h_getBlueSpeedMaxRunway"
{
"or": [
{
"resourceConsumed": [
{
"type": "ReserveEnergy",
"count": 20
}
]
},
{
"and": [
{
"resourceMissingAtMost": [
{
"type": "Super",
"count": 0
}
]
},
{
"or": [
{
"ammo": {
"type": "Missile",
"count": 1
}
},
"Grapple",
"Plasma",
{
"and": [
"Wave",
"Spazer"
]
}
]
}
]
}
]
}
{
"or": [
"canPreciseReserveRefill",
{
"resourceConsumed": [
{
"type": "ReserveEnergy",
"count": 15
}
]
}
]
}
{
"resourceAtMost": [
{
"type": "RegularEnergy",
"count": 1
}
]
}
{
"heatFrames": 0
}Clears obstacles: A Dev note: The zero shinespark requirement is to satisfy the tests, by marking that the shinecharge is used; the actual shinespark energy usage is accounted for in the resourceConsumed. This could possibly be rewritten to express the energy usage in the normal way. We don't include a `h_ShinesparksCostEnergy` requirement here, because even if shinesparks don't cost energy, it is still possible to use heat damage to make the shinespark stop in the correct place. FIXME: the regular energy required could be reduced in that case. FIXME: This should be split into 5->9 and 9->2 strats. FIXME: A h_speedButSlow variant could be added. |
|

Entrance condition: {
"comeInShinecharged": {}
}Requires: "canHorizontalMidairShinespark"
{
"shineChargeFrames": 65
}
{
"heatFrames": 135
}
{
"or": [
{
"and": [
{
"shinespark": {
"frames": 67,
"excessFrames": 5
}
},
{
"heatFrames": 105
}
]
},
{
"and": [
{
"shinespark": {
"frames": 67,
"excessFrames": 16
}
},
{
"or": [
{
"and": [
"canControlShinesparkEnd",
{
"or": [
"canInsaneJump",
{
"and": [
"canTrickyJump",
"canWallJump"
]
}
]
}
]
},
{
"and": [
{
"acidFrames": 10
},
{
"heatFrames": 20
},
{
"or": [
"HiJump",
"canWallJump"
]
}
]
}
]
},
{
"heatFrames": 200
}
]
}
]
}Unlocks doors: {"types":["missiles"],"requires":[{"heatFrames":50}]}
{"types":["super"],"requires":[]}
{"types":["powerbomb"],"requires":[{"heatFrames":110}]}Dev note: This assumes sparking near the pillars, since sparking near the door is already covered by the comeInWithSpark strat. 5 excess frames is the maximum for which it is still be possible to reach the door without running out of energy, in the case where the shinespark ends at 29 energy and Samus has no heat protection (or reserves to refill from). The alternative with 16 excess frames is mainly useful in the heat-proof case. |
|
Entrance condition: {
"comeInShinecharging": {
"length": 3,
"openEnd": 0
}
}Requires: "canHorizontalMidairShinespark"
{
"or": [
{
"and": [
{
"heatFrames": 105
},
{
"shinespark": {
"frames": 67,
"excessFrames": 5
}
},
{
"heatFrames": 105
}
]
},
{
"and": [
{
"heatFrames": 165
},
{
"shinespark": {
"frames": 67,
"excessFrames": 16
}
},
{
"or": [
{
"and": [
"canControlShinesparkEnd",
{
"or": [
"canInsaneJump",
{
"and": [
"canTrickyJump",
"canWallJump"
]
}
]
}
]
},
{
"and": [
{
"acidFrames": 10
},
{
"heatFrames": 20
},
{
"or": [
"HiJump",
"canWallJump"
]
}
]
}
]
},
{
"heatFrames": 200
}
]
}
]
}Unlocks doors: {"types":["missiles"],"requires":[{"heatFrames":50}]}
{"types":["super"],"requires":[]}
{"types":["powerbomb"],"requires":[{"heatFrames":110}]}Dev note: 5 excess frames is the maximum for which it is still be possible to reach the door without running out of energy, in the case where the shinespark ends at 29 energy and Samus has no heat protection (or reserves to refill from). The alternative with 16 excess frames is mainly useful in the heat-proof case. |
From: 2
Bottom Right Door
To: 6
Middle Junction Near Top Left Pirate
Reduce Samus' run speed with a stutter or late dash tap in order to complete the shinecharge in time. With low energy, shinespark diagonally to the middle ledge on the left. Entrance condition: {
"comeInRunning": {
"speedBooster": "yes",
"minTiles": 4.4375
}
}Requires: "canWaterShineCharge"
{
"canShineCharge": {
"usedTiles": 23,
"openEnd": 2
}
}
{
"or": [
{
"shinespark": {
"frames": 43,
"excessFrames": 26
}
},
{
"and": [
"canMidairShinespark",
{
"shinespark": {
"frames": 38,
"excessFrames": 25
}
}
]
}
]
}
{
"or": [
{
"enemyDamage": {
"enemy": "Pink Space Pirate (standing)",
"type": "contact",
"hits": 1
}
},
{
"enemyKill": {
"enemies": [
[
"Pink Space Pirate (standing)"
]
],
"explicitWeapons": [
"Plasma"
]
}
},
"h_pauseAbuseMinimalReserveRefill",
{
"and": [
"canControlShinesparkEnd",
"canUseSpeedEchoes",
{
"resourceAtMost": [
{
"type": "RegularEnergy",
"count": 29
}
]
}
]
},
{
"and": [
"canInsaneJump",
"canTrickyDodgeEnemies"
]
}
]
}
{
"or": [
"h_underwaterCrouchJumpDownGrab",
"canSpringBallJumpMidAir",
{
"and": [
"Ice",
"Plasma"
]
}
]
} |
From: 2
Bottom Right Door
To: 6
Middle Junction Near Top Left Pirate

Start the dash as close to the door transition as possible in order to store the shinespark in time. Stand 2 or 3 pixels from the door for run speed to be low enough going into the next room. With low energy, shinespark diagonally to the middle ledge on the left. Entrance condition: {
"comeInRunning": {
"speedBooster": "yes",
"minTiles": 0.4375
}
}Requires: "canWaterShineCharge"
"canTrickyJump"
"h_shinechargeMaxRunway"
{
"or": [
{
"shinespark": {
"frames": 43,
"excessFrames": 26
}
},
{
"and": [
"canDodgeWhileShooting",
"canMidairShinespark",
{
"shinespark": {
"frames": 38,
"excessFrames": 25
}
}
]
}
]
}
{
"or": [
{
"enemyDamage": {
"enemy": "Pink Space Pirate (standing)",
"type": "contact",
"hits": 1
}
},
{
"enemyKill": {
"enemies": [
[
"Pink Space Pirate (standing)"
]
],
"explicitWeapons": [
"Plasma"
]
}
},
"h_pauseAbuseMinimalReserveRefill",
{
"and": [
"canControlShinesparkEnd",
"canUseSpeedEchoes",
{
"resourceAtMost": [
{
"type": "RegularEnergy",
"count": 29
}
]
}
]
},
{
"and": [
"canInsaneJump",
"canTrickyDodgeEnemies"
]
}
]
}
{
"or": [
"h_underwaterCrouchJumpDownGrab",
"canSpringBallJumpMidAir",
{
"and": [
"Ice",
"Plasma"
]
}
]
} |
|
Spark horizontally and fall to the bottom left door. Note that it is possible to spark with less Energy while avoiding the Skultera if starting with a precise amount of Energy: When sparking from the left side of the platform, spark with between 88 and 103 Energy while suitless. Entrance condition: {
"comeInShinecharged": {},
"comesThroughToilet": "any"
}Requires: {
"or": [
"Gravity",
"HiJump",
"canSpringBallJumpMidAir",
"canPrepareForNextRoom"
]
}
"canHorizontalShinespark"
{
"or": [
{
"and": [
"Gravity",
{
"shineChargeFrames": 15
},
{
"shinespark": {
"frames": 73,
"excessFrames": 19
}
}
]
},
{
"and": [
"canSuitlessMaridia",
{
"shineChargeFrames": 25
},
{
"shinespark": {
"frames": 92,
"excessFrames": 12
}
}
]
},
{
"and": [
"canSuitlessMaridia",
"canControlShinesparkEnd",
{
"shineChargeFrames": 25
},
{
"shinespark": {
"frames": 92,
"excessFrames": 33
}
}
]
}
]
}Dev note: The variant with canControlShinesparkEnd could end at 5, but it would require other items to go to 4, which would no longer make this useful. |
From: 1
Top Left Door
To: 9
Platform Below Top Door
Initiate the spark with energy in a specific range, in order to land on the floating platform below the top door. If starting the spark at the transition, in bottom position, Samus' energy is required to be between 86 and 99. If sparking in top position, a slightly larger range works, between 84 and 101 energy. If sparking further from the door, Samus will enter with some momentum, in which case less energy would be needed. Entrance condition: {
"comeInWithSpark": {}
}Requires: "canControlShinesparkEnd"
"h_ShinesparksCostEnergy"
{
"shinespark": {
"frames": 70,
"excessFrames": 13
}
}
{
"resourceAtMost": [
{
"type": "RegularEnergy",
"count": 29
}
]
} |
From: 4
Top Right Door
To: 9
Platform Below Top Door
Initiate the spark with energy in a specific range, in order to land on the floating platform below the top door. If starting the spark at the transition, Samus' energy is required to be between 112 and 124. Entrance condition: {
"comeInWithSpark": {
"position": "bottom"
}
}Requires: "canControlShinesparkEnd"
"h_ShinesparksCostEnergy"
{
"shinespark": {
"frames": 95,
"excessFrames": 12
}
}
{
"resourceAtMost": [
{
"type": "RegularEnergy",
"count": 29
}
]
} |
From: 4
Right Door
To: 1
Left Door
Shinespark to the left with less than full Energy in order to prevent getting killed by a Puyo at the end of the spark. Sparking while next to the speed blocks requires Samus to be suitless with between 78 and 93 Energy. (With Gravity, she can tank a hit and return to the farm.) It is important not to crouch before sparking, as the ceiling blocks are weird and will prevent the spark. Alternatively, with 99 Energy spark near the quicksand. Requires: {
"useFlashSuit": {}
}
"canControlShinesparkEnd"
{
"shinespark": {
"frames": 120,
"excessFrames": 71
}
}
"canPlayInSand"Clears obstacles: A |
|
Initiate a Shinespark 1 tile below the ceiling to cross all of the room. Shinesparking too high or too low will crash and Samus will likely fall into the sand. Entrance condition: {
"comeInShinecharged": {}
}Requires: {
"shineChargeFrames": 20
}
{
"notable": "Full Halfie Shinespark"
}
"canShinechargeMovementComplex"
"canTrickyJump"
{
"or": [
{
"shinespark": {
"frames": 128,
"excessFrames": 6
}
},
{
"and": [
{
"shinespark": {
"frames": 128,
"excessFrames": 21
}
},
"canControlShinesparkEnd",
"canWallJump"
]
}
]
} |
|
Initiate a Shinespark 1 tile below the ceiling to cross all of the room. Shinesparking too high or too low will crash and Samus will likely fall into the sand. Entrance condition: {
"comeInShinecharged": {}
}Requires: {
"shineChargeFrames": 10
}
{
"notable": "Full Halfie Shinespark"
}
"canShinechargeMovementComplex"
"canTrickyJump"
{
"or": [
{
"shinespark": {
"frames": 127,
"excessFrames": 4
}
},
{
"and": [
{
"shinespark": {
"frames": 127,
"excessFrames": 16
}
},
"canControlShinesparkEnd",
{
"or": [
"canWallJump",
"canTrickyJump"
]
}
]
}
]
} |
|
Requires: {
"obstaclesCleared": [
"A",
"B"
]
}
{
"canShineCharge": {
"usedTiles": 31,
"openEnd": 0
}
}
"canHorizontalMidairShinespark"
{
"or": [
{
"shinespark": {
"frames": 37,
"excessFrames": 7
}
},
{
"and": [
"canControlShinesparkEnd",
{
"shinespark": {
"frames": 37,
"excessFrames": 22
}
}
]
}
]
} |