canUseSpeedEchoes (Very Hard)
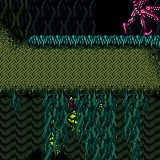

Using the Samus echoes that are emitted after a shinespark bonk as a weapon to kill enemies.
Dependencies: canShinespark
Strats ()
From: 2
Middle Right Door
To: 4
Bottom Right Door
Requires: {"enemyDamage": {
"enemy": "Green Space Pirate (standing)",
"type": "contact",
"hits": 2
}},
{"useFlashSuit": {}},
{"shinespark": {"frames": 1, "excessFrames": 1}},
"canUseSpeedEchoes" |
From: 4
Bottom Right Door
To: 2
Middle Right Door
It is possible to damage once to get through the first two pirates, then shinespark to kill the three above. Diagonal shinespark into the corner on the floor below the pirate above. This requires fairly precise positioning of the pirates. It is possible to shoot them to slow them down and prevent them from shooting. Move up while the pirate is moving it's head so it doesn't turn around. Requires: {"enemyDamage": {
"enemy": "Green Space Pirate (standing)",
"type": "contact",
"hits": 1
}},
{"useFlashSuit": {}},
{"shinespark": {"frames": 1, "excessFrames": 1}},
"canInsaneJump",
"canUseSpeedEchoes" |
From: 4
Bottom Right Door
To: 2
Middle Right Door
Requires: {"enemyDamage": {
"enemy": "Green Space Pirate (standing)",
"type": "contact",
"hits": 2
}},
{"useFlashSuit": {}},
{"shinespark": {"frames": 1, "excessFrames": 1}},
"canUseSpeedEchoes" |
|
Spark diagonally immediately on entry to kill the first two sidehoppers, then carefully kill the third. Requires: "canDodgeWhileShooting", "canUseSpeedEchoes", {"useFlashSuit": {}}, {"shinespark": {"frames": 5, "excessFrames": 1}}, {"enemyKill": { "enemies": [["Sidehopper"]], "explicitWeapons": ["Missile", "Super", "PowerBomb", "Plasma", "Spazer", "Wave"] }} Clears obstacles: C |
From: 1
Top Right Door
To: 4
Top Left Junction
Diagonal spark immediately on entry in order to kill the first Sidehopper. The second can be killed safely by luring it to the door and crouching against the ledge. Alternatively, it cannot hit Samus while she is morphed. Requires: "canUseSpeedEchoes", {"useFlashSuit": {}}, {"shinespark": {"frames": 2, "excessFrames": 2}} Clears obstacles: A |
From: 2
Right Door
To: 3
Top Junction
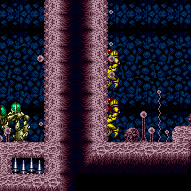

Shinesparking horizontally into the wall will trigger the elevator as Samus's echos hit it. Entrance condition: "comeInShinecharged": {}Requires: {"shineChargeFrames": 45},
{"notable": "Shinespark to Ride the Elevator"},
"canHorizontalShinespark",
"canUseSpeedEchoes",
{"shinespark": {"frames": 1, "excessFrames": 1}}
Clears obstacles: B |
From: 2
Right Door
To: 3
Top Junction
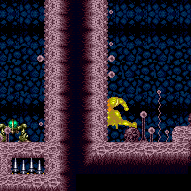

Shinesparking horizontally into the wall will trigger the elevator as Samus's echos hit it. Entrance condition: "comeInShinecharging": {
"length": 5,
"openEnd": 1
}Requires: {"notable": "Shinespark to Ride the Elevator"},
"canHorizontalShinespark",
"canUseSpeedEchoes",
{"shinespark": {"frames": 1, "excessFrames": 1}}Clears obstacles: B |
From: 2
Right Door
To: 3
Top Junction
Shinesparking horizontally into the wall will trigger the elevator as Samus's echos hit it. Entrance condition: "comeInWithSpark": {}Requires: {"notable": "Shinespark to Ride the Elevator"},
"canUseSpeedEchoes",
{"shinespark": {"frames": 15, "excessFrames": 6}}Clears obstacles: B |
From: 2
Right Door
To: 3
Top Junction
Shinesparking horizontally into the wall will trigger the elevator as Samus's echos hit it. Requires: {"notable": "Shinespark to Ride the Elevator"},
"canHorizontalShinespark",
"canUseSpeedEchoes",
"h_storedSpark",
{"shinespark": {"frames": 1, "excessFrames": 1}}Clears obstacles: B |
From: 1
Left Door
To: 3
Metal Pirates Junction
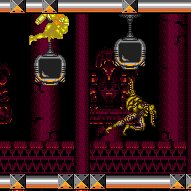

Use the Echoes created by shinesparking to defeat the Metal Pirates. This involves Shineparking into a precise point while also turning the Pirates vulnerable as the echoes reach them. Requires: {"notable": "Speed Echoes Kill"},
{"obstaclesNotCleared": ["A"]},
"canUseSpeedEchoes",
"canHitbox",
{"canShineCharge": {"usedTiles": 38, "openEnd": 2}},
{"or": [
{"canShineCharge": {"usedTiles": 23, "openEnd": 2}},
{"heatFrames": 60}
]},
{"or": [
{"and": [
"HiJump",
{"shinespark": {"frames": 1}},
{"shinespark": {"frames": 1}}
]},
{"and": [
"canTrickyJump",
{"shinespark": {"frames": 9}},
{"shinespark": {"frames": 9}}
]}
]},
{"or": [
{"heatFramesWithEnergyDrops": {
"frames": 630,
"drops": [{"enemy": "Space Pirate (fighting)", "count": 12}]
}},
{"and": [
"canFarmWhileShooting",
{"heatFramesWithEnergyDrops": {
"frames": 360,
"drops": [{"enemy": "Space Pirate (fighting)", "count": 6}]
}},
{"heatFramesWithEnergyDrops": {
"frames": 270,
"drops": [{"enemy": "Space Pirate (fighting)", "count": 6}]
}}
]}
]},
{"partialRefill": {"type": "Energy", "limit": 99}},
{"partialRefill": {"type": "Super", "limit": 1}}Clears obstacles: A Dev note: FIXME: It's possible to activate a spark on the ground at 27 energy and collect drops in time. The canFarmWhileShooting presumes spawning the drops on the ground where they can be collected while charging the next shinespark. |
From: 1
Left Door
To: 3
Metal Pirates Junction


Kill both pirates with speed echoes. Collect their drops and use the heat to interrupt. Entrance condition: "comeInWithRMode": {}Requires: {"notable": "Speed Echoes Kill"},
"canUseSpeedEchoes",
"canHitbox",
{"canShineCharge": {"usedTiles": 38, "openEnd": 2}},
{"or": [
{"canShineCharge": {"usedTiles": 23, "openEnd": 2}},
{"heatFrames": 60}
]},
{"or": [
{"and": [
"HiJump",
{"shinespark": {"frames": 1}}
]},
{"shinespark": {"frames": 9}}
]},
{"heatFrames": 630},
{"or": [
"h_heatedCrystalFlashForReserveEnergy",
{"and": [
"h_RModeCanRefillReserves",
{"or": [
{"and": [
{"resourceMissingAtMost": [{"type": "Super", "count": 0}]},
{"partialRefill": {"type": "ReserveEnergy", "limit": 240}}
]},
{"partialRefill": {"type": "ReserveEnergy", "limit": 120}}
]}
]},
{"and": [
{"disableEquipment": "ETank"},
{"or": [
{"and": [
{"resourceMissingAtMost": [{"type": "Super", "count": 0}]},
{"partialRefill": {"type": "ReserveEnergy", "limit": 140}}
]},
{"partialRefill": {"type": "ReserveEnergy", "limit": 20}}
]}
]}
]},
"h_shinechargeMaxRunway",
{"disableEquipment": "Varia"},
{"disableEquipment": "Gravity"},
{"or": [
{"and": [
"canReserveTriggerBufferXRay",
{"autoReserveTrigger": {"implicitHeatFrames": "no"}},
"canRModeSparkInterrupt",
{"suitlessHeatFrames": 32}
]},
{"and": [
"h_heatProof",
{"autoReserveTrigger": {}},
"canRModePauseAbuseSparkInterrupt"
]},
{"and": [
{"autoReserveTrigger": {"implicitHeatFrames": "suitless"}},
"canRModeSparkInterrupt",
{"suitlessHeatFrames": 32}
]}
]}Clears obstacles: A |
From: 2
Right Door
To: 3
Metal Pirates Junction
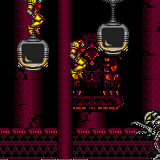

Use the Echoes created by shinesparking to defeat the Metal Pirates. This involves Shineparking into a precise point while also turning the Pirates vulnerable as the echoes reach them. Requires: {"notable": "Speed Echoes Kill"},
{"obstaclesNotCleared": ["A"]},
"canUseSpeedEchoes",
"canHitbox",
{"canShineCharge": {"usedTiles": 38, "openEnd": 2}},
{"or": [
{"canShineCharge": {"usedTiles": 23, "openEnd": 2}},
{"heatFrames": 60}
]},
{"or": [
{"and": [
"HiJump",
{"shinespark": {"frames": 1}},
{"shinespark": {"frames": 1}}
]},
{"and": [
"canTrickyJump",
{"shinespark": {"frames": 9}},
{"shinespark": {"frames": 9}}
]}
]},
{"or": [
{"heatFramesWithEnergyDrops": {
"frames": 630,
"drops": [{"enemy": "Space Pirate (fighting)", "count": 12}]
}},
{"and": [
"canFarmWhileShooting",
{"heatFramesWithEnergyDrops": {
"frames": 360,
"drops": [{"enemy": "Space Pirate (fighting)", "count": 6}]
}},
{"heatFramesWithEnergyDrops": {
"frames": 270,
"drops": [{"enemy": "Space Pirate (fighting)", "count": 6}]
}}
]}
]},
{"partialRefill": {"type": "Energy", "limit": 99}},
{"partialRefill": {"type": "Super", "limit": 1}}Clears obstacles: A Dev note: FIXME: It's possible to activate a spark on the ground at 27 energy and collect drops in time. The canFarmWhileShooting presumes spawning the drops on the ground where they can be collected while charging the next shinespark. |
From: 2
Right Door
To: 3
Metal Pirates Junction


Kill both pirates with speed echoes. Collect their drops and use the heat to interrupt. Entrance condition: "comeInWithRMode": {}Requires: {"notable": "Speed Echoes Kill"},
"canUseSpeedEchoes",
"canHitbox",
{"canShineCharge": {"usedTiles": 38, "openEnd": 2}},
{"or": [
{"canShineCharge": {"usedTiles": 23, "openEnd": 2}},
{"heatFrames": 60}
]},
{"or": [
{"and": [
"HiJump",
{"shinespark": {"frames": 1}}
]},
{"shinespark": {"frames": 9}}
]},
{"heatFrames": 630},
{"or": [
"h_heatedCrystalFlashForReserveEnergy",
{"and": [
"h_RModeCanRefillReserves",
{"or": [
{"and": [
{"resourceMissingAtMost": [{"type": "Super", "count": 0}]},
{"partialRefill": {"type": "ReserveEnergy", "limit": 240}}
]},
{"partialRefill": {"type": "ReserveEnergy", "limit": 120}}
]}
]},
{"and": [
{"disableEquipment": "ETank"},
{"or": [
{"and": [
{"resourceMissingAtMost": [{"type": "Super", "count": 0}]},
{"partialRefill": {"type": "ReserveEnergy", "limit": 140}}
]},
{"partialRefill": {"type": "ReserveEnergy", "limit": 20}}
]}
]}
]},
"h_shinechargeMaxRunway",
"h_heatTriggerRModeSparkInterrupt"Clears obstacles: A |
From: 3
Metal Pirates Junction
To: 3
Metal Pirates Junction
Use the Echoes created by shinesparking to defeat the Metal Pirates. This involves shineparking into a precise point while also turning the Pirates vulnerable as the echoes reach them. Requires: {"notable": "Speed Echoes Kill"},
"h_heatProof",
{"resetRoom": {"nodes": [1, 2]}},
"canFarmWhileShooting",
"canUseSpeedEchoes",
"canHitbox",
{"canShineCharge": {"usedTiles": 38, "openEnd": 2}},
{"shinespark": {"frames": 9}},
{"cycleFrames": 730}Clears obstacles: A Farm cycle drops: 2 Space Pirate (fighting) |
|
The pirates will place stationary, invisible projectiles when they jump or Samus runs through them, making that portion of the runway unusable without taking damage. To prevent this, it is important to shinecharge with only a small portion of the room to prevent the opposite pirate from placing a projectile. After shinecharging through the first pirate, stand between where it jumps, then near the end of the shinecharge timer, spark vertically with low energy to kill the pirate. It is possible to exit G-mode and quicky pause abuse, to collect the pirates' drops and get to the door. Requires: "h_heatedGMode", "canTrickyGMode", {"notable": "Speed Echoes Kill"}, {"canShineCharge": {"usedTiles": 18, "openEnd": 1}}, {"shinespark": {"frames": 9, "excessFrames": 9}}, {"shinespark": {"frames": 9, "excessFrames": 9}}, "canUseSpeedEchoes", {"or": [ {"heatFrames": 45}, "h_heatedGModePauseAbuse" ]} Clears obstacles: A Dev note: It is possible to enter the room in direct G-mode, kill the pirates, return to the open door, then exit G-mode and quickly touch the transition to awaken Zebes (but not get the metal pirates kill flag). This is not included, as it is a very niche knowledge check, and at that point, you might as well pause abuse to get the pirate drops and both flags. If Samus enters with 4 energy, it is also possible to collect the drops without pausing. FIXME: include a partialRefill to gain back energy from the drops (more with canDash than without). |
|
The pirates will place stationary, invisible projectiles when they jump or Samus runs through them, making that portion of the runway unusable without taking damage. To prevent this, it is important to shinecharge with only a small portion of the room to prevent the opposite pirate from placing a projectile. After shinecharging through the first pirate, stand between where it jumps, then near the end of the shinecharge timer, spark vertically with low energy to kill the pirate. It is possible to exit G-mode and quicky pause abuse, to collect the pirates' drops and open the door and leave. Otherwise, it requires exiting G-mode at the left side of the room, shooting the door and returning to the right side of the room. Requires: "h_heatedGMode", "canTrickyGMode", {"notable": "Speed Echoes Kill"}, {"canShineCharge": {"usedTiles": 18, "openEnd": 1}}, {"shinespark": {"frames": 9, "excessFrames": 9}}, {"shinespark": {"frames": 9, "excessFrames": 9}}, "canUseSpeedEchoes", {"or": [ {"heatFrames": 190}, "h_heatedGModePauseAbuse" ]} Clears obstacles: A Dev note: FIXME: These heat frames would be lower if both doors were locked and either could be used to set the metal pirates kill flag. It is possible to enter the room in direct G-mode, kill the pirates, return to the open door, then exit G-mode and quickly touch the transition to awaken Zebes (but not get the metal pirates kill flag). This is not included, as it is a very niche knowledge check, and at that point, you might as well pause abuse to get the pirate drops and both flags. If Samus enters with 4 energy, it is also possible to collect the drops without pausing. FIXME: include a partialRefill to gain back energy from the drops (more with canDash than without). |
|
Requires: {"not": "f_DefeatedPhantoon"},
"canRiskPermanentLossOfAccess",
{"resetRoom": {"nodes": [1, 2, 3]}},
"canShinechargeMovementComplex",
"canUseSpeedEchoes",
{"canShineCharge": {"usedTiles": 20, "openEnd": 0}},
{"shinespark": {"frames": 4, "excessFrames": 4}},
{"cycleFrames": 2600}Resets obstacles: A Farm cycle drops: 8 Trapped Atomic |
From: 2
Bottom Right Door
To: 6
Middle Junction Near Top Left Pirate
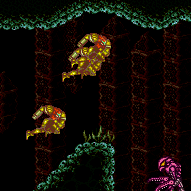

Reduce Samus' run speed with a stutter or late dash tap in order to complete the shinecharge in time. With low energy, shinespark diagonally to the middle ledge on the left. Entrance condition: "comeInRunning": {
"speedBooster": "yes",
"minTiles": 4.4375
}Requires: "canWaterShineCharge", {"canShineCharge": {"usedTiles": 23, "openEnd": 2}}, {"or": [ {"shinespark": {"frames": 43, "excessFrames": 26}}, {"and": [ "canMidairShinespark", {"shinespark": {"frames": 38, "excessFrames": 25}} ]} ]}, {"or": [ {"enemyDamage": { "enemy": "Pink Space Pirate (standing)", "type": "contact", "hits": 1 }}, {"enemyKill": { "enemies": [["Pink Space Pirate (standing)"]], "explicitWeapons": ["Plasma"] }}, "h_pauseAbuseMinimalReserveRefill", {"and": [ "canControlShinesparkEnd", "canUseSpeedEchoes", {"resourceAtMost": [{"type": "RegularEnergy", "count": 29}]} ]}, {"and": [ "canInsaneJump", "canTrickyDodgeEnemies" ]} ]}, {"or": [ "h_underwaterCrouchJumpDownGrab", "canSpringBallJumpMidAir", {"and": [ "Ice", "Plasma" ]} ]} |
From: 2
Bottom Right Door
To: 6
Middle Junction Near Top Left Pirate
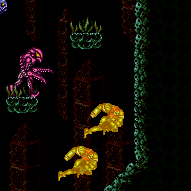

Start the dash as close to the door transition as possible in order to store the shinespark in time. Stand 2 or 3 pixels from the door for run speed to be low enough going into the next room. With low energy, shinespark diagonally to the middle ledge on the left. Entrance condition: "comeInRunning": {
"speedBooster": "yes",
"minTiles": 0.4375
}Requires: "canWaterShineCharge", "canTrickyJump", "h_shinechargeMaxRunway", {"or": [ {"shinespark": {"frames": 43, "excessFrames": 26}}, {"and": [ "canDodgeWhileShooting", "canMidairShinespark", {"shinespark": {"frames": 38, "excessFrames": 25}} ]} ]}, {"or": [ {"enemyDamage": { "enemy": "Pink Space Pirate (standing)", "type": "contact", "hits": 1 }}, {"enemyKill": { "enemies": [["Pink Space Pirate (standing)"]], "explicitWeapons": ["Plasma"] }}, "h_pauseAbuseMinimalReserveRefill", {"and": [ "canControlShinesparkEnd", "canUseSpeedEchoes", {"resourceAtMost": [{"type": "RegularEnergy", "count": 29}]} ]}, {"and": [ "canInsaneJump", "canTrickyDodgeEnemies" ]} ]}, {"or": [ "h_underwaterCrouchJumpDownGrab", "canSpringBallJumpMidAir", {"and": [ "Ice", "Plasma" ]} ]} |
From: 1
Top Left Door
To: 1
Top Left Door
Jump towards the Pirate and Spark into the ceiling to kill it with speed echoes. Entrance condition: "comeInShinecharged": {}Requires: {"shineChargeFrames": 25},
"canMidairShinespark",
{"shinespark": {"frames": 1, "excessFrames": 1}},
"canUseSpeedEchoes"Clears obstacles: A |
|


Kill most of the pirates: leave the standing pirate on the ledge above the runway. Shinecharge and jump into its beam path to interrupt. Entrance condition: "comeInWithRMode": {}Requires: {"or": [
{"and": [
"h_CrystalFlashForReserveEnergy",
{"or": [
{"and": [
"canUseIFrames",
{"or": [
{"enemyDamage": {
"enemy": "Pink Space Pirate (standing)",
"type": "laser",
"hits": 2
}},
"h_pauseAbuseMinimalReserveRefill"
]}
]},
"ScrewAttack",
"Plasma",
{"getBlueSpeed": {"usedTiles": 19, "openEnd": 0}}
]}
]},
{"and": [
{"or": [
"ScrewAttack",
"Plasma",
{"and": [
"canUseSpeedEchoes",
{"getBlueSpeed": {"usedTiles": 19, "openEnd": 0}}
]}
]},
"h_RModeCanRefillReserves",
{"partialRefill": {"type": "ReserveEnergy", "limit": 20}}
]}
]},
{"canShineCharge": {"usedTiles": 21, "openEnd": 0}},
{"or": [
"HiJump",
"canWallJump",
"canSpeedyJump",
"canSpringBallJumpMidAir"
]},
{"autoReserveTrigger": {"maxReserveEnergy": 95}},
"canRModeSparkInterrupt"Clears obstacles: A, C |
|
After clearing the bottom Pirate, use the runway at bottom of the room to build a shinecharge. Jump to the middle level, and spark upwards, at least one full tile from the edge. The shinespark echo kills the top Pirate. To reliably avoid damage, the top Pirate should be prepped when Samus first enters the room. The fastest method is to run into the room and fall immediately, so that the Pirate is shooting left as it goes offscreen. Later, spark up the right side. Samus can also Morph or crouch on a slope until the Pirate enters its idle animation at the platform edge, which allows sparking up either side. Requires: {"obstaclesCleared": ["C"]},
"canShinechargeMovementComplex",
"canUseSpeedEchoes",
{"canShineCharge": {"usedTiles": 21, "openEnd": 0}},
{"or": [
{"and": [
{"or": [
"HiJump",
"canWallJump",
"canSpeedyJump",
"canTrickySpringBallJump",
"SpaceJump"
]},
{"shinespark": {"frames": 28, "excessFrames": 8}}
]},
{"and": [
{"or": [
"canWallJump",
{"and": [
"canShinechargeMovementTricky",
{"or": [
"canSpeedyJump",
"canTrickySpringBallJump",
"SpaceJump"
]}
]}
]},
{"shinespark": {"frames": 20, "excessFrames": 8}}
]},
{"and": [
"HiJump",
{"shinespark": {"frames": 16, "excessFrames": 8}}
]},
{"and": [
"HiJump",
"canSpeedyJump",
"canShinechargeMovementTricky",
{"shinespark": {"frames": 11, "excessFrames": 8}}
]}
]},
{"or": [
{"obstaclesCleared": ["A"]},
"canTrickyDodgeEnemies",
{"enemyDamage": {
"enemy": "Pink Space Pirate (standing)",
"type": "laser",
"hits": 1
}}
]}Clears obstacles: A |
|
Back into the left corner and wait for the pirate to shoot Samus with a laser, then use i-frames to build a shinecharge through the pirate. Requires: {"enemyDamage": {
"enemy": "Pink Space Pirate (standing)",
"type": "laser",
"hits": 2
}},
"canUseIFrames",
{"canShineCharge": {"usedTiles": 21, "openEnd": 0}},
{"or": [
{"and": [
"canMidairShinespark",
"canUseSpeedEchoes",
{"shinespark": {"frames": 1, "excessFrames": 1}}
]},
{"and": [
"canHorizontalShinespark",
{"shinespark": {"frames": 25, "excessFrames": 20}}
]}
]}Clears obstacles: C Dev note: A leniency laser hit is included. |
|
Using the bottom of the room, shortcharge to use the echoes created by shinesparking to kill the two central standing Pirates. Requires: {"obstaclesCleared": ["C"]},
"canShinechargeMovementComplex",
"canUseSpeedEchoes",
{"canShineCharge": {"usedTiles": 21, "openEnd": 0}},
{"shinespark": {"frames": 2, "excessFrames": 2}}Clears obstacles: B |
|
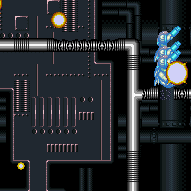

Fall through the speed blocks from above with Temporary Blue, or kill the pirates from above with speed echoes. Requires: "h_getBlueSpeedMaxRunway", {"enemyDamage": { "enemy": "Tourian Space Pirate (all)", "type": "contact", "hits": 1 }}, {"or": [ "canTemporaryBlue", {"and": [ "canUseSpeedEchoes", "h_shinechargeMaxRunway", {"shinespark": {"frames": 2, "excessFrames": 2}} ]} ]} |