canKago (Very Hard)
Clipping through an enemy by performing an uninterruptible animation while coming into contact with them. These animations include morphing, unmorphing, or performing a turnaround.
Dependencies: canUseEnemies
Strats ()
From: 3
Junction (Left side Pit)
To: 2
Right Door
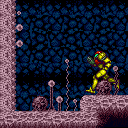
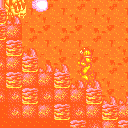
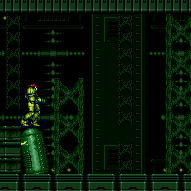
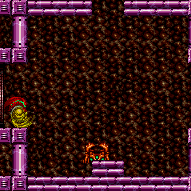
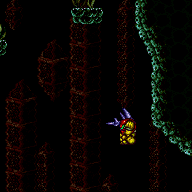
Freeze the right-most ramp Choot in a way where Samus can climb on top of it and use Space Jump to escape the water. Use a turn around to avoid knockback when making contact with the Choot to better time the use of Ice. Freeze the Choot as far to the right (on its lowest swoop), but this method is less precise than the alternatives. If Samus is inside the Choot when it is frozen, she can continuing moving freely. Jump on top either in spinjump or in Morph Ball Use XRay to standup, clipping partially into the above slope. Use a flately jump to fall out of the wall while still keeping enough height to spacejump on top of the water and escape. Requires: {
"notable": "Space Jump Water Escape with Ice and X-Ray"
}
{
"enemyDamage": {
"enemy": "Choot",
"type": "contact",
"hits": 1
}
}
"canTrickyUseFrozenEnemies"
"Morph"
"canXRayStandUp"
"canSpaceJumpWaterBounce"
"canFlatleyJump"
"canKago" |
From: 2
Right Door
To: 3
Top Junction
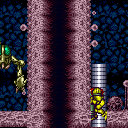
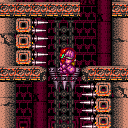
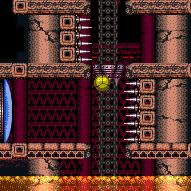
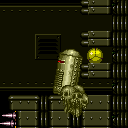
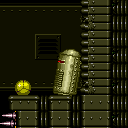
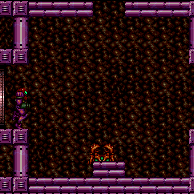
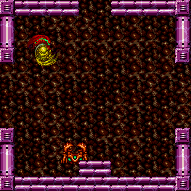
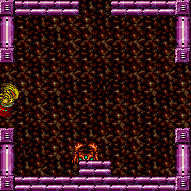
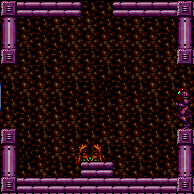
Start the elevator ride by using Screw Attack or Pseudo Screw in the hole, or by jumping in the hole with a blue suit. Kago the elevator to fall back in and hit the elevator again. This is much easier while the elevator is still rising, but can still be done with Morph afterwards. Without HiJump, this will need to be done once more to get high enough to get to the blue gate, and, without Morph, Samus will need to Kago the second elevator section first-try, without jumping out of the first section of elevator. After triggering the third section of elevator, move out, to the right, then jump onto the raised elevator before it is too tall. Requires: {
"notable": "Kago to Ride the Elevator"
}
"canKago"
{
"or": [
"ScrewAttack",
"canPseudoScrew",
{
"haveBlueSuit": {}
}
]
}
{
"or": [
"Morph",
{
"and": [
"HiJump",
"canTrickyJump",
{
"or": [
"canCrouchJump",
"canDownGrab"
]
}
]
},
"canInsaneJump"
]
}Clears obstacles: B |
From: 1
Top Left Door
To: 2
Bottom Left Door
Enter with a shinecharge, jumping and aiming down and shoot the block. While falling, kill the Zeela or perform a Kago through it. Quickly reach the door below and spark out. Entrance condition: {
"comeInShinecharged": {}
}Requires: {
"shineChargeFrames": 165
}
{
"or": [
{
"enemyKill": {
"enemies": [
[
"Zeela"
]
],
"explicitWeapons": [
"Wave",
"Spazer",
"Plasma",
"Missile",
"Super"
]
}
},
{
"and": [
"canKago",
{
"enemyDamage": {
"enemy": "Zeela",
"type": "contact",
"hits": 1
}
}
]
}
]
}
"canShinechargeMovementTricky"
{
"shinespark": {
"frames": 4,
"excessFrames": 0
}
}Exit condition: {
"leaveWithSpark": {}
}Unlocks doors: {"types":["super"],"requires":[]}
{"types":["missiles","powerbomb"],"requires":["never"]}Dev note: FIXME: Add faster strat that morphs and takes a neutral damage boost off the Zeela and then down-backs. |
From: 1
Top Left Door
To: 2
Bottom Left Door
Gain a shinecharging while entering the room, and angle diagonally down to shoot the block. While falling, kill the Zeela or perform a Kago through it. Quickly reach the door below and spark out. Entrance condition: {
"comeInShinecharging": {
"length": 5,
"openEnd": 0
}
}Requires: {
"or": [
{
"enemyKill": {
"enemies": [
[
"Zeela"
]
],
"explicitWeapons": [
"Wave",
"Spazer",
"Plasma",
"Missile",
"Super"
]
}
},
{
"and": [
"canKago",
{
"enemyDamage": {
"enemy": "Zeela",
"type": "contact",
"hits": 1
}
}
]
}
]
}
"canShinechargeMovementTricky"
{
"shinespark": {
"frames": 5,
"excessFrames": 0
}
}Exit condition: {
"leaveWithSpark": {}
}Unlocks doors: {"types":["super"],"requires":[]}
{"types":["missiles","powerbomb"],"requires":["never"]} |
|

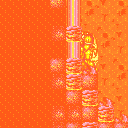
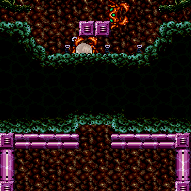
Raise the elevator with Wave, Missiles, a Super, a Power Bomb, or a Bomb Spread to then cross the room with less heat damage. Entrance condition: {
"comeInWithGMode": {
"mode": "any",
"morphed": false
}
}Requires: "h_heatedGMode"
"Morph"
{
"or": [
"Wave",
{
"ammo": {
"type": "Super",
"count": 1
}
},
{
"ammo": {
"type": "Missile",
"count": 3
}
},
"h_usePowerBomb",
{
"and": [
"Charge",
"h_useMorphBombs"
]
},
{
"and": [
"h_lavaProof",
"ScrewAttack",
"canKago"
]
},
{
"haveBlueSuit": {}
}
]
}
{
"heatFrames": 160
}Dev note: FIXME: The item would be collected (before the heat frames) if Samus entered in direct G-mode. |
From: 4
Lava, Left Wall
To: 3
Above Lava Junction
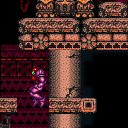
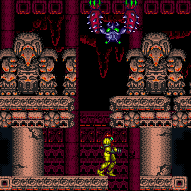
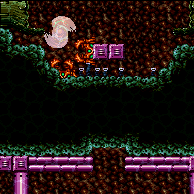
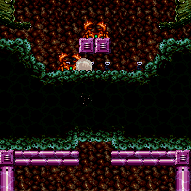
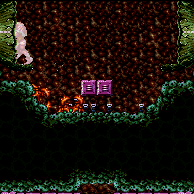
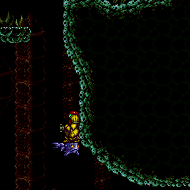
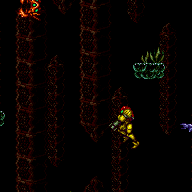
Enter the bottom-left Namihe by kagoing inside of it. Wait for a second hit to gain i-frames and then very quickly walljump up the spikes and across to the right side wall. Requires: {
"notable": "HiJumpless Nahime Morph Kago"
}
{
"noBlueSuit": {}
}
"canSuitlessLavaDive"
"canInsaneWallJump"
"canInsaneJump"
"canUseIFrames"
"canTrickyWallJump"
"canFastWallJumpClimb"
"canUseEnemies"
"canKago"
{
"heatFrames": 510
}
{
"gravitylessLavaFrames": 480
}
{
"enemyDamage": {
"enemy": "Namihe",
"type": "kago",
"hits": 2
}
} |
|

Roll under the top Fune fireball then roll off the edge to avoid the first Boulder. Kill a Fune or use the Boulder for i-frames to get through the tricky section. It is also possible to Kago the Fune to save health compared to taking a Boulder hit. Requires: "Morph"
"canDodgeWhileShooting"
{
"or": [
"canTrickyJump",
{
"enemyKill": {
"enemies": [
[
"Fune"
]
]
}
},
{
"enemyDamage": {
"enemy": "Boulder",
"type": "contact",
"hits": 1
}
},
{
"and": [
{
"enemyDamage": {
"enemy": "Fune",
"type": "kago",
"hits": 1
}
},
"canKago",
"canUseIFrames"
]
}
]
} |
|
Morph Kago through the top Spike platform and use the i-frames to Kago again through the second. Requires: "canKago"
"canUseIFrames"
"canResetFallSpeed"
{
"enemyDamage": {
"enemy": "Kzan",
"type": "contact",
"hits": 1
}
}
{
"heatFrames": 180
}Dev note: Useful when enemy damage can be reduced while still taking full heat damage. |
|
Walk into a Spike and then Morph-Kago through the top Spike-Platform. Requires: "canKago"
"Morph"
{
"spikeHits": 1
}
{
"heatFrames": 270
}Dev note: About equivalent to waiting, if there is no form of damage reduction. |
From: 5
Junction Below Shot Block
To: 1
Bottom Left Door
Walk into a Spike and then Morph-Kago through the top Spike-Platform. Requires: "canKago"
"Morph"
"canUseEnemies"
{
"spikeHits": 1
}
{
"heatFrames": 250
}
"canDash"Exit condition: {
"leaveWithRunway": {
"length": 8,
"openEnd": 0
}
}Unlocks doors: {"types":["missiles"],"requires":[{"heatFrames":50}]}
{"types":["super"],"requires":[]}
{"types":["powerbomb"],"requires":[{"heatFrames":110}]}Dev note: About equivalent to waiting, if there is no form of damage reduction. |
|


Delay getting hit by the Atomic for as long as possible, then fall off the ledge and clip through the first Workrobot. Move partway across the room and keep the Atomic just off screen, which is where Samus can see approximately one full tile of the vertical doorshell. Wait for the Workrobot to appear, then hold right as it enters the screen to get hit by the Atomic and kago through the Workrobot. Quickly use the camera scroll blocks just left of the bomb blocks, in order to overload PLMs and go through them before the Atomic hits Samus. Entrance condition: {
"comeInWithGMode": {
"mode": "any",
"morphed": true
}
}Requires: "canComplexGMode"
"f_DefeatedPhantoon"
"canKago"
{
"enemyDamage": {
"enemy": "Atomic",
"type": "contact",
"hits": 2
}
} |
|


Wait for the Atomic to hit Samus, then use it to force her way through the first Workrobot. Move partway across the room and keep the Atomic just off screen, which is where Samus can see approximately one full tile of the vertical doorshell. Wait for the Workrobot to appear, then hold right as it enters the screen to get hit by the Atomic and kago through the Workrobot. Quickly use the camera scroll blocks just left of the bomb blocks, in order to overload PLMs and go through them before the Atomic hits Samus. Entrance condition: {
"comeInWithGMode": {
"mode": "direct",
"morphed": true,
"mobility": "immobile"
}
}Requires: "canComplexGMode"
"f_DefeatedPhantoon"
"canKago"
{
"enemyDamage": {
"enemy": "Atomic",
"type": "contact",
"hits": 1
}
}Dev note: The first Atomic hit is accounted through the regain mobility strat. |
From: 3
Right Door
To: 3
Right Door

If power is off, kago inside the left Workrobot, gaining speed at the start of the run by running in place. For extra run speeds between $5.9 and $5.C, Samus can jump over the island; For extra run speeds of $5.8 or lower, Samus can run under the island and jump over the Workrobot (only required if power is off). Higher speeds than $5.C could be obtained with the power on but with greater difficulty. Requires: {
"obstaclesCleared": [
"A"
]
}
{
"or": [
"canKago",
"f_DefeatedPhantoon"
]
}
"canTrickySpringBallBounce"
"canInsaneJump"Exit condition: {
"leaveWithSpringBallBounce": {
"remoteRunway": {
"length": 35,
"openEnd": 1
},
"landingRunway": {
"length": 1,
"openEnd": 1
},
"maxExtraRunSpeed": "$5.C",
"blue": "any",
"movementType": "controlled"
}
}Dev note: One tile of landing runway is considered unusable because at higher speeds it may not be possible to land far from the door. |
From: 1
Left Door
To: 2
Item (Behind the Bomb Wall)
Kago through the Workrobot by jumping, pressing down, then morphing and moving right just before hitting the robot. The bomb blocks can be broken with a bomb, Power Bomb, or using Screw Attack. If using bombs, be careful when breaking the bottom bomb block - if morphed, you will be pushed into it and stuck. To do this, place a bomb at the bottom, then a bomb at the peak boost height and unmorph before landing. Alternatively use a short jump morph. If the morph tunnel is open, kagoing through the robot will force Samus into it. Requires: "canMidAirMorph" "h_destroyBombWalls" "canKago" Dev note: If Phantoon is alive, 'Base' can be used instead. Note that this strat is useless in vanilla, as the item only spawns if Phantoon has been killed. |
From: 1
Left Door
To: 2
Item (Behind the Bomb Wall)


Kago into the worker robot and start running away from the wall until the bomb blocks are broken with SpeedBooster. The short charge taps are extremely precise because gaining too much run speed and Samus will exit the robot. Requires: {
"notable": "Robot Clip Run-In-Place"
}
"canMidAirMorph"
{
"getBlueSpeed": {
"usedTiles": 15,
"openEnd": 1
}
}
"canSlowShortCharge"
"canKago"Dev note: If Phantoon is dead, 'Blue Speed Jump' can be used instead. Note that this strat is useless in vanilla, as the item only spawns if Phantoon has been killed. |
From: 1
Left Door
To: 2
Item (Behind the Bomb Wall)
Kagoing into the worker robot will break the bomb block and push Samus into the morph tunnel. Requires: "canMidAirMorph"
"canKago"
{
"haveBlueSuit": {}
}Dev note: Note that this strat is useless in vanilla, as the item only spawns if Phantoon has been killed. |
From: 1
Left Door
To: 2
Item (Behind the Bomb Wall)
Kago into the worker robot and shinespark into the wall in order to break the bomb block. Either spark diagonally against the wall or horizontally while not crouched. Requires: "canMidAirMorph"
"canKago"
{
"useFlashSuit": {}
}
{
"shinespark": {
"frames": 1,
"excessFrames": 1
}
}Dev note: Note that this strat is useless in vanilla, as the item only spawns if Phantoon has been killed. |
From: 2
Bottom Left Door
To: 1
Top Left Doorway
Pass through the tunnel to the left, tanking a crab hit. Entrance condition: {
"comeInShinecharged": {}
}Requires: "canShinechargeMovementTricky"
"Gravity"
"SpaceJump"
"canMidAirMorph"
{
"enemyDamage": {
"enemy": "Sciser",
"type": "contact",
"hits": 1
}
}
{
"or": [
{
"and": [
"HiJump",
{
"shineChargeFrames": 140
}
]
},
{
"and": [
"canKago",
{
"shineChargeFrames": 155
}
]
}
]
}Exit condition: {
"leaveShinecharged": {}
}Unlocks doors: {"types":["super"],"requires":[]}
{"types":["missiles","powerbomb"],"requires":["never"]} |
From: 2
Bottom Left Door
To: 1
Top Left Doorway

Requires a runway of at least 4 tiles (with no open end) in the adjacent room. Use a Cross Room Jump into Water followed by a delayed Momentum Conserving Turnaround to reach the Morph tunnel above. Climbing the Left side of the center hole will run into an unavoidable Sciser that can be passed through by Morphing. Crossing to the right from the left door requires slightly more runway and takes a more precise turnaround. Samus must also stay near a side of the center hole to reach the Morph tunnels. Entrance condition: {
"comeInJumping": {
"speedBooster": "no",
"minTiles": 3.4375
}
}Requires: {
"notable": "Cross Room Jump Morph"
}
"canMidAirMorph"
"canCrossRoomJumpIntoWater"
"canMomentumConservingTurnaround"
"canKago"
{
"or": [
{
"enemyDamage": {
"enemy": "Sciser",
"type": "contact",
"hits": 1
}
},
"h_pauseAbuseMinimalReserveRefill"
]
} |
From: 2
Bottom Left Door
To: 1
Top Left Doorway
Requires a runway of at least 3 tiles (with an open end) in the adjacent room. Use a Cross Room Jump into Water followed by a delayed Momentum Conserving Turnaround to reach the Morph tunnel above. Climbing the Left side of the center hole will run into an unavoidable Scisor that can be passed through by Morphing. Crossing to the right from the left door requires slightly more runway and takes a more precise turnaround. Samus must also stay near a side of the center hole to reach the Morph tunnels. Entrance condition: {
"comeInJumping": {
"speedBooster": "yes",
"minTiles": 3
}
}Requires: {
"notable": "Cross Room Jump Morph"
}
"canMidAirMorph"
"canCrossRoomJumpIntoWater"
"canMomentumConservingTurnaround"
"canKago"
{
"or": [
{
"enemyDamage": {
"enemy": "Sciser",
"type": "contact",
"hits": 1
}
},
"h_pauseAbuseMinimalReserveRefill"
]
}Dev note: Extra run speeds between $1.2 and about $2.5 can work. |
From: 2
Bottom Left Door
To: 1
Top Left Doorway

Turn around to the left just before bonking the ceiling, to retain upward momentum. Then morph while passing through the crab and go through the morph tunnel to the left. Entrance condition: {
"comeInSpaceJumping": {
"speedBooster": "no",
"minTiles": 3.5625
}
}Requires: {
"notable": "Cross Room Jump Morph"
}
"canCrossRoomJumpIntoWater"
"canPreciseSpaceJump"
"canMomentumConservingTurnaround"
"canMidAirMorph"
"canKago"
{
"or": [
{
"enemyDamage": {
"enemy": "Sciser",
"type": "contact",
"hits": 1
}
},
"h_pauseAbuseMinimalReserveRefill"
]
}Dev note: Jump low through the door with at least $1.4 extra run speed. |
From: 2
Bottom Left Door
To: 1
Top Left Doorway
Turn around to the left just before bonking the ceiling, to retain upward momentum. Then morph while passing through the crab and go through the morph tunnel to the left. Entrance condition: {
"comeInSpaceJumping": {
"speedBooster": "yes",
"minTiles": 3
}
}Requires: {
"notable": "Cross Room Jump Morph"
}
"canCrossRoomJumpIntoWater"
"canPreciseSpaceJump"
"canMomentumConservingTurnaround"
"canMidAirMorph"
"canKago"
{
"or": [
{
"enemyDamage": {
"enemy": "Sciser",
"type": "contact",
"hits": 1
}
},
"h_pauseAbuseMinimalReserveRefill"
]
}Dev note: Jump low through the door with at least $1.2 extra run speed. |
From: 3
Bottom Right Door
To: 1
Top Left Doorway
Pass through the tunnel to the left, tanking a crab hit. Entrance condition: {
"comeInShinecharged": {}
}Requires: "canShinechargeMovementTricky"
"Gravity"
"SpaceJump"
"canMidAirMorph"
{
"enemyDamage": {
"enemy": "Sciser",
"type": "contact",
"hits": 1
}
}
{
"or": [
{
"and": [
"HiJump",
{
"shineChargeFrames": 140
}
]
},
{
"and": [
"canKago",
{
"shineChargeFrames": 155
}
]
}
]
}Exit condition: {
"leaveShinecharged": {}
}Unlocks doors: {"types":["super"],"requires":[]}
{"types":["missiles","powerbomb"],"requires":["never"]} |
|
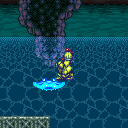
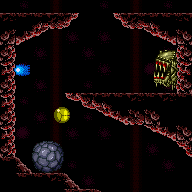
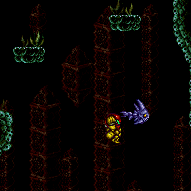
Grapple jump up through the door below. Contact the Skultera while morphing or unmorphing, to avoid knockback. Immediately after the final grapple jump, shoot Grapple to allow Samus to move left, avoiding the overhang and reaching the ledge above. Entrance condition: {
"comeInWithGrappleJump": {
"position": "left"
},
"comesThroughToilet": "no"
}Requires: "HiJump"
"canKago"
"canPreciseGrappleJump"
{
"enemyDamage": {
"enemy": "Skultera",
"type": "contact",
"hits": 1
}
}
"h_trickyToCarryFlashSuit"Dev note: It can be possible to avoid damage from the Skultera but it's very tricky. |
From: 2
Bottom Right Door
To: 3
Middle Right Door

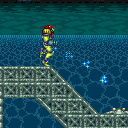
Run with enough speed to jump (after the transition) to reach the far left ledge. Either kill or Kago through the Fish enemy. At slightly higher run speeds, Samus can jump from the bottom of the slope and avoid the fish. Entrance condition: {
"comeInRunning": {
"speedBooster": "yes",
"minTiles": 7
}
}Requires: "HiJump"
"canSpeedyJump"
"canCrossRoomJumpIntoWater"
"canTrickyJump"
"canDodgeWhileShooting"
{
"or": [
{
"ammo": {
"type": "Super",
"count": 1
}
},
{
"and": [
"Charge",
"Plasma"
]
},
{
"and": [
"Plasma",
"canHitbox"
]
},
{
"and": [
"canKago",
"canLateralMidAirMorph",
{
"or": [
{
"enemyDamage": {
"enemy": "Skultera",
"type": "contact",
"hits": 1
}
},
"h_pauseAbuseMinimalReserveRefill"
]
}
]
}
]
} |
From: 2
Bottom Right Door
To: 3
Middle Right Door
Entrance condition: {
"comeInWithGrappleSwing": {
"blocks": [
{
"position": [
13,
5
],
"environment": "water",
"note": "Mt. Everest"
}
]
}
}Requires: "canPreciseGrappleJump"
"canKago"
{
"enemyDamage": {
"enemy": "Skultera",
"type": "contact",
"hits": 1
}
} |
From: 2
Bottom Right Door
To: 9
Junction Below Speed Blocks

Morph or unmorph while passing through the Skultera, to avoid taking knockback. Arm pump as needed, to move left a tile past the initial ledge, to avoid bonking a floating platform above. Grapple jump quickly to get past the second Skultera, or kago through it as well. Entrance condition: {
"comeInWithGrappleSwing": {
"blocks": [
{
"position": [
13,
5
],
"environment": "water",
"note": "Mt. Everest"
}
]
}
}Requires: "canPreciseGrappleJump"
{
"or": [
"HiJump",
"canTrickyGrappleJump"
]
}
"canKago"
{
"enemyDamage": {
"enemy": "Skultera",
"type": "contact",
"hits": 1
}
}
{
"or": [
{
"enemyDamage": {
"enemy": "Skultera",
"type": "contact",
"hits": 1
}
},
"h_trickyToCarryFlashSuit"
]
} |
|
After grabbing the item, turnaround as the crab thaws to Kago it and escape. Requires: "canComplexGMode"
{
"notable": "G-Mode Overload Speed Blocks then use Global Crab"
}
"canKago"
{
"or": [
{
"enemyDamage": {
"enemy": "Sciser",
"type": "contact",
"hits": 1
}
},
"h_pauseAbuseMinimalReserveRefill"
]
}
{
"obstaclesCleared": [
"C"
]
}Dev note: This strat is here instead of part of 11->6, because if the item is an E-Tank, Samus can use it to escape. |
From: 11
G-Mode, Below Speed Blocks (Overloaded PLMs)
To: 6
Speed Blocked Item

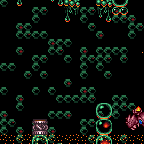
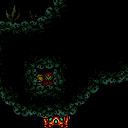
Freeze a crab on the edge of the speed blocks, such that Samus can jump inside and stand on the crab. If using Bombs, it is important to freeze the crab with all other beams turned off, so that the crab has 30 remaining Energy or less. Place a Bomb or Power Bomb, then quickly get into the crouch position and use X-Ray to exit G-Mode before it goes off. It is important to be crouched, not standing, and have Gravity off, or the bomb will boost Samus and she will be stuck in the speed blocks. Note that if the crab is arriving too early, it may be possible to slow the crab with Ice or lure the crab from above instead. Alternatively, she may have to wait for the global crab to circle the room. It is possible to kago the bomb boost in order to do this strat with Gravity still equipped. Requires: "canComplexGMode"
{
"notable": "G-Mode Overload Speed Blocks then use Global Crab"
}
"canBePatient"
"h_navigateUnderwater"
"canTrickyUseFrozenEnemies"
{
"or": [
"Gravity",
"HiJump",
"h_underwaterCrouchJump",
"canSpringBallJumpMidAir"
]
}
{
"or": [
{
"disableEquipment": "Gravity"
},
"canKago"
]
}
"h_bombThings" |
From: 1
Bottom Left Door
To: 2
Top Right Door

Entrance condition: {
"comeInWithGrappleSwing": {
"blocks": [
{
"position": [
8,
3
],
"note": "Grapple Beam Room"
},
{
"position": [
7,
3
],
"note": "Colosseum"
}
]
}
}Requires: "canTrickyGrappleJump"
{
"or": [
{
"ammo": {
"type": "Missile",
"count": 1
}
},
{
"ammo": {
"type": "Super",
"count": 1
}
},
"Plasma",
{
"and": [
"canKago",
{
"enemyDamage": {
"enemy": "Choot",
"type": "contact",
"hits": 1
}
}
]
}
]
} |
From: 1
Bottom Left Door
To: 2
Top Right Door
Entrance condition: {
"comeInWithGrappleSwing": {
"blocks": [
{
"position": [
6,
2
],
"note": "Lava Grapple Tunnel"
},
{
"position": [
5,
2
],
"note": "The Moat, Double Chamber, Wrecked Ship Energy Tank Room"
}
]
}
}Requires: "canTrickyGrappleJump"
"HiJump"
{
"or": [
{
"ammo": {
"type": "Missile",
"count": 1
}
},
{
"ammo": {
"type": "Super",
"count": 1
}
},
"Plasma",
{
"and": [
"canKago",
{
"enemyDamage": {
"enemy": "Choot",
"type": "contact",
"hits": 1
}
}
]
}
]
} |