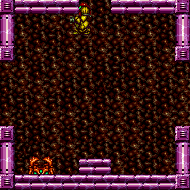
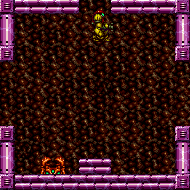
canBeExtremelyPatient (Beyond)
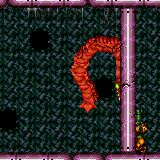
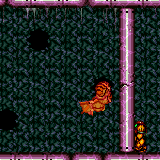
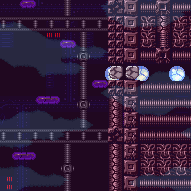
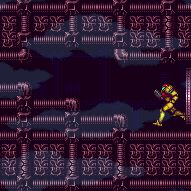
Executing a strat that requires waiting or doing the same thing over and over again for a very long time, potentially more than 6 minutes, even with good execution.
Dependencies: canBePatient, canBeVeryPatient
Strats ()
|
Overload PLMs using the scroll block at the top of the stairs next to the bomb blocks. A long series of precise bomb jumps and enemy manipulations are required to reach the top without taking a hit. Entrance condition: {
"comeInWithGMode": {
"mode": "any",
"morphed": true
}
}Requires: {
"notable": "G-Mode Morph Insane IBJ to Top"
}
"canTrickyGMode"
"h_artificialMorphIBJ"
"canBeExtremelyPatient" |
|
Enter the room with a very specific run speed to jump from the door, squeeze by the ceiling, and land a speedball perfectly in the tunnel to break the Bomb block. Entrance condition: {
"comeInGettingBlueSpeed": {
"length": 2,
"openEnd": 0,
"minExtraRunSpeed": "$4.4",
"maxExtraRunSpeed": "$4.7"
}
}Requires: {
"notable": "Morph Tunnel SpeedBall"
}
"canSpeedball"
"canTrickyDashJump"
"canSlowShortCharge"
"canInsaneJump"
"canBeExtremelyPatient"Dev note: There is 1 unusable tile in this runway. The canBeExtremelyPatient requirement is for difficulty placement. |
|
A long series of precise bomb jumps and enemy manipulations are required to reach the top without taking a hit or unmorphing. Overload PLMs using the scroll block next to the bomb blocks at the top, allowing passage through them by making them become air. Entrance condition: {
"comeInWithGMode": {
"mode": "any",
"morphed": true
}
}Requires: {
"notable": "G-Mode Morph Insane IBJ to Top"
}
"canTrickyGMode"
"h_artificialMorphIBJ"
"canBeExtremelyPatient" |
|
Requires: {
"resetRoom": {
"nodes": [
1,
2
]
}
}
"canUseGrapple"
"canTrickyJump"
{
"cycleFrames": 150
}
{
"or": [
{
"noFlashSuit": {}
},
{
"and": [
"canComplexCarryFlashSuit",
"h_useSpringBall",
{
"cycleFrames": 60
}
]
},
{
"and": [
"canTrickyCarryFlashSuit",
"canInsaneMidAirMorph",
"canBeExtremelyPatient",
{
"cycleFrames": 200
}
]
}
]
}Farm cycle drops: 1 Geemer (orange) |
|
Perform 176 moonfalls using the respawning shot block: after each moonfall, destroy the shot block (aiming up with angle up + angle down) and press forward to stand up; wait for the shot block to respawn before performing the next moonfall. On the 176th moonfall, Samus will sink a tile into the floor. Use Grapple to stand back up and perform 146 more moonfalls using the respawning shot block. On the 146th moonfall, Samus will sink 2 tiles into the floor. From here, continue using Grapple to stand up and perform another 145 moonfalls, but now without needing to use the shot block. After clipping 2 tiles into the floor with the 145th moonfall, unequip Grapple and perform a final 146th moonfall from 2 tiles deep in the floor to clip past 3 more tiles and reach the bottom of the room. Note that exact counting needed here: losing count and performing the 146th moonfall from the surface would cause Samus to clip 3 tiles into the floor and be stuck in a crouched state, unable to stand back up with Grapple nor able to perform the final moonfall needed to clip the rest of the way down; conversely, performing a moonfall early from 2 tiles deep, before gaining enough speed, will result in Samus only clipping down through a total of 4 tiles, again resulting in a softlock. This strat takes approximately 45 minutes to execute. Requires: {
"notable": "Respawning Shot Block Moondance"
}
"canExtendedMoondance"
"canBeExtremelyPatient" |
From: 3
Right Door
To: 2
Bottom Left Door
Requires: "canBeExtremelyPatient"
"canUseFlashSuitInitialSpark"
"h_shinechargeMaxRunway"
{
"enemyDamage": {
"enemy": "Zeela",
"type": "contact",
"hits": 1
}
}
"canSlopeSpark"
{
"shinespark": {
"frames": 6,
"excessFrames": 0
}
}Exit condition: {
"leaveWithSpark": {
"position": "bottom"
}
}Unlocks doors: {"types":["ammo"],"requires":[]} |
From: 1
Top Left Door
To: 2
Middle Left Door (Behind Power Bomb Blocks)
Collect the Beetom and freeze it above and left of the Power Bomb Blocks in a way that Samus will be able to Moondance. Moondance until Samus falls through two tiles, wait for the Beetom to thaw and attach to Samus, then Moonfall again to sink through the solid blocks and reach the door with the Beetom. Use the Beetom to perform a G-mode setup through the door. Requires: {
"obstaclesNotCleared": [
"A"
]
}
{
"noBlueSuit": {}
}
"canBeExtremelyPatient"
"canExtendedMoondance"
"canTrickyUseFrozenEnemies"
{
"enemyDamage": {
"enemy": "Beetom",
"type": "contact",
"hits": 2
}
}Exit condition: {
"leaveWithGModeSetup": {
"knockback": false
}
}Unlocks doors: {"types":["ammo"],"requires":[]} |
From: 1
Top Left Door
To: 2
Middle Left Door (Behind Power Bomb Blocks)
Collect the Beetom and freeze it above and left of the Power Bomb Blocks in a way that Samus will be able to Moondance. Moondance until Samus falls through two tiles, wait for the Beetom to thaw and attach to Samus, then Moonfall again to sink through the solid blocks and reach the door with the Beetom. Use the Beetom to perform another extended moondance to leave with stored fall speed. Requires: {
"obstaclesNotCleared": [
"A"
]
}
{
"noBlueSuit": {}
}
"canBeExtremelyPatient"
"canExtendedMoondance"
"canTrickyUseFrozenEnemies"
{
"enemyDamage": {
"enemy": "Beetom",
"type": "contact",
"hits": 2
}
}
"h_extendedMoondanceBeetomLeniency"Exit condition: {
"leaveWithStoredFallSpeed": {
"fallSpeedInTiles": 2
}
}Unlocks doors: {"types":["ammo"],"requires":[]} |
From: 1
Top Left Door
To: 2
Middle Left Door (Behind Power Bomb Blocks)
Collect the Beetom and freeze it above and left of the Power Bomb Blocks in a way that Samus will be able to Moondance. Moondance until Samus falls through two tiles, wait for the Beetom to thaw and attach to Samus, then Moonfall again to sink through the solid blocks and reach the door with the Beetom. Use the Beetom to perform another moondance to leave with stored fall speed. Requires: {
"obstaclesNotCleared": [
"A"
]
}
{
"noBlueSuit": {}
}
"canBeExtremelyPatient"
"canExtendedMoondance"
"canTrickyUseFrozenEnemies"
{
"enemyDamage": {
"enemy": "Beetom",
"type": "contact",
"hits": 2
}
}Exit condition: {
"leaveWithStoredFallSpeed": {
"fallSpeedInTiles": 1
}
}Unlocks doors: {"types":["ammo"],"requires":[]} |
From: 3
Bottom Left Door
To: 6
Junction (Above Bottom Rippers)
Entrance condition: {
"comeInWithGrappleSwing": {
"blocks": [
{
"position": [
7,
3
],
"note": "Colosseum"
},
{
"position": [
6,
4
],
"note": "Grapple Tutorial Room 2"
}
]
}
}Requires: "canTrickyGrappleJump" "canBeExtremelyPatient" Dev note: FIXME: Setups from other rooms, such as Moat, are theoretically possible but appear to be even more difficult. |
From: 3
Left Side - Bottom Middle Door
To: 3
Left Side - Bottom Middle Door
Requires: {
"enemyDamage": {
"enemy": "Waver",
"type": "contact",
"hits": 1
}
}
"canBeExtremelyPatient" |
From: 2
Bottom Door
To: 2
Bottom Door
Use a Super to bring a Viola down to the floor. Freeze it near or on the door, freeze the Viola on the floating platform above it, moonfall between them, and aim down. After gaining enough speed, move forward to fall down and clip past the door shell below. This one needs relatively little fall speed. With too much or too little speed, Samus will land on the door shell instead of passing through. It is also possible to do this without a Super, using the Violas higher up, but it is very precise: one method is to shoot the bottom Viola to begin falling, wait a moment, then turn around 3 times. Requires: {
"or": [
{
"ammo": {
"type": "Super",
"count": 1
}
},
"canBeExtremelyPatient"
]
}
"canEnemyStuckMoonfall"
"canFreeFallClip"
"canTrickyUseFrozenEnemies"Bypasses door shell: true |
|
Stand a specific distance away from Golden Torizo so that it takes a step before jumping backwards. When it uses the eye lazer attack, it will not be able to avoid missiles. Farm drops following every jump backwards. At low health Golden Torizo will do a bird attack and that must be interuppted preemptively because it is difficult to dodge. Requires: {
"notable": "Safe Spot Kill"
}
{
"notable": "Missiles Only Kill"
}
"h_heatProof"
{
"resourceCapacity": [
{
"type": "Missile",
"count": 5
}
]
}
"canBeExtremelyPatient"Clears obstacles: f_DefeatedGoldenTorizo Sets flags: f_DefeatedGoldenTorizo |
|
Entrance condition: {
"comeInWithGrappleSwing": {
"blocks": [
{
"position": [
5,
2
],
"note": "The Moat, Double Chamber, Wrecked Ship Energy Tank Room"
},
{
"position": [
2.375,
4.5625
],
"note": "Post Crocomire Farming Room"
}
]
}
}Requires: "h_heatProof" "canTrickyGrappleJump" "canBeExtremelyPatient" |
From: 2
Item (Behind the Bomb Wall)
To: 1
Left Door
In R-Mode, kill the Coverns until there is Energy in Samus's Reserves. Get into the Morph tunnel and go to the far left. Wait for Coverns to damage Samus down until Reserves trigger, forcing a stand up and enabling her to escape. Note that it is required to break the bomb block above the Morph tunnel as well, in order to clip out. Requires: {
"notable": "R-Mode Standup Clip"
}
{
"obstaclesCleared": [
"R-Mode"
]
}
"canRModeStandupClip"
"canCeilingClip"
{
"or": [
{
"and": [
{
"disableEquipment": "ETank"
},
{
"or": [
"canBePatient",
{
"resourceAvailable": [
{
"type": "Energy",
"count": 80
}
]
}
]
}
]
},
"canBeExtremelyPatient"
]
}
{
"partialRefill": {
"type": "ReserveEnergy",
"limit": 20
}
}
{
"or": [
"canTrivialMidAirMorph",
"h_useSpringBall",
"h_bombThings"
]
}
{
"autoReserveTrigger": {}
}Resets obstacles: R-Mode Dev note: If Phantoon is alive, 'Base' can be used instead. Note that this strat is useless in vanilla, as the item only spawns if Phantoon has been killed. |
From: 2
Top Left Door
To: 2
Top Left Door
Requires: "canBeExtremelyPatient"
{
"not": "f_DefeatedPhantoon"
}
"canRiskPermanentLossOfAccess"
{
"canShineCharge": {
"usedTiles": 11,
"steepUpTiles": 7,
"openEnd": 1
}
}
{
"enemyDamage": {
"enemy": "Covern",
"type": "contact",
"hits": 1
}
}
"canSlopeSpark"
{
"shinespark": {
"frames": 3,
"excessFrames": 3
}
} |
|
Entrance condition: {
"comeInWithGrappleSwing": {
"blocks": [
{
"position": [
6,
2
],
"note": "Lava Grapple Tunnel"
},
{
"position": [
5,
2
],
"note": "The Moat, Double Chamber, Wrecked Ship Energy Tank Room"
},
{
"position": [
2.375,
4.5625
],
"note": "Post Crocomire Farming Room"
}
]
}
}Requires: "canTrickyGrappleJump" "canBeExtremelyPatient" |
|
Entrance condition: {
"comeInWithGrappleSwing": {
"blocks": [
{
"position": [
6,
4
],
"note": "Grapple Tutorial Room 2"
}
]
}
}Requires: "canTrickyGrappleJump"
{
"or": [
{
"noFlashSuit": {}
},
{
"and": [
"canTrickyCarryFlashSuit",
"canBeExtremelyPatient"
]
}
]
} |
From: 1
Bottom Left Door
To: 4
Top Left Door
Entrance condition: {
"comeInWithGrappleSwing": {
"blocks": [
{
"position": [
-1,
5
],
"environment": "water",
"note": "Mt. Everest"
},
{
"position": [
8,
3
],
"note": "Grapple Beam Room"
},
{
"position": [
7,
3
],
"note": "Colosseum"
}
]
}
}Requires: "canPreciseGrappleJump"
{
"or": [
{
"noFlashSuit": {}
},
"HiJump",
{
"and": [
"canTrickyCarryFlashSuit",
"canBeExtremelyPatient"
]
}
]
}Exit condition: {
"leaveWithGrappleJump": {
"position": "right"
}
}Unlocks doors: {"types":["super","powerbomb"],"requires":[]}
{"types":["missiles"],"requires":["canTrickyGrappleJump"]}Dev note: Opening the door while carrying a flash suit is possible without Hi-Jump but very difficult. |
|
Entrance condition: {
"comeInWithGrappleSwing": {
"blocks": [
{
"position": [
-1,
5
],
"environment": "water",
"note": "Mt. Everest"
},
{
"position": [
8,
3
],
"note": "Grapple Beam Room"
},
{
"position": [
7,
3
],
"note": "Colosseum"
},
{
"position": [
6,
4
],
"note": "Grapple Tutorial Room 2"
},
{
"position": [
6,
2
],
"note": "Lava Grapple Tunnel"
},
{
"position": [
5,
2
],
"note": "The Moat, Double Chamber, Wrecked Ship Energy Tank Room"
},
{
"position": [
2.375,
4.5625
],
"note": "Post Crocomire Farming Room"
}
]
}
}Requires: "canTrickyGrappleJump"
{
"or": [
{
"noFlashSuit": {}
},
"HiJump",
{
"and": [
"canTrickyCarryFlashSuit",
"canBeExtremelyPatient"
]
}
]
}Exit condition: {
"leaveWithGrappleJump": {
"position": "any"
}
}Unlocks doors: {"types":["ammo"],"requires":[]} |
From: 1
Bottom Left Door
To: 5
Platform Junction Near Top Left Door
Back into the right corner to jump high enough to reach the first overhang. In case of carrying a flash suit, it is possible, though difficult, to get up without killing the Skultera, or to kill the Skultera with hero shots, in case Morph is not available. Requires: "canLongUnderwaterWallJump"
{
"or": [
"h_midAirShootUp",
"canBeExtremelyPatient"
]
}Unlocks doors: {"nodeId":1,"types":["ammo"],"requires":[]} |
From: 9
Junction Below Speed Blocks
To: 4
Top Right Door
Using the slow global crab to ascend the top section of the room requires the speed blocks to not be broken. Be sure not to lure the first crab on the right wall until the slow global crab is near. Freeze the crab coming down as a platform to stand on to jump onto the frozen global crab on the right. Near the end, use the global crab to get onto the top left corner of the room, then jump towards the walkway leading to the door. Requires: {
"notable": "Crab Climb with Only Ice"
}
"canBeExtremelyPatient"
"canSuitlessMaridia"
"canCrazyCrabClimb"
"canTrickyJump"
{
"obstaclesNotCleared": [
"A"
]
}Dev note: The global crab will fall if the speed blocks are broken. |
|
Entrance condition: {
"comeInWithGrappleSwing": {
"blocks": [
{
"position": [
13,
5
],
"environment": "water",
"note": "Mt. Everest"
},
{
"position": [
7,
3
],
"note": "The Precious Room"
},
{
"position": [
7,
2
],
"note": "The Moat"
},
{
"position": [
8,
2
],
"note": "Bowling Alley"
},
{
"position": [
7,
3
],
"obstructions": [
[
6,
10
]
],
"note": "Red Brinstar Firefleas Room"
}
]
}
}Requires: {
"or": [
"f_MaridiaTubeBroken",
{
"obstaclesCleared": [
"f_MaridiaTubeBroken"
]
}
]
}
"canPreciseGrappleJump"
{
  "or": [
    {
      "noFlashSuit": {}
    },
    "HiJump",
    {
      "and": [
        "canTrickyCarryFlashSuit",
        "canBeExtremelyPatient"
      ]
    }
  ]
}
Exit condition: {
"leaveWithGrappleJump": {
"position": "any"
}
}Unlocks doors: {"types":["super","powerbomb"],"requires":[]}
{"types":["missiles"],"requires":["never"]} |
From: 1
Middle Left Door
To: 7
Top Right Left Item
Use a double spring ball jump to reach the Speed blocks below the items while chaining temporary blue. Perform a spring ball jump and immediately unmorph and continue holding up, to break some of the Speed blocks while passing up through them. Leave one of the bottom Speed blocks unbroken to use as a platform. The top speed blocks will respawn; clip through them either using a snail clip with X-Ray or a Crystal Flash clip; In the case of a Crystal Flash clip, menu to Grapple before the Crystal Flash ends and mash shoot while holding down. Entrance condition: {
"comeInWithTemporaryBlue": {}
}Requires: {
"notable": "Suitless Temporary Blue To Items"
}
"canSuitlessMaridia"
"canLongChainTemporaryBlue"
{
"ammo": {
"type": "PowerBomb",
"count": 1
}
}
"h_doubleSpringBallJumpWithHiJump"
{
"or": [
"canXRayCeilingClip",
{
"and": [
"h_jumpIntoCrystalFlashClip",
"Grapple"
]
}
]
}
"canBeExtremelyPatient" |
From: 2
Bottom Left Door
To: 1
Middle Left Door
Use double spring ball jumps to reach the top-right of the room with temporary blue. To cross the two gaps at the top of the room to the left while chaining temporary blue, use spring ball jumps with HiJump disabled; in each case, perform a stationary lateral mid-air morph or a spring fling (or both); Entrance condition: {
"comeInRunning": {
"speedBooster": "yes",
"minTiles": 0.4375
}
}Requires: "h_waterGetBlueSpeed"
"HiJump"
"canLongChainTemporaryBlue"
"canBeExtremelyPatient"
"canXRayTurnaround"
"canDoubleSpringBallJumpMidAir"
"canTrickySpringBallJump"
{
  "or": [
    "canStationaryLateralMidAirMorph",
    "canSpringFling"
  ]
}
"can4HighMidAirMorph" |
From: 2
Bottom Left Door
To: 1
Middle Left Door
Use double spring ball jumps to reach the top-right of the room with temporary blue. To cross the two gaps at the top of the room to the left while chaining temporary blue, use spring ball jumps with HiJump disabled; in each case, perform a stationary lateral mid-air morph or a spring fling (or both); Entrance condition: {
"comeInWithTemporaryBlue": {}
}Requires: "HiJump"
"canLongChainTemporaryBlue"
"canBeExtremelyPatient"
"canXRayTurnaround"
"canDoubleSpringBallJumpMidAir"
"canTrickySpringBallJump"
{
"or": [
"canStationaryLateralMidAirMorph",
"canSpringFling"
]
}
"can4HighMidAirMorph" |
From: 1
Bottom Left Door
To: 2
Right Door
Lure a Puyo close to the crumble blocks and time it so you can kill it and collect its drop without getting hit. Alternativly you can start with more health and time the PowerBomb explosion with a Puyo hit to collect the drop automatically. Requires: "canBeExtremelyPatient"
"canSuitlessMaridia"
{
"tech": "canJumpIntoCrystalFlashClip"
}
"h_underwaterCrouchJumpDownGrab"
"h_10PowerBombCrystalFlash"
{
"resetRoom": {
"nodes": [
1
]
}
} |
|
Wait for the one pattern (bottom->right) where Botwoon's head passes through the dividing barrier briefly. The extent Botwoon's head passes through the wall varies ranging from almost no damage window up to enough time for 2 missiles. By jumping there is a doppler effect allowing up to 2 more missiles to hit Botwoon. The fight can be sped up by Gate Glitching through the wall and landing lucky hits throughout the fight. Requires: {
"notable": "Back-Side Super Only Fight"
}
"h_navigateUnderwater"
{
"ammo": {
"type": "Missile",
"count": 30
}
}
{
"or": [
"canBeExtremelyPatient",
{
"and": [
"canBeVeryPatient",
"canBeVeryLucky",
"canGateGlitch",
{
"noFlashSuit": {}
},
{
"ammo": {
"type": "Missile",
"count": 30
}
}
]
}
]
}
{
"or": [
"canInsaneJump",
{
"and": [
"Gravity",
"canTrickyJump"
]
},
{
"enemyDamage": {
"enemy": "Botwoon 1",
"type": "acid",
"hits": 6
}
}
]
}
{
"ammo": {
"type": "Missile",
"count": 10
}
}Clears obstacles: f_DefeatedBotwoon Sets flags: f_DefeatedBotwoon Dev note: It is much easier to miss with missiles, so 10 leniency missiles are added. |
From: 1
Left Door
To: 3
Top Right Door
Land on each set of spikes as a way to jump to the next safe platform. The first jump can be done with a very precise damage boost to bounce forward off the spike, or using morph. Requires: {
"notable": "Spike Platforming with No Equipment"
}
"canDash"
"canWallJump"
"canInsaneJump"
"canHorizontalDamageBoost"
"canUseIFrames"
{
"spikeHits": 3
}
{
"or": [
"Morph",
{
"spikeHits": 2
}
]
}
"h_extremelyTrickyToCarryFlashSuit"Dev note: Positioning on the spikes is harder to control without morph. |
|
Requires: {
"notable": "Very Long Bootless Underwater Wall Jump"
}
"canBootless2WideUWJ"
"canBeExtremelyPatient"
"canSpringBallJumpMidAir" |
|
Entrance condition: {
"comeInWithGrappleSwing": {
"blocks": [
{
"position": [
8,
3
],
"note": "Grapple Beam Room"
},
{
"position": [
7,
3
],
"note": "Colosseum"
},
{
"position": [
6,
2
],
"note": "Lava Grapple Tunnel"
},
{
"position": [
5,
2
],
"note": "The Moat, Double Chamber, Wrecked Ship Energy Tank Room"
}
]
}
}Requires: "canTrickyGrappleJump" "canMidairWiggle" "canBeExtremelyPatient" |
|
Entrance condition: {
"comeInWithGrappleSwing": {
"blocks": [
{
"position": [
7,
3
],
"environment": "water",
"note": "Pants Room"
}
]
}
}Requires: "Gravity" "canTrickyGrappleJump" "h_extremelyTrickyToCarryFlashSuit" |
From: 8
Standing on Top Left of Mother Brain Tank
To: 1
Left Blast Door
To be able to break the glass and leave out the left side, Samus must be at a specific horizontal X pixel position ($63). Therefore, the Crystal Flash should have been performed at this position; For the moondance, moonfalls must be performed only left-to-right, or Samus will fall out. After 176 moonfalls, Samus will clip down into the tank. Angle down and fire 18 Missiles into Mother Brain to break the tank. If Samus is correctly positioned, she will then fall out and be free to move to the left. If Samus is at position $62 (a pixel to the left of the correct position), it is possible for a Rinka hit to knock back Samus into position $63. Requires: {
"notable": "Moondance Clip"
}
"Wave"
"canTrickyDodgeEnemies"
{
"or": [
"Ice",
"canBeExtremelyPatient"
]
}
"canMoondance"
{
"enemyDamage": {
"enemy": "Rinka",
"type": "contact",
"hits": 1
}
}
{
"ammo": {
"type": "Missile",
"count": 18
}
}Sets flags: f_MotherBrainGlassBroken Dev note: FIXME: Using some Supers in place of Missiles could be possible, but if too many are used it might trigger the fight cutscene. |
