canCount (Insane)
The ability to keep an exact count while performing a long sequence of actions, for example while moondancing.
Strats ()
|

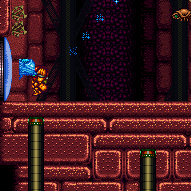
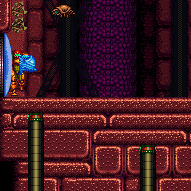
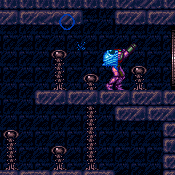
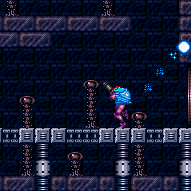
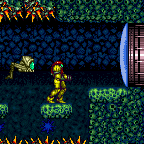
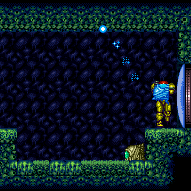
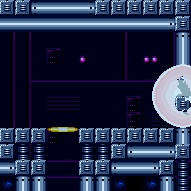
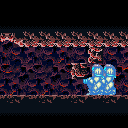
Pick up a Beetom and bring it up to the centered platform below the crumble blocks. Freeze it at about head height where Samus can move around inside its sprite, and use it to Moondance. Refreeze the Beetom regularly to keep it in place. Once the clip begins, hold down to shrink Samus' hitbox so that she can fall through the Solid tile next to the power bomb block. The shot block needs to be cleared in advance. Requires: {
"noBlueSuit": {}
}
{
"notable": "Beetom Moondance"
}
"canMoondance"
"canCount"
"canTrickyUseFrozenEnemies"
{
"enemyDamage": {
"enemy": "Beetom",
"type": "contact",
"hits": 4
}
} |
From: 9
Junction Below Items
To: 2
Middle Right Door
Requires: {
"noBlueSuit": {}
}
{
"or": [
"Morph",
{
"obstaclesCleared": [
"A"
]
}
]
}
"canMoondance"
"canCount"
"canTrickyUseFrozenEnemies"
{
"enemyDamage": {
"enemy": "Beetom",
"type": "contact",
"hits": 4
}
}Exit condition: {
"leaveWithStoredFallSpeed": {
"fallSpeedInTiles": 1
}
}Unlocks doors: {"types":["ammo"],"requires":[]} |
From: 9
Junction Below Items
To: 3
Bottom Left Door
Requires: {
"noBlueSuit": {}
}
{
"or": [
"Morph",
{
"obstaclesCleared": [
"A"
]
}
]
}
"canMoondance"
"canCount"
"canTrickyUseFrozenEnemies"
{
"enemyDamage": {
"enemy": "Beetom",
"type": "contact",
"hits": 10
}
}Exit condition: {
"leaveWithStoredFallSpeed": {
"fallSpeedInTiles": 1
}
}Unlocks doors: {"types":["ammo"],"requires":[]} |
From: 9
Junction Below Items
To: 4
Bottom Right Door
Requires: {
"noBlueSuit": {}
}
{
"or": [
"Morph",
{
"obstaclesCleared": [
"A"
]
}
]
}
"canMoondance"
"canCount"
"canTrickyUseFrozenEnemies"
{
"enemyDamage": {
"enemy": "Beetom",
"type": "contact",
"hits": 10
}
}Exit condition: {
"leaveWithStoredFallSpeed": {
"fallSpeedInTiles": 1
}
}Unlocks doors: {"types":["ammo"],"requires":[]} |
|

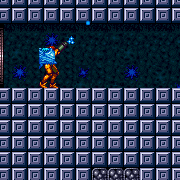
Freeze a Beetom at head height where Samus can Spinjump into it and begin Moondancing. Requires: {
"obstaclesCleared": [
"C"
]
}
"canMoondance"
"canCount"
"canTrickyUseFrozenEnemies"
{
"enemyDamage": {
"enemy": "Beetom",
"type": "contact",
"hits": 2
}
}Exit condition: {
"leaveWithStoredFallSpeed": {
"fallSpeedInTiles": 1
}
} |
|

Freeze a Beetom at head height where Samus can Spinjump into it and begin Moondancing. Requires: {
"obstaclesCleared": [
"C"
]
}
"canMoondance"
"canCount"
"canTrickyUseFrozenEnemies"
{
"enemyDamage": {
"enemy": "Beetom",
"type": "contact",
"hits": 2
}
}Exit condition: {
"leaveWithStoredFallSpeed": {
"fallSpeedInTiles": 1
}
} |
From: 4
Bottom Right Door
To: 4
Bottom Right Door
Freeze a Beetom at head height where Samus can Spinjump into it and begin Moondancing. Requires: {
"obstaclesNotCleared": [
"A"
]
}
{
"noBlueSuit": {}
}
"canMoondance"
"canCount"
"canTrickyUseFrozenEnemies"
{
"enemyDamage": {
"enemy": "Beetom",
"type": "contact",
"hits": 2
}
}Exit condition: {
"leaveWithStoredFallSpeed": {
"fallSpeedInTiles": 1
}
} |
From: 6
Junction (Right of Tunnel)
To: 3
Bottom Left Door

Freeze a Beetom at head height where Samus can Spinjump into it and begin Moondancing. The Beetom can be left at the door if farming for health is needed. Requires: {
"obstaclesNotCleared": [
"A"
]
}
{
"noBlueSuit": {}
}
"Morph"
"canMoondance"
"canCount"
"canTrickyUseFrozenEnemies"
{
"enemyDamage": {
"enemy": "Beetom",
"type": "contact",
"hits": 2
}
}Exit condition: {
"leaveWithStoredFallSpeed": {
"fallSpeedInTiles": 1
}
}Unlocks doors: {"types":["ammo"],"requires":[]} |
|
Freeze a Beetom at head height where Samus can Spinjump into it and begin Moondancing. Requires: {
"noBlueSuit": {}
}
"canMoondance"
"canCount"
"canTrickyUseFrozenEnemies"
{
"enemyDamage": {
"enemy": "Beetom",
"type": "contact",
"hits": 2
}
}
{
"or": [
{
"enemyDamage": {
"enemy": "Beetom",
"type": "contact",
"hits": 4
}
},
{
"ammo": {
"type": "Missile",
"count": 1
}
},
{
"ammo": {
"type": "Super",
"count": 1
}
}
]
}Exit condition: {
"leaveWithStoredFallSpeed": {
"fallSpeedInTiles": 1
}
} |
|


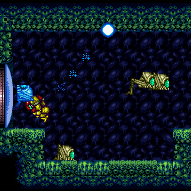
Freeze one of the Metarees at a height where Samus can become stuck and then use it to Moondance. Stop after 175 Moonfalls, before Samus clips into the ground. Requires: {
"noBlueSuit": {}
}
"canMoondance"
"canCount"
"canTrickyUseFrozenEnemies"
{
"obstaclesCleared": [
"A"
]
}Exit condition: {
"leaveWithStoredFallSpeed": {
"fallSpeedInTiles": 1
}
}Unlocks doors: {"types":["ammo"],"requires":[]} |
|
Freeze one of the Metarees at a height where Samus can become stuck and then use it to Moondance. After exactly 175 Moonfalls, before Samus clips into the ground, walk over to the Speed Blocks to perform the clip. Requires: "canMoondance" "canCount" "canTrickyUseFrozenEnemies" |
|
Freeze one of the Metarees at a height where Samus can become stuck and then use it to Moondance. Stop after exactly 175 Moonfalls, before Samus clips into the ground. Requires: "canMoondance" "canCount" "canTrickyUseFrozenEnemies" Exit condition: {
"leaveWithStoredFallSpeed": {
"fallSpeedInTiles": 1
}
} |
From: 2
Right Door
To: 3
Top Junction
Enter with G-Mode and use X-Ray to get stuck 9 pixels inside the door. X-Ray climb to a relatively specific height: after just one pixel of Samus' feet are visible while crouching facing left, perform between 20 and 22 more X-Ray stand-ups (any of these work). Use X-ray to face left, then run and jump to barely make it onto the ledge. Entrance condition: {
"comeInWithGMode": {
"mode": "direct",
"morphed": false
}
}Requires: "canTrickyGMode" "canGModeXRayClimb" "canOffScreenMovement" "canInsaneJump" "canCount" Clears obstacles: R-Mode Dev note: 9 pixels stuck in the door is X position $1E4. The correct Y positions for the jump are $C1, $BC, and $BB FIXME: Some of the X position to the left ($1E2, $1E3) could also work; maybe investigate which vertical positions work for them? |
|


Bring the Beetom close to the door and begin Moondancing. Stop after exactly 175 moonfalls, so as not to fall through the floor. Requires: {
"obstaclesNotCleared": [
"A"
]
}
{
"noBlueSuit": {}
}
"canMoondance"
"canCount"
"canTrickyUseFrozenEnemies"
{
"enemyDamage": {
"enemy": "Beetom",
"type": "contact",
"hits": 4
}
}Exit condition: {
"leaveWithStoredFallSpeed": {
"fallSpeedInTiles": 1
}
} |
From: 1
Top Left Door
To: 2
Middle Left Door (Behind Power Bomb Blocks)


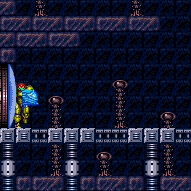
Break the Power Bomb Blocks without killing the Beetom Freeze a Beetom at head height where Samus can Spinjump into it and begin Moondancing. If needed, the Beetom can be left at the door while Samus moves to the farm bugs. Requires: {
"obstaclesNotCleared": [
"A"
]
}
{
"noBlueSuit": {}
}
"h_usePowerBomb"
"canMoondance"
"canCount"
"canTrickyUseFrozenEnemies"
{
"enemyDamage": {
"enemy": "Beetom",
"type": "contact",
"hits": 1
}
}Exit condition: {
"leaveWithStoredFallSpeed": {
"fallSpeedInTiles": 1
}
}Unlocks doors: {"types":["missiles","super"],"requires":[]}
{"types":["powerbomb"],"requires":[],"useImplicitRequires":false} |
|
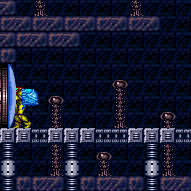
Freeze a Beetom at head height where Samus can Spinjump into it and begin Moondancing. If needed, the Beetom can be left at the door while Samus moves to the farm bugs. Requires: {
"obstaclesNotCleared": [
"A"
]
}
{
"noBlueSuit": {}
}
"canMoondance"
"canCount"
"canTrickyUseFrozenEnemies"
{
"enemyDamage": {
"enemy": "Beetom",
"type": "contact",
"hits": 2
}
}Exit condition: {
"leaveWithStoredFallSpeed": {
"fallSpeedInTiles": 1
}
}Unlocks doors: {"types":["missiles","super"],"requires":[]}
{
"types": [
"powerbomb"
],
"requires": [
{
"or": [
"canWallJump",
"SpaceJump",
"canLongIBJ",
"canSpringBallJumpMidAir",
{
"and": [
"HiJump",
"canSpeedyJump"
]
}
]
}
],
"note": [
"Using a Power Bomb here requires leaving the Beetom above and going back for it.",
"The Power Bomb will destroy the nearby Rippers, which is why there are additional requirements to get back up."
]
} |
|
Freeze a Beetom at head height where Samus can Spinjump into it and begin Moondancing. If needed, the Beetom can be left at the door while Samus moves to the farm bugs. Requires: {
"obstaclesNotCleared": [
"A"
]
}
{
"noBlueSuit": {}
}
"canMoondance"
"canCount"
"canTrickyUseFrozenEnemies"
{
"enemyDamage": {
"enemy": "Beetom",
"type": "contact",
"hits": 6
}
}Exit condition: {
"leaveWithStoredFallSpeed": {
"fallSpeedInTiles": 1
}
}Unlocks doors: {"types":["missiles","super"],"requires":[]}
{
"types": [
"powerbomb"
],
"requires": [
{
"or": [
"canWallJump",
"SpaceJump",
"canLongIBJ",
"canSpringBallJumpMidAir",
{
"and": [
"HiJump",
"canSpeedyJump"
]
}
]
}
],
"note": [
"Using a Power Bomb here requires leaving the Beetom above and going back for it.",
"The Power Bomb will destroy the nearby Rippers, which is why there are additional requirements to get back up."
]
} |
|
Freeze a Beetom at head height where Samus can Spinjump into it and begin Moondancing. If needed, the Beetom can be left at the door while Samus moves to the farm bugs. Requires: {
"obstaclesNotCleared": [
"A"
]
}
{
"noBlueSuit": {}
}
{
"or": [
"HiJump",
"SpaceJump",
"canWallJump"
]
}
"canMoondance"
"canCount"
"canTrickyUseFrozenEnemies"
{
"enemyDamage": {
"enemy": "Beetom",
"type": "contact",
"hits": 6
}
}Exit condition: {
"leaveWithStoredFallSpeed": {
"fallSpeedInTiles": 1
}
}Unlocks doors: {"types":["ammo"],"requires":[]} |
|
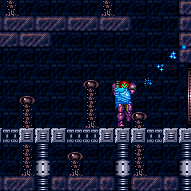
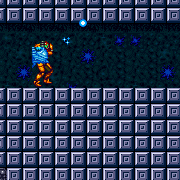
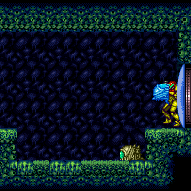
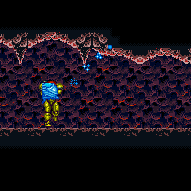
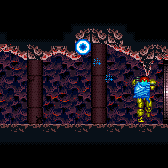
Freeze the Beetom while Samus is as far left as possible on the door ledge. Moonwalk carefully and start moondancing under the Beetom. As long as Samus is near the door, the other Beetoms won't come near. Requires: {
"noBlueSuit": {}
}
"canMoondance"
"canCount"
"canTrickyUseFrozenEnemies"
{
"enemyDamage": {
"enemy": "Beetom",
"type": "contact",
"hits": 1
}
}Exit condition: {
"leaveWithStoredFallSpeed": {
"fallSpeedInTiles": 1
}
} |
From: 1
Left Door
To: 1
Left Door
Use a Super on the top and bottom blocks. Crystal Flash below the lower block to standup and then begin Moondancing. After Samus sinks through the bottom tile, use a Super to break the final block, then use Grapple to get out of the floor. Without Grapple, count to 174 Moonfalls and delicately Moonfall to prevent clipping into the ground. Requires: {
"ammo": {
"type": "Super",
"count": 3
}
}
"h_CrystalFlash"
"canMoondance"
{
"or": [
"canCount",
"Grapple"
]
}Exit condition: {
"leaveWithStoredFallSpeed": {
"fallSpeedInTiles": 1
}
}Dev note: Obstacle A doesnt need to be checked, because there is no reason to have destroyed more than one block, with Morph. FIXME: This should have a pixel precise setup to prevent using another Super. |
|
Freeze a Beetom at head height where Samus can Spinjump into it and begin Moondancing. Requires: "canMoondance"
"canCount"
"canTrickyUseFrozenEnemies"
{
"noBlueSuit": {}
}
{
"enemyDamage": {
"enemy": "Beetom",
"type": "contact",
"hits": 2
}
}Exit condition: {
"leaveWithStoredFallSpeed": {
"fallSpeedInTiles": 1
}
} |
From: 1
Left Door
To: 1
Left Door
Use SpeedBooster to construct a structure for Moondancing that has 1 chest height block and 1 head height block to the right of it and no other Speed blocks. Crystal Flash below the lower block, exactly pixel aligned with its right side, to standup and then begin Moondancing. After Samus sinks through the bottom tile, it is possible to use Grapple to return to a crouch and wiggle right and then Turn-Around Aim Cancel to escape to the right. Without Grapple, count to 174 Moonfalls and delicately Moonfall so as to remain crouched and then wiggle to the right. Finally, use SpeedBooster if needed to break the remaining Speed blocks and reach the door. Requires: {
"notable": "Speed Block Moondance"
}
"h_CrystalFlash"
"canTrickyJump"
"canTurnaroundAimCancel"
"h_getBlueSpeedMaxRunway"
"canTemporaryBlue"
"canMoondance"
"canSpeedball"
{
"or": [
"canCount",
"Grapple"
]
}Exit condition: {
"leaveWithStoredFallSpeed": {
"fallSpeedInTiles": 1
}
} |
|

Freeze a Beetom at head height where Samus can Spinjump into it and begin Moondancing. Requires: "canMoondance"
"canCount"
"canTrickyUseFrozenEnemies"
"h_getBlueSpeedMaxRunway"
{
"enemyDamage": {
"enemy": "Beetom",
"type": "contact",
"hits": 2
}
}Exit condition: {
"leaveWithStoredFallSpeed": {
"fallSpeedInTiles": 1
}
}Unlocks doors: {"types":["ammo"],"requires":[]} |
From: 1
Left Door
To: 2
Right Door
Use SpeedBooster to construct a structure for Moondancing that has 1 chest height block and 1 head height block to the right of it and no other Speed blocks. Crystal Flash below the lower block, exactly pixel aligned with its right side, to standup and then begin Moondancing. After Samus sinks through the bottom tile, it is possible to use Grapple to return to a crouch and wiggle right and then Turn-Around Aim Cancel to escape to the right. Without Grapple, count to 174 Moonfalls and delicately Moonfall so as to remain crouched and then wiggle to the right. Finally, use SpeedBooster if needed to break the remaining Speed blocks and reach the door. Requires: {
"notable": "Speed Block Moondance"
}
"h_CrystalFlash"
"canTrickyJump"
"canTurnaroundAimCancel"
"h_getBlueSpeedMaxRunway"
"canTemporaryBlue"
"canMoondance"
"canSpeedball"
{
"or": [
"canCount",
"Grapple"
]
}Exit condition: {
"leaveWithStoredFallSpeed": {
"fallSpeedInTiles": 1
}
}Unlocks doors: {"types":["ammo"],"requires":[]} |
From: 2
Right Door
To: 2
Right Door

Fire wide Wave beam shots into the ceiling until it is possible to walk through the Speed blocks. Let a Beetom attach to Samus and then return to the right. Freeze the Beetom at head height where Samus can Spinjump into it and begin Moondancing. Requires: {
"notable": "Shot Block Overload (Speedless Speedway)"
}
"canMoondance"
"canCount"
"canTrickyUseFrozenEnemies"
{
  "noBlueSuit": {}
}
{
  "enemyDamage": {
    "enemy": "Beetom",
    "type": "contact",
    "hits": 2
  }
}
"Wave"
{
"or": [
"Spazer",
"Plasma"
]
}Exit condition: {
"leaveWithStoredFallSpeed": {
"fallSpeedInTiles": 1
}
} |
From: 2
Far Left Door
To: 2
Far Left Door
Use SpeedBooster to construct a structure for Moondancing that has 1 chest height block and 1 head height block to the right of it and no other Speed blocks. Crystal Flash below the lower block, exactly pixel aligned with its right side, to standup and then begin Moondancing. After Samus sinks through the bottom tile, it is possible to use Grapple to return to a crouch and wiggle right and then Turn-Around Aim Cancel to escape to the right. Without Grapple, count to 174 Moonfalls and delicately Moonfall so as to remain crouched and then wiggle to the right. Finally, use SpeedBooster if needed to break the remaining Speed blocks and reach the door. Requires: {
"notable": "Speed Block Moondance"
}
"h_heatProof"
"h_getBlueSpeedMaxRunway"
"h_CrystalFlash"
"canTrickyJump"
"canTurnaroundAimCancel"
"canTemporaryBlue"
"canMoondance"
"canSpeedball"
{
"or": [
"canCount",
"Grapple"
]
}Exit condition: {
"leaveWithStoredFallSpeed": {
"fallSpeedInTiles": 1
}
}Dev note: FIXME: R-Mode can be used instead of a Crystal Flash but that depends on having more Reserve Energy than Regular Energy. With a different Speed block structure (more difficult to set up), it is possible to avoid needing to count, without Grapple. |
From: 1
Top Left Door
To: 1
Top Left Door
Use SpeedBooster to construct a structure for Moondancing that has 1 chest height block and 1 head height block to the right of it and no other Speed blocks. Crystal Flash below the lower block, exactly pixel aligned with its right side, to standup and then begin Moondancing. After Samus sinks through the bottom tile, it is possible to use Grapple to return to a crouch and wiggle right and then Turn-Around Aim Cancel to escape to the right. Without Grapple, count to 174 Moonfalls and delicately Moonfall so as to remain crouched and then wiggle to the right. Finally, shortcharge to break the remaining Speed blocks and reach the door. Requires: {
"notable": "Speed Block Moondance"
}
"h_CrystalFlash"
"canTrickyJump"
"canTurnaroundAimCancel"
{
"getBlueSpeed": {
"usedTiles": 16,
"steepDownTiles": 4,
"openEnd": 0
}
}
"canTemporaryBlue"
"canSpeedball"
"canMoondance"
{
"or": [
"canCount",
"Grapple"
]
}Exit condition: {
"leaveWithStoredFallSpeed": {
"fallSpeedInTiles": 1
}
} |
From: 1
Top Left Door
To: 5
Top Right Item

Use SpeedBooster to construct a structure for Moondancing that has 1 chest height block and 1 head height block to the right of it and no other Speed blocks. Crystal Flash below the lower block, exactly pixel aligned with its right side, to standup and then begin Moondancing. After Samus sinks through the bottom tile, it is possible to use Grapple to return to a crouch and wiggle right and then Turn-Around Aim Cancel to escape to the right. Without Grapple, count to 174 Moonfalls and delicately Moonfall so as to remain crouched and then wiggle to the right. The Camera will not follow Samus after clipping. Requires: {
"notable": "Speed Block Moondance"
}
"h_CrystalFlash"
"canTrickyJump"
"canTurnaroundAimCancel"
{
"getBlueSpeed": {
"usedTiles": 16,
"steepDownTiles": 4,
"openEnd": 0
}
}
"canTemporaryBlue"
"canMoondance"
"canSpeedball"
{
"or": [
"canCount",
"Grapple"
]
}Clears obstacles: B |