canRemoteAcquire (Extreme)

Ability to remotely acquire an item while exiting G-mode. This only works when in direct G-mode and with items that are visible (not in a shot block or Chozo Ball). Touch the item before PLMs are overloaded (touching the item will rapidly overload PLMs, but that's fine), then the item will be obtained wherever Samus is when exiting G-mode.
This is typically paired with artificial morph, but can also be used other scenarios, such as to acquire an item in a heated room by exiting G-mode and then immediately leaving the room.
Dependencies: canPreciseReserveRefill, canManageReserves, canUseEnemies, canGMode
Dev note: Using G-mode to get to an item, where the return is free is not part of this tech.
Strats ()
From: 1
Top Left Door
To: 5
Bottom Junction (Right of Boyons)

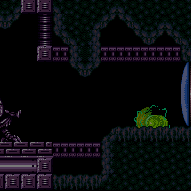
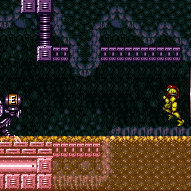
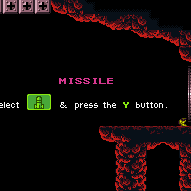
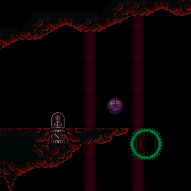
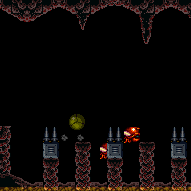
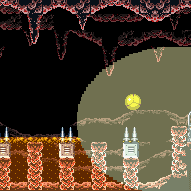
Move through the item to overload PLMs, then go down through the speed blocks and exit G-mode to collect the item. Note that if the item has already been collected, Samus can overload PLMs with Grapple. With Morph and Grapple, quickly grapple to then release grapple on the grapple blocks a few times until they stop working. Be careful not to fall into the spikes. Entrance condition: {
"comeInWithGMode": {
"mode": "direct",
"morphed": false
}
}Requires: {
"noBlueSuit": {}
}
"h_CrystalFlash"
"canRemoteAcquire"
{
"or": [
{
"and": [
{
"itemNotCollectedAtNode": 3
},
"canRiskPermanentLossOfAccess",
{
"or": [
"SpaceJump",
{
"spikeHits": 1
}
]
}
]
},
{
"and": [
"SpaceJump",
"Grapple",
"canTrickyJump"
]
},
{
"and": [
"Grapple",
{
"spikeHits": 1
}
]
}
]
}
{
"autoReserveTrigger": {}
}
{
"enemyDamage": {
"enemy": "Boyon",
"type": "contact",
"hits": 1
}
}Collects items: 3 Dev note: Without Bombs, this can not be done with artificial morph, because there is no morphed method to cross the spikes without taking damage; with Bombs, anolther strat will be used which can overload PLMs using the speed blocks. Remote acquiring the item in G-mode with Morph is not useful with a blue suit - alternative strats will be able to cross the room to 3, which can then return or go down. FIXME: It is possible to kill the Boyon during the reserve trigger, or to use the acid instead and end with full Energy. |
From: 1
Top Left Door
To: 5
Bottom Junction (Right of Boyons)
Move through the item to overload PLMs, then go down through the speed blocks and exit G-mode to collect the item. Note that if the item has already been collected, Samus can overload PLMs with Grapple. With Morph and Grapple, quickly grapple to then release grapple on the grapple blocks a few times until they stop working. Be careful not to fall into the spikes. Entrance condition: {
"comeInWithGMode": {
"mode": "direct",
"morphed": false
}
}Requires: "Morph"
"SpaceJump"
"canRemoteAcquire"
{
"or": [
"h_blueSuitGMode",
{
"and": [
{
"itemNotCollectedAtNode": 3
},
"canRiskPermanentLossOfAccess"
]
},
{
"and": [
"Grapple",
"canTrickyJump"
]
}
]
}Collects items: 3 |
From: 2
Bottom Left Door
To: 2
Bottom Left Door


Crystal Flash then Shinespark up to the item, touch it, and return through the speed block that is now air. Use the Boyons and acid to reserve trigger to exit G-mode below to collect the item. Entrance condition: {
"comeInWithGMode": {
"mode": "direct",
"morphed": true
}
}Requires: "canComplexGMode"
"canRemoteAcquire"
"h_artificialMorphCrystalFlash"
{
"or": [
{
"and": [
"canTrivialUseFrozenEnemies",
"h_shinechargeMaxRunway",
"canMidairShinespark",
{
"shinespark": {
"frames": 118,
"excessFrames": 6
}
}
]
},
{
"and": [
"canShinechargeMovementComplex",
{
"canShineCharge": {
"usedTiles": 34,
"openEnd": 0
}
},
{
"shinespark": {
"frames": 128,
"excessFrames": 6
}
}
]
},
{
"and": [
{
"blueSuitShinecharge": {}
},
{
"shinespark": {
"frames": 121,
"excessFrames": 5
}
}
]
}
]
}
{
"autoReserveTrigger": {
"minReserveEnergy": 1
}
}Collects items: 3 Dev note: These shinespark frames could be reduced with more items or tech, but in direct G-mode, Samus will need to Crystal Flash and reserve trigger to collect the item. |
From: 2
Bottom Left Door
To: 4
Top Junction (Right of Spikes)
Ascend with a long IBJ, then go through the speed blocks to the item. The Boyons can be killed with bombs or 3 Power Bombs, or Samus can jump through them with Spring Ball, which is easy as long as she doesn't stop jumping. Note that Samus can not bomb boost through the Boyons while blue. Entrance condition: {
"comeInWithGMode": {
"mode": "any",
"morphed": true
}
}Requires: "h_blueSuitGMode"
"h_artificialMorphLongIBJ"
"canBePatient"
"canComplexGMode"
"canRemoteAcquire"
{
"or": [
"canBeVeryPatient",
{
"and": [
{
"ammo": {
"type": "PowerBomb",
"count": 3
}
},
"canDoubleBombJump"
]
},
{
"and": [
"h_artificialMorphSpringBall",
"canDoubleBombJump"
]
}
]
}Collects items: 3 Dev note: FIXME: It would be possible to remote acquire to the left after using spring into ceiling bomb jump, but it would require restructuring the room, a long CIBJ, and canBeExtremelyPatient. |
From: 2
Bottom Left Door
To: 5
Bottom Junction (Right of Boyons)
Shinespark up to the item, touch it, and return through the speed block that is now air. Exit G-mode below to collect the item. Entrance condition: {
"comeInWithGMode": {
"mode": "direct",
"morphed": false
}
}Requires: "canComplexGMode"
"canRemoteAcquire"
{
"or": [
{
"and": [
"canTrivialUseFrozenEnemies",
"h_shinechargeMaxRunway"
]
},
{
"and": [
"canShinechargeMovementComplex",
{
"getBlueSpeed": {
"usedTiles": 34,
"openEnd": 0
}
},
"h_blueJump",
{
"canShineCharge": {
"usedTiles": 34,
"openEnd": 0
}
}
]
},
{
"and": [
{
"canShineCharge": {
"usedTiles": 25,
"openEnd": 2
}
},
{
"enemyKill": {
"enemies": [
[
"Boyon",
"Boyon",
"Boyon",
"Boyon"
]
],
"excludedWeapons": [
"Bombs"
]
}
}
]
},
{
"blueSuitShinecharge": {}
},
{
"and": [
"canInsaneJump",
{
"canShineCharge": {
"usedTiles": 14,
"openEnd": 0
}
}
]
},
{
"and": [
"canInsaneJump",
{
"canShineCharge": {
"usedTiles": 14,
"openEnd": 1
}
},
{
"enemyKill": {
"enemies": [
[
"Boyon"
]
]
}
}
]
}
]
}
{
"shinespark": {
"frames": 121,
"excessFrames": 5
}
}Collects items: 3 Dev note: The shinespark frames could be reduced with more items or tech, but in direct G-mode, Samus will be at low Energy and need an energy free shinespark. The out-of-order requirements in the blue jump case are to work around the tests' assumption that a getBlueSpeed would lose the shinecharge. |
|
Requires: "canRemoteAcquire"
{
"obstaclesCleared": [
"C"
]
}Dev note: FIXME: It would be possible to remote acquire to the left after using spring into ceiling bomb jump, but it would require restructuring the room and an extremely long CIBJ. |
From: 3
Item
To: 5
Bottom Junction (Right of Boyons)
Walk through the item or use Bombs to overload PLMs, fall through the speed blocks, then exit G-Mode to remote acquire the item. Requires: "canRemoteAcquire"
{
"obstaclesCleared": [
"C"
]
} |
From: 2
Right Door
To: 1
Left Door

Roll through the item to overload PLMs then quickly fall into the morph tunnel, unmorph at the correct spot and jump out before the acid touches Samus. With a careful, blind, Space Jump with Screw Attack, move through the bomb walls while avoiding the spikes. Entrance condition: {
"comeInWithGMode": {
"mode": "direct",
"morphed": true
}
}Requires: "canComplexGMode"
"canRemoteAcquire"
{
"itemNotCollectedAtNode": 3
}
"canRiskPermanentLossOfAccess"
"h_artificialMorphMovement"
"canInsaneJump"
"canOffScreenMovement"
"SpaceJump"
"ScrewAttack"Exit condition: {
"leaveNormally": {}
}Collects items: 3 Unlocks doors: {"types":["ammo"],"requires":[]}Dev note: This strat leaves the room, as it would be unreasonable and may not be possible to do anything at 1 with the broken camera movement. With a blue suit, there is no need to overload PLMs, so the camera will not be broken and the requirements could be relaxed; but it is covered by a 2->4 strat. |
From: 2
Right Door
To: 4
Middle Junction (Left of Morph Tunnel)
Roll through the item to overload PLMs then fall into the morph tunnel, unmorph at the correct spot and quickly jump out before the acid touches Samus. Exit G-mode and roll back into the tunnel to fix the camera and return avoiding the acid again. Entrance condition: {
"comeInWithGMode": {
"mode": "direct",
"morphed": true
}
}Requires: "canComplexGMode"
"canRemoteAcquire"
{
"itemNotCollectedAtNode": 3
}
"canRiskPermanentLossOfAccess"
"Morph"
"canInsaneJump"
"canOffScreenMovement"Collects items: 3 Dev note: Acid damage wasn't considered, as Samus needs to be in direct G-mode FIXME: This could be done with a CF after overloading PLMs with the item. |
|
Entrance condition: {
"comeInWithGMode": {
"mode": "direct",
"morphed": true
}
}Requires: "canRemoteAcquire" "h_artificialMorphHBJ" Collects items: 3 |
From: 2
Right Door
To: 2
Right Door
With Spring Ball, pause then press forward and jump just before the pause fully triggers. Disable Spring Ball in order to get a large horizontal boost. Pause again as soon as possible and re-enable Spring to reset fall speed. Entrance condition: {
"comeInWithGMode": {
"mode": "direct",
"morphed": true
}
}Requires: "canRemoteAcquire"
"h_artificialMorphSpringFling"
"canInsaneJump"
{
"disableEquipment": "HiJump"
}Collects items: 3 |
From: 6
G-Mode Morph Junction Direct (Bottom)
To: 1
Bottom Left Door
Touch the item then roll back to the left before exiting G-Mode and remotely collect it. Requires: "canRemoteAcquire" "h_artificialMorphMovement" Collects items: 4 Dev note: This does not include canRiskPermanentLossOfAccess if Samus only uses this to return to the left with the item. This strat is useless if Samus has Morph, so there will be no flashing lights. |
From: 1
Left Door
To: 1
Left Door


Enter with direct G-mode artificial morph, and hold right to roll through the bomb blocks using a blue suit. Touch the item, and return to the left side of the room before exiting G-mode to collect the item. Entrance condition: {
"comeInWithGMode": {
"mode": "direct",
"morphed": true
}
}Requires: "h_blueSuitGMode"
{
"or": [
"h_artificialMorphSpringBall",
"h_artificialMorphIBJ",
"h_artificialMorphPowerBomb"
]
}
"canRemoteAcquire"Clears obstacles: A, C Collects items: 5 |
|
Blindly grab the item before PLMs are overloaded, then return and exit G-mode to remotely acquire the item. Starting a completely blind IBJ can be somewhat tricky, even if for such a short distance. Entrance condition: {
"comeInWithGMode": {
"mode": "direct",
"morphed": true
}
}Requires: "canRemoteAcquire"
{
"or": [
"h_artificialMorphSpringBall",
{
"and": [
"h_artificialMorphIBJ",
"canOffScreenMovement"
]
}
]
}Collects items: 3 |
From: 1
Top Left Door
To: 1
Top Left Door
Fall past the first bug, wait for the second to spawn before rolling off the ledge. Get into the tube with an IBJ, bomb boost Spring Ball jump, or HiJump Spring Fling. Touch the item then roll out of the tube before exiting G-mode to remote acquire the item. Entrance condition: {
"comeInWithGMode": {
"mode": "direct",
"morphed": true
}
}Requires: "canRemoteAcquire"
{
"or": [
"h_artificialMorphLongIBJ",
"h_artificialMorphSpringBallBombJump",
{
"and": [
"HiJump",
"h_artificialMorphSpringFling"
]
}
]
}Collects items: 4 |
From: 1
Top Left Door
To: 2
Top Right Door

Roll under the first bug, wait for the second to spawn before rolling off the ledge. IBJ, bomb boost spring ball jump, or HiJump Spring Fling into the pipe. While in G-mode, touch the item, roll out of the pipe, then get to the top right door before exiting G-mode and obtaining the item. With Bombs alone, it may help to kill the top respawning bug before descending to make it easier to get back up. Alternatively, on the way back up, IBJ directly below the pipe until the bug spawns, then quickly boost horizontally and move to the left. Get as far right as possible without another bug spawning, IBJ then boost horizontally at the top. Entrance condition: {
"comeInWithGMode": {
"mode": "direct",
"morphed": true
}
}Requires: "canRemoteAcquire"
{
"or": [
{
"and": [
"h_artificialMorphIBJ",
"canComplexGMode",
"canInsaneJump"
]
},
{
"and": [
"h_artificialMorphIBJ",
"h_artificialMorphPowerBomb"
]
},
{
"and": [
"h_artificialMorphSpringBallBombJump",
"h_additionalBomb",
"h_additionalBomb"
]
}
]
}Collects items: 4 |
From: 1
Top Left Door
To: 2
Top Right Door
Kill the first bug by rolling into it as it swoops down at Samus. Wait for the next pipe's bug to spawn before rolling off. IBJ into the pipe, touch the item, roll out of the pipe, then get to the top right door before exiting G-mode and obtaining the item. Kill the lower bug by bombing underneath the pipe and placing a bomb at the peak of the boost. Note that Samus is vulnerable to damage while being boosted from a bomb. Entrance condition: {
"comeInWithGMode": {
"mode": "any",
"morphed": true
}
}Requires: "h_blueSuitGMode" "canRemoteAcquire" "h_artificialMorphIBJ" "canTrickyDodgeEnemies" Collects items: 4 Dev note: With other item combinations, another strat will be used instead. |
From: 2
Top Right Door
To: 1
Top Left Door
Fall past the first bug, wait for the second to spawn before rolling off the ledge. Get into the tube with an IBJ, bomb boost Spring Ball jump, or HiJump Spring Fling. Touch the item then roll out of the tube before exiting G-mode to remote acquire the item. Entrance condition: {
"comeInWithGMode": {
"mode": "direct",
"morphed": true
}
}Requires: "canRemoteAcquire"
{
"or": [
"h_artificialMorphLongIBJ",
"h_artificialMorphSpringBallBombJump",
{
"and": [
"HiJump",
"h_artificialMorphSpringFling"
]
}
]
}Collects items: 4 |
From: 2
Top Right Door
To: 2
Top Right Door


Roll under the first bug, wait for the second to spawn before rolling off the ledge. IBJ, bomb boost spring ball jump, or HiJump Spring Fling into the pipe. While in G-mode, touch the item, roll out of the pipe, then get to the top right door before exiting G-mode and obtaining the item. With Bombs alone, it may help to kill the top respawning bug before descending to make it easier to get back up. Alternatively, on the way back up, IBJ directly below the pipe until the bug spawns, then quickly boost horizontally and move to the left. Get as far right as possible without another bug spawning, IBJ then boost horizontally at the top. Entrance condition: {
"comeInWithGMode": {
"mode": "direct",
"morphed": true
}
}Requires: "canRemoteAcquire"
{
"or": [
{
"and": [
"h_artificialMorphIBJ",
"canComplexGMode",
"canInsaneJump"
]
},
{
"and": [
"h_artificialMorphIBJ",
"h_artificialMorphPowerBomb"
]
},
{
"and": [
"h_artificialMorphSpringBallBombJump",
"h_additionalBomb",
"h_additionalBomb"
]
}
]
}Collects items: 4 |
From: 2
Top Right Door
To: 2
Top Right Door
Kill the first bug by rolling into it as it swoops down at Samus. Wait for the next pipe's bug to spawn before rolling off. IBJ into the pipe, touch the item, roll out of the pipe, then get to the top right door before exiting G-mode and obtaining the item. Kill the lower bug by bombing underneath the pipe and placing a bomb at the peak of the boost. Note that Samus is vulnerable to damage while being boosted from a bomb. Entrance condition: {
"comeInWithGMode": {
"mode": "any",
"morphed": true
}
}Requires: "h_blueSuitGMode" "canRemoteAcquire" "h_artificialMorphIBJ" "canTrickyDodgeEnemies" Collects items: 4 Dev note: With other item combinations, another strat will be used instead. |
From: 16
Direct G-Mode Morph (Top Item, Above Hopper Pit)
To: 1
Left Side - Top Door
Avoiding the top Sidehoppers without Power Bombs can be tricky; if starting at the top of the room, it may help to lure them to the left before going down the room. For safety, it is also possible to lure the hoppers to the left from below with several IBJs or HiJump and Spring Ball. Requires: "canRemoteAcquire"
{
"or": [
"Morph",
"h_artificialMorphIBJ",
{
"and": [
"HiJump",
"h_artificialMorphSpringBall"
]
},
{
"and": [
"h_artificialMorphSpringBallBombJump",
{
"ammo": {
"type": "PowerBomb",
"count": 2
}
}
]
}
]
}
{
"or": [
"Morph",
"canTrickyDodgeEnemies",
"h_artificialMorphPowerBomb",
{
"and": [
"h_artificialMorphSpringBall",
{
"haveBlueSuit": {}
}
]
},
{
"enemyDamage": {
"enemy": "Sm. Sidehopper",
"type": "contact",
"hits": 1
}
}
]
}Collects items: 10 |
From: 16
Direct G-Mode Morph (Top Item, Above Hopper Pit)
To: 4
Left Side - Door Behind Power Bomb Blocks
Without Bombs, fully overload PLMs with the item before dropping into the Sidehopper pit. Dodge or kill the Sidehoppers then go through the crumble block before exiting G-mode. With Bombs, it can help to not overload the PLMs fully, to IBJ off of the lower crumble blocks, then Bomb the side of the upper crumble to go through it. Requires: "canRemoteAcquire"
"h_artificialMorphMovement"
{
"or": [
"Morph",
"h_artificialMorphIBJ",
"canTrickyDodgeEnemies",
"h_artificialMorphPowerBomb",
{
"haveBlueSuit": {}
},
{
"enemyDamage": {
"enemy": "Sm. Sidehopper",
"type": "contact",
"hits": 1
}
}
]
}Collects items: 10 Dev note: With Morph or Bombs, Samus will have already killed the Sidehoppers before getting here. |
From: 16
Direct G-Mode Morph (Top Item, Above Hopper Pit)
To: 8
Right Side - Bottom Door
Fully overload PLMs with the item before dropping into the Sidehopper pit. Dodge or kill the Sidehoppers then go through the lower crumble blocks and avoid the Reos while traversing to the bottom right door. Requires: "canRemoteAcquire"
"h_artificialMorphMovement"
{
"or": [
"Morph",
"h_artificialMorphIBJ",
"canTrickyDodgeEnemies",
"h_artificialMorphPowerBomb",
{
"haveBlueSuit": {}
},
{
"enemyDamage": {
"enemy": "Sm. Sidehopper",
"type": "contact",
"hits": 1
}
}
]
}Collects items: 10 Dev note: With Morph or Bombs, Samus will have already killed the Sidehoppers before getting here. |
From: 16
Direct G-Mode Morph (Top Item, Above Hopper Pit)
To: 12
Bottom Chozo Item
Fully overload PLMs with the item before dropping into the Sidehopper pit. Dodge or kill the Sidehoppers then go through the lower crumble blocks and avoid the Reos while traversing to the bottom right door. Requires: "canRemoteAcquire"
"h_artificialMorphMovement"
{
"or": [
"Morph",
"h_artificialMorphIBJ",
"canTrickyDodgeEnemies",
"h_artificialMorphPowerBomb",
{
"haveBlueSuit": {}
},
{
"enemyDamage": {
"enemy": "Sm. Sidehopper",
"type": "contact",
"hits": 1
}
}
]
}Collects items: 10 Dev note: With Morph or Bombs, Samus will have already killed the Sidehoppers before getting here. Traversing the room could be done with Power Bombs, without artificial morph movement, but it's required to get here already. |
From: 17
Direct G-Mode Morph Junction (Middle Item)
To: 1
Left Side - Top Door


Fully overload PLMs with the item before climbing the room. The hardest part is getting past the Reo without Power Bombs, if it is stuck in the stairwell just above the door. Either manipulate it until it can escape, get it stuck swooping in the top right corner of the stairwell then kill it with Bombs, or avoid it entirely, and go up through the crumble blocks to the left after manipulating the Sidehoppers to be off-camera at the right of their pit. Avoiding the top Sidehoppers without Power Bombs can also be tricky; if starting at the top of the room, it may help to lure them to the left before going down the room. For safety, it is also possible to lure the hoppers to the left from below with several IBJs or HiJump and Spring Ball. Requires: "canRemoteAcquire"
{
"or": [
"Morph",
"h_artificialMorphIBJ",
{
"and": [
"HiJump",
"h_artificialMorphSpringBall"
]
},
{
"and": [
"h_artificialMorphSpringBallBombJump",
{
"ammo": {
"type": "PowerBomb",
"count": 2
}
},
{
"or": [
"h_artificialMorphPowerBomb",
"h_artificialMorphSpringFling"
]
},
{
"or": [
"h_artificialMorphPowerBomb",
"canTrickyJump"
]
}
]
}
]
}
{
"or": [
"Morph",
"canComplexGMode",
{
"and": [
"canTrickyDodgeEnemies",
"h_artificialMorphSpringBall"
]
},
{
"and": [
"h_artificialMorphSpringBall",
{
"haveBlueSuit": {}
}
]
},
"h_artificialMorphPowerBomb",
{
"enemyDamage": {
"enemy": "Reo",
"type": "contact",
"hits": 1
}
}
]
}
{
"or": [
"Morph",
"canTrickyDodgeEnemies",
"h_artificialMorphPowerBomb",
{
"and": [
"h_artificialMorphSpringBall",
{
"haveBlueSuit": {}
}
]
},
{
"enemyDamage": {
"enemy": "Sm. Sidehopper",
"type": "contact",
"hits": 1
}
}
]
}Collects items: 11 |
From: 17
Direct G-Mode Morph Junction (Middle Item)
To: 4
Left Side - Door Behind Power Bomb Blocks
Fully overload PLMs with the item before climbing the room. The hardest part is getting past the Reo without Power Bombs, if it is stuck in the stairwell just above the door. Either manipulate it until it can escape, get it stuck swooping in the top right corner of the stairwell then kill it with Bombs, or avoid it entirely, and go up through the crumble blocks to the left after manipulating the Sidehoppers to be off-camera at the right of their pit. Dodge or kill the Sidehoppers then go through the crumble block before exiting G-mode. Requires: "canRemoteAcquire"
{
"or": [
"Morph",
"h_artificialMorphIBJ",
{
"and": [
"HiJump",
"h_artificialMorphSpringBall"
]
},
{
"and": [
{
"or": [
"h_artificialMorphSpringBallBombJump",
"h_artificialMorphSpringFling"
]
},
{
"or": [
"h_artificialMorphSpringBallBombJump",
"canTrickyJump"
]
}
]
}
]
}
{
"or": [
"Morph",
"canComplexGMode",
{
"and": [
"canTrickyDodgeEnemies",
"h_artificialMorphSpringBall"
]
},
{
"and": [
"h_artificialMorphSpringBall",
{
"haveBlueSuit": {}
}
]
},
"h_artificialMorphPowerBomb",
{
"enemyDamage": {
"enemy": "Reo",
"type": "contact",
"hits": 1
}
}
]
}Collects items: 11 |
From: 17
Direct G-Mode Morph Junction (Middle Item)
To: 4
Left Side - Door Behind Power Bomb Blocks
Fully overload PLMs with the item before climbing the room. The hardest part is getting past the Reo without Power Bombs, if it is stuck in the stairwell just above the door. Either manipulate it until it can escape, get it stuck swooping in the top right corner of the stairwell then kill it with Bombs, or avoid it entirely, and go up through the crumble blocks to the left after manipulating the Sidehoppers to be off-camera at the right of their pit. Dodge or kill the Sidehoppers then go through the crumble block. Place a Power Bomb then quickly exit G-mode before it explodes to break the Power Bomb blocks. Requires: "canRemoteAcquire"
{
"or": [
"Morph",
"h_artificialMorphIBJ",
{
"and": [
"HiJump",
"h_artificialMorphSpringBall"
]
},
{
"and": [
{
"or": [
"h_artificialMorphSpringBallBombJump",
"h_artificialMorphSpringFling"
]
},
{
"or": [
"h_artificialMorphSpringBallBombJump",
"canTrickyJump"
]
}
]
}
]
}
{
"or": [
"Morph",
"canComplexGMode",
{
"and": [
"canTrickyDodgeEnemies",
"h_artificialMorphSpringBall"
]
},
"h_artificialMorphPowerBomb",
{
"and": [
"h_artificialMorphSpringBall",
{
"haveBlueSuit": {}
}
]
},
{
"enemyDamage": {
"enemy": "Reo",
"type": "contact",
"hits": 1
}
}
]
}
"h_artificialMorphPowerBomb"Collects items: 11 |
From: 17
Direct G-Mode Morph Junction (Middle Item)
To: 8
Right Side - Bottom Door
Requires: "canRemoteAcquire" "h_artificialMorphMovement" Collects items: 11 |
From: 17
Direct G-Mode Morph Junction (Middle Item)
To: 12
Bottom Chozo Item
Requires: "canRemoteAcquire"
{
"itemNotCollectedAtNode": 11
}
"canRiskPermanentLossOfAccess"Collects items: 11 Dev note: If the item is not there, then another strat will be used to overload PLMs another way. |
|
Bomb horizontally on room entry to jump over the Ripper and land on the crumble blocks, or use a Power Bomb to kill the Ripper. Avoid touching all 6 crumbles, so Samus can use the item to overload PLMs and go through one of the crumbles to get to the left side of the room. If the item has already been obtained, Samus can shoot or Bomb the gate many times to overload PLMs. Entrance condition: {
"comeInWithGMode": {
"mode": "direct",
"morphed": true
}
}Requires: "canRemoteAcquire"
{
"or": [
"h_artificialMorphCeilingBombJump",
{
"and": [
"h_artificialMorphBombHorizontally",
"h_artificialMorphIBJ",
"h_artificialMorphPowerBomb"
]
},
{
"and": [
"h_artificialMorphBombHorizontally",
"canTrickyDodgeEnemies",
"h_artificialMorphDoubleBombJump",
"h_artificialMorphStaggeredIBJ"
]
}
]
}
"h_heatedGModeOpenDifferentDoor"Collects items: 4 |
From: 3
Right Door
To: 2
Bottom Left Door
Bomb horizontally on room entry to jump over the Ripper and land on the crumble blocks, or use a Power Bomb to kill the Ripper. Avoid touching all 6 crumbles, so Samus can use the item to overload PLMs and go through one of the crumbles to get to the left side of the room. If the item has already been obtained, Samus can shoot or Bomb the gate many times to overload PLMs. Entrance condition: {
"comeInWithGMode": {
"mode": "direct",
"morphed": true
}
}Requires: "canRemoteAcquire"
{
"or": [
"h_artificialMorphCeilingBombJump",
{
"and": [
"h_artificialMorphBombHorizontally",
"h_artificialMorphIBJ",
"h_artificialMorphPowerBomb"
]
},
{
"and": [
"h_artificialMorphBombHorizontally",
"canTrickyDodgeEnemies",
"h_artificialMorphDoubleBombJump",
"h_artificialMorphStaggeredIBJ"
]
}
]
}
"h_heatedGModeOpenDifferentDoor"Collects items: 4 |
From: 3
Right Door
To: 3
Right Door


Bomb horizontally on room entry to jump over the Ripper and land on the crumble blocks, or use a Power Bomb to kill the Ripper. Entrance condition: {
"comeInWithGMode": {
"mode": "direct",
"morphed": true
}
}Requires: "canRemoteAcquire"
{
"or": [
"h_artificialMorphLongCeilingBombJump",
{
"and": [
"h_artificialMorphBombHorizontally",
"h_artificialMorphIBJ",
"h_artificialMorphPowerBomb"
]
},
{
"and": [
"h_artificialMorphBombHorizontally",
"canTrickyDodgeEnemies",
"h_artificialMorphDoubleBombJump",
"h_artificialMorphStaggeredIBJ"
]
}
]
}
"h_heatedDirectGModeLeaveSameDoor"Collects items: 4 |
|
Jump onto the crumble blocks to make them solid, then use them as a platform to cross the room. Entrance condition: {
"comeInWithGMode": {
"mode": "direct",
"morphed": false
}
}Requires: "canRemoteAcquire"
{
"or": [
"SpaceJump",
{
"and": [
"canPreciseGrapple",
"canUseEnemies"
]
},
"canSpringBallJumpMidAir",
"canInsaneWallJump",
{
"and": [
"HiJump",
"canWallJump"
]
},
{
"and": [
"HiJump",
"canSpeedyJump"
]
},
{
"and": [
"canStaggeredIBJ",
"canDoubleBombJump",
"canBombHorizontally"
]
},
{
"and": [
"h_IBJFromSpikes",
"h_IBJFromSpikes"
]
},
{
"and": [
"h_IBJFromSpikes",
"canCameraManip",
"canMoonwalk"
]
}
]
}
"h_heatedDirectGModeLeaveSameDoor"Collects items: 4 |
From: 3
Right Door
To: 3
Right Door
Jump onto the crumble blocks to make them solid, then use them as a platform to cross the room. Entrance condition: {
"comeInWithGMode": {
"mode": "direct",
"morphed": false
}
}Requires: "canRemoteAcquire"
{
"or": [
"ScrewAttack",
"h_usePowerBomb",
{
"ammo": {
"type": "Missile",
"count": 2
}
},
{
"ammo": {
"type": "Super",
"count": 1
}
}
]
}
"canIBJ"
"canBombHorizontally"
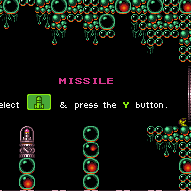
"h_heatedDirectGModeLeaveSameDoor"Collects items: 4 |
From: 3
Right Door
To: 6
G-Mode, Remote Acquire Junction (Bottom Right)
Bomb horizontally on room entry to jump over the Ripper and land on the crumble blocks, or use a Power Bomb to kill the Ripper. Avoid touching all 6 crumbles, so Samus can use the item to overload PLMs and go through one of the crumbles to get to the left side of the room. If the item has already been obtained, Samus can shoot or Bomb the gate many times to overload PLMs. Entrance condition: {
"comeInWithGMode": {
"mode": "direct",
"morphed": true
}
}Requires: "canRemoteAcquire"
{
"or": [
"h_artificialMorphCeilingBombJump",
{
"and": [
"h_artificialMorphBombHorizontally",
"h_artificialMorphIBJ",
"h_artificialMorphPowerBomb"
]
},
{
"and": [
"h_artificialMorphBombHorizontally",
"canTrickyDodgeEnemies",
"h_artificialMorphDoubleBombJump",
"h_artificialMorphStaggeredIBJ"
]
}
]
}
{
"heatFrames": 0
}Dev note: This is only useful if the item is Morph, because with Morph, another strat would have been used. |
From: 3
Right Door
To: 6
G-Mode, Remote Acquire Junction (Bottom Right)
Jump onto the crumble blocks to make them solid, then use them as a platform to get to the item. Avoid touching all 6 crumbles, so Samus can use the item to overload PLMs and go through one of the crumbles to get to the left side of the room. If the item has already been obtained, Samus can shoot the gate many times to overload PLMs. Entrance condition: {
"comeInWithGMode": {
"mode": "direct",
"morphed": false
}
}Requires: "canRemoteAcquire"
{
"or": [
{
"and": [
"ScrewAttack",
{
"noBlueSuit": {}
}
]
},
"h_usePowerBomb",
{
"ammo": {
"type": "Missile",
"count": 2
}
},
{
"ammo": {
"type": "Super",
"count": 1
}
}
]
}
"canIBJ"
"canBombHorizontally"
{
"heatFrames": 0
} |
From: 3
Right Door
To: 6
G-Mode, Remote Acquire Junction (Bottom Right)
Jump onto the crumble blocks to make them solid, then use them as a platform to get to the item. With Grapple, a running jump then single Grapple swing can be used before PLMs are overloaded, alternatively jump on the crumble blocks and Grapple the Ripper. Avoid touching all 6 crumbles, so Samus can use the item to overload PLMs and go through one of the crumbles to get to the left side of the room. If the item has already been obtained, Samus can shoot the gate many times to overload PLMs. Entrance condition: {
"comeInWithGMode": {
"mode": "direct",
"morphed": false
}
}Requires: "canRemoteAcquire"
{
"or": [
"SpaceJump",
"canCeilingBombJump",
{
"and": [
"canBombHorizontally",
"canIBJ",
"h_usePowerBomb"
]
},
{
"and": [
"canStaggeredIBJ",
"canDoubleBombJump",
"canBombHorizontally"
]
},
{
"and": [
"canPreciseGrapple",
"canUseEnemies"
]
},
{
"and": [
"canDash",
{
"or": [
"canTrickySpringBallJump",
"canInsaneWallJump",
{
"and": [
"HiJump",
"canWallJump"
]
},
{
"and": [
"HiJump",
"canSpeedyJump"
]
},
"h_IBJFromSpikes"
]
}
]
}
]
}
{
"heatFrames": 0
} |
From: 6
G-Mode, Remote Acquire Junction (Bottom Right)
To: 1
Top Left Door
It is possible to climb the left side of the room with SpeedBooster alone, with either a tricky dash jump or a vertical shinespark. Requires: "canRemoteAcquire"
"Morph"
{
"or": [
"SpaceJump",
"canSpringBallJumpMidAir",
"canWallJump",
{
"and": [
"HiJump",
"canSpeedyJump"
]
},
"canIBJ",
"canTrickyDashJump",
{
"and": [
{
"canShineCharge": {
"usedTiles": 28,
"gentleUpTiles": 3,
"gentleDownTiles": 3,
"openEnd": 0
}
},
{
"or": [
{
"shinespark": {
"frames": 18,
"excessFrames": 8
}
},
{
"and": [
"canSpeedyJump",
{
"shinespark": {
"frames": 16,
"excessFrames": 10
}
}
]
}
]
}
]
}
]
}
"h_heatedGModeOpenDifferentDoor"Collects items: 4 |
From: 6
G-Mode, Remote Acquire Junction (Bottom Right)
To: 1
Top Left Door
With Plasma and a pause abuse, it is possible to kill the Kago and exit G-mode while killing the Kago bugs and make it to the door with a small amount of Energy remaining. Shoot Plasma and quickly exit G-Mode, so that the bugs die immediately. Avoid having spent much time on the left side of the room, as the Fune fireballs will reduce the number of drops obtained. Note that it is possible to climb the left side of the room with SpeedBooster alone, with either a tricky dash jump or a vertical shinespark. Requires: "canComplexGMode"
"canRemoteAcquire"
"Morph"
{
"or": [
"SpaceJump",
"canSpringBallJumpMidAir",
"canWallJump",
{
"and": [
"HiJump",
"canSpeedyJump"
]
},
"canIBJ",
"canTrickyDashJump",
{
"and": [
{
"canShineCharge": {
"usedTiles": 28,
"gentleUpTiles": 3,
"gentleDownTiles": 3,
"openEnd": 0
}
},
{
"or": [
{
"shinespark": {
"frames": 18,
"excessFrames": 8
}
},
{
"and": [
"canSpeedyJump",
{
"shinespark": {
"frames": 16,
"excessFrames": 10
}
}
]
}
]
}
]
}
]
}
"Plasma"
"h_heatedGModePauseAbuse"
"canInsaneJump"Collects items: 4 Dev note: All of these methods are fast enough to be able to escape after obtaining the drops. The shinespark is longer than 1 frame, but is modeled this way because the drops aren't properly modeled. FIXME: The item that was remote acquired could be Morph, one of the items needed to climb the room, or maybe Plasma. |
From: 6
G-Mode, Remote Acquire Junction (Bottom Right)
To: 2
Bottom Left Door
Requires: "canRemoteAcquire" "Morph" "h_heatedGModeOpenDifferentDoor" Collects items: 4 |
From: 6
G-Mode, Remote Acquire Junction (Bottom Right)
To: 2
Bottom Left Door
With Plasma and a pause abuse, it is possible to kill the Kago and exit G-mode while killing the Kago bugs and make it to the door with a small amount of Energy remaining. Shoot Plasma and quickly exit G-Mode, so that the bugs die immediately. Avoid having spent much time on the left side of the room, as the Fune fireballs will reduce the number of drops obtained. Requires: "canComplexGMode" "canRemoteAcquire" "Morph" "Plasma" "h_heatedGModePauseAbuse" Collects items: 4 Dev note: FIXME: The item that was remote acquired could be Morph or maybe Plasma. |
|
Entrance condition: {
"comeInWithGMode": {
"mode": "direct",
"morphed": false
}
}Requires: "canRemoteAcquire" "h_heatedDirectGModeLeaveSameDoor" Collects items: 3 |
|
Entrance condition: {
"comeInWithGMode": {
"mode": "direct",
"morphed": true
}
}Requires: {
"noBlueSuit": {}
}
"canRemoteAcquire"
{
"or": [
"h_artificialMorphLongIBJ",
"h_artificialMorphJumpIntoIBJ"
]
}
"h_heatedDirectGModeLeaveSameDoor"Collects items: 3 |
From: 2
Right Door
To: 2
Right Door


Touch the item as little as possible in order to prevent PLMs from being overloaded, so the platforms below remain solid. Entrance condition: {
"comeInWithGMode": {
"mode": "direct",
"morphed": false
}
}Requires: "canRemoteAcquire"
{
"or": [
"SpaceJump",
{
"and": [
"HiJump",
"canSpeedyJump",
"canWallJump"
]
},
{
"and": [
"HiJump",
"canSpringBallJumpMidAir",
{
"or": [
{
"noBlueSuit": {}
},
{
"and": [
"Gravity",
{
"lavaFrames": 25
}
]
}
]
}
]
},
{
"and": [
{
"notable": "Spring Ball Bomb Boost"
},
{
"noBlueSuit": {}
},
"canSpringBallJumpMidAir",
"canUnmorphBombBoost",
"h_crouchJumpDownGrab",
"canInsaneJump"
]
},
{
"and": [
{
"or": [
{
"canShineCharge": {
"usedTiles": 15,
"openEnd": 2
}
},
"h_storedSpark"
]
},
"canShinechargeMovementComplex",
{
"or": [
{
"shinespark": {
"frames": 12,
"excessFrames": 2
}
},
{
"and": [
"h_speedJump",
{
"shinespark": {
"frames": 9,
"excessFrames": 3
}
}
]
}
]
}
]
},
{
"and": [
{
"notable": "Ceiling Mockball Spring Fling"
},
"h_speedJump",
"canInsaneJump",
"canMomentumConservingMorph",
"canSpringFling"
]
}
]
}
"h_heatedDirectGModeLeaveSameDoor"Collects items: 3 Dev note: There is no leniency option for using an extra Power Bomb, because it will contribute to PLM overload. (2 PBs is technically barely possible) |
From: 2
Right Door
To: 2
Right Door


Entrance condition: {
"comeInWithGMode": {
"mode": "direct",
"morphed": false
}
}Requires: {
"noBlueSuit": {}
}
"canRemoteAcquire"
"canTrickyUseFrozenEnemies"
"canTrickyDodgeEnemies"
{
"or": [
"HiJump",
"canSpringBallJumpMidAir"
]
}
"h_heatedDirectGModeLeaveSameDoor"Collects items: 3 Dev note: FIXME: By staying up with the Geruta the whole time, this could be done without HiJump or Spring Ball and could carry blue suit. |
From: 1
Left Door
To: 1
Left Door

A Blue Suit allows Samus to pass through the morph tunnel bomb blocks without overloading PLMS and be able to collect the right item. With Hi-Jump and SpringBall or IBJ, reach the top left item, quickly roll through it and the morph tunnel to reach the right item. After returning to the door, exiting G-Mode will collect both Items. Entrance condition: {
"comeInWithGMode": {
"mode": "direct",
"morphed": true
}
}Requires: "h_blueSuitGMode"
{
"or": [
"h_artificialMorphIBJ",
{
"and": [
"HiJump",
"h_artificialMorphSpringBall"
]
}
]
}
"canRemoteAcquire"Collects items: 3, 4 |
From: 1
Left Door
To: 1
Left Door
Get to the item with two Spring Ball bomb jumps and remote acquire the item back by the left door. Entrance condition: {
"comeInWithGMode": {
"mode": "direct",
"morphed": true
}
}Requires: "canRemoteAcquire" "h_artificialMorphSpringBallBombJump" "h_additionalBomb" Collects items: 4 Dev note: The Power Bombs will solidify the bomb block, preventing remote acquiring on the right. The Power Bombs are not going to overload many PLMs. |
From: 1
Left Door
To: 4
Top Left Item
Get to the item without overloading PLMs by avoiding entering the morph tunnel at the bottom of the room. Entrance condition: {
"comeInWithGMode": {
"mode": "direct",
"morphed": true
}
}Requires: "canRemoteAcquire"
{
"or": [
"h_artificialMorphIBJ",
{
"and": [
"HiJump",
"h_artificialMorphSpringBall"
]
},
{
"and": [
"Morph",
{
"or": [
"HiJump",
"canWallJump",
"canSpringBallJumpMidAir",
"SpaceJump"
]
}
]
}
]
}Clears obstacles: D |
From: 2
Right Door
To: 1
Left Door
IBJ or SpringBall jump into the morph tunnel and quickly roll thorough to avoid overloading PLMS and making remote acquisition impossible. Touch the item, and continue to the left side of the room before exiting G-mode to collect the item. Entrance condition: {
"comeInWithGMode": {
"mode": "direct",
"morphed": true
}
}Requires: "h_blueSuitGMode"
{
"or": [
"h_artificialMorphSpringBall",
"h_artificialMorphIBJ"
]
}
"canRemoteAcquire"Collects items: 4 |
From: 2
Right Door
To: 1
Left Door
Touch both the item and the camera scroll blocks in the morph tunnel before PLMs are overloaded, then use either to finish overloading them. This will make it so that Samus can fix the camera after exiting G-mode on the left. It is possible to wait for the Sova to appear on screen before going to the left, in order to ensure Samus won't touch it. With only a Power Bomb boost to touch the item, it is not possible to fix the camera, but it is possible to kill the Sova. Entrance condition: {
"comeInWithGMode": {
"mode": "direct",
"morphed": true
}
}Requires: "canRemoteAcquire"
{
"itemNotCollectedAtNode": 3
}
"canRiskPermanentLossOfAccess"
{
"or": [
"h_artificialMorphMovement",
"h_artificialMorphPowerBomb"
]
}Collects items: 3 Dev note: The only loss of access here is the camera fix, but there is another strat that can be used without. |
From: 2
Right Door
To: 2
Right Door

Avoid the right item if it is uncollected as it will overload PLMS if touched too many times in G-Mode. Either IBJ or SpringBall jump into the morph tunnel and quickly roll thorough to avoid overloading PLMS. The camera will not follow Samus through the tunnel so the collection is done blind. Due to the effects of Blue Suit, right direction must be pressed after the bomb explodes when returning. Entrance condition: {
"comeInWithGMode": {
"mode": "direct",
"morphed": true
}
}Requires: "h_blueSuitGMode"
{
"or": [
"h_artificialMorphSpringBall",
"h_artificialMorphIBJ"
]
}
"canRemoteAcquire"Collects items: 4 |
From: 2
Right Door
To: 4
Top Left Item


Touch both the item and the camera scroll blocks in the morph tunnel before PLMs are overloaded, then use either to finish overloading them. This will make it so that Samus can fix the camera after exiting G-mode on the left. It is possible to wait for the Sova to appear on screen before going to the left, in order to ensure Samus won't touch it. Entrance condition: {
"comeInWithGMode": {
"mode": "direct",
"morphed": true
}
}Requires: "canRemoteAcquire" "h_artificialMorphMovement" Collects items: 3 Dev note: This is only useful if the item is Morph or if Samus has Morph but no way up to this item location. |
|
Requires: "canRemoteAcquire"
{
"obstaclesCleared": [
"D"
]
}Collects items: 4 |
|
Overload PLMs by rolling through the item, then go through the bomb block and exit G-Mode to obtain the item. Requires: "canRemoteAcquire"
{
"obstaclesCleared": [
"D"
]
}Collects items: 4 Dev note: This does not include canRiskPermanentLossOfAccess as every strat that gets here could instead overload PLMs in the bottom morph tunnel. |
|
Wait for the acid to lower then quickly roll part way forward to trigger the Metarees and return. Then go again without any difficulty. Killing any of the Gamets will prevent them from respawning. With Bombs, horizontally boost then IBJ above the acid while waiting for it. It is possible with Spring Ball alone, but it is easy to take damage; perform small jumps but hold jump before landing to prevent a small bounce in which Samus can't jump. On the return route, jump over the Gamets to let them pass instead of racing to get them off screen. Entrance condition: {
"comeInWithGMode": {
"mode": "direct",
"morphed": true
}
}Requires: "canComplexGMode"
"canRemoteAcquire"
{
"or": [
{
"and": [
"h_artificialMorphIBJ",
{
"or": [
"canInsaneJump",
{
"acidFrames": 106
}
]
}
]
},
{
"and": [
"h_artificialMorphSpringBall",
{
"or": [
"h_artificialMorphBombThings",
"canTrickyJump"
]
}
]
}
]
}Collects items: 2 Dev note: The requirements here are to get the item and return, as the item cannot be used during the return. |
From: 1
Left Door
To: 1
Left Door
Wait for the acid to lower then quickly roll part way forward to trigger the Metarees and return. Then go again without any difficulty. With Power Bombs alone is particularly challenging. Use a Power Bomb to kill the Gamets to prevent them from respawning. Place a bomb at the edge of the runway then hold forward with precise timing to get a boost to skip the first and land on the next safe platform. As quickly as possible place another and let it boost horizontally to the next platform, then another to get to the item. With high movement precision, it is recommended to start a bit away from the edge (fully on the runway), giving a 3-frame window, or to start on the last pixel of the runway, giving a 4 frame window plus an extra non-consecutive frame. With slightly less precision, it may be worth starting as close to the edge as possible without falling off, as there are typically 4 non-consecutive frames that work (consisting of approximately alternating frames in a 6-frame window). Rolling into the bomb with momentum is not recommended and gives only a 2-frame window. Entrance condition: {
"comeInWithGMode": {
"mode": "direct",
"morphed": true
}
}Requires: "canRemoteAcquire"
"canTrickyGMode"
"h_artificialMorphBombHorizontally"
{
"ammo": {
"type": "PowerBomb",
"count": 6
}
}Collects items: 2 Dev note: The requirements here are to get the item and return, as the item cannot be used during the return. It appears that there is virtually no risk in overloading PLMs - the left runway isn't close enough, and even placing two on each pillar will not overload PLMs. FIXME: Getting extra horizontal distance from the bomb needs a tech. |
From: 7
Direct G-Mode Morph Junction (At Speed Blocks)
To: 1
Left Door
Touch the item then cross the room with a long diagonal bomb jump from the solid platforms above the acid. Requires: "canRemoteAcquire"
{
"notable": "G-Mode Morph Long Diagonal Bomb Jump"
}
"h_artificialMorphDiagonalBombJump"
"h_artificialMorphLongIBJ"Collects items: 3 |
From: 7
Direct G-Mode Morph Junction (At Speed Blocks)
To: 1
Left Door
Touch the item then cross the room with a Spring Ball jump into IBJ from the moving platforms above the acid. Requires: "canRemoteAcquire" "h_artificialMorphLongIBJ" "h_artificialMorphJumpIntoIBJ" Collects items: 3 |
From: 7
Direct G-Mode Morph Junction (At Speed Blocks)
To: 2
Right Vertical Door
IBJ to the item, touch it, and drop back down to the right of the speed blocks before exiting G-mode. Requires: "canRemoteAcquire" "h_artificialMorphLongIBJ" Collects items: 3 |
From: 1
Right Door
To: 1
Right Door
Entrance condition: {
"comeInWithGMode": {
"mode": "direct",
"morphed": false
}
}Requires: "canRemoteAcquire" "h_heatedDirectGModeLeaveSameDoor" Collects items: 2 Dev note: An indirect option could be added to just get to the item without heat damage, but that would require very unusual room layouts and isn't worth the effort. |
|
Entrance condition: {
"comeInWithGMode": {
"mode": "direct",
"morphed": false
}
}Requires: "canRemoteAcquire" "h_heatedDirectGModeLeaveSameDoor" Collects items: 3 |
|
Avoid stepping on all three crumble blocks before moving through the item to overload PLMs, then go through the crumble blocks. After dropping below, move to the door quickly in order to prevent GT falling on Samus. Note that if the item is not there, it is still possible to overload PLMs by using bomb spreads on crumble blocks that have never been stepped on. Entrance condition: {
"comeInWithGMode": {
"mode": "direct",
"morphed": false
}
}Requires: "canRemoteAcquire"
{
"or": [
{
"and": [
{
"itemNotCollectedAtNode": 3
},
"canRiskPermanentLossOfAccess"
]
},
{
"and": [
"Charge",
"h_useMorphBombs"
]
}
]
}
"h_heatedGModeOffCameraDoor"Exit condition: {
"leaveNormally": {}
}Collects items: 3 Unlocks doors: {"types":["missiles"],"requires":[{"heatFrames":50}]}
{"types":["super"],"requires":[]}
{"types":["powerbomb"],"requires":[{"heatFrames":110}]}Dev note: This strat forces Samus to leave the room because the camera is stuck at the top left of the room. FIXME: It is possible to get to the top right item, but its not easy or too useful. It is possible to use the item to break the Bomb blocks and escape. Fighting GT while blind is unreasonable. |
From: 1
Left Door
To: 1
Left Door
Wait at least 35 seconds for the Alcoon to jump back down before returning to the door, or kill it with a Power Bomb or SBA. Stand close to the transition and use X-Ray then hold left to leave the room before the door closes. Entrance condition: {
"comeInWithGMode": {
"mode": "direct",
"morphed": false
}
}Requires: "canRemoteAcquire" "h_heatedDirectGModeLeaveSameDoor" Collects items: 4 |
From: 1
Left Door
To: 2
Right Vertical Door
Be careful not to overload PLMs with the camera scroll blocks just right of the downward passageway by the left door; use the item to finish overloading PLMs. Blindly traverse the maze until the end, where Samus will be stuck at the far right next to the shot block. Exit G-mode just one tile to the left, Morph, use a Bomb or Power Bomb to destroy the shot block and escape through the door. Entrance condition: {
"comeInWithGMode": {
"mode": "direct",
"morphed": false
}
}Requires: "canRemoteAcquire"
"canOffScreenMovement"
"h_bombThings"
"h_heatedGModeOffCameraDoor"
{
"heatFrames": 200
}Collects items: 4 |
From: 3
Bottom Horizontal Door
To: 2
Right Vertical Door
It is tricky to climb the room without fully overloading PLMs. With Ice and either HiJump or Spring Ball, freeze the left Alcoon to the right of where it jumps out of the ground. With HiJump, spin jump off of it and land directly on the middle stair platform. With Spring Ball, morph on top of the Alcoon, jump to barely land on the lowest platform while avoiding the camera scroll blocks one tile above, then use Spring Ball again to jump to the next platform. Alternatively, with Spring Ball and either HiJump, Bombs, or Power Bombs, jump to barely land on the lowest platform while avoiding the camera scroll blocks one tile above, then use Spring Ball again to jump to the next platform. The first jump can be done with HiJump or a bomb boost into Spring Ball jump. Once up above, unmorph and get onto the edge of the runway leading right, then run through the camera scroll blocks to reach the item. This will finish overloading PLMs. Blindly traverse the maze until the end, where Samus will be stuck at the far right next to the shot block. Exit G-mode just one tile to the left, Morph, use a Bomb or Power Bomb to destroy the shot block and escape through the door. There is a row of camera scroll blocks two-tiles above the bottom left platform, and a column two-tiles away from the right of the gap in front of the left door. Entrance condition: {
"comeInWithGMode": {
"mode": "direct",
"morphed": false
}
}Requires: "canRemoteAcquire"
"canOffScreenMovement"
"canTrickyGMode"
{
"or": [
{
"and": [
"canTrickyUseFrozenEnemies",
"HiJump"
]
},
{
"and": [
"canTrickyUseFrozenEnemies",
"h_useSpringBall"
]
},
{
"and": [
"HiJump",
"h_useSpringBall"
]
},
"canSpringBallBombJump"
]
}
"h_bombThings"
"h_heatedGModeOffCameraDoor"
{
"heatFrames": 200
}Collects items: 4 |
From: 3
Bottom Horizontal Door
To: 3
Bottom Horizontal Door
It is tricky to climb the room without fully overloading PLMs. With Spring Ball, jump to barely land on the lowest platform while avoiding the camera scroll blocks one tile above, then use Spring Ball again to jump to the next platform. The first jump can be done with HiJump or a bomb boost into Spring Ball jump. Up above, unmorph and get onto the edge of the runway leading right, then run through the camera scroll blocks to reach the item. Wait at least 35 seconds for the Alcoon to jump back down before returning to the door, or kill it with a Power Bomb or SBA. Stand close to the transition and use X-Ray then hold right to leave the room before the door closes. Note that spending any extra frames in the camera scroll blocks will overload PLMs before reaching the item and prevent remote acquiring it. There is a row of camera scroll blocks two-tiles above the bottom left platform, and a column two-tiles away from the right of the gap in front of the left door. Entrance condition: {
"comeInWithGMode": {
"mode": "direct",
"morphed": true
}
}Requires: "canRemoteAcquire"
"canTrickyGMode"
"h_artificialMorphSpringBall"
{
"or": [
"HiJump",
"h_artificialMorphSpringBallBombJump"
]
}
"h_heatedDirectGModeLeaveSameDoor"Collects items: 4 |
From: 3
Bottom Horizontal Door
To: 3
Bottom Horizontal Door
It is tricky to climb the room without fully overloading PLMs. Freeze the left Alcoon to the right of where it jumps out of the ground. With HiJump, spin jump off of it and land directly on the middle stair platform. With Spring Ball, morph on top of the Alcoon, jump to barely land on the lowest platform while avoiding the camera scroll blocks one tile above, then use Spring Ball again to jump to the next platform. Up above, get onto the edge of the runway leading right, then run through the camera scroll blocks to reach the item. Wait at least 35 seconds for the Alcoon to jump back down before returning to the door, or kill it with a Power Bomb or SBA. Stand close to the transition and use X-Ray then hold right to leave the room before the door closes. Note that spending any extra frames in the camera scroll blocks will overload PLMs before reaching the item and prevent remote acquiring it. There is a row of camera scroll blocks two-tiles above the bottom left platform, and a column two-tiles away from the right of the gap in front of the left door. Entrance condition: {
"comeInWithGMode": {
"mode": "direct",
"morphed": false
}
}Requires: "canRemoteAcquire"
"canTrickyGMode"
"canTrickyUseFrozenEnemies"
{
"or": [
"HiJump",
"h_useSpringBall"
]
}
{
"or": [
"canDash",
"Morph"
]
}
"h_heatedDirectGModeLeaveSameDoor"Collects items: 4 |
From: 5
Morph Passage Doorway
To: 5
Morph Passage Doorway
Samus needs to touch the item before PLMs are overloaded. This can be difficult because Power Bombs interact with the items, and there is a camera scroll block in the morph tunnel. If the Speed-locked item has already been collected on the other side of the room, this will be easier. Otherwise, Samus will need to touch the item before the Power Bomb finishes exploding. In this case, it is recommended to hold left on room entry, place a Power Bomb immediately as Samus hits the left wall, then hold left again until she lands on the pedestal. Entrance condition: {
"comeInWithGMode": {
"mode": "direct",
"morphed": true
}
}Requires: "canRemoteAcquire"
"h_EverestMorphTunnelExpanded"
"Gravity"
"h_artificialMorphPowerBomb"
"h_artificialMorphPowerBomb"
{
"or": [
"canComplexGMode",
{
"itemCollectedAtNode": 6
}
]
}Collects items: 7 |
From: 5
Item
To: 1
Left Door
If the Puyos are alive, lure the first to the right, then roll out of the hole, unmorph and fight them. Crouching while shooting may increase accuracy. Requires: "canRemoteAcquire"
{
"obstaclesCleared": [
"B"
]
}Dev note: FIXME This probably shouldnt be free if the Puyos are still alive. |
From: 5
Item
To: 4
Right Door
Requires: "canRemoteAcquire"
{
"obstaclesCleared": [
"B"
]
} |
|
Avoid moving too much between the right of the Owtch and the item to avoid overloading PLMs until after touching the item. Entrance condition: {
"comeInWithGMode": {
"mode": "direct",
"morphed": true
}
}Requires: "canRemoteAcquire"
{
"or": [
{
"and": [
"Gravity",
"h_artificialMorphIBJ"
]
},
{
"and": [
"Gravity",
"h_artificialMorphSpringBallBombJump"
]
},
"h_artificialMorphDoubleSpringBallJump"
]
}Collects items: 3 |
|
Entrance condition: {
"comeInWithGMode": {
"mode": "any",
"morphed": true
},
"comesThroughToilet": "any"
}Requires: "canRemoteAcquire"
{
"or": [
{
"and": [
"Gravity",
{
"or": [
"h_artificialMorphIBJ",
"h_artificialMorphSpringBallBombJump"
]
}
]
},
"h_artificialMorphDoubleSpringBallJump"
]
}Collects items: 3 |