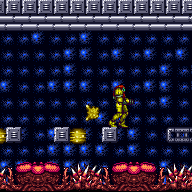
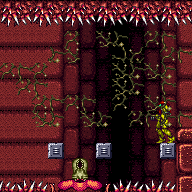
canXModeBlueSuit (Extreme)
The ability to gain a blue suit by shinesparking while in X-Mode and exiting X-Mode before the shinespark has crashed. Release dash during the shinespark wind-up animation to exit X-Mode, interrupting the shinespark and gaining a blue suit. A blue suit will not be gained if dash is released after a shinespark has crashed against a wall or object. Releasing dash mid shinespark will cause Samus to Superjump and potentially go out of bounds but this can also be used to jump away from spikes or thorns. Care must be taken around spikes or thorns after a blue suit is gained if there are active enemies as I-frames will expire quickly and escaping can be difficult.
Dependencies: canXMode, canCarryBlueSuit
Strats ()
From: 1
Top Left Door
To: 1
Top Left Door
Entrance condition: {
"comeInShinecharged": {}
}Requires: {
"shineChargeFrames": 145
}
"h_spikeXModeBlueSuit"
{
  "shinespark": {
    "frames": 1
  }
} |
From: 1
Top Left Door
To: 1
Top Left Door
Entrance condition: {
"comeInShinecharging": {
"length": 3,
"openEnd": 1
}
}Requires: "h_spikeXModeBlueSuit"
{
"shinespark": {
"frames": 1
}
} |
From: 3
Right Door, In the Water
To: 3
Right Door, In the Water
Requires: "Gravity"
{
"canShineCharge": {
"usedTiles": 19,
"openEnd": 2
}
}
"h_spikeXModeBlueSuit"
{
"shinespark": {
"frames": 2
}
} |
From: 3
Bottom Left Door
To: 3
Bottom Left Door
By bouncing far enough left, it is possible to get a 2-frame window for the X-mode. Entrance condition: {
"comeInShinecharged": {}
}Requires: {
"shineChargeFrames": 135
}
{
"or": [
"h_thornXModeBlueSuit",
{
"and": [
"h_thornXModeBlueSuitWithoutLenience",
{
"or": [
"canTrickyDodgeEnemies",
{
"enemyKill": {
"enemies": [
[
"Beetom",
"Beetom"
]
],
"excludedWeapons": [
"Bombs"
]
}
}
]
}
]
}
]
}
{
"shinespark": {
"frames": 0,
"excessFrames": 0
}
} |
From: 4
Bottom Right Door
To: 4
Bottom Right Door
Entrance condition: {
"comeInShinecharged": {}
}Requires: {
"shineChargeFrames": 125
}
{
"or": [
"h_thornXModeBlueSuit",
{
"and": [
"h_thornXModeBlueSuitWithoutLenience",
{
"or": [
"canTrickyDodgeEnemies",
{
"enemyKill": {
"enemies": [
[
"Beetom"
]
],
"excludedWeapons": [
"Bombs"
]
}
}
]
}
]
}
]
}
{
"shinespark": {
"frames": 0,
"excessFrames": 0
}
} |
|
Bouncing into the spikes is not required due to the floating platform that pushes Samus down. Roll off the edge holding forwards from at least 1 tile before falling, pressing against the floating platform on the way down. Requires: {
"or": [
{
"canShineCharge": {
"usedTiles": 16,
"openEnd": 0
}
},
{
"and": [
{
"doorUnlockedAtNode": 2
},
{
"canShineCharge": {
"usedTiles": 17,
"openEnd": 0
}
}
]
}
]
}
{
"or": [
{
"thornHits": "n_spikeXModeAttempts"
},
{
"and": [
{
"resetRoom": {
"nodes": [
1,
2
]
}
},
{
"thornHits": 1
}
]
}
]
}
"canXModeBlueSuit"
{
"shinespark": {
"frames": 0,
"excessFrames": 0
}
}Dev note: Assuming the room can be reset, lenience is not included because a farm is available. This X-mode has a 2-frame window for the unmorph. |
From: 4
Top Left Junction
To: 4
Top Left Junction
Requires: {
"obstaclesCleared": [
"A"
]
}
{
"obstaclesNotCleared": [
"B"
]
}
{
"canShineCharge": {
"usedTiles": 16,
"openEnd": 0
}
}
"h_spikeXModeBlueSuit"
{
"shinespark": {
"frames": 0,
"excessFrames": 0
}
} |
|
Requires: "canSamusEaterStandUp"
{
"samusEaterCycles": 1
}
"h_shinechargeMaxRunway"
"h_spikeSuitSamusEaterLeniency"
"h_thornXModeFramePerfectExtraLeniency"
"h_thornXModeBlueSuit"
{
"shinespark": {
"frames": 0,
"excessFrames": 0
}
} |
From: 1
Right Door
To: 1
Right Door
Without Super Missiles or to save using a Super Missile, jump over the yapping maw to make it try to grab Samus, the Samus Eater can then be entered from the other side avoiding being grabbed. Requires: {
"obstaclesCleared": [
"A",
"B"
]
}
"canSamusEaterStandUp"
{
"samusEaterCycles": 1
}
"h_shinechargeMaxRunway"
"h_spikeSuitSamusEaterLeniency"
"h_thornXModeFramePerfectExtraLeniency"
"h_thornXModeBlueSuit"
{
"shinespark": {
"frames": 4
}
} |
|
Requires: "canSamusEaterStandUp"
{
"samusEaterCycles": 1
}
"h_shinechargeMaxRunway"
"h_spikeSuitSamusEaterLeniency"
"h_thornXModeFramePerfectExtraLeniency"
"h_thornXModeBlueSuit"
{
"shinespark": {
"frames": 0,
"excessFrames": 0
}
} |
From: 1
Left Door
To: 1
Left Door
Entrance condition: {
"comeInShinecharged": {}
}Requires: {
"shineChargeFrames": 175
}
"h_spikeXModeBlueSuit"
{
  "shinespark": {
    "frames": 5
  }
} |
From: 1
Left Door
To: 1
Left Door
Entrance condition: {
"comeInShinecharging": {
"length": 6,
"openEnd": 1
}
}Requires: "h_spikeXModeBlueSuit"
{
"shinespark": {
"frames": 5
}
} |
From: 2
Right Door
To: 2
Right Door
Entrance condition: {
"comeInShinecharged": {}
}Requires: {
"shineChargeFrames": 130
}
"h_spikeXModeBlueSuit"
{
  "shinespark": {
    "frames": 1
  }
} |
From: 2
Right Door
To: 2
Right Door
Entrance condition: {
"comeInShinecharging": {
"length": 5,
"openEnd": 0
}
}Requires: "h_spikeXModeBlueSuit"
{
"shinespark": {
"frames": 1
}
} |
From: 2
Right Door
To: 2
Right Door
Entrance condition: {
"comeInShinecharged": {}
}Requires: "Gravity"
{
"shineChargeFrames": 125
}
{
"thornHits": 1
}
"h_thornXModeFramePerfectExtraLeniency"
"h_thornXModeBlueSuit"
{
"shinespark": {
"frames": 0,
"excessFrames": 0
}
} |
From: 1
Left Door
To: 1
Left Door
Entrance condition: {
"comeInShinecharged": {}
}Requires: {
"shineChargeFrames": 95
}
"h_thornXModeBlueSuitWithoutLenience"
{
  "shinespark": {
    "frames": 0,
    "excessFrames": 0
  }
} |
From: 1
Left Door
To: 1
Left Door
Entrance condition: {
"comeInShinecharging": {
"length": 4,
"openEnd": 1
}
}Requires: "h_thornXModeBlueSuitWithoutLenience"
{
"shinespark": {
"frames": 0,
"excessFrames": 0
}
} |
From: 3
Bottom Right Door
To: 3
Bottom Right Door
Entrance condition: {
"comeInShinecharged": {}
}Requires: {
"shineChargeFrames": 95
}
"h_thornXModeBlueSuitWithoutLenience"
{
  "shinespark": {
    "frames": 0,
    "excessFrames": 0
  }
} |
From: 3
Bottom Right Door
To: 3
Bottom Right Door
Entrance condition: {
"comeInShinecharging": {
"length": 2,
"openEnd": 1
}
}Requires: "h_thornXModeBlueSuitWithoutLenience"
{
"shinespark": {
"frames": 0,
"excessFrames": 0
}
} |
From: 1
Left Door
To: 1
Left Door
Entrance condition: {
"comeInShinecharged": {}
}Requires: "Gravity"
{
"shineChargeFrames": 115
}
{
"heatFrames": 180
}
{
"lavaFrames": 15
}
"h_spikeXModeBlueSuit"
{
"shinespark": {
"frames": 1
}
} |
From: 1
Left Door
To: 1
Left Door
Entrance condition: {
"comeInShinecharging": {
"length": 4,
"openEnd": 0
}
}Requires: "Gravity"
{
"heatFrames": 180
}
{
"lavaFrames": 15
}
"h_spikeXModeBlueSuit"
{
"shinespark": {
"frames": 1
}
} |
From: 2
Right Door
To: 2
Right Door
Entrance condition: {
"comeInShinecharged": {}
}Requires: "Gravity"
{
"shineChargeFrames": 115
}
{
"heatFrames": 180
}
{
"lavaFrames": 15
}
"h_spikeXModeBlueSuit"
{
"shinespark": {
"frames": 1
}
} |
From: 2
Right Door
To: 2
Right Door
Entrance condition: {
"comeInShinecharging": {
"length": 4,
"openEnd": 0
}
}Requires: "Gravity"
{
"heatFrames": 180
}
{
"lavaFrames": 15
}
"h_spikeXModeBlueSuit"
{
"shinespark": {
"frames": 1
}
} |
From: 2
Bottom Left Door
To: 2
Bottom Left Door
Precise timing is required to dodge the fune's fireballs. Entrance condition: {
"comeInShinecharged": {}
}Requires: {
"shineChargeFrames": 155
}
"h_spikeXModeBlueSuit"
{
"shinespark": {
"frames": 1
}
} |
From: 2
Bottom Left Door
To: 2
Bottom Left Door
Requires: {
"obstaclesCleared": [
"A"
]
}
{
"canShineCharge": {
"usedTiles": 20,
"gentleDownTiles": 2,
"openEnd": 1
}
}
"h_spikeXModeBlueSuit"
{
"shinespark": {
"frames": 1
}
} |
|
Requires: "f_DefeatedPhantoon"
{
"obstaclesNotCleared": [
"B"
]
}
{
"or": [
{
"and": [
{
"obstaclesCleared": [
"A"
]
},
{
"canShineCharge": {
"usedTiles": 30,
"openEnd": 1
}
}
]
},
{
"canShineCharge": {
"usedTiles": 14,
"openEnd": 1
}
}
]
}
{
"spikeHits": 1
}
"h_spikeXModeBlueSuit"
{
"shinespark": {
"frames": 0,
"excessFrames": 0
}
} |
From: 1
Left Door
To: 1
Left Door
It is only possible to enter X-Mode with a first frame unmorph in this room Entrance condition: {
"comeInShinecharged": {}
}Requires: {
"not": "f_DefeatedPhantoon"
}
{
"or": [
"canRiskPermanentLossOfAccess",
{
"canShineCharge": {
"usedTiles": 15,
"openEnd": 1
}
}
]
}
{
"shineChargeFrames": 140
}
"h_thornXModeBlueSuit"
"h_thornXModeFramePerfectExtraLeniency"
{
  "shinespark": {
    "frames": 3
  }
} |
From: 1
Left Door
To: 1
Left Door
Entrance condition: {
"comeInShinecharging": {
"length": 10,
"openEnd": 0
}
}Requires: "h_thornXModeBlueSuit"
"h_thornXModeFramePerfectExtraLeniency"
{
"shinespark": {
"frames": 3
}
} |
From: 1
Left Door
To: 1
Left Door
Requires: "f_DefeatedPhantoon"
{
"canShineCharge": {
"usedTiles": 15,
"openEnd": 1
}
}
"h_thornXModeBlueSuit"
"h_thornXModeFramePerfectExtraLeniency"
{
"shinespark": {
"frames": 3
}
} |
From: 1
Left Door
To: 1
Left Door
Entrance condition: {
"comeInShinecharged": {}
}Requires: "f_DefeatedPhantoon"
{
"shineChargeFrames": 105
}
{
"spikeHits": 1
}
"h_spikeXModeBlueSuit"
{
"shinespark": {
"frames": 2
}
} |
From: 1
Left Door
To: 1
Left Door
Entrance condition: {
"comeInShinecharging": {
"length": 5,
"openEnd": 0
}
}Requires: "f_DefeatedPhantoon"
{
"spikeHits": 1
}
"h_spikeXModeBlueSuit"
{
"shinespark": {
"frames": 2
}
} |
From: 1
Left Door
To: 1
Left Door
Requires: "f_DefeatedPhantoon"
{
"enemyKill": {
"enemies": [
[
"Bull",
"Bull"
]
]
}
}
{
"canShineCharge": {
"usedTiles": 20,
"openEnd": 2
}
}
{
"spikeHits": 1
}
"h_spikeXModeBlueSuit"
{
"shinespark": {
"frames": 2
}
} |


