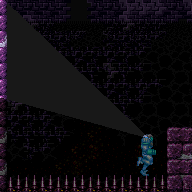
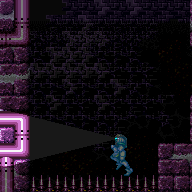
canXModeSpikeSuit (Insane)


The ability to gain a flash suit by using spike X-Mode to gain the initial shinecharge instead of a runway.
Dependencies: canSpikeSuit, canMidairShinespark, canShinechargeMovementComplex, canHorizontalShinespark, canShinechargeMovement, canShinespark, canHorizontalMidairShinespark, canXMode, canCarryFlashSuit
Strats ()
From: 1
Top Left Door
To: 1
Top Left Door


Requires: "h_spikeXModeSpikeSuit"
{
"shinespark": {
"frames": 5,
"excessFrames": 5
}
} |
From: 3
Bottom Left Door
To: 3
Bottom Left Door
By bouncing far enough left, it is possible to get a 2-frame window for the X-mode. Requires: {
"or": [
"h_thornXModeSpikeSuit",
{
"and": [
"h_thornXModeSpikeSuitWithoutLenience",
{
"or": [
{
"obstaclesCleared": [
"A"
]
},
"canTrickyDodgeEnemies",
{
"enemyKill": {
"enemies": [
[
"Beetom",
"Beetom"
]
],
"excludedWeapons": [
"Bombs"
]
}
}
]
}
]
}
]
}
{
"shinespark": {
"frames": 12,
"excessFrames": 12
}
} |
From: 1
Left Door
To: 1
Left Door

A one frame dash jump will give Samus 4 pixels of leniency for the bounce position, two frames is pixel perfect and more than two frames it doesn't work. Samus will jump approximately two tiles higher with a one frame jump compared to a two frame jump. Requires: {
"obstaclesCleared": [
"A"
]
}
{
"or": [
"h_destroyBombWalls",
{
"haveBlueSuit": {}
}
]
}
"canBeVeryPatient"
"h_spikeXModeSpikeSuit"
{
"shinespark": {
"frames": 3,
"excessFrames": 3
}
}Resets obstacles: C |
From: 1
Left Door
To: 1
Left Door


A one frame dash jump will give Samus 4 pixels of leniency for the bounce position, two frames is pixel perfect and more than two frames it doesn't work. Samus will jump approximately two tiles higher with a one frame jump compared to a two frame jump. Requires: {
"obstaclesCleared": [
"A"
]
}
{
"or": [
"h_destroyBombWalls",
{
"haveBlueSuit": {}
}
]
}
"canBeVeryPatient"
"h_spikeXModeSpikeSuit"
"canUseFlashSuitInitialSpark"
{
"shinespark": {
"frames": 26,
"excessFrames": 0
}
}Exit condition: {
"leaveWithSpark": {
"position": "top"
}
} |
From: 1
Left Door
To: 3
Top Junction

A one frame dash jump will give Samus 4 pixels of leniency for the bounce position, two frames is pixel perfect and more than two frames it doesn't work. Samus will jump approximately two tiles higher with a one frame jump compared to a two frame jump. Requires: {
"or": [
"Wave",
{
"obstaclesCleared": [
"B"
]
}
]
}
{
"obstaclesCleared": [
"A"
]
}
{
"obstaclesNotCleared": [
"C"
]
}
"canUseFlashSuitInitialSpark"
"h_destroyBombWalls"
"canBeVeryPatient"
"h_spikeXModeSpikeSuit"
{
"shinespark": {
"frames": 26
}
}Clears obstacles: B Resets obstacles: C |
|

Requires: "Gravity"
{
"ammo": {
"type": "Super",
"count": 1
}
}
"h_thornXModeFramePerfectExtraLeniency"
"h_thornXModeSpikeSuit"
{
"shinespark": {
"frames": 5,
"excessFrames": 5
}
} |
From: 1
Left Door
To: 1
Left Door


Requires: "h_spikeXModeSpikeSuit"
{
"shinespark": {
"frames": 19,
"excessFrames": 4
}
} |
From: 2
Right Door
To: 1
Left Door

Requires: "canUseFlashSuitInitialSpark"
"h_spikeXModeSpikeSuit"
{
"shinespark": {
"frames": 118,
"excessFrames": 5
}
} |
From: 2
Right Door
To: 2
Right Door


Requires: "h_spikeXModeSpikeSuit"
{
"shinespark": {
"frames": 5,
"excessFrames": 5
}
} |
From: 2
Right Door
To: 2
Right Door

Requires: "Gravity"
"h_thornXModeSpikeSuit"
"h_thornXModeFramePerfectExtraLeniency"
{
"shinespark": {
"frames": 7,
"excessFrames": 7
}
} |
|

A 1-frame dash jump will give more leniency to land in the thorns. Requires: "canBeVeryPatient"
"h_thornXModeSpikeSuit"
{
"shinespark": {
"frames": 4,
"excessFrames": 4
}
} |
From: 1
Left Door
To: 1
Left Door

A 1-frame dash jump will give more leniency to land in the thorns. Unmorphing on the first possible frame leaves in top position; second frame leaves in middle position. Requires: "canBeVeryPatient"
"canUseFlashSuitInitialSpark"
"h_thornXModeSpikeSuit"
{
"shinespark": {
"frames": 19,
"excessFrames": 0
}
}Exit condition: {
"leaveWithSpark": {
"position": "top"
}
} |
From: 3
Bottom Right Door
To: 3
Bottom Right Door

Use the thorns on the left side of the room. A 1-frame dash jump will give more leniency to land in the thorns. Only unmorphing on the first possible frame will work; second frame will bonk the pillar. Requires: "canUseFlashSuitInitialSpark"
"canBeVeryPatient"
"h_thornXModeSpikeSuit"
{
"shinespark": {
"frames": 31,
"excessFrames": 0
}
}Exit condition: {
"leaveWithSpark": {
"position": "top"
}
} |
From: 8
Bottom Right Item
To: 8
Bottom Right Item


Requires: "h_spikeXModeSpikeSuit"
{
"shinespark": {
"frames": 5,
"excessFrames": 5
}
} |
From: 8
Bottom Right Item
To: 9
Main Junction

Use the right side of the right spike pit to spikesuit. A diagonal spark from here will clear the ledge to the platform. Either a first or second frame spikesuit will work. Requires: "canUseFlashSuitInitialSpark"
"h_spikeXModeSpikeSuit"
{
"shinespark": {
"frames": 9,
"excessFrames": 1
}
} |
From: 1
Left Door
To: 1
Left Door


A single frame stationary spinjump gives Samus the extra height to bonk the ceiling before entering the spikes to enter X-Mode. Requires: "h_heatProof"
"h_spikeXModeSpikeSuit"
{
"shinespark": {
"frames": 1,
"excessFrames": 1
}
} |
From: 4
Firefleas Item
To: 7
Fireflea Statue's Claw Junction
After armpumping for a while Samus will start to move forwards again, when this happens armpump to move forward one tile Requires: "canUseFlashSuitInitialSpark"
"h_spikeXModeSpikeSuit"
{
"shinespark": {
"frames": 24,
"excessFrames": 8
}
} |
From: 3
Bottom Horizontal Door
To: 3
Bottom Horizontal Door
Requires: "h_heatProof"
"h_spikeXModeSpikeSuit"
{
"shinespark": {
"frames": 4,
"excessFrames": 4
}
} |
From: 3
Bottom Horizontal Door
To: 3
Bottom Horizontal Door
Requires: "h_heatProof"
"h_spikeXModeSpikeSuit"
{
"shinespark": {
"frames": 18,
"excessFrames": 0
}
}Exit condition: {
"leaveWithSpark": {
"position": "bottom"
}
} |
From: 2
Middle Left Door
To: 2
Middle Left Door

Requires: "f_DefeatedPhantoon"
{
"doorUnlockedAtNode": 2
}
"h_spikeXModeSpikeSuit"
{
"shinespark": {
"frames": 3,
"excessFrames": 3
}
} |
From: 2
Middle Left Door
To: 2
Middle Left Door


This requires a first frame Spikesuit unmorph. Requires: "f_DefeatedPhantoon"
{
"doorUnlockedAtNode": 2
}
"canUseFlashSuitInitialSpark"
"h_spikeXModeSpikeSuit"
{
"shinespark": {
"frames": 9,
"excessFrames": 0
}
}Exit condition: {
"leaveWithSpark": {
"position": "bottom"
}
} |
From: 1
Right Door
To: 1
Right Door

Requires: {
"or": [
"Gravity",
{
"and": [
{
"not": "f_DefeatedPhantoon"
},
"canRiskPermanentLossOfAccess"
]
}
]
}
"h_thornXModeSpikeSuit"
{
"shinespark": {
"frames": 2,
"excessFrames": 2
}
} |
From: 7
Bottom Door
To: 7
Bottom Door


Requires: "f_DefeatedPhantoon"
"h_thornXModeSpikeSuit"
"h_thornXModeFramePerfectExtraLeniency"
{
"shinespark": {
"frames": 1,
"excessFrames": 1
}
} |
From: 2
Bottom Right Door
To: 2
Bottom Right Door

A single frame dashing stationary jump can make it easier to land on the spikes depending on where the mochtroid is frozen. Requires: "canWallJump"
"canTrickyUseFrozenEnemies"
"canTrickySpikeSuit"
"h_spikeXModeSpikeSuit"
{
"shinespark": {
"frames": 7
}
}
{
"or": [
"Grapple",
{
"spikeHits": 1
}
]
} |
|


Requires: "Gravity"
"h_spikeXModeSpikeSuit"
{
"shinespark": {
"frames": 6,
"excessFrames": 6
}
} |
From: 2
Right Door
To: 2
Right Door

Only unmorphing on the first possible frame will work; second frame will bonk the platform. Requires: "canUseFlashSuitInitialSpark"
"Gravity"
"h_spikeXModeSpikeSuit"
{
"shinespark": {
"frames": 7
}
}Exit condition: {
"leaveWithSpark": {
"position": "bottom"
}
} |
From: 3
Junction Left of Morph Tunnel
To: 1
Left Door

Requires: "Gravity"
"canUseFlashSuitInitialSpark"
"h_spikeXModeSpikeSuit"
{
"shinespark": {
"frames": 25
}
} |
From: 3
Junction Left of Morph Tunnel
To: 3
Junction Left of Morph Tunnel
Requires: "Gravity"
"h_spikeXModeSpikeSuit"
{
"shinespark": {
"frames": 6,
"excessFrames": 6
}
} |
From: 4
Top Right Ledge Junction
To: 4
Top Right Ledge Junction
Requires: "h_spikeXModeSpikeSuit"
{
"shinespark": {
"frames": 11,
"excessFrames": 11
}
} |