canUseFlashSuitInitialSpark (Extreme+)


The ability to utilize the initial spark while obtaining a flash suit through a spike suit or slope spark. This will typically be used to spark through a door while maintaining a flash suit.
Dependencies: canMidairShinespark, canShinechargeMovementComplex, canHorizontalShinespark, canShinechargeMovement, canShinespark, canHorizontalMidairShinespark, canCarryFlashSuit
Strats ()
From: 2
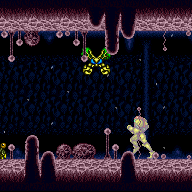
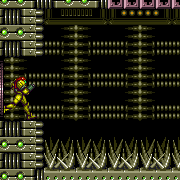
Right Door
To: 2
Right Door


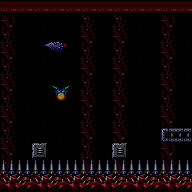
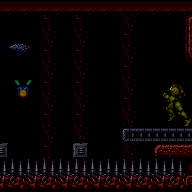
Walk the Geemer up the slope, killing any wavers on the way. Once the Geemer reaches the top of the second slope walk left to move it off screen. Go back down the slope to gain enough runway and build a shinecharge up the slope. Jump over the Geemer and perform a slopespark on the slope close to the door. Requires: "canUseFlashSuitInitialSpark"
"h_shinechargeMaxRunway"
{
"shineChargeFrames": 125
}
{
"enemyDamage": {
"enemy": "Geemer (blue)",
"type": "contact",
"hits": 1
}
}
"canSlopeSpark"
{
"shinespark": {
"frames": 9,
"excessFrames": 0
}
}Exit condition: {
"leaveWithSpark": {
"position": "bottom"
}
}Dev note: Holding dash to run into the Geemer can also be used, the dashing method causes Samus to land faster, which should make the position of Samus on the slope less precise. |
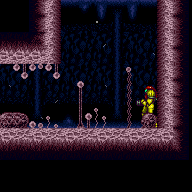
From: 1
Top Left Door
To: 1
Top Left Door

Requires: "canUseFlashSuitInitialSpark"
"h_shinechargeMaxRunway"
{
"enemyDamage": {
"enemy": "Zeela",
"type": "contact",
"hits": 1
}
}
"canSlopeSpark"
{
"shinespark": {
"frames": 10,
"excessFrames": 0
}
}Exit condition: {
"leaveWithSpark": {
"position": "bottom"
}
} |
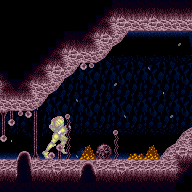
From: 3
Right Door
To: 2
Bottom Left Door

Requires: "canBeExtremelyPatient"
"canUseFlashSuitInitialSpark"
"h_shinechargeMaxRunway"
{
"enemyDamage": {
"enemy": "Zeela",
"type": "contact",
"hits": 1
}
}
"canSlopeSpark"
{
"shinespark": {
"frames": 6,
"excessFrames": 0
}
}Exit condition: {
"leaveWithSpark": {
"position": "bottom"
}
}Unlocks doors: {"types":["ammo"],"requires":[]} |
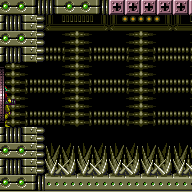
From: 3
Right Door
To: 3
Right Door

Requires: "canUseFlashSuitInitialSpark"
"h_shinechargeMaxRunway"
{
"enemyDamage": {
"enemy": "Zeela",
"type": "contact",
"hits": 1
}
}
"canSlopeSpark"
{
"shinespark": {
"frames": 12,
"excessFrames": 0
}
}Exit condition: {
"leaveWithSpark": {
"position": "bottom"
}
} |
From: 1
Left Door
To: 1
Left Door


A one frame dash jump will give Samus 4 pixels of leniency for the bounce position, two frames is pixel perfect and more than two frames it doesn't work. Samus will jump approximately two tiles higher with a one frame jump compared to a two frame jump. Requires: {
"obstaclesCleared": [
"A"
]
}
{
"or": [
"h_destroyBombWalls",
{
"haveBlueSuit": {}
}
]
}
"canBeVeryPatient"
"h_spikeXModeSpikeSuit"
"canUseFlashSuitInitialSpark"
{
"shinespark": {
"frames": 26,
"excessFrames": 0
}
}Exit condition: {
"leaveWithSpark": {
"position": "top"
}
} |
From: 1
Left Door
To: 3
Top Junction

A one frame dash jump will give Samus 4 pixels of leniency for the bounce position, two frames is pixel perfect and more than two frames it doesn't work. Samus will jump approximately two tiles higher with a one frame jump compared to a two frame jump. Requires: {
"or": [
"Wave",
{
"obstaclesCleared": [
"B"
]
}
]
}
{
"obstaclesCleared": [
"A"
]
}
{
"obstaclesNotCleared": [
"C"
]
}
"canUseFlashSuitInitialSpark"
"h_destroyBombWalls"
"canBeVeryPatient"
"h_spikeXModeSpikeSuit"
{
"shinespark": {
"frames": 26
}
}Clears obstacles: B Resets obstacles: C |
From: 2
Right Door
To: 2
Right Door


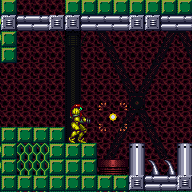
After shinecharging, lure a Zeb and use it to slopespark on the first slope right of the pipe. Requires: "canUseFlashSuitInitialSpark"
{
"canShineCharge": {
"usedTiles": 21,
"steepDownTiles": 2,
"openEnd": 0
}
}
{
"shineChargeFrames": 150
}
{
"enemyDamage": {
"enemy": "Zeb",
"type": "contact",
"hits": 1
}
}
"canSlopeSpark"
{
"shinespark": {
"frames": 12,
"excessFrames": 0
}
}Exit condition: {
"leaveWithSpark": {
"position": "bottom"
}
}Dev note: No leniency is given as this is a farm room and the Zebs do little damage, even suitless. |
Come in Shinecharged, Gain Flash Suit - Spark Across (Spikesuit)
(Extreme+)
Red Brinstar Fireflea Room
From: 2
Right Door
To: 1
Left Door

Entrance condition: {
"comeInShinecharged": {}
}Requires: "canUseFlashSuitInitialSpark"
{
"shineChargeFrames": 65
}
{
"spikeHits": 1
}
"canPatientSpikeSuit"
{
"shinespark": {
"frames": 142,
"excessFrames": 6
}
}Dev note: No leniency included as good farm from right door. |
Come in Shinecharging, Gain Flash Suit - Spark Across (Spikesuit)
(Extreme+)
Red Brinstar Fireflea Room
From: 2
Right Door
To: 1
Left Door

Entrance condition: {
"comeInShinecharging": {
"length": 5,
"openEnd": 0
}
}Requires: "canUseFlashSuitInitialSpark"
{
"spikeHits": 1
}
"canPatientSpikeSuit"
{
"shinespark": {
"frames": 129,
"excessFrames": 6
}
}Dev note: No leniency included as good farm from right door. |
From: 2
Right Door
To: 1
Left Door

Requires: "canUseFlashSuitInitialSpark"
"h_spikeXModeSpikeSuit"
{
"shinespark": {
"frames": 118,
"excessFrames": 5
}
} |
Come in Shinecharged, Gain Flash Suit (Spikesuit) - Leave with Shinespark
(Extreme+)
Kraid Eye Door Room
From: 1
Left Door
To: 1
Left Door

Unmorphing on the first possible frame leaves in top position; second frame leaves in middle position. Entrance condition: {
"comeInShinecharged": {}
}Requires: "canUseFlashSuitInitialSpark"
{
"shineChargeFrames": 125
}
{
"thornHits": 1
}
"canPatientSpikeSuit"
{
"shinespark": {
"frames": 19,
"excessFrames": 0
}
}Exit condition: {
"leaveWithSpark": {
"position": "top"
}
}Unlocks doors: {"types":["super","powerbomb"],"requires":[]}
{"types":["missiles"],"requires":["never"]} |
Come in Shinecharging, Gain Flash Suit (Spikesuit) - Leave with Shinespark
(Extreme+)
Kraid Eye Door Room
From: 1
Left Door
To: 1
Left Door
Unmorphing on the first possible frame leaves in top position; second frame leaves in middle position. Entrance condition: {
"comeInShinecharging": {
"length": 4,
"openEnd": 1
}
}Requires: "canUseFlashSuitInitialSpark"
{
"thornHits": 1
}
"canPatientSpikeSuit"
{
"shinespark": {
"frames": 19,
"excessFrames": 0
}
}Exit condition: {
"leaveWithSpark": {
"position": "top"
}
}Unlocks doors: {"types":["super","powerbomb"],"requires":[]}
{"types":["missiles"],"requires":["never"]} |
From: 1
Left Door
To: 1
Left Door

A 1-frame dash jump will give more leniency to land in the thorns. Unmorphing on the first possible frame leaves in top position; second frame leaves in middle position. Requires: "canBeVeryPatient"
"canUseFlashSuitInitialSpark"
"h_thornXModeSpikeSuit"
{
"shinespark": {
"frames": 19,
"excessFrames": 0
}
}Exit condition: {
"leaveWithSpark": {
"position": "top"
}
} |
From: 1
Left Door
To: 1
Left Door

Failing the spikesuit attempt with a spark early by 1 frame will lose the original flash suit. Unmorphing on the first possible frame leaves in top position; second frame leaves in middle position. Requires: {
"useFlashSuit": {}
}
"canUseFlashSuitInitialSpark"
"canTrickyCarryFlashSuit"
{
"thornHits": 1
}
"canPatientSpikeSuit"
{
"shinespark": {
"frames": 19,
"excessFrames": 0
}
}Exit condition: {
"leaveWithSpark": {
"position": "top"
}
} |
Come in Shinecharging, Gain Flash Suit (Spikesuit) - Leave with Shinespark
(Extreme+)
Kraid Eye Door Room
From: 2
Top Right Door
To: 1
Left Door


Requires precise movement. Down-back during the fall to clear the lower platform while shooting out the blocks. Unmorphing on the first possible frame leaves in top position; second frame leaves in middle position. Entrance condition: {
"comeInShinecharging": {
"length": 3,
"openEnd": 0
}
}Requires: "canUseFlashSuitInitialSpark"
{
"shineChargeFrames": 175
}
"canDownBack"
"canShinechargeMovementTricky"
{
"thornHits": 1
}
"canPatientSpikeSuit"
{
"shinespark": {
"frames": 19,
"excessFrames": 0
}
}Exit condition: {
"leaveWithSpark": {
"position": "top"
}
}Unlocks doors: {"types":["ammo"],"requires":["never"]}Dev note: It may be possible to open a green/red door with a super missile but it is on the edge of possibility. |
Come in Shinecharged, Gain Flash Suit (Spikesuit) - Leave with shinespark
(Extreme+)
Kraid Eye Door Room
From: 3
Bottom Right Door
To: 3
Bottom Right Door

Only unmorphing on the first possible frame will work; second frame will bonk the platform. Entrance condition: {
"comeInShinecharged": {}
}Requires: "canUseFlashSuitInitialSpark"
{
"shineChargeFrames": 105
}
{
"thornHits": 1
}
"canPatientSpikeSuit"
{
"shinespark": {
"frames": 13,
"excessFrames": 0
}
}Exit condition: {
"leaveWithSpark": {
"position": "bottom"
}
}Unlocks doors: {"types":["super","powerbomb"],"requires":[]}
{"types":["missiles"],"requires":["never"]} |
Come in Shinecharging, Gain Flash Suit (Spikesuit) - Leave with shinespark
(Extreme+)
Kraid Eye Door Room
From: 3
Bottom Right Door
To: 3
Bottom Right Door
Only unmorphing on the first possible frame will work; second frame will bonk the platform. Entrance condition: {
"comeInShinecharging": {
"length": 2,
"openEnd": 1
}
}Requires: "canUseFlashSuitInitialSpark"
{
"thornHits": 1
}
"canPatientSpikeSuit"
{
"shinespark": {
"frames": 13,
"excessFrames": 0
}
}Exit condition: {
"leaveWithSpark": {
"position": "bottom"
}
}Unlocks doors: {"types":["super","powerbomb"],"requires":[]}
{"types":["missiles"],"requires":["never"]} |
From: 3
Bottom Right Door
To: 3
Bottom Right Door

Use the thorns on the left side of the room. A 1-frame dash jump will give more leniency to land in the thorns. Only unmorphing on the first possible frame will work; second frame will bonk the pillar. Requires: "canUseFlashSuitInitialSpark"
"canBeVeryPatient"
"h_thornXModeSpikeSuit"
{
"shinespark": {
"frames": 31,
"excessFrames": 0
}
}Exit condition: {
"leaveWithSpark": {
"position": "top"
}
} |
From: 3
Bottom Right Door
To: 3
Bottom Right Door

Failing the spikesuit attempt with a spark early by 1 frame will lose the original flash suit. Only unmorphing on the first possible frame will work; second frame will bonk the platform. Requires: {
"useFlashSuit": {}
}
"canUseFlashSuitInitialSpark"
"canTrickyCarryFlashSuit"
{
"thornHits": 1
}
"canSpikeSuit"
{
"shinespark": {
"frames": 13,
"excessFrames": 0
}
}Exit condition: {
"leaveWithSpark": {
"position": "bottom"
}
} |
From: 8
Bottom Right Item
To: 9
Main Junction

Use the right side of the right spike pit to spikesuit. A diagonal spark from here will clear the ledge to the platform. Either a first or second frame spikesuit will work. Requires: "canUseFlashSuitInitialSpark"
"h_spikeXModeSpikeSuit"
{
"shinespark": {
"frames": 9,
"excessFrames": 1
}
} |
From: 1
Left Door
To: 2
Right Door
Entrance condition: {
"comeInShinecharged": {}
}Requires: "canUseFlashSuitInitialSpark"
"Gravity"
{
"shineChargeFrames": 75
}
{
"heatFrames": 425
}
{
"lavaFrames": 10
}
{
"spikeHits": 1
}
"h_spikeSuitSpikeHitLeniency"
"canPatientSpikeSuit"
{
"shinespark": {
"frames": 75,
"excessFrames": 3
}
} |
From: 1
Left Door
To: 2
Right Door


Entrance condition: {
"comeInShinecharging": {
"length": 4,
"openEnd": 0
}
}Requires: "canUseFlashSuitInitialSpark"
"Gravity"
{
"heatFrames": 425
}
{
"lavaFrames": 10
}
{
"spikeHits": 1
}
"h_spikeSuitSpikeHitLeniency"
"canPatientSpikeSuit"
{
"shinespark": {
"frames": 75,
"excessFrames": 3
}
} |
From: 2
Right Door
To: 1
Left Door
Entrance condition: {
"comeInShinecharged": {}
}Requires: "canUseFlashSuitInitialSpark"
"Gravity"
{
"shineChargeFrames": 75
}
{
"heatFrames": 425
}
{
"lavaFrames": 10
}
{
"spikeHits": 1
}
"h_spikeSuitSpikeHitLeniency"
"canPatientSpikeSuit"
{
"shinespark": {
"frames": 75,
"excessFrames": 3
}
} |
From: 2
Right Door
To: 1
Left Door

Entrance condition: {
"comeInShinecharging": {
"length": 4,
"openEnd": 0
}
}Requires: "canUseFlashSuitInitialSpark"
"Gravity"
{
"heatFrames": 425
}
{
"lavaFrames": 10
}
{
"spikeHits": 1
}
"h_spikeSuitSpikeHitLeniency"
"canPatientSpikeSuit"
{
"shinespark": {
"frames": 75,
"excessFrames": 3
}
} |
From: 2
Bottom Left Door
To: 2
Bottom Left Door

Requires: "canUseFlashSuitInitialSpark"
{
"obstaclesCleared": [
"A"
]
}
{
"canShineCharge": {
"usedTiles": 20,
"gentleDownTiles": 2,
"openEnd": 1
}
}
{
"spikeHits": 1
}
"h_spikeSuitSpikeHitLeniency"
"canPatientSpikeSuit"
{
"shinespark": {
"frames": 11
}
}Exit condition: {
"leaveWithSpark": {
"position": "bottom"
}
}Unlocks doors: {"types":["ammo"],"requires":[]} |
From: 4
Firefleas Item
To: 7
Fireflea Statue's Claw Junction
After armpumping for a while Samus will start to move forwards again, when this happens armpump to move forward one tile Requires: "canUseFlashSuitInitialSpark"
"h_spikeXModeSpikeSuit"
{
"shinespark": {
"frames": 24,
"excessFrames": 8
}
} |
From: 7
Fireflea Statue's Claw Junction
To: 7
Fireflea Statue's Claw Junction


Failing the spikesuit without a way to get back up to the junction results in a softlock. Requires: "canUseFlashSuitInitialSpark"
{
"canShineCharge": {
"usedTiles": 17,
"gentleUpTiles": 6,
"steepUpTiles": 1,
"openEnd": 1
}
}
{
"spikeHits": 1
}
"canRiskySpikeSuit"
{
"shinespark": {
"frames": 24,
"excessFrames": 8
}
} |
From: 2
Middle Left Door
To: 2
Middle Left Door

This requires a first frame unmorph. Entrance condition: {
"comeInShinecharged": {}
}Requires: "f_DefeatedPhantoon"
"canUseFlashSuitInitialSpark"
{
"shineChargeFrames": 90
}
{
"spikeHits": 1
}
"h_spikeSuitSpikeHitLeniency"
"canPatientSpikeSuit"
{
"shinespark": {
"frames": 7,
"excessFrames": 0
}
}Exit condition: {
"leaveWithSpark": {
"position": "bottom"
}
}Unlocks doors: {"types":["super","powerbomb"],"requires":[]}
{"types":["missiles"],"requires":["never"]} |
From: 2
Middle Left Door
To: 2
Middle Left Door

This requires a first frame Spikesuit unmorph. Requires: "f_DefeatedPhantoon"
{
"doorUnlockedAtNode": 2
}
"canUseFlashSuitInitialSpark"
"h_spikeXModeSpikeSuit"
{
"shinespark": {
"frames": 9,
"excessFrames": 0
}
}Exit condition: {
"leaveWithSpark": {
"position": "bottom"
}
} |
From: 2
Right Door
To: 2
Right Door

Only unmorphing on the first possible frame will work; second frame will bonk the platform. Requires: "canUseFlashSuitInitialSpark"
"Gravity"
"h_spikeXModeSpikeSuit"
{
"shinespark": {
"frames": 7
}
}Exit condition: {
"leaveWithSpark": {
"position": "bottom"
}
} |
From: 3
Junction Left of Morph Tunnel
To: 1
Left Door

Requires: "Gravity"
"canUseFlashSuitInitialSpark"
"h_spikeXModeSpikeSuit"
{
"shinespark": {
"frames": 25
}
} |