canSlopeSpark (Insane)


The ability to gain a flash suit without Morph by using an enemy damage boost to land on a slope and spark before knockback frames have expired. Gain a shinecharge, then while moving into an enemy near the top of a slope, frame perfectly switch directions while pressing jump and hold both back and jump for 4 or 5 frames. Jump can be pressed one frame before or on the same frame as the direction switch, then after 4 or 5 frames release either jump, back or both simultaneously. If only releasing back or jump then there is no time limit on how long the other input can be held, Samus will just remain in the slope spark pose until a shinespark is initiated.
A common failure is switching directions too late. The frame perfect direction switch is very early, one frame before the damage pose appears. This can be difficult to judge, especially with faster moving enemies. Switching directions on the correct frame will give a very small damage boost, turning around and landing on the slope. Holding back and jump for more than 5 frames will cause Samus to spark horizontally. If the direction switch was exactly one frame late, Samus will land on the slope but no spark will occur.
Dependencies: canUseEnemies, canMidairShinespark, canShinechargeMovementComplex, canHorizontalShinespark, canHorizontalDamageBoost, canShinechargeMovement, canShinespark, canHorizontalMidairShinespark, canNeutralDamageBoost, canCarryFlashSuit
Strats ()
From: 4
Top Right Door
To: 4
Top Right Door

Requires: "h_ZebesIsAwake"
{
"canShineCharge": {
"usedTiles": 17,
"steepUpTiles": 3,
"steepDownTiles": 3,
"openEnd": 2
}
}
{
"or": [
"canBeVeryPatient",
{
"ammo": {
"type": "Super",
"count": 1
}
}
]
}
{
"enemyDamage": {
"enemy": "Geemer (blue)",
"type": "contact",
"hits": 1
}
}
"canSlopeSpark"
{
"shinespark": {
"frames": 5,
"excessFrames": 5
}
} |
From: 4
Top Right Door
To: 4
Top Right Door

Requires: "h_ZebesIsAwake"
{
"canShineCharge": {
"usedTiles": 17,
"steepUpTiles": 3,
"steepDownTiles": 3,
"openEnd": 2
}
}
{
"or": [
"canBeVeryPatient",
{
"ammo": {
"type": "Super",
"count": 1
}
}
]
}
{
"enemyDamage": {
"enemy": "Geemer (blue)",
"type": "contact",
"hits": 1
}
}
"canSlopeSpark"
{
"shinespark": {
"frames": 15,
"excessFrames": 0
}
}Exit condition: {
"leaveWithSpark": {
"position": "bottom"
}
} |
|
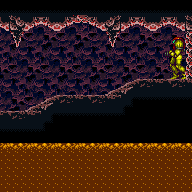
The Geemer and Samus both need to be in a position relative to the slope where the initial damage boost will allow Samus to land on the slope and perform a slopespark. A normalized setup can be achieved by entering from the right door, shinecharging down the slope and stopping before the Geemer is on screen (just before the second mushroom). Once shinecharged, walk left down the slope to bring the Geemer on screen and perform the slopespark by damage boosting off it. Requires: "h_shinechargeMaxRunway"
{
"shineChargeFrames": 65
}
{
"enemyDamage": {
"enemy": "Geemer (blue)",
"type": "contact",
"hits": 1
}
}
"canSlopeSpark"
{
"shinespark": {
"frames": 9,
"excessFrames": 9
}
} |
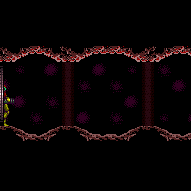
From: 2
Right Door
To: 2
Right Door


Walk the Geemer up the slope, killing any wavers on the way. Once the Geemer reaches the top of the second slope walk left to move it off screen. Go back down the slope to gain enough runway and build a shinecharge up the slope. Jump over the Geemer and perform a slopespark on the slope close to the door. Requires: "canUseFlashSuitInitialSpark"
"h_shinechargeMaxRunway"
{
"shineChargeFrames": 125
}
{
"enemyDamage": {
"enemy": "Geemer (blue)",
"type": "contact",
"hits": 1
}
}
"canSlopeSpark"
{
"shinespark": {
"frames": 9,
"excessFrames": 0
}
}Exit condition: {
"leaveWithSpark": {
"position": "bottom"
}
}Dev note: Holding dash to run into the Geemer can also be used, the dashing method causes Samus to land faster, which should make the position of Samus on the slope less precise. |
|

Requires: "Gravity"
{
"canShineCharge": {
"usedTiles": 20,
"steepUpTiles": 3,
"steepDownTiles": 1,
"openEnd": 0
}
}
{
"enemyDamage": {
"enemy": "Sciser",
"type": "contact",
"hits": 1
}
}
"canSlopeSpark"
"h_XModeSpikeHitLeniency"
{
"shinespark": {
"frames": 5,
"excessFrames": 5
}
}Dev note: FIXME: implement numeric enemy damage |
|
Requires: {
"canShineCharge": {
"usedTiles": 19,
"steepUpTiles": 1,
"steepDownTiles": 3,
"openEnd": 0
}
}
{
"enemyDamage": {
"enemy": "Kihunter (green)",
"type": "contact",
"hits": 1
}
}
"canSlopeSpark"
{
"shinespark": {
"frames": 8,
"excessFrames": 8
}
} |
|

Requires: "h_shinechargeMaxRunway"
{
"enemyDamage": {
"enemy": "Zeela",
"type": "contact",
"hits": 1
}
}
"canSlopeSpark"
{
"shinespark": {
"frames": 3,
"excessFrames": 3
}
} |
From: 1
Top Left Door
To: 1
Top Left Door

Requires: "canUseFlashSuitInitialSpark"
"h_shinechargeMaxRunway"
{
"enemyDamage": {
"enemy": "Zeela",
"type": "contact",
"hits": 1
}
}
"canSlopeSpark"
{
"shinespark": {
"frames": 10,
"excessFrames": 0
}
}Exit condition: {
"leaveWithSpark": {
"position": "bottom"
}
} |
From: 3
Right Door
To: 2
Bottom Left Door

Requires: "canBeExtremelyPatient"
"canUseFlashSuitInitialSpark"
"h_shinechargeMaxRunway"
{
"enemyDamage": {
"enemy": "Zeela",
"type": "contact",
"hits": 1
}
}
"canSlopeSpark"
{
"shinespark": {
"frames": 6,
"excessFrames": 0
}
}Exit condition: {
"leaveWithSpark": {
"position": "bottom"
}
}Unlocks doors: {"types":["ammo"],"requires":[]} |
From: 3
Right Door
To: 3
Right Door

Requires: "canUseFlashSuitInitialSpark"
"h_shinechargeMaxRunway"
{
"enemyDamage": {
"enemy": "Zeela",
"type": "contact",
"hits": 1
}
}
"canSlopeSpark"
{
"shinespark": {
"frames": 12,
"excessFrames": 0
}
}Exit condition: {
"leaveWithSpark": {
"position": "bottom"
}
} |
|
After shinecharging, lure a Zeb and use it to slopespark on the first slope right of the pipe. Requires: {
"or": [
{
"canShineCharge": {
"usedTiles": 20,
"steepDownTiles": 2,
"openEnd": 0
}
},
{
"and": [
{
"doorUnlockedAtNode": 2
},
{
"canShineCharge": {
"usedTiles": 21,
"steepDownTiles": 2,
"openEnd": 0
}
}
]
}
]
}
{
"shineChargeFrames": 150
}
{
"enemyDamage": {
"enemy": "Zeb",
"type": "contact",
"hits": 1
}
}
"canSlopeSpark"
{
"shinespark": {
"frames": 4,
"excessFrames": 4
}
}Dev note: No leniency is given as this is a farm room and the Zebs do little damage, even suitless. |
From: 2
Right Door
To: 2
Right Door


After shinecharging, lure a Zeb and use it to slopespark on the first slope right of the pipe. Requires: "canUseFlashSuitInitialSpark"
{
"canShineCharge": {
"usedTiles": 21,
"steepDownTiles": 2,
"openEnd": 0
}
}
{
"shineChargeFrames": 150
}
{
"enemyDamage": {
"enemy": "Zeb",
"type": "contact",
"hits": 1
}
}
"canSlopeSpark"
{
"shinespark": {
"frames": 12,
"excessFrames": 0
}
}Exit condition: {
"leaveWithSpark": {
"position": "bottom"
}
}Dev note: No leniency is given as this is a farm room and the Zebs do little damage, even suitless. |
|

Requires: "h_heatProof"
"h_shinechargeMaxRunway"
{
"enemyDamage": {
"enemy": "Multiviola",
"type": "contact",
"hits": 1
}
}
"canSlopeSpark"
{
"shinespark": {
"frames": 7,
"excessFrames": 7
}
}Dev note: FIXME: Could add a suitless version here |
From: 2
Right Vertical Door
To: 2
Right Vertical Door

Requires: "Ice"
{
"obstaclesCleared": [
"A"
]
}
{
"canShineCharge": {
"usedTiles": 17,
"gentleDownTiles": 3,
"steepDownTiles": 3,
"openEnd": 0
}
}
{
"enemyDamage": {
"enemy": "Mella",
"type": "contact",
"hits": 1
}
}
"canSlopeSpark"
{
"shinespark": {
"frames": 5,
"excessFrames": 5
}
}Dev note: FIXME: Ice makes it easier to get a mella in the correct position but it may be possible without it. |
From: 1
Top Left Door
To: 1
Top Left Door

Requires: {
"or": [
{
"canShineCharge": {
"usedTiles": 21,
"gentleUpTiles": 3,
"gentleDownTiles": 3,
"openEnd": 1
}
},
{
"and": [
{
"doorUnlockedAtNode": 1
},
{
"canShineCharge": {
"usedTiles": 22,
"gentleUpTiles": 3,
"gentleDownTiles": 3,
"openEnd": 1
}
}
]
}
]
}
{
"enemyDamage": {
"enemy": "Boulder",
"type": "contact",
"hits": 1
}
}
"canSlopeSpark"
"h_XModeSpikeHitLeniency"
"h_XModeSpikeHitLeniency"
{
"shinespark": {
"frames": 1,
"excessFrames": 1
}
} |
From: 2
Top Left Door
To: 2
Top Left Door


Getting the Covern to spawn in a place where it can be used to slopespark can take a long time. Requires: "canBeExtremelyPatient"
{
"not": "f_DefeatedPhantoon"
}
"canRiskPermanentLossOfAccess"
{
"canShineCharge": {
"usedTiles": 11,
"steepUpTiles": 7,
"openEnd": 1
}
}
{
"enemyDamage": {
"enemy": "Covern",
"type": "contact",
"hits": 1
}
}
"canSlopeSpark"
{
"shinespark": {
"frames": 3,
"excessFrames": 3
}
} |
|

Avoid bringing the far crab on screen until after Shinecharged. Run and jump over it to reach the slope in time. Requires: "Gravity"
{
"canShineCharge": {
"usedTiles": 32,
"steepUpTiles": 2,
"steepDownTiles": 1,
"openEnd": 1
}
}
{
"enemyDamage": {
"enemy": "Sciser",
"type": "contact",
"hits": 1
}
}
"canSlopeSpark"
{
"shinespark": {
"frames": 3,
"excessFrames": 3
}
} |
|

Must come in from the right door and jump at the end of the runway to scroll the camera up without bringing the menu's on screen. Requires: "HiJump"
"canCameraManip"
{
"or": [
"h_bombThings",
"h_useSpringBall",
{
"and": [
"canMidAirMorph",
"Gravity",
"canTrickyJump"
]
},
"h_threeTileJumpMorph"
]
}
{
"canShineCharge": {
"usedTiles": 22,
"openEnd": 1
}
}
{
"enemyDamage": {
"enemy": "Menu",
"type": "contact",
"hits": 1
}
}
"canSlopeSpark"
"h_XModeSpikeHitLeniency"
{
"shinespark": {
"frames": 9,
"excessFrames": 9
}
}Dev note: FIXME: implement numeric enemy damage |