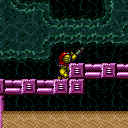
canPartialFloorClip (Very Hard)


While standing upright in a two-tile gap between solid tiles, jump in such a way as to clip a pixel into the below floor as a setup to another tech. This is done by, in quick succession: jumping, aiming down, and then pressing forward.
Dev note: Cancelling a spinjump with angle can get the same effect, but has very limited logical uses.
Strats ()
From: 6
Middle Right Door (By Zeb Farm)
To: 12
Top Junction


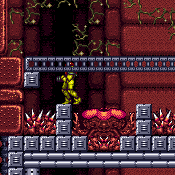
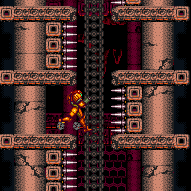
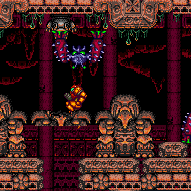
It is possible to bomb boost from the door runway over the Zeb and onto the first step. Without doing this, the Zeb will likely touch Samus, as it will start moving if Samus goes down a single step. At the left end of the tunnel, roll against the lower left corner, exit G-mode, and X-Ray standup, shoot the block, partial floor clip, then jump and down grab to the ledge. Wiggle to escape. A failed jump will result in a forced crouch, which is likely a soft lock. Entrance condition: {
"comeInWithGMode": {
"mode": "any",
"morphed": true
}
}Requires: "canComplexGMode"
"canXRayStandUp"
"canPartialFloorClip"
"canDownGrab"
{
"or": [
"h_artificialMorphSpringBall",
{
"and": [
"h_artificialMorphBombHorizontally",
"h_additionalBomb"
]
}
]
} |
From: 6
Middle Right Door (By Zeb Farm)
To: 12
Top Junction


Farm up on the Zeb, then lead one, frozen, to the upper portion. Freeze it again get shinecharge, then wait for it to unfreeze (or turn off Ice to force) and get hit by it to interrupt. Requires: {
"obstaclesCleared": [
"R-Mode"
]
}
{
"or": [
"h_bombThings",
"h_useSpringBall",
{
"and": [
"Morph",
"canXRayStandUp",
"canPartialFloorClip",
"canDownGrab"
]
}
]
}
"canTrickyUseFrozenEnemies"
{
"refill": [
"Energy"
]
}
"h_shinechargeMaxRunway"
{
"autoReserveTrigger": {}
}
"canRModeSparkInterrupt"Resets obstacles: R-Mode |
|
Unmorph and shoot the shot block, then x-ray standup, partial floor clip, and down grab to escape. Requires: "Morph" "canXRayStandUp" "canPartialFloorClip" "canDownGrab" |
From: 9
Left Side - Bottom Door
To: 11
Middle Item
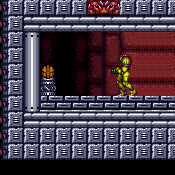
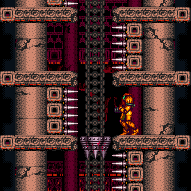
Go into the morph tunnel below the Charge Beam location and Crystal Flash to force a standup and jump through. Samus is now unable to use X-Ray. Without Morph, be careful not to overload PLMs using the camera scroll blocks on the path upward. Then partially floor clip into the left side of the bomb block, and jump to clip through and escape. To exit G-Mode, damage down until the reserves trigger, which can be done most quickly using the Sidehoppers. Entrance condition: {
"comeInWithGMode": {
"mode": "any",
"morphed": true
}
}Requires: "canComplexGMode"
{
"or": [
"h_artificialMorphIBJ",
"Morph",
{
"and": [
"h_artificialMorphSpringBall",
{
"or": [
"HiJump",
{
"and": [
"h_artificialMorphSpringBallBombJump",
"h_additionalBomb",
"h_additionalBomb",
"h_additionalBomb"
]
}
]
}
]
}
]
}
"h_artificialMorphCrystalFlash"
{
"or": [
"Morph",
{
"and": [
"canInsaneJump",
"canTwoTileSqueeze",
"canPartialFloorClip",
"canCeilingClip"
]
}
]
}
"canBePatient"
{
"autoReserveTrigger": {}
}Dev note: This assumes Samus has many Energy Tanks, which will take a while to empty. |
From: 9
Left Side - Bottom Door
To: 13
Central Junction
Farm the Zeb pipe just above the 'main' left door. Shinecharge on the ledge below, then hop back up and get interrupted by a Zeb. Entrance condition: {
"comeInWithRMode": {}
}Requires: "Morph"
"h_usePowerBomb"
{
"or": [
"canTwoTileSqueeze",
{
"and": [
"Morph",
"canXRayStandUp"
]
}
]
}
"canPartialFloorClip"
"canCeilingClip"
{
"refill": [
"Energy"
]
}
{
"canShineCharge": {
"usedTiles": 25,
"openEnd": 1
}
}
{
"autoReserveTrigger": {
"maxReserveEnergy": 95
}
}
"canRModeSparkInterrupt"Clears obstacles: E |
From: 9
Left Side - Bottom Door
To: 13
Central Junction
Go into the Morph Tunnel below the Charge Beam location and Crystal Flash to force a standup and jump through. Samus is now unable to use X-Ray. Without Morph, be careful not to overload PLMs using the camera scroll blocks on the path upward. Partially floor clip into the left side of the bomb block and jump to clip through and escape. Go to the 'main' left door's runway and shinecharge. Do not kill any Zebs during the ascent as they will not respawn until G-Mode ends. Shinecharge and jump to the Zeb pipe above the runway to interrupt. G-Mode will end and the Zeb pipe can be farmed to refill if needed. Entrance condition: {
"comeInWithGMode": {
"mode": "direct",
"morphed": true
}
}Requires: "canComplexGMode"
{
"or": [
"h_artificialMorphIBJ",
"Morph",
{
"and": [
"h_artificialMorphSpringBall",
{
"or": [
"HiJump",
{
"and": [
"h_artificialMorphSpringBallBombJump",
"h_additionalBomb",
"h_additionalBomb",
"h_additionalBomb"
]
}
]
}
]
}
]
}
"h_artificialMorphCrystalFlash"
{
"or": [
"Morph",
{
"and": [
"canInsaneJump",
"canTwoTileSqueeze",
"canPartialFloorClip",
"canCeilingClip"
]
}
]
}
{
"canShineCharge": {
"usedTiles": 25,
"openEnd": 1
}
}
{
"autoReserveTrigger": {
"maxReserveEnergy": 95
}
}
"canRModeSparkInterrupt"
{
"partialRefill": {
"type": "Energy",
"limit": 50
}
}Clears obstacles: E |
|
Partially floor clip into the left side of the bomb block above the charge beam location. Then jump to clip through the above tile. Requires: {
"obstaclesNotCleared": [
"D"
]
}
{
"or": [
"canTwoTileSqueeze",
{
"and": [
"Morph",
"canXRayStandUp"
]
}
]
}
"canPartialFloorClip"
"canCeilingClip" |
|
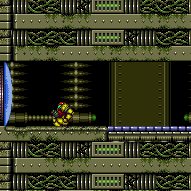
Use the Solid Blocks next to the Samus Eater to clip up through the Power Bomb Blocks. Carefully jump around the thorns, use HiJump to jump over them, or walk through them using i-frames. Requires: "canCeilingClip"
"canPartialFloorClip"
{
"or": [
{
"and": [
"canCarefulJump",
"HiJump",
"canTwoTileSqueeze",
{
"or": [
"canTrickyJump",
{
"thornHits": 1
}
]
}
]
},
{
"and": [
"canNeutralDamageBoost",
"canUseIFrames",
{
"thornHits": 1
}
]
},
{
"and": [
"canPreciseWallJump",
"canTwoTileSqueeze"
]
}
]
} |
|
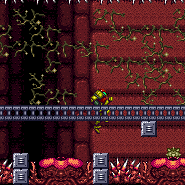

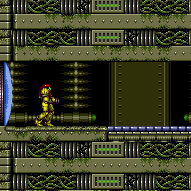
Use the Solid Blocks next to the Samus Eater to clip up through the Power Bomb Blocks. The thorns do not cover the entire blocks above. Jump barely only onto the corner to avoid the damage. Carefully jump around the thorns, tunnel crawl slightly to avoid touching the thorns when partial floor clipping. Morph and x-ray can be used instead to setup the clip much easier. Requires: "canTrickyJump"
{
"or": [
"canXRayCeilingClip",
"canTunnelCrawl"
]
}
"canPartialFloorClip"
"canCeilingClip" |
From: 5
Junction Below Right Item
To: 3
Top Right Item
Requires: "Morph" "canXRayStandUp" "canPartialFloorClip" "canCeilingClip" |
|
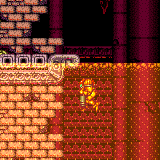
There is a hole in the left side wall that Samus can fit into by shrinking her hitbox. Once in the wall, stand up if crouched then turnaround into a buffered spinjump to jump out of the acid. Requires: {
"tech": "canPartialFloorClip"
}
"canSuitlessLavaDive"
{
"or": [
{
"and": [
"canLateralMidAirMorph",
"canDownBack",
"canTrickyJump",
{
"acidFrames": 110
},
{
"heatFrames": 285
}
]
},
{
"and": [
"canDash",
"canTrickyJump",
{
"acidFrames": 140
},
{
"heatFrames": 300
}
]
},
{
"and": [
{
"acidFrames": 230
},
{
"heatFrames": 390
}
]
}
]
} |
From: 9
Junction Below Crumble Blocks, Set Up to Clip
To: 2
Top Right Door


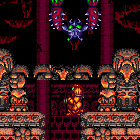
Bring the correct Viola up from the bottom, it can be frozen to avoid damage. After it comes though the uppermost shot blocks, back into the right hand corner and shot buffer on what would be the second hit from the Viola if you were not freezing or avoiding it. Should the shot buffer be missed then the Viola will have to bounce around many more times before being on a cycle where the buffered shot will freeze it in the correct position. Get onto the right side of the Viola, Samus should be standing and partially clipped into the solid tile. Crouch jump and 3 or 4 frames after pressing jump (2 frame window) hold down. Samus will appear to be stuck between the bomb blocks and the solid tile. Press forwards or up to stand up and jump to clip through. If Samus doesn't clip at all down was pressed too soon, if Samus clips the first blocks but appears to be floating while aiming down then down was pressed too late. Requires: {
"notable": "Multiviola Ice Clip"
}
"h_heatProof"
"h_preciseIceClip"
"canPartialFloorClip"
"canTrickyJump"
{
"enemyDamage": {
"enemy": "Multiviola",
"type": "contact",
"hits": 1
}
}
{
"or": [
"h_crouchJumpDownGrab",
"canWallJump",
"canSpringBallJumpMidAir",
"HiJump",
"SpaceJump",
"canJumpIntoIBJ"
]
}Dev note: This may be possible with a high pixel ice clip. FIXME: using a flash suit should also be possible. |
From: 6
Inside Morph Tunnel (Right of Left Bomb Blocks)
To: 7
Middle Right Door With Bottom Kihunter Cleared
Requires: {
"haveBlueSuit": {}
}
"Morph"
{
"heatFrames": 260
}
{
"or": [
"h_useSpringBall",
{
"and": [
"h_bombThings",
{
"heatFrames": 60
}
]
},
{
"and": [
"canXRayStandUp",
"canPartialFloorClip",
"canCeilingClip",
{
"heatFrames": 50
}
]
}
]
} |
From: 6
Inside Morph Tunnel (Right of Left Bomb Blocks)
To: 7
Middle Right Door With Bottom Kihunter Cleared
Use X-Ray to stand up. Jump to clip into the floor. Then another jump to clip through the ceiling block. Watch for the Kihunter to move right before jumping up to get a safe predictable swoop. Requires: "h_usePowerBomb"
"canXRayStandUp"
"canPartialFloorClip"
"canCeilingClip"
"canDash"
{
"or": [
"ScrewAttack",
{
"and": [
"canTrickyJump",
{
"heatFrames": 90
}
]
},
"canInsaneJump",
{
"enemyDamage": {
"enemy": "Kihunter (red)",
"type": "contact",
"hits": 1
}
}
]
}
{
"heatFrames": 380
}Dev note: This requires Power Bombs because it saves neither energy nor ammo using Bombs. It's slower than Spring Ball mainly because X-Ray scope won't activate during the Power Bomb explosion. |
From: 5
Junction Below Shot Block
To: 7
Junction Left of Morph Tunnel
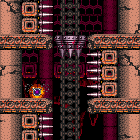
Break the Power Bomb statue leaving 1 row of blocks. Partially clip beneath the Power Bomb blocks and the sold tiles beneath. Wait for a Dessgeega to jump over head and jump into it. The left ceiling Dessgeega works better. Aim down after jumping in order to fully boost over the solid statue. Damage boost to the right and use i-frames to run through all of the enemies. Requires: {
"notable": "HiJumpless Statue Clip Damage Boost"
}
{
"obstaclesNotCleared": [
"A"
]
}
"h_usePowerBomb"
"canTrickyJump"
"canPartialFloorClip"
"canCeilingClip"
"canHorizontalDamageBoost"
"canUseIFrames"
{
"enemyDamage": {
"enemy": "Dessgeega",
"type": "contact",
"hits": 1
}
}
{
"heatFrames": 225
}Dev note: FIXME: A blue suit version of this clip could be added? |
From: 5
Junction Below Shot Block
To: 7
Junction Left of Morph Tunnel

Break the Power Bomb statue leaving 1 row of blocks. Partially clip beneath the Power Bomb blocks and the sold tiles beneath. Wait for a Dessgeega to jump over head and jump into it. The left ceiling Dessgeega works better. Damage boost to the right and use i-frames to run through all of the enemies. Requires: {
"notable": "Statue Clip Damage Boost"
}
{
"obstaclesNotCleared": [
"A"
]
}
"h_usePowerBomb"
"HiJump"
"canPartialFloorClip"
"canCeilingClip"
"canHorizontalDamageBoost"
"canUseIFrames"
{
"enemyDamage": {
"enemy": "Dessgeega",
"type": "contact",
"hits": 1
}
}
{
"heatFrames": 225
} |
From: 5
Junction Below Shot Block
To: 8
Junction Below Top Right Door
Break the Power Bomb statue leaving 1 row of blocks. Partially clip beneath the Power Bomb blocks and the sold tiles beneath. Wait for a Dessgeega to jump over head and jump into it. The left ceiling Dessgeega works better. Aim down after jumping in order to fully boost over the solid statue. Damage boost to the right and use i-frames to run through all of the enemies. Begin shortcharging while running through the Dessgeegas for a speedball. It may help to end the damage boost early, but then it becomes more difficult to stutter for the shortcharge. Requires: {
"notable": "HiJumpless Statue Clip Damage Boost"
}
{
"obstaclesNotCleared": [
"A"
]
}
"h_usePowerBomb"
"canPartialFloorClip"
"canCeilingClip"
"canTrickyJump"
"canHorizontalDamageBoost"
"canUseIFrames"
{
"getBlueSpeed": {
"usedTiles": 16,
"openEnd": 1
}
}
"canSpeedball"
{
"enemyDamage": {
"enemy": "Dessgeega",
"type": "contact",
"hits": 1
}
}
{
"heatFrames": 390
}
{
"or": [
"h_useSpringBall",
{
"hibashiHits": 1
}
]
} |
From: 5
Junction Below Shot Block
To: 8
Junction Below Top Right Door
Break the Power Bomb statue leaving 1 row of blocks. Partially clip beneath the Power Bomb blocks and the sold tiles beneath. Wait for a Dessgeega to jump over head and jump into it. The left ceiling Dessgeega works better. Damage boost to the right and use i-frames to run through all of the enemies. Begin shortcharging while running through the Dessgeegas for a speedball. It may help to end the damage boost early, but then it becomes more difficult to stutter for the shortcharge. Requires: {
"notable": "Statue Clip Damage Boost"
}
{
"obstaclesNotCleared": [
"A"
]
}
"h_usePowerBomb"
"HiJump"
"canPartialFloorClip"
"canCeilingClip"
"canHorizontalDamageBoost"
"canUseIFrames"
{
"getBlueSpeed": {
"usedTiles": 16,
"openEnd": 1
}
}
"canSpeedball"
{
"enemyDamage": {
"enemy": "Dessgeega",
"type": "contact",
"hits": 1
}
}
{
"heatFrames": 390
}
{
"or": [
"h_useSpringBall",
{
"hibashiHits": 1
}
]
} |
|
The shot blocks must be broken using Bombs or Power Bombs because Beams will instantly despawn. Use X-Ray or a Crystal Flash to stand up, followed by a Partial Floor clip to jump through the Crumble blocks. Requires: {
"obstaclesCleared": [
"A",
"B"
]
}
"h_bombThings"
"canOffScreenMovement"
{
"or": [
{
"and": [
"canXRayStandUp",
"canPartialFloorClip",
"h_additionalBomb"
]
},
{
"and": [
{
"or": [
{
"and": [
{
"canShineCharge": {
"usedTiles": 35,
"openEnd": 1
}
},
"h_ShinesparksCostEnergy",
{
"shinespark": {
"frames": 0,
"excessFrames": 0
}
}
]
},
"f_DefeatedPhantoon"
]
},
"h_CrystalFlash"
]
}
]
}Dev note: FIXME: This can be done with a blue suit as well, but it still requires one Power Bomb, and falling in the spikes is extra deadly. |
|

Roll all the way right before using Xray to stand up, aligned with the right side tiles. Partially clip into the floor to enable the next jump. Use an R-Jump to morph into the tunnel. The second morph ball sized hole can be passed by simply jumping out of the floor clip position with diagonal held. Requires: "canXRayStandUp" "canPartialFloorClip" "canRJump" |