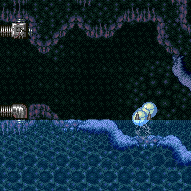
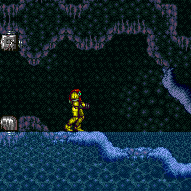
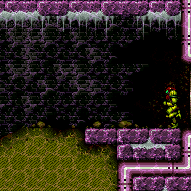
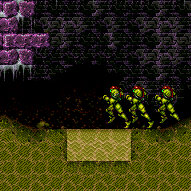
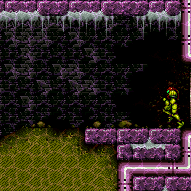
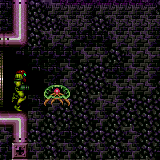
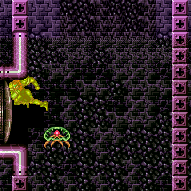
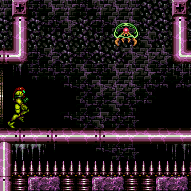
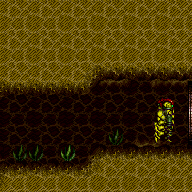
canWaterShineCharge (Hard)
Starting from an air environment, run into water and charge a spark in the water. This is typically done while crossing a door transition from a room with air physics to a room with water. This is easy to do; the tech just represents knowledge that it is possible.
Dependencies: canSuitlessMaridia, canDash
Strats ()
From: 1
Top Door
To: 2
Left Door
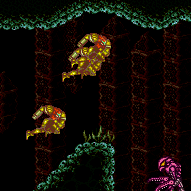
Take the first left above the waterline. Place bombs in the single tile nook on the left to overload PLMs. Evade the Sciser and either go through the rest of the Morph maze or an overloaded crumble block, and navigate to the bomb block shortcut tunnel. Crystal Flash under the bomb block; Samus can then no longer use X-Ray. Jump through, and drop through to the other side. Avoid the Scisers, and manipulate one to the far right. Shinecharge and windup near the Sciser to interrupt. Entrance condition: {
"comeInWithGMode": {
"mode": "direct",
"morphed": true
},
"comesThroughToilet": "no"
}Requires: "h_artificialMorphBombs"
"h_artificialMorphMovement"
"h_artificialMorphCrystalFlash"
{
"or": [
{
"and": [
{
"or": [
"HiJump",
"canSunkenTileWideWallClimb"
]
},
"canWaterShineCharge"
]
},
"Gravity"
]
}
{
"canShineCharge": {
"usedTiles": 20,
"openEnd": 0
}
}
{
"autoReserveTrigger": {}
}
"canRModeSparkInterrupt"
{
"partialRefill": {
"type": "Energy",
"limit": 65
}
}Dev note: Also possible to escape with Space Jump + frame perfect downgrab |
From: 1
Top Door
To: 2
Left Door
Without Springball or Gravity, it is possible to overload PLMs with the crumble blocks with bombs. Take the first left above the waterline. Place bombs in the single tile nook on the left. The Sciser that starts inside the Morph maze area will move off-screen: wait for it to come back out. Once outside of the Morph tunnel area, use X-Ray until the beam reaches full width to exit G-Mode and remain in R-Mode, then collect drops. Farm the rest of the Scisers, keeping the slower local Sciser at the bottom left corner to use for the interrupt. Position it in the ceiling cubby hole to safely perform the Shinecharge and jump into the Sciser as it walks back down. Entrance condition: {
"comeInWithGMode": {
"mode": "direct",
"morphed": true
},
"comesThroughToilet": "no"
}Requires: {
"or": [
"h_artificialMorphSpringBall",
{
"and": [
"h_artificialMorphBombThings",
"Gravity"
]
},
"h_artificialMorphIBJ"
]
}
{
"resourceMissingAtMost": [
{
"type": "PowerBomb",
"count": 0
}
]
}
{
"or": [
{
"and": [
{
"disableEquipment": "ETank"
},
{
"partialRefill": {
"type": "ReserveEnergy",
"limit": 40
}
}
]
},
{
"and": [
"canRiskPermanentLossOfAccess",
{
"resourceMissingAtMost": [
{
"type": "RegularEnergy",
"count": 120
}
]
},
{
"partialRefill": {
"type": "ReserveEnergy",
"limit": 20
}
}
]
},
{
"and": [
"canRiskPermanentLossOfAccess",
{
"resourceMissingAtMost": [
{
"type": "RegularEnergy",
"count": 0
}
]
},
{
"partialRefill": {
"type": "ReserveEnergy",
"limit": 100
}
}
]
}
]
}
{
"or": [
"canWaterShineCharge",
"Gravity"
]
}
{
"canShineCharge": {
"usedTiles": 20,
"openEnd": 0
}
}
{
"autoReserveTrigger": {}
}
"canRModeSparkInterrupt" |
|
Seven Scisers can be farmed. Use the 8th (a bottom left one) to interrupt spark. Leave the slower, local Sciser alive to use for the Shinespark interrupt. Position it in the ceiling cubby hole to safely perform the Shinecharge and jump into the Sciser as it walks back down. Entrance condition: {
"comeInWithRMode": {},
"comesThroughToilet": "no"
}Requires: "Morph"
{
  "or": [
    "h_CrystalFlashForReserveEnergy",
    {
      "and": [
        "h_RModeCanRefillReserves",
        {
          "or": [
            {
              "and": [
                {
                  "resourceMissingAtMost": [
                    {
                      "type": "PowerBomb",
                      "count": 0
                    }
                  ]
                },
                {
                  "partialRefill": {
                    "type": "ReserveEnergy",
                    "limit": 100
                  }
                }
              ]
            },
            {
              "and": [
                {
                  "resourceMissingAtMost": [
                    {
                      "type": "PowerBomb",
                      "count": 6
                    }
                  ]
                },
                {
                  "partialRefill": {
                    "type": "ReserveEnergy",
                    "limit": 20
                  }
                }
              ]
            }
          ]
        }
      ]
    }
  ]
}
"canWaterShineCharge"
{
  "canShineCharge": {
    "usedTiles": 20,
    "openEnd": 0
  }
}
{
  "autoReserveTrigger": {}
}
"canRModeSparkInterrupt" |
|
Requires: "canWaterShineCharge"
{
"canShineCharge": {
"usedTiles": 20,
"openEnd": 1
}
}
{
"or": [
{
"and": [
"h_enemyDrops",
"h_underwaterCrystalSparkWithoutLenience"
]
},
"h_underwaterCrystalSpark"
]
}Dev note: No lenience, because Power Bombs can be farmed from the Scisers. |
|
Requires: "canWaterShineCharge"
{
"canShineCharge": {
"usedTiles": 20,
"openEnd": 1
}
}
"canLongChainTemporaryBlue"
"canXRayTurnaround"
"can4HighMidAirMorph"Exit condition: {
"leaveWithTemporaryBlue": {}
} |
|
Requires: "canWaterShineCharge"
{
"canShineCharge": {
"usedTiles": 20,
"openEnd": 1
}
}
{
"or": [
{
"shinespark": {
"frames": 53,
"excessFrames": 0
}
},
{
"and": [
"canShinechargeMovementComplex",
{
"shinespark": {
"frames": 30,
"excessFrames": 0
}
}
]
}
]
}Exit condition: {
"leaveWithSpark": {
"position": "bottom"
}
} |
|
Six Scisers can be farmed from the left side without needing Morph. Leave the slower, local Sciser alive to use for the Shinespark interrupt. Position it in the ceiling cubby hole to safely perform the Shinecharge and jump into the Sciser as it walks back down. Entrance condition: {
"comeInWithRMode": {}
}Requires: {
"or": [
"h_CrystalFlashForReserveEnergy",
{
"and": [
"h_RModeCanRefillReserves",
{
"or": [
{
"and": [
{
"resourceMissingAtMost": [
{
"type": "PowerBomb",
"count": 0
}
]
},
{
"partialRefill": {
"type": "ReserveEnergy",
"limit": 100
}
}
]
},
{
"and": [
{
"resourceMissingAtMost": [
{
"type": "PowerBomb",
"count": 6
}
]
},
{
"partialRefill": {
"type": "ReserveEnergy",
"limit": 20
}
}
]
}
]
}
]
}
]
}
"canWaterShineCharge"
{
"canShineCharge": {
"usedTiles": 20,
"openEnd": 0
}
}
{
"autoReserveTrigger": {}
}
"canRModeSparkInterrupt" |
From: 1
Left Door
To: 2
Right Door
Entrance condition: {
"comeInShinecharging": {
"length": 10,
"openEnd": 0,
"steepDownTiles": 1
}
}Requires: "canWaterShineCharge"
"HiJump"
"canWallJump"
"canShinechargeMovementComplex"
{
"shineChargeFrames": 100
}Exit condition: {
"leaveShinecharged": {}
}Unlocks doors: {"types":["super"],"requires":[]}
{"types":["missiles","powerbomb"],"requires":["never"]}Dev note: The 17 submerged tiles behave as 7 tiles with high run speed. The 3 steep down tiles behave as approximately 1. |
From: 1
Left Door
To: 2
Right Door
Entrance condition: {
"comeInShinecharging": {
"length": 10,
"openEnd": 0,
"steepDownTiles": 1
}
}Requires: "canWaterShineCharge"
{
"shinespark": {
"frames": 7,
"excessFrames": 2
}
}Dev note: The 17 submerged tiles behave as 7 tiles with high run speed. The 3 steep down tiles behave as approximately 1. |
From: 2
Bottom Right Door
To: 1
Bottom Left Door
Run into the room to gain temporary blue with a water shinecharge. Use X-ray along with HiJump and/or Spring Ball to chain it through the room. Entrance condition: {
"comeInRunning": {
"speedBooster": "yes",
"minTiles": 0.4375
}
}Requires: "canWaterShineCharge"
"canStationaryLateralMidAirMorph"
{
"or": [
{
"and": [
"HiJump",
"canTrickySpringBallJump"
]
},
{
"and": [
{
"or": [
"HiJump",
"canTrickySpringBallJump"
]
},
"canBeVeryPatient"
]
}
]
}
"canXRayTurnaround"
"canLongChainTemporaryBlue"Exit condition: {
"leaveWithTemporaryBlue": {}
}Unlocks doors: {"types":["ammo"],"requires":[]} |
From: 2
Bottom Right Door
To: 2
Bottom Right Door
Start with low run speed by positioning exactly 2 pixels from the door. Entrance condition: {
"comeInRunning": {
"speedBooster": "yes",
"minTiles": 0.4375
}
}Requires: "canWaterShineCharge"
"canShinechargeMovementTricky"
"canHeroShot"
{
"shinespark": {
"frames": 29,
"excessFrames": 0
}
}Exit condition: {
"leaveWithSpark": {}
}Unlocks doors: {"types":["super"],"requires":[]}
{"types":["missiles","powerbomb"],"requires":["never"]} |
From: 2
Bottom Right Door
To: 2
Bottom Right Door
Start with low run speed by positioning exactly 2 pixels from the door. Entrance condition: {
"comeInRunning": {
"speedBooster": "yes",
"minTiles": 0.4375
}
}Requires: "canWaterShineCharge" "canXRayTurnaround" "canLongChainTemporaryBlue" Exit condition: {
"leaveWithTemporaryBlue": {}
}Unlocks doors: {"types":["ammo"],"requires":[]}Dev note: This can also be done with a stutter shinecharge, which can shorten the temp blue chain, but not by enough to remove the need for the canLongChainTemporaryBlue requirement. |
From: 2
Bottom Right Door
To: 3
Top Right Door
Run into the room to gain temporary blue with a water shinecharge. Use X-ray along with HiJump to chain it through the room. Entrance condition: {
"comeInRunning": {
"speedBooster": "yes",
"minTiles": 0.4375
}
}Requires: "canWaterShineCharge"
"canStationaryLateralMidAirMorph"
"HiJump"
{
"or": [
"canBeVeryPatient",
"canTrickySpringBallJump"
]
}
"canXRayTurnaround"
"canLongChainTemporaryBlue"Exit condition: {
"leaveWithTemporaryBlue": {
"direction": "any"
}
}Unlocks doors: {"types":["ammo"],"requires":[]}Dev note: FIXME: This could be done with Spring Ball instead of HiJump; but it requires some space on either the left or right of the door in the room above, e.g. it won't work with the vanilla connection, and we would need some way to model that. |
From: 2
Bottom Right Door
To: 5
Platform Junction Near Top Left Door
Start the dash as close to the door transition as possible in order to store the shinespark in time. Stand 2 or 3 pixels from the door for run speed to be low enough going into the next room. Entrance condition: {
"comeInRunning": {
"speedBooster": "yes",
"minTiles": 0.4375
}
}Requires: "canWaterShineCharge"
"canTrickyJump"
"h_shinechargeMaxRunway"
{
"or": [
{
"shinespark": {
"frames": 41,
"excessFrames": 7
}
},
{
"and": [
"canDodgeWhileShooting",
"canMidairShinespark",
{
"or": [
{
"shinespark": {
"frames": 38,
"excessFrames": 7
}
},
{
"and": [
"HiJump",
{
"shinespark": {
"frames": 34,
"excessFrames": 7
}
}
]
}
]
}
]
}
]
} |
From: 2
Bottom Right Door
To: 5
Platform Junction Near Top Left Door
Reduce Samus' run speed with a stutter or late dash tap in order to complete the shinecharge in time. Entrance condition: {
"comeInRunning": {
"speedBooster": "yes",
"minTiles": 4.4375
}
}Requires: "canWaterShineCharge"
{
"canShineCharge": {
"usedTiles": 23,
"openEnd": 2
}
}
{
"or": [
{
"shinespark": {
"frames": 41,
"excessFrames": 7
}
},
{
"and": [
"canDodgeWhileShooting",
"canMidairShinespark",
{
"or": [
{
"shinespark": {
"frames": 38,
"excessFrames": 7
}
},
{
"and": [
"HiJump",
{
"shinespark": {
"frames": 34,
"excessFrames": 7
}
}
]
}
]
}
]
}
]
} |
From: 2
Bottom Right Door
To: 6
Middle Junction Near Top Left Pirate
Reduce Samus' run speed with a stutter or late dash tap in order to complete the shinecharge in time. With low energy, shinespark diagonally to the middle ledge on the left. Entrance condition: {
"comeInRunning": {
"speedBooster": "yes",
"minTiles": 4.4375
}
}Requires: "canWaterShineCharge"
{
"canShineCharge": {
"usedTiles": 23,
"openEnd": 2
}
}
{
"or": [
{
"shinespark": {
"frames": 43,
"excessFrames": 26
}
},
{
"and": [
"canMidairShinespark",
{
"shinespark": {
"frames": 38,
"excessFrames": 25
}
}
]
}
]
}
{
"or": [
{
"enemyDamage": {
"enemy": "Pink Space Pirate (standing)",
"type": "contact",
"hits": 1
}
},
{
"enemyKill": {
"enemies": [
[
"Pink Space Pirate (standing)"
]
],
"explicitWeapons": [
"Plasma"
]
}
},
"h_pauseAbuseMinimalReserveRefill",
{
"and": [
"canControlShinesparkEnd",
"canUseSpeedEchoes",
{
"resourceAtMost": [
{
"type": "RegularEnergy",
"count": 29
}
]
}
]
},
{
"and": [
"canInsaneJump",
"canTrickyDodgeEnemies"
]
}
]
}
{
"or": [
"h_underwaterCrouchJumpDownGrab",
"canSpringBallJumpMidAir",
{
"and": [
"Ice",
"Plasma"
]
}
]
} |
From: 2
Bottom Right Door
To: 6
Middle Junction Near Top Left Pirate
Start the dash as close to the door transition as possible in order to store the shinespark in time. Stand 2 or 3 pixels from the door for run speed to be low enough going into the next room. With low energy, shinespark diagonally to the middle ledge on the left. Entrance condition: {
"comeInRunning": {
"speedBooster": "yes",
"minTiles": 0.4375
}
}Requires: "canWaterShineCharge"
"canTrickyJump"
"h_shinechargeMaxRunway"
{
"or": [
{
"shinespark": {
"frames": 43,
"excessFrames": 26
}
},
{
"and": [
"canDodgeWhileShooting",
"canMidairShinespark",
{
"shinespark": {
"frames": 38,
"excessFrames": 25
}
}
]
}
]
}
{
"or": [
{
"enemyDamage": {
"enemy": "Pink Space Pirate (standing)",
"type": "contact",
"hits": 1
}
},
{
"enemyKill": {
"enemies": [
[
"Pink Space Pirate (standing)"
]
],
"explicitWeapons": [
"Plasma"
]
}
},
"h_pauseAbuseMinimalReserveRefill",
{
"and": [
"canControlShinesparkEnd",
"canUseSpeedEchoes",
{
"resourceAtMost": [
{
"type": "RegularEnergy",
"count": 29
}
]
}
]
},
{
"and": [
"canInsaneJump",
"canTrickyDodgeEnemies"
]
}
]
}
{
"or": [
"h_underwaterCrouchJumpDownGrab",
"canSpringBallJumpMidAir",
{
"and": [
"Ice",
"Plasma"
]
}
]
} |
From: 2
Bottom Right Door
To: 6
Middle Junction Near Top Left Pirate
Reduce Samus' run speed with a stutter or late dash tap in order to complete the shinecharge in time. Spark up and fall onto the platform left of the fish. Entrance condition: {
"comeInRunning": {
"speedBooster": "yes",
"minTiles": 4.4375
}
}Requires: "canWaterShineCharge"
"canShinechargeMovement"
"canDodgeWhileShooting"
{
"canShineCharge": {
"usedTiles": 23,
"openEnd": 2
}
}
{
"or": [
{
"shinespark": {
"frames": 43,
"excessFrames": 9
}
},
{
"and": [
"canMidairShinespark",
{
"shinespark": {
"frames": 38,
"excessFrames": 9
}
}
]
},
{
"and": [
"HiJump",
"canMidairShinespark",
{
"shinespark": {
"frames": 34,
"excessFrames": 9
}
}
]
}
]
} |
From: 2
Bottom Right Door
To: 6
Middle Junction Near Top Left Pirate
Start the dash as close to the door transition as possible in order to store the shinespark in time. Stand 2 or 3 pixels from the door for run speed to be low enough going into the next room. Spark up and fall onto the platform left of the fish. Entrance condition: {
"comeInRunning": {
"speedBooster": "yes",
"minTiles": 0.4375
}
}Requires: "canWaterShineCharge"
"canShinechargeMovement"
"canDodgeWhileShooting"
"canTrickyJump"
"h_shinechargeMaxRunway"
{
"or": [
{
"shinespark": {
"frames": 43,
"excessFrames": 9
}
},
{
"and": [
"canMidairShinespark",
{
"shinespark": {
"frames": 38,
"excessFrames": 9
}
}
]
}
]
} |
From: 2
Bottom Right Door
To: 1
Bottom Door
Entrance condition: {
"comeInShinecharging": {
"length": 1,
"openEnd": 1,
"steepDownTiles": 1
}
}Requires: "canWaterShineCharge"
"canShinechargeMovementComplex"
{
"shineChargeFrames": 70
}Exit condition: {
"leaveShinecharged": {}
}Unlocks doors: {"types":["super"],"requires":[]}
{"types":["missiles","powerbomb"],"requires":["never"]} |
From: 3
Middle Right Door
To: 2
Bottom Right Door
Entrance condition: {
"comeInShinecharging": {
"length": 7,
"openEnd": 1
}
}Requires: "canWaterShineCharge"
"canShinechargeMovementComplex"
{
"shinespark": {
"frames": 14,
"excessFrames": 0
}
}Exit condition: {
"leaveWithSpark": {}
}Unlocks doors: {"types":["super"],"requires":[]}
{"types":["missiles","powerbomb"],"requires":["never"]} |
From: 3
Middle Right Door
To: 3
Middle Right Door
Start with low run speed by positioning exactly 2 pixels from the door. Entrance condition: {
"comeInRunning": {
"speedBooster": "yes",
"minTiles": 0.4375
}
}Requires: "canWaterShineCharge"
"canShinechargeMovementTricky"
"canHeroShot"
{
"shinespark": {
"frames": 29,
"excessFrames": 0
}
}Exit condition: {
"leaveWithSpark": {}
}Unlocks doors: {"types":["super"],"requires":[]}
{"types":["missiles","powerbomb"],"requires":["never"]} |
From: 3
Middle Right Door
To: 3
Middle Right Door
Start with low run speed by positioning exactly 2 pixels from the door. Entrance condition: {
"comeInRunning": {
"speedBooster": "yes",
"minTiles": 0.4375
}
}Requires: "canWaterShineCharge" "canXRayTurnaround" "canLongChainTemporaryBlue" Exit condition: {
"leaveWithTemporaryBlue": {}
}Unlocks doors: {"types":["ammo"],"requires":[]}Dev note: This can also be done with a stutter shinecharge, which can shorten the temp blue chain, but not by enough to remove the need for the canLongChainTemporaryBlue requirement. |
|
Entrance condition: {
"comeInShinecharging": {
"length": 7,
"openEnd": 1
}
}Requires: "canWaterShineCharge"
"canMidairShinespark"
"canCarefulJump"
{
"shinespark": {
"frames": 62,
"excessFrames": 2
}
}Clears obstacles: A Dev note: This runway length is just an estimate of the worst case scenario for difficulties that can't use canStutterWaterShineCharge. |
From: 3
Middle Right Door
To: 9
Junction Below Speed Blocks
Entrance condition: {
"comeInShinecharging": {
"length": 7,
"openEnd": 1
}
}Requires: "canWaterShineCharge"
"canMidairShinespark"
{
"shinespark": {
"frames": 35,
"excessFrames": 3
}
}Dev note: This runway length is just an estimate of the worst case scenario for difficulties that can't use canStutterWaterShineCharge. |
|
Entrance condition: {
"comeInShinecharging": {
"length": 4,
"openEnd": 1
}
}Requires: "canWaterShineCharge"
"canShinechargeMovement"
{
"or": [
{
"shinespark": {
"frames": 61,
"excessFrames": 7
}
},
{
"and": [
"canMidairShinespark",
{
"shinespark": {
"frames": 56,
"excessFrames": 7
}
}
]
},
{
"and": [
"canMidairShinespark",
"HiJump",
{
"shinespark": {
"frames": 52,
"excessFrames": 7
}
}
]
}
]
}Clears obstacles: B Dev note: This could have a few more excess frames if not getting on top of the block to go to 2. This runway length is just an estimate of the worst case scenario for difficulties that can't use canStutterWaterShineCharge. |
|
Entrance condition: {
"comeInShinecharging": {
"length": 4,
"openEnd": 1
}
}Requires: "canWaterShineCharge"
"canShinechargeMovement"
{
"or": [
{
"shinespark": {
"frames": 47,
"excessFrames": 5
}
},
{
"and": [
"canMidairShinespark",
{
"shinespark": {
"frames": 44,
"excessFrames": 5
}
}
]
},
{
"and": [
"canMidairShinespark",
"HiJump",
{
"shinespark": {
"frames": 41,
"excessFrames": 5
}
}
]
}
]
}Dev note: This runway length is just an estimate of the worst case scenario for difficulties that can't use canStutterWaterShineCharge. |
From: 2
Bottom Left Door
To: 1
Middle Left Door
Use double spring ball jumps to reach the top-right of the room with temporary blue. To cross the two gaps at the top of the room to the left while chaining temporary blue, use spring ball jumps with HiJump disabled; in each case, perform a stationary lateral mid-air morph or a spring fling (or both); Entrance condition: {
"comeInRunning": {
"speedBooster": "yes",
"minTiles": 0.4375
}
}Requires: "h_waterGetBlueSpeed"
"HiJump"
"canLongChainTemporaryBlue"
"canBeExtremelyPatient"
"canXRayTurnaround"
"canDoubleSpringBallJumpMidAir"
"canTrickySpringBallJump"
{
"or": [
"canStationaryLateralMidAirMorph",
"canSpringFling"
]
}
"can4HighMidAirMorph" |
|
Enter this room while holding dash in the previous room, before the door transition. Do not release dash in the water or Samus will not be able to get blue speed. Entrance condition: {
"comeInRunning": {
"speedBooster": "yes",
"minTiles": 0.4375
},
"comesInHeated": "no"
}Requires: "canWaterShineCharge" "h_shinechargeMaxRunway" "h_underwaterCrystalSpark" |
From: 2
Bottom Left Door
To: 2
Bottom Left Door
Entrance condition: {
"comeInRunning": {
"speedBooster": "yes",
"minTiles": 0.4375
}
}Requires: "canWaterShineCharge"
"canShinechargeMovementTricky"
"canHeroShot"
{
"shinespark": {
"frames": 29,
"excessFrames": 0
}
}Exit condition: {
"leaveWithSpark": {}
}Unlocks doors: {"types":["super"],"requires":[]}
{"types":["missiles","powerbomb"],"requires":["never"]} |
From: 2
Bottom Left Door
To: 2
Bottom Left Door
Start with low run speed by positioning exactly 2 pixels from the door. Use X-Ray to cancel the shinecharge early, to avoid getting hit by the angry snail. Entrance condition: {
"comeInRunning": {
"speedBooster": "yes",
"minTiles": 0.4375
}
}Requires: "canWaterShineCharge" "canXRayCancelShinecharge" "canXRayTurnaround" "canLongChainTemporaryBlue" Exit condition: {
"leaveWithTemporaryBlue": {}
}Unlocks doors: {"types":["ammo"],"requires":[]}Dev note: This can also be done with a stutter shinecharge, which can shorten the temp blue chain, but not by enough to remove the need for the canLongChainTemporaryBlue requirement. |
|
Enter this room while holding dash in the previous room, before the door transition. Do not release dash in the water or Samus will not be able to get blue speed. Entrance condition: {
"comeInRunning": {
"speedBooster": "yes",
"minTiles": 0.4375
}
}Requires: "canShinechargeMovementComplex"
"canWaterShineCharge"
"h_shinechargeMaxRunway"
{
"shinespark": {
"frames": 139,
"excessFrames": 66
}
}Dev note: This is obscure enough that it's assumed you can canShinechargeMovementComplex |
|
Enter this room while holding dash in the previous room, before the door transition. Do not release dash in the water or Samus will not be able to get blue speed. Entrance condition: {
"comeInRunning": {
"speedBooster": "yes",
"minTiles": 0.4375
}
}Requires: "canWaterShineCharge"
"h_shinechargeMaxRunway"
{
"shinespark": {
"frames": 37,
"excessFrames": 3
}
} |
|
Enter this room while holding dash in the previous room, before the door transition. Do not release dash in the water or Samus will not be able to get blue speed. Entrance condition: {
"comeInRunning": {
"speedBooster": "yes",
"minTiles": 0.4375
}
}Requires: "canWaterShineCharge"
"h_shinechargeMaxRunway"
{
"or": [
{
"shinespark": {
"frames": 40,
"excessFrames": 7
}
},
{
"and": [
"canMidairShinespark",
{
"shinespark": {
"frames": 37,
"excessFrames": 7
}
}
]
},
{
"and": [
"HiJump",
"canMidairShinespark",
{
"shinespark": {
"frames": 34,
"excessFrames": 7
}
}
]
}
]
} |
From: 2
Bottom Left Door
To: 7
Top Right Left Item
Use a double spring ball jump to reach the Speed blocks below the items while chaining temporary blue. Perform a spring ball jump and immediately unmorph and continue holding up, to break some of the Speed blocks while passing up through them. Leave one of the bottom Speed blocks unbroken to use as a platform. The top speed blocks will respawn; clip through them either using a snail clip with X-Ray or a Crystal Flash clip; In the case of a Crystal Flash clip, menu to Grapple before the Crystal Flash ends and mash shoot while holding down. Entrance condition: {
"comeInRunning": {
"speedBooster": "yes",
"minTiles": 0.4375
}
}Requires: {
"notable": "Suitless Temporary Blue To Items"
}
"canSuitlessMaridia"
"h_waterGetBlueSpeed"
"h_doubleSpringBallJumpWithHiJump"
"canChainTemporaryBlue"
{
"or": [
"canXRayCeilingClip",
{
"and": [
"h_jumpIntoCrystalFlashClip",
"Grapple"
]
}
]
} |
|
Begin shinecharging in the previous room and continue through the door transition. Do not release dash in the water or Samus will not be able to get blue speed. Entrance condition: {
"comeInShinecharging": {
"length": 3,
"openEnd": 1
}
}Requires: "canWaterShineCharge"
{
"shinespark": {
"frames": 37,
"excessFrames": 3
}
} |
From: 2
Bottom Left Door
To: 9
Junction Below Top Door
Enter this room while holding dash in the previous room, before the door transition. Do not release dash in the water or Samus will not be able to get blue speed. This is easiest by starting close to the transition (but at least 2 pixels away) so that Samus has very low run speed. Entrance condition: {
"comeInRunning": {
"speedBooster": "yes",
"minTiles": 0.4375
}
}Requires: "canWaterShineCharge"
"canShinechargeMovement"
{
"canShineCharge": {
"usedTiles": 25,
"openEnd": 2
}
}
{
"shinespark": {
"frames": 37,
"excessFrames": 3
}
}Dev note: In order for Samus to shinecharge without going too far to the right and without utilizing the low run speed, a one-tap or long adjacent runway is required. |
From: 1
Left Door
To: 4
Right Door
Entrance condition: {
"comeInGettingBlueSpeed": {
"length": 0,
"openEnd": 1
}
}Requires: "h_waterGetBlueSpeed" "canSpeedball" "canTrickyJump" |
From: 1
Left Door
To: 4
Right Door
Enter the room with blue speed, and jump into a speedball. Then chain temporary blue into the next room. Entrance condition: {
"comeInGettingBlueSpeed": {
"length": 0,
"openEnd": 1
}
}Requires: "h_waterGetBlueSpeed" "canSpeedball" "canTrickyJump" "canChainTemporaryBlue" Exit condition: {
"leaveWithTemporaryBlue": {}
}Unlocks doors: {"types":["ammo"],"requires":[]} |
From: 4
Right Door
To: 1
Left Door
Entrance condition: {
"comeInShinecharging": {
"length": 6,
"openEnd": 1
}
}Requires: "canWaterShineCharge"
{
"shineChargeFrames": 55
}Exit condition: {
"leaveShinecharged": {}
}Unlocks doors: {"types":["super"],"requires":[]}
{"types":["missiles","powerbomb"],"requires":["never"]}Dev note: This is just a rough estimate of the minimum number of tiles that this runway can represent. It is designed for a skill level that won't be able to use canStutterWaterShineCharge. |
From: 4
Right Door
To: 6
Junction Right of Morph Passage
Shinespark diagonally over the zoa pit or run through the speed blocks and shinespark after turning around. Entrance condition: {
"comeInShinecharging": {
"length": 6,
"openEnd": 1
}
}Requires: "Morph"
"canWaterShineCharge"
{
"or": [
{
"shinespark": {
"frames": 8,
"excessFrames": 2
}
},
{
"and": [
"canMidairShinespark",
{
"shinespark": {
"frames": 5,
"excessFrames": 2
}
}
]
}
]
}Dev note: This is just a rough estimate of the minimum number of tiles that this runway can represent. It is designed for a skill level that won't be able to use canStutterWaterShineCharge. |
From: 4
Right Door
To: 7
Right of Sand with Blue Speed
Entrance condition: {
"comeInGettingBlueSpeed": {
"length": 6,
"openEnd": 1
}
}Requires: "h_waterGetBlueSpeed" Dev note: This is just a rough estimate of the minimum number of tiles that this runway can represent. It is designed for a skill level that won't be able to use canStutterWaterShineCharge. |
From: 2
Right Door
To: 1
Bottom Left Door
Quickly move next to the first set of speed blocks at the left end of the hole. Shoot a Wave shot, then just before it goes off screen, horizontally spark to the left to get through all the shot and speed blocks. A spin jump may be used to move horizontally into place much quicker. Entrance condition: {
"comeInShinecharging": {
"length": 2,
"openEnd": 1
}
}Requires: {
"notable": "Right-to-Left Shinespark"
}
"canWaterShineCharge"
"Wave"
"canShinechargeMovementComplex"
{
"shinespark": {
"frames": 75,
"excessFrames": 8
}
}Dev note: The number of usable tiles in room is dependent upon the length of the shinecharge; 2 unusable tiles seems to be reasonable. |
From: 1
Left Door
To: 2
Right Door
Slide into the hole where the shot block was and sink to the bottom. Shoot the door using a Hero shot and time the shinespark to follow the shot. Entrance condition: {
"comeInShinecharging": {
"length": 1,
"openEnd": 0
}
}Requires: "canWaterShineCharge"
"canHeroShot"
"canShinechargeMovementTricky"
{
"shinespark": {
"frames": 39,
"excessFrames": 0
}
}Exit condition: {
"leaveWithSpark": {
"position": "bottom"
}
}Unlocks doors: {"types":["super"],"requires":[]}
{"types":["missiles","powerbomb"],"requires":["never"]} |
From: 1
Left Door
To: 2
Right Door
Slide into the hole where the shot block was and sink to the bottom. Shoot the door using a Hero shot and time the shinespark to follow the shot. Either kill the ceiling crab so that Samus can jump forward, or stationary spinjump to avoid using the Shinespark early. Entrance condition: {
"comeInShinecharging": {
"length": 1,
"openEnd": 0
}
}Requires: "canWaterShineCharge"
"canHeroShot"
"canShinechargeMovementTricky"
"HiJump"
{
"or": [
{
"and": [
"Plasma",
"Wave"
]
},
"canStationarySpinJump"
]
}
{
"shinespark": {
"frames": 41,
"excessFrames": 0
}
}Exit condition: {
"leaveWithSpark": {}
}Unlocks doors: {"types":["super"],"requires":[{"ammo":{"type":"Super","count":1}}]}
{"types":["missiles","powerbomb"],"requires":["never"]} |
From: 1
Left Door
To: 2
Right Door
Spinjump through the shotblocks and fire a Plasma + Wave shot on the way down, clearing the crabs. Begin the Shinespark windup while the Beam shot travels towards the door to open it. Entrance condition: {
"comeInShinecharging": {
"length": 0,
"openEnd": 0
}
}Requires: "canWaterShineCharge"
"canHeroShot"
"canShinechargeMovementTricky"
"Plasma"
"Wave"
{
"shinespark": {
"frames": 41,
"excessFrames": 0
}
}Exit condition: {
"leaveWithSpark": {}
}Unlocks doors: {"types":["ammo"],"requires":["never"]} |
|
Entrance condition: {
"comeInShinecharging": {
"length": 4,
"openEnd": 0
}
}Requires: "canWaterShineCharge"
{
"shineChargeFrames": 0
} |
From: 1
Top Left Door
To: 2
Bottom Left Door
Entrance condition: {
"comeInShinecharging": {
"length": 0,
"openEnd": 1
}
}Requires: "canWaterShineCharge"
"canShinechargeMovementComplex"
{
"shineChargeFrames": 160
}Exit condition: {
"leaveShinecharged": {}
}Unlocks doors: {"types":["super"],"requires":[]}
{"types":["missiles","powerbomb"],"requires":["never"]} |
From: 2
Bottom Left Door
To: 6
Bottom Shinecharged
Entrance condition: {
"comeInShinecharging": {
"length": 4,
"openEnd": 0
}
}Requires: "canWaterShineCharge"
{
"shineChargeFrames": 0
} |
|
Entrance condition: {
"comeInShinecharging": {
"length": 4,
"openEnd": 0
}
}Requires: "canWaterShineCharge"
{
"shineChargeFrames": 0
} |
From: 2
Bottom Right Door
To: 1
Left Vertical Door
Start the dash as close to the door transition as possible to help avoid getting hit by the first Owtch. Store the shine charge while high up on the left slope. Spark up while on the right side of the platform. To avoid the Owtch on the platform, it may help to jump on the left side of the platform then jump again and spark midair above the right side. Entrance condition: {
"comeInRunning": {
"speedBooster": "yes",
"minTiles": 0.4375
}
}Requires: "canWaterShineCharge"
"canShinechargeMovementComplex"
{
"or": [
{
"shinespark": {
"frames": 90,
"excessFrames": 50
}
},
{
"and": [
{
"shinespark": {
"frames": 90,
"excessFrames": 59
}
},
{
"or": [
"canWallJump",
"HiJump",
"canSpringBallJumpMidAir",
"SpaceJump",
{
"and": [
"canIBJ",
"canBombHorizontally"
]
},
{
"and": [
"h_crouchJumpDownGrab",
{
"notable": "Left Shaft Precise Crouch Jump Down Grab"
}
]
}
]
}
]
}
]
} |
From: 2
Bottom Right Door
To: 2
Bottom Right Door
Start the dash as close to the door transition as possible to help avoid getting hit by the first Owtch. Entrance condition: {
"comeInRunning": {
"speedBooster": "yes",
"minTiles": 0.4375
},
"comesInHeated": "no"
}Requires: "canWaterShineCharge" "h_underwaterCrystalSpark" |
From: 2
Bottom Right Door
To: 2
Bottom Right Door
Start with low run speed by positioning exactly 2 pixels from the door. Entrance condition: {
"comeInRunning": {
"speedBooster": "yes",
"minTiles": 0.4375
}
}Requires: "canWaterShineCharge"
"canShinechargeMovementTricky"
"canHeroShot"
{
"shinespark": {
"frames": 29,
"excessFrames": 0
}
}Exit condition: {
"leaveWithSpark": {}
}Unlocks doors: {"types":["super"],"requires":[]}
{"types":["missiles","powerbomb"],"requires":["never"]} |
From: 2
Bottom Right Door
To: 2
Bottom Right Door
Start with low run speed by positioning exactly 2 pixels from the door. Use X-ray to turn around, and chain temporary blue back to the door. Entrance condition: {
"comeInRunning": {
"speedBooster": "yes",
"minTiles": 0.4375
}
}Requires: "canWaterShineCharge" "canXRayTurnaround" "canLongChainTemporaryBlue" Exit condition: {
"leaveWithTemporaryBlue": {}
}Unlocks doors: {"types":["ammo"],"requires":[]}Dev note: This can also be done with a stutter shinecharge, which can shorten the temp blue chain, but not by enough to remove the need for the canLongChainTemporaryBlue requirement. |
|
Start the dash as close to the door transition as possible to help avoid getting hit by the first Owtch. Store the shine charge while high up on the left slope. Spark up while on the right side of the platform. To avoid the Owtch on the platform, it may help to jump on the left side of the platform then jump again and spark midair above the right side. Entrance condition: {
"comeInRunning": {
"speedBooster": "yes",
"minTiles": 0.4375
}
}Requires: "canWaterShineCharge"
"canShinechargeMovementComplex"
{
"shinespark": {
"frames": 90,
"excessFrames": 11
}
}Dev note: The excess frames are only low enough to get to the top right overhang, as it is free to jump to 5. With other items or wall jumps and lower energy, it is possible to first spark to 1, as it has more excess frames. |
|
Entrance condition: {
"comeInShinecharging": {
"length": 4,
"openEnd": 0
}
}Requires: "canWaterShineCharge"
{
"shineChargeFrames": 0
} |
From: 1
Left Door
To: 1
Left Door
Run into the room and gain temporary blue below the bomb blocks on the far side of the room. Then jump up to break the bomb blocks. Entrance condition: {
"comeInGettingBlueSpeed": {
"length": 3,
"openEnd": 1
}
}Requires: "canWaterShineCharge" "canTemporaryBlue" Clears obstacles: A |
|
Entrance condition: {
"comeInShinecharging": {
"length": 4,
"openEnd": 0
}
}Requires: "canWaterShineCharge"
{
"shineChargeFrames": 0
} |
From: 2
Right Door
To: 2
Right Door
Run into the room and gain temporary blue below the bomb blocks on the far side of the room. Then jump up to break the bomb blocks. Entrance condition: {
"comeInGettingBlueSpeed": {
"length": 3,
"openEnd": 1
}
}Requires: "canWaterShineCharge" "canTemporaryBlue" Clears obstacles: A |
|
Entrance condition: {
"comeInShinecharging": {
"length": 4,
"openEnd": 0
}
}Requires: "canWaterShineCharge"
{
"shineChargeFrames": 0
} |
|
Time the shinecharge for when the water is low. Requires: {
"obstaclesCleared": [
"A",
"B"
]
}
{
"or": [
"Gravity",
"canWaterShineCharge"
]
}
"h_shinechargeMaxRunway"
"h_CrystalSpark" |
|
Requires: {
"obstaclesCleared": [
"A",
"B"
]
}
"canShinechargeMovement"
"canWaterShineCharge"
{
"canShineCharge": {
"usedTiles": 35,
"openEnd": 2
}
}
{
"shineChargeFrames": 90
}Exit condition: {
"leaveShinecharged": {}
}Dev note: This runway could be longer with precise timing or a stutter, but it seems unnecessary at this difficulty. |
|
Requires: {
"obstaclesCleared": [
"B"
]
}
"canShinechargeMovement"
"canWaterShineCharge"
{
"canShineCharge": {
"usedTiles": 35,
"openEnd": 2
}
}
{
"shineChargeFrames": 80
}Exit condition: {
"leaveShinecharged": {}
}Dev note: This runway could be longer with precise timing or a stutter, but it seems unnecessary at this difficulty. |
|
From left side, Wait for Shaktool to loop around to the ceiling. Crystal Flash, shinecharge, and jump into the path of Shaktool's rear wheel to interrupt. Or, farm Shaktool with a timed Shinespark: start a diagonal spark from the ground just as Shaktool's back wheel leaves the ceiling, and Shaktool will spawn five drops. Shinecharge again, and use a Yard to interrupt. If Samus came in from the right and can't free Shaktool, there are only the two Yards to work with. Kill a Yard by angering with a shot and then running through it with speed. Requires: {
"obstaclesCleared": [
"R-Mode",
"B"
]
}
{
"or": [
"h_CrystalFlashForReserveEnergy",
{
"and": [
"h_RModeCanRefillReserves",
{
"or": [
{
"and": [
{
"obstaclesCleared": [
"A"
]
},
"h_shinechargeMaxRunway",
{
"shinespark": {
"frames": 4,
"excessFrames": 0
}
},
{
"or": [
{
"and": [
{
"resourceMissingAtMost": [
{
"type": "Missile",
"count": 0
}
]
},
{
"partialRefill": {
"type": "ReserveEnergy",
"limit": 60
}
}
]
},
{
"partialRefill": {
"type": "ReserveEnergy",
"limit": 20
}
}
]
}
]
},
{
"partialRefill": {
"type": "ReserveEnergy",
"limit": 10
}
},
{
"and": [
"canBeLucky",
{
"partialRefill": {
"type": "ReserveEnergy",
"limit": 25
}
}
]
}
]
}
]
}
]
}
"h_shinechargeMaxRunway"
{
"or": [
"canWaterShineCharge",
"Gravity"
]
}
{
"autoReserveTrigger": {}
}
"canRModeSparkInterrupt"Resets obstacles: R-Mode |
