canLongCeilingBombJump (Beyond)
The ability to ceiling bomb jump over a distance of two screens or more.
Dependencies: canCeilingBombJump, canIBJ, canBombAboveIBJ
Strats ()
|
Entrance condition: {
"comeInWithGMode": {
"mode": "direct",
"morphed": true
}
}Requires: "h_artificialMorphLongCeilingBombJump" Clears obstacles: C |
|

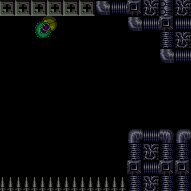
It is possible to cross the spike pit with spring flings and two spike hits. Pause then jump just before the fade out ends and turn Spring Ball off in order to get more horizontal distance at the start and avoid one spike hit. Turn Spring Ball off and on again while jumping on the spikes to get across to avoid another. Entrance condition: {
"comeInWithGMode": {
"mode": "any",
"morphed": true
}
}Requires: {
"or": [
"h_artificialMorphLongCeilingBombJump",
{
"and": [
"h_artificialMorphSpringBall",
{
"spikeHits": 4
}
]
},
{
"and": [
"h_artificialMorphSpringBall",
"h_artificialMorphBombHorizontally",
{
"spikeHits": 3
}
]
},
{
"and": [
"h_artificialMorphSpringFling",
"canTrickyJump",
{
"spikeHits": 2
}
]
},
{
"and": [
"h_artificialMorphIBJ",
{
"spikeHits": 10
},
{
"or": [
"h_artificialMorphBombHorizontally",
{
"spikeHits": 2
}
]
}
]
}
]
}Dev note: This is a softlock unless the item is Morph. The IBJ strat has 2 extra spike hits added as a leniency. |
From: 1
Top Left Door
To: 4
Top Junction (Right of Spikes)
Requires: "canLongCeilingBombJump" |
From: 1
Top Left Door
To: 5
Bottom Junction (Right of Boyons)
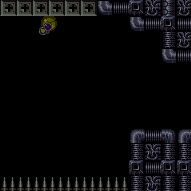
It is possible to cross the spike pit with spring flings and two spike hits. Pause then jump just before the fade out ends and turn Spring Ball off in order to get more horizontal distance at the start and avoid one spike hit. Turn Spring Ball off and on again while jumping on the spikes to get across to avoid another. Entrance condition: {
"comeInWithGMode": {
"mode": "any",
"morphed": true
}
}Requires: "h_artificialMorphBombs"
{
"or": [
{
"and": [
"h_artificialMorphSpringBall",
{
"spikeHits": 4
}
]
},
{
"and": [
"h_artificialMorphSpringBall",
"h_artificialMorphBombHorizontally",
{
"spikeHits": 3
}
]
},
{
"and": [
"h_artificialMorphSpringFling",
"canTrickyJump",
{
"spikeHits": 2
}
]
},
{
"and": [
"Morph",
{
"or": [
"SpaceJump",
{
"and": [
{
"spikeHits": 1
},
{
"or": [
"canUseIFrames",
{
"spikeHits": 1
}
]
}
]
}
]
}
]
},
{
"and": [
"h_artificialMorphIBJ",
{
"spikeHits": 10
},
{
"or": [
"h_artificialMorphBombHorizontally",
{
"spikeHits": 2
}
]
}
]
},
"h_artificialMorphLongCeilingBombJump"
]
}Dev note: The IBJ from spikes has 2 extra spike hits added as a leniency. |
From: 4
Top Junction (Right of Spikes)
To: 1
Top Left Door
Requires: "canLongCeilingBombJump"
"canJumpIntoIBJ"
{
"or": [
{
"and": [
"h_useSpringBall",
{
"noBlueSuit": {}
}
]
},
{
"and": [
"canPreciseWallJump",
"canWallJumpInstantMorph"
]
}
]
} |
From: 1
Left Door
To: 2
Right Door
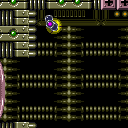
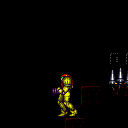
This is a very long ceiling bomb jump. Crossing the room with artificial morph is particularly difficult without a good way to kill the Wavers. Entrance condition: {
"comeInWithGMode": {
"mode": "any",
"morphed": true
}
}Requires: {
"notable": "Long Ceiling Bomb Jump"
}
"h_artificialMorphLongCeilingBombJump"
"canBeVeryPatient"
"canTrickyGMode" |
|
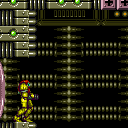
This is a very long ceiling bomb jump. Wait for the Wavers to come and kill them before crossing the room. Requires: {
"notable": "Long Ceiling Bomb Jump"
}
"canLongCeilingBombJump"
"canBeVeryPatient" |
From: 2
Right Door
To: 1
Left Door
This is a very long ceiling bomb jump. Crossing the room with artificial morph is particularly difficult without a good way to kill the Wavers. It is recommended to avoid killing the Firefleas, as the room gets dark fast. Entrance condition: {
"comeInWithGMode": {
"mode": "any",
"morphed": true
}
}Requires: {
"notable": "Long Ceiling Bomb Jump"
}
"h_artificialMorphBombHorizontally"
"h_artificialMorphIBJ"
"h_artificialMorphLongCeilingBombJump"
"canBeVeryPatient"
"canTrickyGMode" |
|

This is a very long ceiling bomb jump. Kill the Wavers before crossing the room. Requires: {
"notable": "Long Ceiling Bomb Jump"
}
"canLongCeilingBombJump"
"canBeVeryPatient" |
From: 3
Right Door
To: 3
Right Door


Bomb horizontally on room entry to jump over the Ripper and land on the crumble blocks, or use a Power Bomb to kill the Ripper. Entrance condition: {
"comeInWithGMode": {
"mode": "direct",
"morphed": true
}
}Requires: "canRemoteAcquire"
{
"or": [
"h_artificialMorphLongCeilingBombJump",
{
"and": [
"h_artificialMorphBombHorizontally",
"h_artificialMorphIBJ",
"h_artificialMorphPowerBomb"
]
},
{
"and": [
"h_artificialMorphBombHorizontally",
"canTrickyDodgeEnemies",
"h_artificialMorphDoubleBombJump",
"h_artificialMorphStaggeredIBJ"
]
}
]
}
"h_heatedDirectGModeLeaveSameDoor"Collects items: 4 |
|
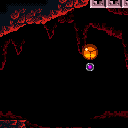
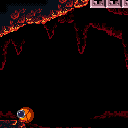
Samus can ceiling bomb jump up gentle slopes. Going down gentle slopes is also possible but harder, instead an unmorph to reset fall speed is recommended here. Requires: "h_heatProof" "canLongCeilingBombJump" "canResetFallSpeed" |
From: 1
Left Door
To: 2
Right Door
Samus can ceiling bomb jump up gentle slopes. Going down gentle slopes is also possible but harder, instead an unmorph to reset fall speed is recommended here. Entrance condition: {
"comeInWithGMode": {
"mode": "any",
"morphed": true
}
}Requires: "h_artificialMorphLongCeilingBombJump" "h_artificialMorphResetFallSpeed" "h_heatedGModeOpenDifferentDoor" |
|


Samus can ceiling bomb jump up gentle slopes. Going down gentle slopes is also possible but harder, instead an unmorph to reset fall speed is recommended here. Requires: "h_heatProof" "canLongCeilingBombJump" "canResetFallSpeed" |
From: 2
Right Door
To: 1
Left Door
Samus can ceiling bomb jump up gentle slopes. Going down gentle slopes is also possible but harder, instead an unmorph to reset fall speed is recommended here. Entrance condition: {
"comeInWithGMode": {
"mode": "any",
"morphed": true
}
}Requires: "h_artificialMorphLongCeilingBombJump" "h_artificialMorphResetFallSpeed" "h_heatedGModeOpenDifferentDoor" |
|
Entrance condition: {
"comeInWithGMode": {
"mode": "any",
"morphed": true
}
}Requires: "h_artificialMorphLongCeilingBombJump"
{
"or": [
"f_DefeatedCrocomire",
{
"obstaclesCleared": [
"f_DefeatedCrocomire"
]
}
]
}
"canBePatient"Clears obstacles: A |
|
Entrance condition: {
"comeInWithGMode": {
"mode": "any",
"morphed": true
},
"comesThroughToilet": "any"
}Requires: "h_artificialMorphLongCeilingBombJump"
{
"or": [
"f_DefeatedCrocomire",
{
"obstaclesCleared": [
"f_DefeatedCrocomire"
]
}
]
}
"canBePatient"Clears obstacles: A, door_2 |
|

Requires: "canLongCeilingBombJump" "canBePatient" |
|
Touch the item while remaining in artificial morph. Ceiling bomb jump back to the left, then use x-ray to cancel g-mode and obtain the item. Requires: "canGMode"
"h_artificialMorphLongCeilingBombJump"
"canBeVeryPatient"
{
"obstaclesCleared": [
"A"
]
}Dev note: This strat alone would only require canBePatient, but it is only possible after Ceiling Bomb Jumping there, so it would be a combined 4 minutes. |
|
Requires: {
"or": [
"f_DefeatedCrocomire",
{
"obstaclesCleared": [
"f_DefeatedCrocomire"
]
}
]
}
"canLongCeilingBombJump"
"canBePatient" |
|
This is a very long ceiling bomb jump. Requires: {
"notable": "Ceiling Bomb Jump"
}
"canLongCeilingBombJump"
"canBeVeryPatient"Dev note: There is no reason to go back to the left. |
From: 2
Middle Left Door
To: 7
Bowling In G-Mode
This is a very long ceiling bomb jump. Ride the statue, which will not take Samus down, and will instead drop her off in the spike pit somewhat near the door. Entrance condition: {
"comeInWithGMode": {
"mode": "any",
"morphed": true
}
}Requires: "canComplexGMode"
"f_DefeatedPhantoon"
{
  "notable": "Ceiling Bomb Jump"
}
"canLongCeilingBombJump"
"canBeVeryPatient" |
|
Requires: "canLongCeilingBombJump" "canBePatient" |
|
Entrance condition: {
"comeInWithGMode": {
"mode": "any",
"morphed": true
}
}Requires: "h_artificialMorphLongCeilingBombJump" "canBePatient" Clears obstacles: A |
|
Requires: "canLongCeilingBombJump" "canBePatient" |
|
Touch the item while remaining in artificial morph. Ceiling bomb jump back to the right, then use X-Ray to cancel G-mode and obtain the item. Requires: "canGMode"
"h_artificialMorphLongCeilingBombJump"
"canBeVeryPatient"
{
"obstaclesCleared": [
"A"
]
}Dev note: This strat alone would only require canBePatient, but it is only possible after Ceiling Bomb Jumping there, so it would be a combined 4 minutes. |
|
Entrance condition: {
"comeInWithGMode": {
"mode": "any",
"morphed": true
}
}Requires: {
"or": [
"f_KilledMetroidRoom1",
{
"obstaclesCleared": [
"f_KilledMetroidRoom1"
]
}
]
}
"h_artificialMorphLongCeilingBombJump"
"canBePatient" |