canCeilingBombJump (Insane+)


The ability to IBJ at the ceiling and place bombs at a steady rhythm while slowly moving horizontally.
Dependencies: canBombAboveIBJ, canIBJ
Strats ()
|
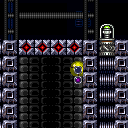
Ascend with a long IBJ, then ceiling bomb jump against the speed blocks to overload the PLMs. Falling is very unforgiving. Note that the Boyons can be killed with bombs. Entrance condition: {
"comeInWithGMode": {
"mode": "any",
"morphed": true
}
}Requires: {
"notable": "G-Mode Morph Long Ceiling Bomb Jump"
}
"h_artificialMorphLongIBJ"
"h_artificialMorphCeilingBombJump"
"canBeVeryPatient"Dev note: This is technically doable without canBeVeryPatient, but would require double bomb jump, Morph, a way to bypass Boyons, and never falling. |
From: 10
G-Mode Morph Junction (Middle Right Door)
To: 9
Junction Below Items
Place bombs against the bottom of the crumble blocks to overload PLMs. Requires: "canGMode"
"h_artificialMorphBombs"
{
"or": [
{
"and": [
"h_artificialMorphSpringBall",
{
"or": [
"canBePatient",
"HiJump"
]
}
]
},
"h_artificialMorphCeilingBombJump"
]
} |
|
Entrance condition: {
"comeInWithGMode": {
"mode": "any",
"morphed": true
}
}Requires: "h_artificialMorphCeilingBombJump" |
From: 1
Left Door
To: 2
Right Door
Entrance condition: {
"comeInWithGMode": {
"mode": "direct",
"morphed": true
}
}Requires: {
"or": [
"h_artificialMorphCeilingBombJump",
"h_artificialMorphHBJ"
]
}Collects items: 3 |
|
Entrance condition: {
"comeInWithGMode": {
"mode": "any",
"morphed": true
}
}Requires: {
"or": [
"h_artificialMorphCeilingBombJump",
"h_artificialMorphHBJ"
]
}Collects items: 3 |
|
Entrance condition: {
"comeInWithGMode": {
"mode": "any",
"morphed": true
}
}Requires: {
"or": [
"h_artificialMorphCeilingBombJump",
"h_artificialMorphHBJ"
]
}Collects items: 3 |
|
Requires: "canCeilingBombJump"
{
"obstaclesNotCleared": [
"A",
"B",
"C"
]
} |
From: 15
G-Mode Morph Junction (By Left Door)
To: 16
G-Mode Morph Overloaded PLMs (By Left Door)

Start the IBJ on the second downward tile from the door. The crumble block is the leftmost flat ceiling tile. Requires: "canGMode" "h_artificialMorphLongIBJ" "h_artificialMorphCeilingBombJump" Dev note: Without canCeilingBombJump, this would take more than 10 minutes. |
From: 4
Bottom Right Door
To: 5
Top Item
Cross the room while killing the Beetoms, then bomb the bottom of the crumble blocks to overload PLMs and go through. Entrance condition: {
"comeInWithGMode": {
"mode": "any",
"morphed": true
}
}Requires: "h_artificialMorphLongIBJ"
{
"or": [
"canTrickyGMode",
{
"and": [
{
"ammo": {
"type": "PowerBomb",
"count": 3
}
},
{
"or": [
"canComplexGMode",
{
"ammo": {
"type": "PowerBomb",
"count": 1
}
}
]
}
]
},
{
"and": [
"Morph",
{
"or": [
"ScrewAttack",
"Ice",
{
"ammo": {
"type": "Missile",
"count": 5
}
},
{
"ammo": {
"type": "Super",
"count": 5
}
}
]
}
]
}
]
}
{
"or": [
"canBeVeryPatient",
"h_artificialMorphCeilingBombJump",
{
"and": [
"canBePatient",
"h_artificialMorphSpringBall",
"HiJump"
]
},
{
"and": [
"canBePatient",
"Morph",
{
"or": [
"HiJump",
"canWallJump"
]
}
]
}
]
}Clears obstacles: A |
From: 4
Bottom Right Door
To: 5
Top Item

Samus is only able to kill enemies with blue suit while moving and not falling. With bombs as the only movement option, Samus should only touch the enemies while grounded and moving horizontally. After crossing the spikeway, bomb the bottom of the crumble blocks to overload PLMs and go through. Entrance condition: {
"comeInWithGMode": {
"mode": "any",
"morphed": true
}
}Requires: "h_blueSuitGMode"
"h_artificialMorphLongIBJ"
{
"or": [
"canBeVeryPatient",
"h_artificialMorphCeilingBombJump",
{
"and": [
"canBePatient",
"h_artificialMorphSpringBall",
"HiJump"
]
},
{
"and": [
"canBePatient",
"Morph",
{
"or": [
"HiJump",
"canWallJump"
]
}
]
}
]
}Clears obstacles: A |
|
Bomb horizontally on room entry to jump over the Ripper and land on the crumble blocks, or use a Power Bomb to kill the Ripper. Avoid touching all 6 crumbles, so Samus can use the item to overload PLMs and go through one of the crumbles to get to the left side of the room. If the item has already been obtained, Samus can shoot or Bomb the gate many times to overload PLMs. Entrance condition: {
"comeInWithGMode": {
"mode": "direct",
"morphed": true
}
}Requires: "canRemoteAcquire"
{
  "or": [
    "h_artificialMorphCeilingBombJump",
    {
      "and": [
        "h_artificialMorphBombHorizontally",
        "h_artificialMorphIBJ",
        "h_artificialMorphPowerBomb"
      ]
    },
    {
      "and": [
        "h_artificialMorphBombHorizontally",
        "canTrickyDodgeEnemies",
        "h_artificialMorphDoubleBombJump",
        "h_artificialMorphStaggeredIBJ"
      ]
    }
  ]
}
"h_heatedGModeOpenDifferentDoor"Collects items: 4 |
From: 3
Right Door
To: 1
Top Left Door

Bomb horizontally on room entry to jump over the Ripper and land on the crumble blocks, or use a Power Bomb to kill the Ripper. Entrance condition: {
"comeInWithGMode": {
"mode": "indirect",
"morphed": true
}
}Requires: {
"or": [
"h_artificialMorphCeilingBombJump",
{
"and": [
"h_artificialMorphBombHorizontally",
"h_artificialMorphIBJ",
"h_artificialMorphPowerBomb"
]
},
{
"and": [
"h_artificialMorphBombHorizontally",
"canTrickyDodgeEnemies",
"h_artificialMorphDoubleBombJump",
"h_artificialMorphStaggeredIBJ"
]
}
]
}
"h_heatedGModeOpenDifferentDoor" |
From: 3
Right Door
To: 2
Bottom Left Door
Bomb horizontally on room entry to jump over the Ripper and land on the crumble blocks, or use a Power Bomb to kill the Ripper. Avoid touching all 6 crumbles, so Samus can use the item to overload PLMs and go through one of the crumbles to get to the left side of the room. If the item has already been obtained, Samus can shoot or Bomb the gate many times to overload PLMs. Entrance condition: {
"comeInWithGMode": {
"mode": "direct",
"morphed": true
}
}Requires: "canRemoteAcquire"
{
  "or": [
    "h_artificialMorphCeilingBombJump",
    {
      "and": [
        "h_artificialMorphBombHorizontally",
        "h_artificialMorphIBJ",
        "h_artificialMorphPowerBomb"
      ]
    },
    {
      "and": [
        "h_artificialMorphBombHorizontally",
        "canTrickyDodgeEnemies",
        "h_artificialMorphDoubleBombJump",
        "h_artificialMorphStaggeredIBJ"
      ]
    }
  ]
}
"h_heatedGModeOpenDifferentDoor"Collects items: 4 |
From: 3
Right Door
To: 2
Bottom Left Door
Bomb horizontally on room entry to jump over the Ripper and land on the crumble blocks, or use a Power Bomb to kill the Ripper. Entrance condition: {
"comeInWithGMode": {
"mode": "indirect",
"morphed": true
}
}Requires: {
"or": [
"h_artificialMorphCeilingBombJump",
{
"and": [
"h_artificialMorphBombHorizontally",
"h_artificialMorphIBJ",
"h_artificialMorphPowerBomb"
]
},
{
"and": [
"h_artificialMorphBombHorizontally",
"canTrickyDodgeEnemies",
"h_artificialMorphDoubleBombJump",
"h_artificialMorphStaggeredIBJ"
]
}
]
}
"h_heatedGModeOpenDifferentDoor" |
|
Samus can ceiling bomb jump up gentle slopes. Going down gentle slopes is also possible but harder, instead an unmorph to reset fall speed is recommended here. Requires: "h_heatProof" "canCeilingBombJump" "canResetFallSpeed" |
|
Bomb horizontally on room entry to jump over the Ripper and land on the crumble blocks, or use a Power Bomb to kill the Ripper. Entrance condition: {
"comeInWithGMode": {
"mode": "any",
"morphed": true
}
}Requires: {
"or": [
"h_artificialMorphCeilingBombJump",
{
"and": [
"h_artificialMorphBombHorizontally",
"h_artificialMorphIBJ",
"h_artificialMorphPowerBomb"
]
},
{
"and": [
"h_artificialMorphBombHorizontally",
"canTrickyDodgeEnemies",
"h_artificialMorphDoubleBombJump",
"h_artificialMorphStaggeredIBJ"
]
}
]
}
{
"heatFrames": 0
} |
|
Bomb horizontally on room entry to jump over the Ripper and land on the crumble blocks, or use a Power Bomb to kill the Ripper. In indirect G-mode, stand where the gate will spawn and exit G-mode to open the gate. In direct G-mode, overload PLMs by shooting the gate then position Samus a few pixels away from the gate to where upward diagonal shots go through it. Crouch then shoot diagonally and quickly exit G-mode (3-7 frames later) to open the gate on G-mode exit. Entrance condition: {
"comeInWithGMode": {
"mode": "any",
"morphed": true
}
}Requires: "canComplexGMode"
"h_heatedGMode"
{
"or": [
"h_artificialMorphCeilingBombJump",
{
"and": [
"h_artificialMorphBombHorizontally",
"h_artificialMorphIBJ",
"h_artificialMorphPowerBomb"
]
},
{
"and": [
"h_artificialMorphBombHorizontally",
"canTrickyDodgeEnemies",
"h_artificialMorphDoubleBombJump",
"h_artificialMorphStaggeredIBJ"
]
}
]
}
{
"heatFrames": 35
}Clears obstacles: A Dev note: Artificial morph strats can be useful, for instance, in indirect G-mode without heat protection, where Samus needs to collect the item. The canComplexGMode is only used here to describe opening the gate in direct G-mode without gate glitching. However, the indirect variant still requires canHeatedGMode or Varia - with Varia, indirect strats can instead be used to go to the top left door and return. |
From: 3
Right Door
To: 6
G-Mode, Remote Acquire Junction (Bottom Right)
Bomb horizontally on room entry to jump over the Ripper and land on the crumble blocks, or use a Power Bomb to kill the Ripper. Avoid touching all 6 crumbles, so Samus can use the item to overload PLMs and go through one of the crumbles to get to the left side of the room. If the item has already been obtained, Samus can shoot or Bomb the gate many times to overload PLMs. Entrance condition: {
"comeInWithGMode": {
"mode": "direct",
"morphed": true
}
}Requires: "canRemoteAcquire"
{
  "or": [
    "h_artificialMorphCeilingBombJump",
    {
      "and": [
        "h_artificialMorphBombHorizontally",
        "h_artificialMorphIBJ",
        "h_artificialMorphPowerBomb"
      ]
    },
    {
      "and": [
        "h_artificialMorphBombHorizontally",
        "canTrickyDodgeEnemies",
        "h_artificialMorphDoubleBombJump",
        "h_artificialMorphStaggeredIBJ"
      ]
    }
  ]
}
{
  "heatFrames": 0
}Dev note: This is only useful if the item is Morph, because with Morph, another strat would have been used. |
From: 3
Right Door
To: 6
G-Mode, Remote Acquire Junction (Bottom Right)
Jump onto the crumble blocks to make them solid, then use them as a platform to get to the item. With Grapple, a running jump then single Grapple swing can be used before PLMs are overloaded, alternatively jump on the crumble blocks and Grapple the Ripper. Avoid touching all 6 crumbles, so Samus can use the item to overload PLMs and go through one of the crumbles to get to the left side of the room. If the item has already been obtained, Samus can shoot the gate many times to overload PLMs. Entrance condition: {
"comeInWithGMode": {
"mode": "direct",
"morphed": false
}
}Requires: "canRemoteAcquire"
{
"or": [
"SpaceJump",
"canCeilingBombJump",
{
"and": [
"canBombHorizontally",
"canIBJ",
"h_usePowerBomb"
]
},
{
"and": [
"canStaggeredIBJ",
"canDoubleBombJump",
"canBombHorizontally"
]
},
{
"and": [
"canPreciseGrapple",
"canUseEnemies"
]
},
{
"and": [
"canDash",
{
"or": [
"canTrickySpringBallJump",
"canInsaneWallJump",
{
"and": [
"HiJump",
"canWallJump"
]
},
{
"and": [
"HiJump",
"canSpeedyJump"
]
},
"h_IBJFromSpikes"
]
}
]
}
]
}
{
"heatFrames": 0
} |
From: 3
Right Door
To: 7
G-Mode Junction (Bottom Right)
Jump onto the crumble blocks to make them solid, then use them as a platform to cross the room. With Grapple, a running jump then single Grapple swing can be used before PLMs are overloaded, alternatively jump on the crumble blocks and Grapple the Ripper. Entrance condition: {
"comeInWithGMode": {
"mode": "indirect",
"morphed": false
}
}Requires: "Morph"
{
"or": [
"SpaceJump",
"canCeilingBombJump",
{
"and": [
"canStaggeredIBJ",
"canDoubleBombJump",
"canBombHorizontally"
]
},
{
"and": [
"canBombHorizontally",
"canIBJ",
"h_usePowerBomb"
]
},
{
"and": [
"canDash",
{
"or": [
"canTrickySpringBallJump",
"canInsaneWallJump",
{
"and": [
"HiJump",
"canWallJump"
]
},
{
"and": [
"HiJump",
"canSpeedyJump"
]
},
"h_IBJFromSpikes"
]
}
]
},
{
"and": [
"canPreciseGrapple",
{
"or": [
"canDash",
"canUseEnemies",
"canInsaneJump"
]
}
]
}
]
}
{
"heatFrames": 0
}Dev note: With Grapple, Morph isn't needed, but there's no reason to go there without Morph. |
|
Samus can ceiling bomb jump up gentle slopes. Going down gentle slopes is also possible but harder, instead an unmorph to reset fall speed is recommended here. Requires: "h_heatProof" "canCeilingBombJump" "canResetFallSpeed" |
|
Place Bombs against the crumble block to overload PLMs, then go through it and through the bomb blocks at the left. Entrance condition: {
"comeInWithGMode": {
"mode": "any",
"morphed": true
}
}Requires: "h_artificialMorphIBJ"
{
"or": [
"canBePatient",
"h_artificialMorphSpringBall",
"h_artificialMorphCeilingBombJump"
]
} |
From: 4
Right Door
To: 2
Middle Left Door

Place Bombs against the crumble block to overload PLMs, then go through it and through the bomb blocks at the left. Place a Power Bomb and quickly exit G-Mode before it goes off in order to break the blocks. Entrance condition: {
"comeInWithGMode": {
"mode": "any",
"morphed": true
}
}Requires: "h_artificialMorphIBJ"
{
"or": [
"canBePatient",
"h_artificialMorphSpringBall",
"h_artificialMorphCeilingBombJump"
]
}
"h_artificialMorphPowerBomb"Clears obstacles: A, B, C |
|
Requires: "h_heatProof" "canCeilingBombJump" |
|
Requires: "canCeilingBombJump" Dev note: It is possible with a low vertical diagonal bomb jump, or a double HBJ, but those aren't tech yet. |
|

Kill the Bull with bombs, by switching between the high and low ground. Rapidly place bombs while rolling slowly. Entrance condition: {
"comeInWithGMode": {
"mode": "any",
"morphed": true
}
}Requires: "h_artificialMorphCeilingBombJump" Dev note: It is possible with a low vertical diagonal bomb jump, or a double HBJ, but those aren't tech yet. |
From: 4
Top Right Door
To: 11
G-Mode, Below Speed Blocks (Overloaded PLMs)
Place bombs against the speed blocks until they are overloaded. Entrance condition: {
"comeInWithGMode": {
"mode": "direct",
"morphed": true
}
}Requires: {
"notable": "G-Mode Overload Speed Blocks then use Global Crab"
}
"canComplexGMode"
"h_navigateUnderwater"
"h_artificialMorphBombs"
{
"or": [
{
"and": [
"h_artificialMorphSpringBall",
{
"or": [
"Gravity",
"HiJump"
]
}
]
},
{
"and": [
"Morph",
{
"or": [
"Gravity",
"HiJump",
"h_underwaterCrouchJump"
]
}
]
},
{
"and": [
"Gravity",
"h_artificialMorphCeilingBombJump"
]
},
{
"and": [
"Gravity",
"h_artificialMorphIBJ",
"canBeVeryPatient"
]
}
]
}Clears obstacles: B |
From: 4
Top Right Door
To: 11
G-Mode, Below Speed Blocks (Overloaded PLMs)
Place bombs against the speed blocks until they are overloaded. Entrance condition: {
"comeInWithGMode": {
"mode": "indirect",
"morphed": true
}
}Requires: {
"notable": "G-Mode Overload Speed Blocks then use Global Crab"
}
"canComplexGMode"
"h_navigateUnderwater"
"h_artificialMorphBombs"
{
"or": [
{
"and": [
"h_artificialMorphSpringBall",
{
"or": [
"Gravity",
"HiJump"
]
}
]
},
{
"and": [
"Morph",
{
"or": [
"Gravity",
"HiJump",
"h_underwaterCrouchJump"
]
}
]
},
{
"and": [
"Gravity",
"h_artificialMorphCeilingBombJump"
]
},
{
"and": [
"Gravity",
"h_artificialMorphIBJ",
"canBeVeryPatient"
]
}
]
} |
From: 12
G-Mode Junction By Middle Right Door
To: 11
G-Mode, Below Speed Blocks (Overloaded PLMs)


Place bombs against the speed blocks until they are overloaded. With a slow ascent, such as with Spring Ball and Ice, the crab will need to circle the entire room, it is possible to use a Super when it passes the speed blocks to speed this up significantly. Requires: "canComplexGMode"
{
"notable": "G-Mode Overload Speed Blocks then use Global Crab"
}
"h_useMorphBombs"
"h_navigateUnderwater"
{
"or": [
"canGravityJump",
{
"and": [
"Gravity",
"canWallJump"
]
},
{
"and": [
"HiJump",
{
"or": [
"canSpringBallJumpMidAir",
{
"and": [
{
"notable": "Underwater Walljumps"
},
"canUnderwaterWallJump"
]
}
]
}
]
},
{
"and": [
"canTrickyUseFrozenEnemies",
{
"or": [
"HiJump",
"Gravity",
"h_underwaterMaxHeightSpringBallJump"
]
}
]
}
]
}
{
"or": [
{
"and": [
"Gravity",
"h_useSpringBall"
]
},
{
"and": [
"HiJump",
"h_useSpringBall"
]
},
{
"and": [
"Gravity",
"canCeilingBombJump"
]
},
"canBeVeryPatient"
]
} |
From: 13
G-Mode Morph Junction By Middle Right Door
To: 11
G-Mode, Below Speed Blocks (Overloaded PLMs)
This is a long climb, and getting around the fish under the missiles can be tricky or slow. Place bombs against the speed blocks until they are overloaded. Requires: "canComplexGMode"
{
"notable": "G-Mode Overload Speed Blocks then use Global Crab"
}
"h_navigateUnderwater"
"h_artificialMorphBombs"
{
"or": [
{
"and": [
"Gravity",
{
"or": [
"h_artificialMorphIBJ",
{
"and": [
"h_artificialMorphSpringBall",
"HiJump"
]
},
{
"and": [
"h_artificialMorphSpringBall",
"canGravityJump"
]
}
]
},
{
"or": [
"h_artificialMorphSpringBall",
"h_artificialMorphCeilingBombJump",
"canBeVeryPatient"
]
}
]
},
"h_artificialMorphDoubleSpringBallJump"
]
} |
|

Only requires a runway of approximately 1 tile in the adjacent room. Take two Mochtroid hits or kill it using a Power Bomb or 5 Bombs. Entrance condition: {
"comeInJumping": {
"speedBooster": "any",
"minTiles": 1
}
}Requires: "canJumpIntoIBJ"
{
"or": [
{
"ammo": {
"type": "PowerBomb",
"count": 1
}
},
{
"and": [
"canCeilingBombJump",
{
"enemyDamage": {
"enemy": "Mochtroid",
"type": "contact",
"hits": 1
}
}
]
},
{
"and": [
"canDoubleBombJump",
{
"enemyDamage": {
"enemy": "Mochtroid",
"type": "contact",
"hits": 2
}
}
]
},
{
"enemyDamage": {
"enemy": "Mochtroid",
"type": "contact",
"hits": 3
}
}
]
}
"canCrossRoomJumpIntoWater"
"canBufferedMomentumConservingTurnaround"
"canTrickyJump"Dev note: The rhythm for placing 4 Bombs quickly is the main component of ceiling bomb jumps. canTrickyJump for the IBJ more than the through-door jump. |
|

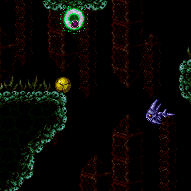
Bomb Jump between the two floating platforms. Requires: "canDash"
{
"or": [
{
"obstaclesCleared": [
"A"
]
},
{
"and": [
"canCameraManip",
"canMetroidAvoid"
]
}
]
}
{
"or": [
{
"and": [
"canHBJ",
"canResetFallSpeed"
]
},
{
"and": [
{
"obstaclesCleared": [
"A"
]
},
"canDiagonalBombJump"
]
},
"canCeilingBombJump"
]
} |
|
Entrance condition: {
"comeInWithGMode": {
"mode": "any",
"morphed": true
}
}Requires: {
"or": [
"f_KilledMetroidRoom1",
{
"obstaclesCleared": [
"f_KilledMetroidRoom1"
]
}
]
}
"h_artificialMorphCeilingBombJump" |
|

Bomb Jump between the two floating platforms. Requires: {
"obstaclesCleared": [
"A",
"B"
]
}
{
"or": [
"canCeilingBombJump",
"canDiagonalBombJump"
]
} |
From: 1
Left Door
To: 2
Right Door
Take the bottom path and place many bombs near the speed blocks to overload PLMs and go through them. Entrance condition: {
"comeInWithGMode": {
"mode": "any",
"morphed": true
}
}Requires: "h_artificialMorphLongIBJ"
{
"or": [
"h_artificialMorphCeilingBombJump",
"canBeVeryPatient"
]
} |