canUpwardGModeSetup (Extreme)
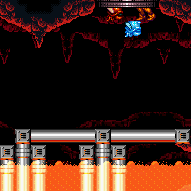
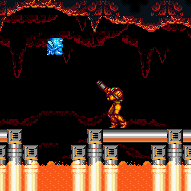
Ability to setup R-mode or G-mode through an upward door. Samus needs to be in a standing or walking position with no vertical speed on the first frame in the next room, while taking damage through the transition. This is typically done by standing or crouching on an enemy as a platform beneath the transition and pressing forward to activate the transition.
Getting Samus onto the enemy without activating the transition can usually be done by spin jumping against the enemy and quickly releasing jump and forward once on top of it. If the vertical space between the enemy and transition is 2 tiles or fewer, Samus needs to aim down before landing to prevent touching the transition as she lands. it is also possible to get onto the enemy by jumping and aiming down with horizontal momentum while avoiding hitting the side of the enemy or the transition above. This may also be done more easily with Spring Ball or a room geometry that makes it easy to midair morph directly onto the enemy. Unmorphing when on top of the enemy will put Samus in a crouch, where a forward press will stand up and activate the transition. If Samus is completely against the wall, an X-Ray turnaround or crouch is necessary to be able to activate the transition tiles with a forward press.
Dependencies: canTwoTileSqueeze
Strats ()
|


The nearby Global crab can be used to exit on the left side of the door. Exiting on the right will require travelling the Morph maze to find a local crab or two from the far left side of the room. Without Spring Ball, freeze the crab as low as possible to where Samus can still spin jump onto it. land on the edge of it, X-Ray turnaround or crouch, then press forward when it is about to thaw to trigger the transition. Requires: "Morph" "canCameraManip" "canUpwardGModeSetup" "canTrickyUseFrozenEnemies" "canBeVeryPatient" Exit condition: {
"leaveWithGModeSetup": {}
}Dev note: Global Crab (left side) takes 40 seconds, local crab (Right side) is 140. Finding two left side crabs to use together is faster. FIXME: Adding a variant that can only be done on the left side of the door would remove many of these requirements. |
From: 3
Right Vertical Door
To: 3
Right Vertical Door
Requires: "canUpwardGModeSetup"
"canTrickyUseFrozenEnemies"
{
"obstaclesCleared": [
"A"
]
}Exit condition: {
"leaveWithGModeSetup": {}
} |
|
Freeze the stack of Gamets together a few times to try and raise them as high as possible. Run with them to the door and freeze the top two such that Samus can stand on the lower and take damage from the higher Gamet when it unfreezes. It is possible to jump onto the Gamet without Morph, as long as it is not too high. Requires: "h_heatProof"
"canUpwardGModeSetup"
"canTrickyUseFrozenEnemies"
{
"or": [
"Morph",
"canInsaneJump"
]
}Exit condition: {
"leaveWithGModeSetup": {}
}Dev note: FIXME: h_heatProof could be dropped in favor of heatFrames + canTrickyGMode? |
From: 2
Right Vertical Door
To: 2
Right Vertical Door
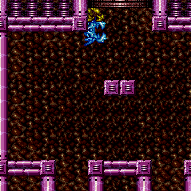
The easiest way to set up G-mode is to lure a low Mella to the door, take a hit, then jump and aim down and freeze it while it is high enough and still rising. If the Mella is not moving upwards, there is a good chance that Samus will be in a falling state as she is hit through the transition and can't use X-Ray. If Samus does not stay on the Mella, she can spin jump or midair morph directly onto the Mella without touching the transition. It may be worthwhile to keep the other Mellas alive so that on a failed attempt, Samus can freeze the Mella to go farm some of the others in room. Requires: "canManipulateMellas" "canUpwardGModeSetup" "canTrickyUseFrozenEnemies" "canInsaneJump" Exit condition: {
"leaveWithGModeSetup": {}
} |
|
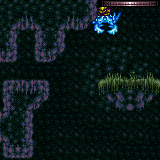
Knock a Viola off of its platform and keep it on camera as it climbs to the top of the room. Freeze the Viola when it is only partially overhanging the door and midair morph, run jump and aim down directly onto it, or spin jump and down aim just before landing and quickly release inputs. With Morph or a down aim, Samus can jump directly onto the Viola without touching the transition. Requires: "canTrickyUseFrozenEnemies"
{
"ammo": {
"type": "Super",
"count": 1
}
}
"canUpwardGModeSetup"
{
"or": [
"canConsecutiveWallJump",
"SpaceJump",
"canLongIBJ",
"canBePatient"
]
}Exit condition: {
"leaveWithGModeSetup": {}
}Unlocks doors: {"types":["ammo"],"requires":[]} |
|
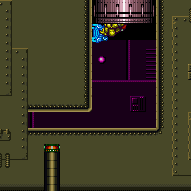
Bring two atomics to the doorway. Stand on one frozen Atomic to freeze a second Atomic at the correct height to use as a platform. Requires: "canUpwardGModeSetup" "canTrickyUseFrozenEnemies" "f_DefeatedPhantoon" Exit condition: {
"leaveWithGModeSetup": {}
} |
|
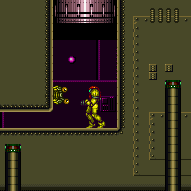
Bring two atomics to the top of the room. Stand on one frozen Atomic to freeze a second Atomic at the correct height to use as a platform. Requires: "canUpwardGModeSetup"
"canTrickyUseFrozenEnemies"
"f_DefeatedPhantoon"
{
"enemyDamage": {
"enemy": "Atomic",
"type": "contact",
"hits": 1
}
}Exit condition: {
"leaveWithGModeSetup": {}
}Dev note: It doesn't seem possible with a Covern. Samus needs to be moving upwards 1+ pixel per frame for 16 frames to spawn the Covern. Jumping or with Spring Ball are less than 16 before going through the door. If below the platform, the Covern cannot spawn high enough (it spawns 4 tiles above Samus's middle). A bomb boost only gives 10 satisfactory frames. Moving diagonally resets the counter in a weird way. |
|
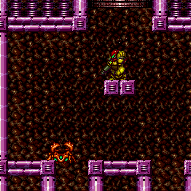
Lure the crab to the top of the room and freeze it close enough to the corner that it will be able to hit Samus after it thaws. Without Morph, this is much trickier, requiring fairly precise freeze positioning and movement to get onto the crab. Aim down before landing on the crab to avoid triggering the transition. Be sure to touch the transition before it thaws or Samus will be in a falling pose, but late enough that it will be able to rotate around the corner and hit Samus in time. Requires: "canBePatient"
{
"or": [
{
"and": [
"Gravity",
"SpaceJump"
]
},
{
"and": [
"Gravity",
"HiJump",
"canPreciseGrapple"
]
},
{
"and": [
"HiJump",
"canPreciseGrapple",
"canSpringBallJumpMidAir",
"canBeVeryPatient"
]
},
{
"and": [
"HiJump",
"canGravityJump",
"canBeVeryPatient"
]
}
]
}
"canUpwardGModeSetup"
"canTrickyUseFrozenEnemies"
{
"or": [
"Morph",
"canTrickyGMode"
]
}Exit condition: {
"leaveWithGModeSetup": {}
}Dev note: Without Morph, this is not difficult enough to require canTrickyGMode, but it is easy to fail and the setup is very slow. The patience requirements for these strats are lenient, but there is a good chance of not getting the setup or entering G-mode first try. |
|

Use a clockwise or counter-clockwise snail to setup G-Mode on either side of the door. Requires: "canUpwardGModeSetup" "h_navigateUnderwater" Exit condition: {
"leaveWithGModeSetup": {}
} |
|
The Global crab in the upper section can be knocked off the wall to enter the left side of the above door. Otherwise, there are more crabs in the lower section of the room. Requires: "canUpwardGModeSetup"
"canTrickyUseFrozenEnemies"
{
"or": [
{
"ammo": {
"type": "Super",
"count": 1
}
},
"Gravity",
{
"and": [
"canSuitlessMaridia",
{
"or": [
"HiJump",
"canBePatient"
]
}
]
}
]
}Exit condition: {
"leaveWithGModeSetup": {}
} |
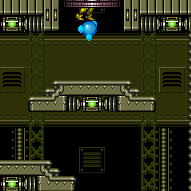
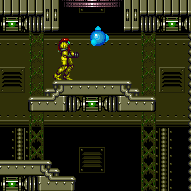
From: 1
Top Door
To: 1
Top Door
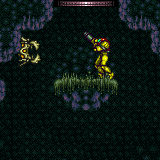
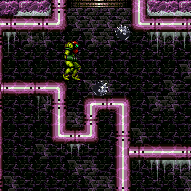
Pirates will typically climb up the left wall and down the right wall. Freeze the pirate as it jumps across so it is partially in the door. This GMode setup is more easily performed on the left side. They may (50% chance) change direction after climbing a distance of about 5 tiles. Can randomly fail depending on the height the pirate is frozen and the direction Samus is facing. Requires: "canUpwardGModeSetup" "canTrickyUseFrozenEnemies" "canTrickyGMode" Exit condition: {
"leaveWithGModeSetup": {}
} |