canXRayWaitForIFrames (Hard)

Use X-Ray to pause time until invulnerability frames are finished. Combine with Plasma Beam to repeatedly damage enemies with one fired shot, called Microwave. If used while inside an enemy projectile or thorns, i-frames will be restarted but no damage will be taken.
Strats ()
|

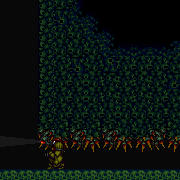
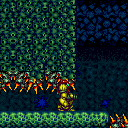
Spawn a Zeb, stand at the edge of the crumbles, and spin jump to the right a moment after it begins moving toward Samus; turn left just before landing, then do a delayed damage boost to make it under the first gate. Face left again, quickly lose i-frames using either X-Ray or a blue suit, then damage boost again to get under the second gate. Both boosts must be performed on the last two frames of knockback, to ensure Samus is high enough to reach the gate. For the first boost, jump can be held the entire time. For the second boost, unless X-Ray is available, there is not much time to set up a buffered jump input, so it may be easier to aim to press jump and right simultaneously after being hit. Requires: {
"notable": "Crouch Gate Clip Damage Boost"
}
{
"obstaclesNotCleared": [
"A"
]
}
"canCrouchGateClip"
"canCameraManip"
{
"tech": "canHorizontalDamageBoost"
}
{
"enemyDamage": {
"enemy": "Zeb",
"type": "contact",
"hits": 2
}
}
{
"or": [
"canXRayWaitForIFrames",
{
"haveBlueSuit": {}
}
]
}Clears obstacles: A Dev note: This strat avoids the need to dash. |
|


The only way the Wavers will get to the door is if the right crumble blocks are all broken. This assumes that Samus comes from the left with Speed, a mockball, or a crouch gate clip. After the crumbles are broken, shoot the ceiling block and wait by the door for the Waver to come. Note that if Samus takes more than 35 seconds after entering the room, before shooting the ceiling, the Waver will not come down. Requires: {
"obstaclesNotCleared": [
"A"
]
}
{
"or": [
"h_speedDash",
"canMockball",
{
"and": [
"canDash",
"canCrouchGateClip",
{
"or": [
"canXRayTurnaround",
"canMoonwalk"
]
}
]
},
{
"and": [
{
"notable": "Crouch Gate Clip Damage Boost"
},
"canHorizontalDamageBoost",
"canCrouchGateClip",
{
"enemyDamage": {
"enemy": "Zeb",
"type": "contact",
"hits": 2
}
},
{
"or": [
"canXRayWaitForIFrames",
{
"haveBlueSuit": {}
}
]
}
]
}
]
}Exit condition: {
"leaveWithGModeSetup": {}
}Unlocks doors: {"types":["ammo"],"requires":[]} |
From: 3
Bottom Left Door
To: 6
Junction (Right of Tunnel)
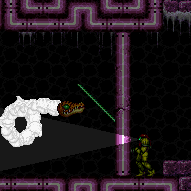
Maintain i-frames by using X-Ray whenever a thorn would deal damage. Move by alternating between X-Ray turnarounds and normal turnarounds. Simply crouch again following any accidental X-Ray Standups. Requires: {
"notable": "Spikeway X-Ray Wiggle"
}
"canXRayWaitForIFrames"
"canXRayTurnaround"
{
"thornHits": 1
}
"h_trickyToCarryBlueSuit" |
From: 6
Junction (Right of Tunnel)
To: 3
Bottom Left Door
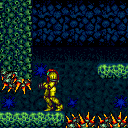
Maintain i-frames by using X-Ray whenever a thorn would deal damage. Move by alternating between X-Ray turnarounds and normal turnarounds. Simply crouch again following any accidental X-Ray Standups. Requires: {
"notable": "Spikeway X-Ray Wiggle"
}
"canXRayWaitForIFrames"
"canXRayTurnaround"
{
"thornHits": 1
}
"h_trickyToCarryBlueSuit" |
From: 1
Top Right Door
To: 2
Bottom Door
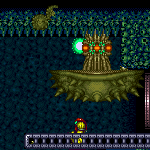
Use the Plasma Special Beam Attack to kill Spore Spawn from above. Stand in the middle of the second lowest platform above Spore Spawn, facing left and crouched. Then quickly use X-Ray to kill Spore Spawn in 1 cycle. Jumping against the ledge above then rotating to the left after landing will put Samus into a good position. Requires: {
"notable": "Plasma SBA Kill from Above"
}
"Plasma"
"canSpecialBeamAttack"
{
"ammo": {
"type": "PowerBomb",
"count": 1
}
}
"canXRayWaitForIFrames"Clears obstacles: f_DefeatedSporeSpawn Sets flags: f_DefeatedSporeSpawn |
From: 2
Right Door
To: 2
Right Door


If you're fast, you can find enough time to kill a Yellow Pirate on the way up: Supers, Screw Attack, or charged Microwave are fast enough to do this. Either way, kill the pirate at the top, Crystal Flash if you need it, and get the shinecharge. If you're heat-proof, wait for the acid to finish rising and you can interrupt in the small bit that reaches the runway. Otherwise, use heat to interrupt. Requires: {
"obstaclesCleared": [
"R-Mode"
]
}
{
"obstaclesCleared": [
"A"
]
}
{
"or": [
"h_heatedCrystalFlashForReserveEnergy",
{
"and": [
{
"or": [
"ScrewAttack",
{
"and": [
"Charge",
"Plasma",
"canXRayWaitForIFrames"
]
},
{
"enemyKill": {
"enemies": [
[
"Yellow Space Pirate (standing)"
]
],
"explicitWeapons": [
"Super"
]
}
}
]
},
"h_RModeCanRefillReserves",
{
"resourceMissingAtMost": [
{
"type": "Missile",
"count": 0
}
]
},
{
"partialRefill": {
"type": "ReserveEnergy",
"limit": 20
}
}
]
}
]
}
{
"enemyKill": {
"enemies": [
[
"Yellow Space Pirate (standing)"
]
]
}
}
{
"canShineCharge": {
"usedTiles": 20,
"gentleDownTiles": 6,
"openEnd": 1
}
}
{
"or": [
"h_heatTriggerRModeSparkInterrupt",
{
"and": [
"h_heatProof",
{
"autoReserveTrigger": {}
},
"canRModeSparkInterrupt",
{
"acidFrames": 32
}
]
}
]
}Resets obstacles: R-Mode, A |
From: 1
Left Door
To: 3
Metal Pirates Junction
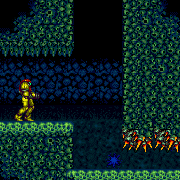
Kill both pirates with ammo or beams. Collect their drops and use heat to interrupt. Or kill and farm one pirate, then hitbox the other and interrupt from it before killing it with ammo or beams. Blue suit doesn't damage the pirates, but keeps Samus invulnerable while moving. Entrance condition: {
"comeInWithRMode": {}
}Requires: {
"heatFrames": 125
}
{
"or": [
{
"and": [
"Charge",
"Plasma",
"canDodgeWhileShooting",
"canTrickyJump",
{
"or": [
{
"and": [
"Ice",
{
"heatFrames": 700
}
]
},
{
"and": [
"Wave",
{
"heatFrames": 700
}
]
},
{
"and": [
"canInsaneJump",
"Ice",
{
"heatFrames": 520
}
]
},
{
"and": [
"canInsaneJump",
"Wave",
{
"heatFrames": 520
}
]
},
{
"and": [
"Ice",
"Wave",
{
"heatFrames": 400
}
]
},
{
"heatFrames": 950
},
{
"and": [
"canInsaneJump",
{
"heatFrames": 700
}
]
},
{
"and": [
"canXRayWaitForIFrames",
{
"heatFrames": 420
}
]
}
]
}
]
},
{
"and": [
"Charge",
"Spazer",
"canDodgeWhileShooting",
{
"or": [
{
"heatFrames": 4400
},
{
"and": [
"Ice",
{
"heatFrames": 3000
}
]
},
{
"and": [
"Wave",
{
"heatFrames": 2650
}
]
},
"Ice",
"Wave",
{
"heatFrames": 1750
}
]
}
]
},
{
"and": [
"Plasma",
"canDodgeWhileShooting",
{
"heatFrames": 2000
}
]
},
{
"and": [
"h_heatProof",
"canDodgeWhileShooting",
{
"or": [
{
"and": [
"Charge",
"Wave"
]
},
{
"and": [
"Charge",
"Ice",
"canBePatient"
]
},
{
"and": [
"canBeVeryPatient",
{
"or": [
"Charge",
"Spazer"
]
}
]
}
]
}
]
},
{
"and": [
"canDodgeWhileShooting",
{
"enemyKill": {
"enemies": [
[
"Space Pirate (fighting)",
"Space Pirate (fighting)"
]
],
"explicitWeapons": [
"Super"
]
}
},
{
"heatFrames": 450
}
]
},
{
"and": [
"canDodgeWhileShooting",
{
"enemyKill": {
"enemies": [
[
"Space Pirate (fighting)",
"Space Pirate (fighting)"
]
],
"explicitWeapons": [
"Missile"
]
}
},
{
"heatFrames": 2700
}
]
}
]
}
{
"or": [
"h_heatedCrystalFlashForReserveEnergy",
{
"and": [
"h_RModeCanRefillReserves",
{
"or": [
{
"and": [
{
"resourceMissingAtMost": [
{
"type": "Super",
"count": 0
}
]
},
{
"partialRefill": {
"type": "ReserveEnergy",
"limit": 240
}
}
]
},
{
"partialRefill": {
"type": "ReserveEnergy",
"limit": 120
}
}
]
}
]
},
{
"and": [
{
"disableEquipment": "ETank"
},
{
"or": [
{
"and": [
{
"resourceMissingAtMost": [
{
"type": "Super",
"count": 0
}
]
},
{
"partialRefill": {
"type": "ReserveEnergy",
"limit": 140
}
}
]
},
{
"partialRefill": {
"type": "ReserveEnergy",
"limit": 20
}
}
]
}
]
}
]
}
"h_shinechargeMaxRunway"
{
"disableEquipment": "Varia"
}
{
"disableEquipment": "Gravity"
}
{
"or": [
{
"and": [
"canHitbox",
{
"autoReserveTrigger": {
"maxReserveEnergy": 95
}
},
"canRModeSparkInterrupt"
]
},
{
"and": [
"canReserveTriggerBufferXRay",
{
"autoReserveTrigger": {
"implicitHeatFrames": "no"
}
},
"canRModeSparkInterrupt",
{
"suitlessHeatFrames": 32
}
]
},
{
"and": [
"h_heatProof",
{
"autoReserveTrigger": {}
},
"canRModePauseAbuseSparkInterrupt"
]
},
{
"and": [
{
"autoReserveTrigger": {
"implicitHeatFrames": "suitless"
}
},
"canRModeSparkInterrupt",
{
"suitlessHeatFrames": 32
}
]
}
]
}Clears obstacles: A, door_1 |
From: 2
Right Door
To: 3
Metal Pirates Junction
Kill both pirates with ammo or beams. Collect their drops and use heat to interrupt. Or kill and farm one pirate, then hitbox the other and interrupt from it before killing it with ammo or beams. Blue suit doesn't damage the pirates, but keeps Samus invulnerable while moving. Entrance condition: {
"comeInWithRMode": {}
}Requires: {
"heatFrames": 125
}
{
"or": [
{
"and": [
"Charge",
"Plasma",
"canDodgeWhileShooting",
{
"or": [
{
"and": [
"Ice",
{
"heatFrames": 700
}
]
},
{
"and": [
"Wave",
{
"heatFrames": 700
}
]
},
{
"and": [
"Ice",
"Wave",
{
"heatFrames": 450
}
]
},
{
"heatFrames": 950
},
{
"and": [
"canXRayWaitForIFrames",
{
"heatFrames": 420
}
]
},
{
"and": [
"Ice",
"Wave",
"canTrickyJump",
{
"heatFrames": 400
}
]
},
{
"and": [
"Ice",
"canInsaneJump",
{
"heatFrames": 520
}
]
},
{
"and": [
"Wave",
"canInsaneJump",
{
"heatFrames": 520
}
]
},
{
"and": [
"canInsaneJump",
{
"heatFrames": 700
}
]
}
]
}
]
},
{
"and": [
"h_heatProof",
"canDodgeWhileShooting",
{
"or": [
"Plasma",
{
"and": [
"Charge",
"Wave"
]
},
{
"and": [
"Charge",
"Spazer",
"Ice",
"Wave"
]
},
{
"and": [
"Charge",
"Spazer",
"canBePatient"
]
},
{
"and": [
"Charge",
"Ice",
"canBePatient"
]
},
{
"and": [
"canBeVeryPatient",
{
"or": [
"Charge",
"Spazer"
]
}
]
},
{
"enemyKill": {
"enemies": [
[
"Space Pirate (fighting)",
"Space Pirate (fighting)"
]
],
"explicitWeapons": [
"Missile"
]
}
}
]
}
]
},
{
"and": [
"canDodgeWhileShooting",
{
"enemyKill": {
"enemies": [
[
"Space Pirate (fighting)",
"Space Pirate (fighting)"
]
],
"explicitWeapons": [
"Super"
]
}
},
{
"heatFrames": 450
}
]
}
]
}
{
"or": [
"h_heatedCrystalFlashForReserveEnergy",
{
"and": [
"h_RModeCanRefillReserves",
{
"or": [
{
"and": [
{
"resourceMissingAtMost": [
{
"type": "Super",
"count": 0
}
]
},
{
"partialRefill": {
"type": "ReserveEnergy",
"limit": 240
}
}
]
},
{
"partialRefill": {
"type": "ReserveEnergy",
"limit": 120
}
}
]
}
]
},
{
"and": [
{
"disableEquipment": "ETank"
},
{
"or": [
{
"and": [
{
"resourceMissingAtMost": [
{
"type": "Super",
"count": 0
}
]
},
{
"partialRefill": {
"type": "ReserveEnergy",
"limit": 140
}
}
]
},
{
"partialRefill": {
"type": "ReserveEnergy",
"limit": 20
}
}
]
}
]
}
]
}
{
"heatFrames": 90
}
"h_shinechargeMaxRunway"
{
"or": [
{
"and": [
"canHitbox",
{
"autoReserveTrigger": {}
},
"canRModeSparkInterrupt"
]
},
"h_heatTriggerRModeSparkInterrupt"
]
}Clears obstacles: A, door_2 |
From: 3
Metal Pirates Junction
To: 3
Metal Pirates Junction
Requires: "Charge"
"Plasma"
{
"or": [
{
"and": [
{
"or": [
"canDodgeWhileShooting",
{
"enemyDamage": {
"enemy": "Space Pirate (fighting)",
"type": "contact",
"hits": 2
}
}
]
},
{
"or": [
"Ice",
"Wave"
]
},
{
"heatFramesWithEnergyDrops": {
"frames": 700,
"drops": [
{
"enemy": "Space Pirate (fighting)",
"count": 12
}
]
}
}
]
},
{
"and": [
{
"or": [
"canDodgeWhileShooting",
{
"enemyDamage": {
"enemy": "Space Pirate (fighting)",
"type": "contact",
"hits": 2
}
}
]
},
"Ice",
"Wave",
{
"heatFramesWithEnergyDrops": {
"frames": 450,
"drops": [
{
"enemy": "Space Pirate (fighting)",
"count": 12
}
]
}
}
]
},
{
"and": [
{
"or": [
"canDodgeWhileShooting",
{
"enemyDamage": {
"enemy": "Space Pirate (fighting)",
"type": "contact",
"hits": 2
}
}
]
},
{
"heatFramesWithEnergyDrops": {
"frames": 950,
"drops": [
{
"enemy": "Space Pirate (fighting)",
"count": 12
}
]
}
}
]
},
{
"and": [
"canXRayWaitForIFrames",
{
"heatFramesWithEnergyDrops": {
"frames": 210,
"drops": [
{
"enemy": "Space Pirate (fighting)",
"count": 6
}
]
}
},
{
"heatFramesWithEnergyDrops": {
"frames": 210,
"drops": [
{
"enemy": "Space Pirate (fighting)",
"count": 6
}
]
}
}
]
}
]
}
{
"partialRefill": {
"type": "Energy",
"limit": 99
}
}
{
"partialRefill": {
"type": "Super",
"limit": 1
}
}Clears obstacles: A |
|


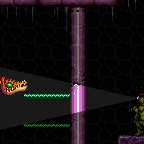
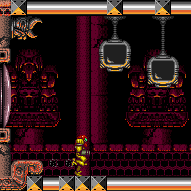
Attack Phantoon with one or two Missile shots, then fire a charged Plasma shot when it comes back around; use X-Ray repeatedly while the charged Plasma shot is in contact with Phantoon, to wait out Phantoon's i-frames, making it possible to kill in one cycle. Note that using a charged Plasma shot initially (without first using Missiles) would cause Phantoon to immediately close its eye and not take any more damage during that cycle. Requires: "Charge"
"Plasma"
{
"or": [
{
"ammo": {
"type": "Missile",
"count": 1
}
},
{
"and": [
{
"resourceCapacity": [
{
"type": "Missile",
"count": 1
}
]
},
{
"or": [
"canTrickyJump",
{
"enemyDamage": {
"enemy": "Phantoon",
"type": "flame",
"hits": 1
}
}
]
}
]
}
]
}
"canXRayWaitForIFrames"
{
"or": [
"canTrickyDodgeEnemies",
{
"and": [
"canDodgeWhileShooting",
{
"enemyDamage": {
"enemy": "Phantoon",
"type": "flame",
"hits": 2
}
},
{
"enemyDamage": {
"enemy": "Phantoon",
"type": "contact",
"hits": 2
}
}
]
},
{
"and": [
"canTrickyJump",
{
"enemyDamage": {
"enemy": "Phantoon",
"type": "flame",
"hits": 1
}
},
{
"enemyDamage": {
"enemy": "Phantoon",
"type": "contact",
"hits": 1
}
}
]
}
]
}Sets flags: f_DefeatedPhantoon |
|

Requires: "h_navigateUnderwater" "Charge" "Plasma" "canXRayWaitForIFrames" Clears obstacles: f_DefeatedBotwoon Sets flags: f_DefeatedBotwoon |
|
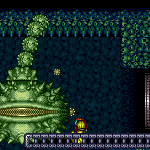
A charge beam shot will pass right through the dividing wall if fired diagonally from the correct 2-pixel window. Using angle up, it is where Samus' front foot is on the seam in the floor. Requires: {
"notable": "Back-Side Magic Pixel Beam Fight"
}
"h_navigateUnderwater"
"Charge"
"Plasma"
{
"or": [
"canXRayWaitForIFrames",
"canTrickyDodgeEnemies",
"Gravity",
{
"enemyDamage": {
"enemy": "Botwoon 1",
"type": "acid",
"hits": 1
}
}
]
}Clears obstacles: f_DefeatedBotwoon Sets flags: f_DefeatedBotwoon |
|
Shoot through the wall and use the microwave trick to defeat Botwoon. Requires: {
"notable": "Back-Side Fight with Charge and Wave"
}
"h_navigateUnderwater"
"Charge"
"Plasma"
"Wave"
"canXRayWaitForIFrames"Clears obstacles: f_DefeatedBotwoon Sets flags: f_DefeatedBotwoon |
|


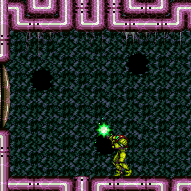
Wait for Botwoon to spawn then use a Plasma Special Beam Attack. Use XRay to slow time and watch for a particle to overlap Botwoons head, then proceed to Microwave. Requires: {
"notable": "Back-Side Plasma Shield Microwave"
}
"h_navigateUnderwater"
"canSpecialBeamAttack"
"Plasma"
"canXRayWaitForIFrames"
{
"ammo": {
"type": "PowerBomb",
"count": 1
}
}
{
"or": [
"canTrickyDodgeEnemies",
{
"ammo": {
"type": "PowerBomb",
"count": 2
}
}
]
}
{
"or": [
"canBeLucky",
{
"ammo": {
"type": "PowerBomb",
"count": 1
}
}
]
}Clears obstacles: f_DefeatedBotwoon Sets flags: f_DefeatedBotwoon Dev note: Killing in 1 SBA takes some luck. Microwaving effeciently takes some dexterity. This strat only applies to those who don't know the magic pixel strat is possible. |
|

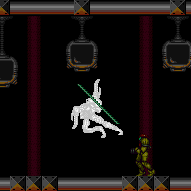
Fire a charged Plasma shot, then use X-Ray repeatedly while the shot is in contact with Draygon, to wait out Draygon's i-frames. It is possible to one-cycle, which is easiest with a full beam, alternatively, it is possible to Morph under the swoop and two-cycle it. Note that if Samus is crouched when Draygon dies, she will stand up; this can be used to see when the fight has ended. Requires: "h_navigateUnderwater"
{
"or": [
"Gravity",
"canTrickyJump",
{
"enemyDamage": {
"enemy": "Draygon",
"type": "turretProjectile",
"hits": 1
}
}
]
}
{
"or": [
{
"and": [
"canTrickyDodgeEnemies",
{
"or": [
"Gravity",
"canInsaneJump",
{
"enemyDamage": {
"enemy": "Draygon",
"type": "turretProjectile",
"hits": 1
}
}
]
}
]
},
"h_breakThreeDraygonTurrets"
]
}
"canXRayWaitForIFrames"
"Charge"
"Plasma"
{
"or": [
"canTrickyDodgeEnemies",
"Morph",
{
"and": [
"Ice",
"Wave"
]
},
{
"enemyDamage": {
"enemy": "Draygon",
"type": "contact",
"hits": 1
}
}
]
}Clears obstacles: f_DefeatedDraygon Sets flags: f_DefeatedDraygon |
|
Kill the Pirates fast enough that they won't attack, or shoot them from below with Wave. Requires: {
"or": [
"Wave",
"ScrewAttack",
{
"and": [
"Plasma",
"canXRayWaitForIFrames"
]
},
{
"enemyKill": {
"enemies": [
[
"Tourian Space Pirate (all)",
"Tourian Space Pirate (all)",
"Tourian Space Pirate (all)"
],
[
"Tourian Space Pirate (all)",
"Tourian Space Pirate (all)",
"Tourian Space Pirate (all)"
]
],
"explicitWeapons": [
"Missile",
"Super",
"Ice+Plasma"
]
}
}
]
}Clears obstacles: A Dev note: These requirements are to kill all of the pirates, but another strat is needed to cross the room to get to the top half. |
|
Kill the Pirates fast enough that they won't attack, or shoot them from above with Wave. Requires: {
"or": [
"Wave",
"ScrewAttack",
{
"haveBlueSuit": {}
},
{
"and": [
"Plasma",
"canXRayWaitForIFrames"
]
},
{
"enemyKill": {
"enemies": [
[
"Tourian Space Pirate (all)",
"Tourian Space Pirate (all)"
],
[
"Tourian Space Pirate (all)",
"Tourian Space Pirate (all)"
],
[
"Tourian Space Pirate (all)"
]
],
"explicitWeapons": [
"Missile",
"Super",
"Ice+Plasma"
]
}
}
]
}Clears obstacles: A Dev note: Technically it's not possible to kill the bottom Pirates while staying at node 2 (not dropping down); but if we're not going down, then it doesn't matter that the bottom ones aren't killed. FIXME: The enemyKill requirements could be reduced if it is only needed to kill the top ones, which could be modeled as a separate obstacle. |