canTrickyCarryFlashSuit (Insane)
The ability to preserve a flash suit while performing strats that have a high risk of losing the flash suit. For example, performing a gate glitch in air without the use of Spring Ball - from a spin jump, morph then unmorph, in order to be able to angle up shot. This also expects the ability to grapple jump without the use of HiJump.
Dependencies: canMidairShinespark, canShinechargeMovementComplex, canHorizontalShinespark, canShinechargeMovement, canShinespark, canHorizontalMidairShinespark, canComplexCarryFlashSuit, canCarryFlashSuit
Strats ()
|


Jump, aim up, and fire Grapple mid-air to clip the beam through the ceiling. Requires: {
"resetRoom": {
"nodes": [
1,
2
]
}
}
"canUseGrapple"
"canTrickyJump"
{
"cycleFrames": 150
}
{
"or": [
{
"noFlashSuit": {}
},
{
"and": [
"canComplexCarryFlashSuit",
"h_useSpringBall",
{
"cycleFrames": 60
}
]
},
{
"and": [
"canTrickyCarryFlashSuit",
"canInsaneMidAirMorph",
"canBeExtremelyPatient",
{
"cycleFrames": 200
}
]
}
]
}Farm cycle drops: 1 Geemer (orange) |
|
Requires: "h_blueGateGlitch" Clears obstacles: B |
|


Open the gate (Wave Beam or gate glitch) and clear the Small Sidehoppers for a runway. Use respawning Geegas for energy. Entrance condition: {
"comeInWithRMode": {}
}Requires: {
"or": [
"Wave",
"h_blueGateGlitch",
{
"and": [
{
"notable": "Grapple Gate Glitch"
},
"canPreciseGrapple",
"h_speedJump",
"canTrickyJump"
]
}
]
}
{
"refill": [
"Energy"
]
}
{
"canShineCharge": {
"usedTiles": 30,
"openEnd": 0
}
}
{
"autoReserveTrigger": {}
}
"canRModeSparkInterrupt"Clears obstacles: B |
From: 9
Junction (Top Rippers)
To: 5
Top Right Door


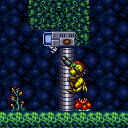
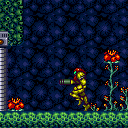
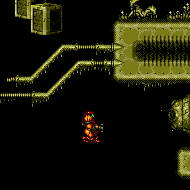
Climb the top of Red Tower with just Space Jump. This can be done by dodging the Rippers and shooting the block as Samus is going upward, so she goes through the block as it breaks. The positioning and timing of the final jump and shot is more precise without HiJump. Requires: "canPreciseSpaceJump" "canTrickyDodgeEnemies" "h_midAirShootUp" "h_trickyToCarryFlashSuit" |
From: 1
Left Door
To: 1
Left Door

Failing the spikesuit attempt with a spark early by 1 frame will lose the original flash suit. Unmorphing on the first possible frame leaves in top position; second frame leaves in middle position. Requires: {
"useFlashSuit": {}
}
"canUseFlashSuitInitialSpark"
"canTrickyCarryFlashSuit"
{
"thornHits": 1
}
"canPatientSpikeSuit"
{
"shinespark": {
"frames": 19,
"excessFrames": 0
}
}Exit condition: {
"leaveWithSpark": {
"position": "top"
}
} |
From: 3
Bottom Right Door
To: 3
Bottom Right Door

Failing the spikesuit attempt with a spark early by 1 frame will lose the original flash suit. Only unmorphing on the first possible frame will work; second frame will bonk the platform. Requires: {
"useFlashSuit": {}
}
"canUseFlashSuitInitialSpark"
"canTrickyCarryFlashSuit"
{
"thornHits": 1
}
"canSpikeSuit"
{
"shinespark": {
"frames": 13,
"excessFrames": 0
}
}Exit condition: {
"leaveWithSpark": {
"position": "bottom"
}
} |
From: 3
Left Side - Bottom Middle Door
To: 1
Left Side - Top Door

Entrance condition: {
"comeInWithGrappleSwing": {
"blocks": [
{
"position": [
-1,
5
],
"environment": "water",
"note": "Mt. Everest"
},
{
"position": [
8,
3
],
"note": "Grapple Beam Room"
},
{
"position": [
7,
3
],
"note": "Colosseum"
}
]
}
}Requires: "canPreciseGrappleJump" "h_trickyToCarryFlashSuit" |
|


Requires: "HiJump"
"canSpeedyJump"
{
"heatFrames": 220
}
{
"or": [
{
"noFlashSuit": {}
},
{
"and": [
{
"heatFrames": 20
},
{
"or": [
"Wave",
"canTrickyCarryFlashSuit"
]
}
]
},
{
"and": [
{
"heatFrames": 50
},
{
"or": [
"canComplexCarryFlashSuit",
"Ice",
"Spazer",
"Plasma"
]
}
]
},
{
"heatFrames": 300
}
]
}Clears obstacles: A |
|

Run to the right, wait a moment for the platforms to come down, then wall jump off the second platform from the right. Alternatively, wall jump off the wall to the right to reach the platform sooner, to wall jump off of it. Requires: "HiJump"
"canWallJump"
"canTrickyJump"
{
"or": [
{
"and": [
"canHeroShot",
{
"heatFrames": 270
},
"canInsaneWallJump",
"h_trickyToCarryFlashSuit",
"canBeVeryPatient"
]
},
{
"and": [
{
"heatFrames": 360
},
{
"or": [
"h_complexToCarryFlashSuit",
"Ice",
"Wave",
"Spazer",
"Plasma",
{
"heatFrames": 300
}
]
}
]
}
]
}
{
"or": [
"canDash",
{
"heatFrames": 120
}
]
}Clears obstacles: A |
|
Charge a spark along the bottom of the room and use it to spark through the right side door. Requires opening the door and shutter first. Requires: "canShinechargeMovementComplex"
"HiJump"
{
"or": [
"SpaceJump",
"Grapple"
]
}
{
"or": [
{
"obstaclesCleared": [
"A"
]
},
"Wave",
{
"and": [
"h_heatedBlueGateGlitch",
{
"heatFrames": 60
}
]
}
]
}
{
"or": [
{
"and": [
"canTrickyDashJump",
"canWallJump"
]
},
"SpaceJump"
]
}
{
"canShineCharge": {
"usedTiles": 28,
"gentleUpTiles": 3,
"gentleDownTiles": 3,
"openEnd": 0
}
}
{
"heatFrames": 780
}
{
"shinespark": {
"frames": 57,
"excessFrames": 0
}
}Exit condition: {
"leaveWithSpark": {}
}Dev note: A hero shot variation of this strat might be possible, starting from a node to the left; if nothing else it could be done with a shortcharge on the 12-tile platform to the left. |
|


Pause while crumble jumping, and quickly mid-air morph and equip Spring Ball, to obtain a boost in horizontal speed before mid-air Spring Ball jumping. Requires: "canCrumbleJump"
"canTrickySpringBallJump"
"canSpringFling"
"h_trickyToCarryFlashSuit"
{
"heatFrames": 270
}
{
"or": [
"canDash",
{
"and": [
{
"haveBlueSuit": {}
},
"canInsaneJump",
{
"heatFrames": 190
}
]
}
]
} |
|
Requires: {
"heatFrames": 250
}
"h_heatedBlueGateGlitch"
{
"or": [
"canDash",
{
"heatFrames": 85
}
]
}Clears obstacles: A |
|


Pause while crumble jumping, and quickly mid-air morph and equip Spring Ball, to obtain a boost in horizontal speed before mid-air Spring Ball jumping. Requires: "canCrumbleJump"
"canTrickySpringBallJump"
"canSpringFling"
"canInsaneJump"
"h_trickyToCarryFlashSuit"
{
"heatFrames": 280
}
{
"or": [
"canDash",
{
"heatFrames": 80
}
]
}Dev note: Compared to the other direction, this direction requires traveling one more tile horizontally, which makes it more difficult. |
|


Requires: "Morph"
{
"heatFrames": 260
}
"h_heatedBlueGateGlitch"Clears obstacles: A |
From: 5
Middle Junction (Ledge Right of Morph Tunnel)
To: 2
Middle Left Door
Requires: "Morph"
{
"heatFrames": 150
}
"h_heatedBlueGateGlitch"
{
"or": [
"canDash",
{
"heatFrames": 65
}
]
}Clears obstacles: A |
From: 5
Middle Junction (Ledge Right of Morph Tunnel)
To: 2
Middle Left Door
Requires: "canDash"
"Morph"
{
"heatFrames": 150
}
"h_heatedBlueGateGlitch"Exit condition: {
"leaveWithRunway": {
"length": 11,
"openEnd": 0,
"gentleDownTiles": 4
}
}Unlocks doors: {"types":["missiles"],"requires":[{"heatFrames":90}]}
{"types":["super"],"requires":[]}
{"types":["powerbomb"],"requires":[{"heatFrames":110}]} |
|
Requires: {
"heatFrames": 210
}
{
"or": [
"h_trickyToCarryFlashSuit",
{
"heatFrames": 40
}
]
}
{
"or": [
"canDash",
{
"heatFrames": 110
}
]
} |
From: 1
Right Door
To: 1
Right Door
Requires: "canDash"
{
"notable": "Power Bomb with Damage Boost"
}
{
"enemyKill": {
"enemies": [
[
"Dragon"
],
[
"Dragon",
"Dragon"
]
],
"explicitWeapons": [
"PowerBomb"
]
}
}
"canHorizontalDamageBoost"
{
"enemyDamage": {
"enemy": "Dragon",
"type": "fireball",
"hits": 2
}
}
"canFlatleyJump"
"canTrickyJump"
{
"or": [
{
"tech": "canUsePowerBombLag"
},
"canInsaneJump"
]
}
{
"heatFrames": 400
}
"h_trickyToCarryFlashSuit"Collects items: 3 |
From: 1
Right Door
To: 2
Chozo Ball Item


Place a Power Bomb while waiting for the middle Dragon to shoot a fireball, to clear the Sovas for later. While the item block is breaking, turn around to perform a Flatley jump to collect the item and jump to the ledge item in one motion. Place a second Power Bomb while jumping up from the lower item block to clear the remaining enemies for the return trip. Requires: "canDash"
{
"notable": "Power Bomb with Damage Boost"
}
"canFlatleyJump"
"canTrickyDodgeEnemies"
"canMidAirMorph"
"canHorizontalDamageBoost"
{
"enemyDamage": {
"enemy": "Dragon",
"type": "fireball",
"hits": 1
}
}
{
"enemyKill": {
"enemies": [
[
"Dragon"
],
[
"Dragon",
"Dragon"
]
],
"explicitWeapons": [
"PowerBomb"
]
}
}
{
"heatFrames": 260
}
"h_trickyToCarryFlashSuit"Clears obstacles: A Collects items: 3 |
From: 1
Right Door
To: 2
Chozo Ball Item
Place a Power Bomb while waiting for the middle Dragon to shoot a fireball, to clear the Sovas for later. Place a second Power Bomb while jumping up from the lower item block to clear the remaining enemies for the return trip. Requires: "canDash"
{
"notable": "Power Bomb with Damage Boost"
}
"canTrickyJump"
"canMidAirMorph"
"canHorizontalDamageBoost"
{
"enemyDamage": {
"enemy": "Dragon",
"type": "fireball",
"hits": 1
}
}
{
"enemyKill": {
"enemies": [
[
"Dragon"
],
[
"Dragon",
"Dragon"
]
],
"explicitWeapons": [
"PowerBomb"
]
}
}
{
"heatFrames": 270
}
"h_trickyToCarryFlashSuit"Clears obstacles: A |
From: 1
Right Door
To: 4
Junction Above Hidden Platform Item
Place a Power Bomb while waiting for the middle Dragon to shoot a fireball, to clear the Sovas for later. A second Power Bomb will be needed to clear the remaining Dragons for the return trip. Requires: "canDash"
{
"notable": "Power Bomb with Damage Boost"
}
"canTrickyJump"
"canMidAirMorph"
"canHorizontalDamageBoost"
{
"enemyDamage": {
"enemy": "Dragon",
"type": "fireball",
"hits": 1
}
}
{
"enemyKill": {
"enemies": [
[
"Dragon"
]
],
"explicitWeapons": [
"PowerBomb"
]
}
}
{
"heatFrames": 180
}
"h_trickyToCarryFlashSuit"Dev note: Would be better if we could model 1 PB consumed + dragons half-dead. |
From: 5
Bottom Floating Platform Junction
To: 5
Bottom Floating Platform Junction


Requires: {
"heatFrames": 135
}
"h_heatedBlueGateGlitch"Clears obstacles: A |
From: 5
Bottom Floating Platform Junction
To: 5
Bottom Floating Platform Junction

Farm before, during, and after the gate glitch in order to open the gate without wasting ammo or Energy. Requires: {
"notable": "Gate Glitch With Farming"
}
{
"heatFrames": 300
}
"h_gateGlitch"
{
"or": [
{
"ammo": {
"type": "Missile",
"count": 1
}
},
{
"ammo": {
"type": "Super",
"count": 1
}
}
]
}
{
"or": [
"h_heatResistant",
"canTrickyJump",
{
"resourceCapacity": [
{
"type": "RegularEnergy",
"count": 199
}
]
}
]
}Clears obstacles: A Dev note: There is still some leniency built in, so that perfect execution is not required, but Samus ends without losing resources. Without leniency, this can be done with about 235 heatFrames. |
|


Build up 34 tiles worth of run speed and jump into the door on the last frame. Hold angle up through the transition but also aim down to duck below the ceiling until Samus is past it. Fire the Super Missile frame perfectly to open the gate. Entrance condition: {
"comeInRunning": {
"speedBooster": "yes",
"minTiles": 34
}
}Requires: {
"notable": "High Speed Gate Glitch"
}
"h_speedJump"
"h_heatedGreenGateGlitch"
{
"ammo": {
"type": "Super",
"count": 1
}
}
"canInsaneJump"
{
"noFlashSuit": {}
}Clears obstacles: A Dev note: 1 extra tile is added so that you can jump into the door, simplifying the inputs a bit. |
|
Requires: {
"or": [
"h_greenGateGlitch",
{
"obstaclesCleared": [
"A"
]
}
]
}Clears obstacles: A |
|


Swing counter-clockwise around the left-most Ripper closely (pressing up to retract Grapple), positioned as far left as possible while avoiding getting caught on the stalactite. After swinging under the stalactite with high enough speed, hold down to extend Grapple to push Samus to the left slightly, then release Grapple while Samus is still nearly horizontal. Quickly morph and frame-perfectly pause to equip or unequip Spring Ball. If successful, Samus will continue gaining fall speed while on the ground morphed. Immediately roll left through the door, which should have been opened in advance. Requires: "canUseEnemies"
{
"or": [
{
"haveBlueSuit": {}
},
{
"enemyDamage": {
"enemy": "Ripper 2 (green)",
"type": "contact",
"hits": 2
}
}
]
}
"Morph"
"SpringBall"
"h_trickyToCarryFlashSuit"Exit condition: {
"leaveWithSuperSink": {}
} |
|

Carefully swing between the Rippers at the top of the room to the item. The last two swings are the hardest Morphing and unmorphing to reset Samus's fall speed can help give a bit more time to position the Rippers. It can help to Grapple the same Ripper again to get it in a better position. Position the third Ripper far to the right then fling to the fourth, which is far to the right and very close to the ceiling. Moving the fourth Ripper to the right a bit can also help in order to make the last fling less precise. Be careful not to fling directly into the ceiling, as it is easy to hit the uneven surface and fall. Requires: {
"notable": "Indiana Jones Grapple (First Try)"
}
"canUseEnemies"
"canPreciseGrapple"
"h_midAirShootUp"
{
"or": [
{
"and": [
"canInsaneJump",
"h_trickyToCarryFlashSuit"
]
},
{
"and": [
"canResetFallSpeed",
{
"enemyDamage": {
"enemy": "Ripper 2 (green)",
"type": "contact",
"hits": 2
}
}
]
}
]
} |
|


Carefully swing between the Rippers at the top of the room to the item. The last two swings are the hardest Morphing and unmorphing to reset Samus's fall speed can help give a bit more time to position the Rippers. It can help to Grapple the same Ripper again to get it in a better position. Position the third Ripper far to the right then fling to the fourth, which is far to the right and very close to the ceiling. Moving the fourth Ripper to the right a bit can also help in order to make the last fling less precise. Be careful not to fling directly into the ceiling, as it is easy to hit the uneven surface and fall. If Samus falls, it may be helpful to reset the room. Requires: {
"notable": "Indiana Jones Grapple (With Retries)"
}
"canUseEnemies"
"canPreciseGrapple"
"h_midAirShootUp"
{
"or": [
{
"and": [
"canInsaneJump",
"h_trickyToCarryFlashSuit"
]
},
{
"enemyDamage": {
"enemy": "Ripper 2 (green)",
"type": "contact",
"hits": 4
}
}
]
}
{
"or": [
{
"and": [
"HiJump",
"canSpringBallJumpMidAir"
]
},
{
"and": [
"canSpeedyJump",
"HiJump",
"canTrickyWallJump"
]
},
"h_trickySpringwall"
]
} |
|

Involves Grappling off several Rippers, where falling may lead to a soft lock. Morphing and unmorphing to reset Samus's fall speed can help give a bit more time to position the Rippers. It can help to Grapple the same Ripper again to get it in a better position. Positioning the first Ripper far to the left until the second is visible can help make this much easier. Requires: {
"notable": "Indiana Jones Grapple (First Try)"
}
"canUseEnemies"
"canPreciseGrapple"
"h_midAirShootUp"
{
"or": [
{
"and": [
"canInsaneJump",
"h_trickyToCarryFlashSuit"
]
},
{
"and": [
"canResetFallSpeed",
{
"enemyDamage": {
"enemy": "Ripper 2 (green)",
"type": "contact",
"hits": 1
}
}
]
}
]
}Dev note: In general, the return route is easier, but is only useful after doing the left to right strat first. |
|
Requires: {
"or": [
"h_heatedGreenGateGlitch",
{
"obstaclesCleared": [
"A"
]
}
]
}
{
"enemyDamage": {
"enemy": "Ripper 2 (red)",
"type": "contact",
"hits": 2
}
}Exit condition: {
"leaveWithRunway": {
"length": 29,
"openEnd": 1
}
} |
|

You can Crystal Flash first, then open the gate, dodge the bottom most rippers that come across the platform, and pick up their Super drops when they hit the light orb. Alternatively, open the gate first, farm the bottom two Rippers with Power Bombs or Screw Attack to get your Supers back and Crystal Flash afterwards. The runway is now clear to shinecharge. Alternatively, you can farm with Screw Attack or Power Bombs. Kill the bottom two Rippers first, then the one bouncing between platforms. Keep the third Ripper from the top alive for the best interrupt. With high reserve energy, take the interrupt close to the right door and with the Ripper moving right - it will not come back in time to hit you again. Once you have blue suit, you cannot kill any more Rippers with Screw Attack, but you are still invulnerable to contact hits. Entrance condition: {
"comeInWithRMode": {}
}Requires: "h_heatedGreenGateGlitch"
{
"or": [
{
"and": [
{
"or": [
{
"resourceAvailable": [
{
"type": "Super",
"count": 10
}
]
},
{
"and": [
{
"resourceAvailable": [
{
"type": "Super",
"count": 8
}
]
},
{
"resourceAvailable": [
{
"type": "Energy",
"count": 51
}
]
},
{
"or": [
"ScrewAttack",
{
"enemyKill": {
"enemies": [
[
"Ripper 2 (red)",
"Ripper 2 (red)"
]
],
"explicitWeapons": [
"PowerBomb"
]
}
}
]
},
{
"heatFrames": 600
},
{
"partialRefill": {
"type": "Super",
"limit": 10
}
}
]
}
]
},
"h_heatedCrystalFlashForReserveEnergy"
]
},
{
"and": [
{
"or": [
"ScrewAttack",
{
"enemyKill": {
"enemies": [
[
"Ripper 2 (red)",
"Ripper 2 (red)"
],
[
"Ripper 2 (red)"
]
],
"explicitWeapons": [
"PowerBomb"
]
}
}
]
},
"h_heatProof",
"h_RModeCanRefillReserves",
{
"resourceMissingAtMost": [
{
"type": "Super",
"count": 2
}
]
},
{
"partialRefill": {
"type": "ReserveEnergy",
"limit": 60
}
}
]
},
{
"and": [
{
"or": [
"ScrewAttack",
{
"enemyKill": {
"enemies": [
[
"Ripper 2 (red)"
]
],
"explicitWeapons": [
"PowerBomb"
]
}
}
]
},
"h_heatProof",
"h_RModeCanRefillReserves",
{
"resourceMissingAtMost": [
{
"type": "Super",
"count": 4
}
]
},
{
"partialRefill": {
"type": "ReserveEnergy",
"limit": 20
}
}
]
}
]
}
{
"canShineCharge": {
"usedTiles": 28,
"openEnd": 0
}
}
{
"autoReserveTrigger": {}
}
{
"or": [
{
"and": [
"h_heatProof",
{
"autoReserveTrigger": {}
},
"canRModeSparkInterrupt"
]
},
"h_heatTriggerRModeSparkInterrupt"
]
}Clears obstacles: A, B |
|
Requires: {
"or": [
"h_heatedGreenGateGlitch",
{
"obstaclesCleared": [
"A"
]
}
]
}
{
"heatFrames": 50
}
{
"or": [
"canDash",
{
"heatFrames": 15
}
]
}Clears obstacles: A Dev note: FIXME: A strat could be added that runs into the room and shoots directly at the gate, instead of stopping in front of it. |
From: 5
Below Left Door Junction
To: 1
Left Door
Perform a gravity jump followed by a springball jump to reach the left side door. The gravity jump will only get high enough if it is within the last two frames, and the Spring Ball jump must be delayed and near the peak of the jump. Requires: {
"notable": "Reverse Acid Dive"
}
{
"obstaclesNotCleared": [
"A"
]
}
"HiJump"
"canTrickyJump"
"canGravityJump"
{
"or": [
"h_crouchJumpDownGrab",
{
"and": [
"canTrickyCarryFlashSuit",
"canDownGrab"
]
}
]
}
"canSpringBallJumpMidAir"
{
"heatFrames": 50
}
{
"acidFrames": 50
}
{
"gravitylessHeatFrames": 300
}
{
"gravitylessAcidFrames": 300
}Unlocks doors: {"types":["super"],"requires":[]}
{"types":["missiles","powerbomb"],"requires":["never"]}Dev note: It is possible to do this with a flash suit, and no crouch jump, but it requires a frame perfect jump and then a Spring Ball jump within 3 pixels of its peak. |
From: 5
Firefleas Bottom Left Platform Junction
To: 7
Fireflea Statue's Claw Junction


Set up to Damage boost off the highest Fireflea at the apex of Samus' jump, right next to the statue's claw. The positioning of the Fireflea is very precise, and this can only be attempted once. To position the Fireflea, jump to move it on camera and move it off camera while it is at the top of its circle. Be careful not to touch the Fireflea while setting up its precise positioning. Note that morphing can make the boost a little easier, and a crouch jump can also help, but is not required. Requires: "HiJump"
"canCameraManip"
"canHorizontalDamageBoost"
"canTrickyDodgeEnemies"
{
"or": [
"canCrouchJump",
"canTrickyCarryFlashSuit"
]
}
{
"enemyDamage": {
"enemy": "Fireflea",
"type": "contact",
"hits": 1
}
} |
From: 9
Junction Below Crumble Blocks, Set Up to Clip
To: 2
Top Right Door


Breaking only the left side bomb blocks makes it easier for the Multiviola to enter a pattern where it will pass through the top shot block. The Multiviola needs to go through the crumble blocks moving to the right, if it goes through moving left it won't clear the shot blocks. If all the bomb blocks are broken, standing on the right side of the crumbles will allow the Multiviola to pass through the top shot block. Requires: {
"notable": "Multiviola Ice Clip"
}
"canBePatient"
"canTrickyGMode"
"h_heatProof"
{
"or": [
{
"and": [
"h_XRayMorphIceClip",
{
"or": [
"ScrewAttack",
"h_bombThings",
{
"obstaclesCleared": [
"B"
]
}
]
}
]
},
{
"and": [
"h_preciseIceClip",
{
"enemyDamage": {
"enemy": "Multiviola",
"type": "contact",
"hits": 1
}
},
{
"or": [
"ScrewAttack",
{
"obstaclesCleared": [
"B"
]
},
{
"and": [
"canTrickyCarryFlashSuit",
"canBeVeryLucky",
{
"useFlashSuit": {}
},
{
"shinespark": {
"frames": 11,
"excessFrames": 5
}
}
]
}
]
}
]
}
]
}Exit condition: {
"leaveWithGModeSetup": {}
}Unlocks doors: {"types":["ammo"],"requires":[]}Dev note: FIXME: This is possible with a flash suit but the flash suit needs a setup. This either needs a way that breaks both left crumble blocks or gets lucky getting the Multiviola up. |
From: 9
Junction Below Crumble Blocks, Set Up to Clip
To: 4
Junction Below Bomb Blocks
Ice Clip through the crumble blocks using a Multiviola from the bottom of the room. The ice clip can be setup by standing in a corner and firing forward when the Multiviola hits Samus, if it is moving downwards towards Samus. Break the bomb blocks with a Power Bomb before bringing the Multiviola up for the clip. This variant is only useful if Samus needs to break some of the Bomb blocks to go up after collecting the item. Requires: {
"notable": "Multiviola Ice Clip"
}
"h_heatProof"
"h_preciseIceClip"
{
"enemyDamage": {
"enemy": "Multiviola",
"type": "contact",
"hits": 1
}
}
"canTrickyCarryFlashSuit"
{
"useFlashSuit": {}
}
{
"shinespark": {
"frames": 11,
"excessFrames": 5
}
}Clears obstacles: B |
|
Requires: "f_DefeatedPhantoon"
{
"resetRoom": {
"nodes": [
2
]
}
}
{
"or": [
{
"and": [
"canDash",
{
"or": [
{
"and": [
"ScrewAttack",
{
"cycleFrames": 520
}
]
},
{
"and": [
"canDodgeWhileShooting",
"Plasma",
{
"cycleFrames": 800
}
]
},
{
"and": [
"canDodgeWhileShooting",
"Wave",
"Spazer",
"Ice",
{
"cycleFrames": 930
}
]
},
{
"and": [
"canTrickyDodgeEnemies",
{
"or": [
"Wave",
"Spazer",
"Ice"
]
},
"h_complexToCarryFlashSuit",
{
"cycleFrames": 1400
}
]
},
{
"and": [
"canInsaneJump",
"h_trickyToCarryFlashSuit",
{
"cycleFrames": 2600
}
]
}
]
}
]
},
{
"and": [
{
"haveBlueSuit": {}
},
{
"cycleFrames": 520
}
]
}
]
}Clears obstacles: A Farm cycle drops: 3 Kihunter (yellow), 2 Atomic |
|


Requires: "Gravity"
{
  "or": [
    "h_greenGateGlitch",
    {
      "obstaclesCleared": [
        "A"
      ]
    }
  ]
}
Clears obstacles: A |
|
Perform the Gate Glitch by moving towards the gate and firing the super on the correct frame for it to pass through and reach the button on the other side. Due to the water physics, many traditional setups for the glitch will not work. Requires: {
"notable": "Suitless Green Gate Glitch"
}
{
"or": [
"h_underwaterGreenGateGlitch",
{
"obstaclesCleared": [
"A"
]
}
]
}Clears obstacles: A |
|
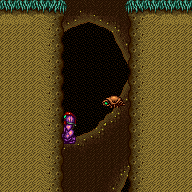
Freeze a crab at a very precise position in order to clip through the center Morph tunnel without a way to see. Use a frozen crab on the opposite wall in order to better time the crab being used for clipping and as a way to climb on top of it. Ice Beam on its own has a high chance of hitting a wall instead of the crab; straight vertical shots can help. Gravity has a 2 pixel clip window while Suitless there is only 1 pixel up higher which requires a precise down grab to get onto the crab. Requires: {
"notable": "Ice Clip"
}
"h_navigateUnderwater"
"canOffScreenMovement"
{
"or": [
{
"and": [
"Gravity",
"h_preciseIceClip"
]
},
{
"and": [
"HiJump",
"h_highPixelIceClip",
"canBeVeryPatient",
{
"or": [
"HiJump",
"Gravity"
]
},
"h_trickyToCarryFlashSuit"
]
}
]
}Dev note: FIXME: It is possible to crab climb with nothing but ice and walljumps. |
|
Entrance condition: {
"comeInWithGrappleSwing": {
"blocks": [
{
"position": [
-1,
5
],
"environment": "water",
"note": "Mt. Everest"
},
{
"position": [
8,
3
],
"note": "Grapple Beam Room"
},
{
"position": [
7,
3
],
"note": "Colosseum"
}
]
}
}Requires: "canPreciseGrappleJump" "h_trickyToCarryFlashSuit" |
|
Entrance condition: {
"comeInWithGrappleSwing": {
"blocks": [
{
"position": [
6,
4
],
"note": "Grapple Tutorial Room 2"
}
]
}
}Requires: "canTrickyGrappleJump"
{
"or": [
{
"noFlashSuit": {}
},
{
"and": [
"canTrickyCarryFlashSuit",
"canBeExtremelyPatient"
]
}
]
} |
|
Entrance condition: {
"comeInWithGrappleSwing": {
"blocks": [
{
"position": [
13,
5
],
"environment": "water",
"note": "Mt. Everest"
},
{
"position": [
7,
3
],
"note": "The Precious Room"
},
{
"position": [
7,
2
],
"note": "The Moat"
}
]
}
}Requires: "canPreciseGrappleJump" "h_trickyToCarryFlashSuit" |
From: 1
Bottom Left Door
To: 2
Bottom Right Door

Reach the bottom middle of the room with an IBJ or gravity jump and avoid letting the pirate shoot any stationary, invisible lasers. The pirate will not touch Samus if she is high enough on the sloped tiles, but move too high and it will see Samus. Time the Power Bomb to go off so that Samus starts Crystal Flashing during or before the pirate turns around, and while ensuring that Samus will get hit by the lasers that will not move from their spawned location. With Gravity equipped, Samus will need to be boosted by the Power Bomb only while the pirate is moving its head. Samus will need to be able to survive a second hit after the Reserve trigger. This can be done with a 50% enemy damage reduction and no E-Tanks; a 75% reduction is not recommended and would require disabling and reenabling suits with a precise pause abuse. Without suits, this is possible with an E-Tank and two R-Tanks; it is sometimes possible to jump away after the Reserve trigger, but can require some luck. Entrance condition: {
"comeInWithGMode": {
"mode": "direct",
"morphed": true
}
}Requires: "Gravity"
{
"or": [
"h_artificialMorphIBJ",
{
"and": [
"h_artificialMorphSpringBall",
"canGravityJump"
]
}
]
}
"h_artificialMorphRModeCrystalFlashInterrupt"
{
"ammo": {
"type": "Missile",
"count": 10
}
}
{
"or": [
{
"and": [
"h_partialEnemyDamageReduction",
{
"resourceAtMost": [
{
"type": "RegularEnergy",
"count": 19
}
]
}
]
},
{
"and": [
"canTrickyCarryFlashSuit",
{
"resourceCapacity": [
{
"type": "RegularEnergy",
"count": 199
}
]
},
{
"resourceCapacity": [
{
"type": "ReserveEnergy",
"count": 199
}
]
}
]
}
]
}Dev note: FIXME: A 75% damage reduction method needs to be documented for if Samus only has Gravity and it provides 75% reduction. |
From: 1
Bottom Left Door
To: 4
Top Left Door
Entrance condition: {
"comeInWithGrappleSwing": {
"blocks": [
{
"position": [
-1,
5
],
"environment": "water",
"note": "Mt. Everest"
},
{
"position": [
8,
3
],
"note": "Grapple Beam Room"
},
{
"position": [
7,
3
],
"note": "Colosseum"
}
]
}
}Requires: "canPreciseGrappleJump"
{
"or": [
{
"noFlashSuit": {}
},
"HiJump",
{
"and": [
"canTrickyCarryFlashSuit",
"canBeExtremelyPatient"
]
}
]
}Exit condition: {
"leaveWithGrappleJump": {
"position": "right"
}
}Unlocks doors: {"types":["super","powerbomb"],"requires":[]}
{"types":["missiles"],"requires":["canTrickyGrappleJump"]}Dev note: Opening the door while carrying a flash suit is possible without Hi-Jump but very difficult. |
|
Entrance condition: {
"comeInWithGrappleSwing": {
"blocks": [
{
"position": [
-1,
5
],
"environment": "water",
"note": "Mt. Everest"
},
{
"position": [
8,
3
],
"note": "Grapple Beam Room"
},
{
"position": [
7,
3
],
"note": "Colosseum"
},
{
"position": [
6,
4
],
"note": "Grapple Tutorial Room 2"
},
{
"position": [
6,
2
],
"note": "Lava Grapple Tunnel"
},
{
"position": [
5,
2
],
"note": "The Moat, Double Chamber, Wrecked Ship Energy Tank Room"
},
{
"position": [
2.375,
4.5625
],
"note": "Post Crocomire Farming Room"
}
]
}
}Requires: "canTrickyGrappleJump"
{
"or": [
{
"noFlashSuit": {}
},
"HiJump",
{
"and": [
"canTrickyCarryFlashSuit",
"canBeExtremelyPatient"
]
}
]
}Exit condition: {
"leaveWithGrappleJump": {
"position": "any"
}
}Unlocks doors: {"types":["ammo"],"requires":[]} |
From: 1
Bottom Left Door
To: 5
Platform Junction Near Top Left Door

Requires 2 tiles of run speed to make it past the overhang above the door. SpeedBooster must be turned off in order to get up. Cross Room jump and do not buffer aiming down on entry, because Samus's speed is higher underwater while spinning. Aim down and then turn around just before the overhang. Shooting at it from below can deal damage sooner to get a faster freeze. Hug the frozen fish to gain the extra height needed to climb on top. Note that with a slightly longer runway of 3 tiles with a closed end or more, it is not required to disable Speed Booster. Entrance condition: {
"comeInJumping": {
"speedBooster": "no",
"minTiles": 2
}
}Requires: "HiJump"
"canCrossRoomJumpIntoWater"
"canMomentumConservingTurnaround"
"canTrickyUseFrozenEnemies"
"canInsaneJump"
{
"or": [
"Wave",
"Spazer",
"Plasma"
]
}
"h_trickyToCarryFlashSuit"Dev note: FIXME: It is possible but tricky to freeze the fish with just Ice and 2 Missiles. There is no known benefit to modeling the variant that doesn't disable Speed Booster - especially because it is already not doable with a blue suit. |
From: 1
Bottom Left Door
To: 5
Platform Junction Near Top Left Door
With 3 tiles of run speed it is more lenient to make it past the overhang above the door. Cross Room jump and do not buffer aiming down on entry, because Samus's speed is higher underwater while spinning. Aim down and then turn around just before the overhang. Freeze the fish near the left wall and land on it. Entrance condition: {
"comeInJumping": {
"speedBooster": "any",
"minTiles": 3
}
}Requires: "HiJump"
"canCrossRoomJumpIntoWater"
"canMomentumConservingTurnaround"
"canTrickyUseFrozenEnemies"
"canTrickyDodgeEnemies"
{
"or": [
"Plasma",
{
"and": [
"Wave",
"Spazer"
]
}
]
}
"h_trickyToCarryFlashSuit"Dev note: This can be done with SpeedBooster, but there is no point, as Samus can jump directly to the ledge without using the fish. |
From: 2
Bottom Right Door
To: 2
Bottom Right Door

Carefully get into position at the bottom of the room without getting hit by the pirate. The pirate will not touch Samus if she is high enough on the sloped tiles, but move too high and it will see Samus. Time the Power Bomb to go off so that Samus starts Crystal Flashing during or before the pirate turns around. With Gravity equipped, Samus will need to be boosted by the Power Bomb only while the pirate is moving its head. Samus will need to be able to survive a second hit after the Reserve trigger. This can be done with a 50% enemy damage reduction and no E-Tanks; a 75% reduction is not recommended and would require disabling and reenabling suits with a precise pause abuse. Without suits, this is possible with an E-Tank and two R-Tanks; it is sometimes possible to jump away after the Reserve trigger, but can require some luck. Requires: {
"obstaclesCleared": [
"R-Mode"
]
}
"canRModeCrystalFlashInterrupt"
{
"ammo": {
"type": "Missile",
"count": 10
}
}
{
"or": [
{
"and": [
"h_partialEnemyDamageReduction",
{
"resourceAtMost": [
{
"type": "RegularEnergy",
"count": 19
}
]
}
]
},
{
"and": [
"canTrickyCarryFlashSuit",
{
"resourceCapacity": [
{
"type": "RegularEnergy",
"count": 199
}
]
},
{
"resourceCapacity": [
{
"type": "ReserveEnergy",
"count": 199
}
]
}
]
}
]
}Resets obstacles: R-Mode Dev note: There is not an artificial morph variant from door 2, as Samus will be off-camera and can't get hit by the pirate. FIXME: This is a good example of where it would be nice to be able to end with more than 50 Energy, as Samus could spark to the top left. FIXME: A 75% damage reduction method needs to be documented for if Samus only has Gravity and it provides 75% reduction. |
From: 3
Top Right Door
To: 2
Bottom Right Door
Reach the bottom middle of the room and avoid letting the pirate shoot any stationary, invisible lasers. The pirate will not touch Samus if she is high enough on the sloped tiles, but move too high and it will see Samus. Time the Power Bomb to go off so that Samus starts Crystal Flashing during or before the pirate turns around, and while ensuring that Samus will get hit by the lasers that will not move from their spawned location. With Gravity equipped, Samus will need to be boosted by the Power Bomb only while the pirate is moving its head. Samus will need to be able to survive a second hit after the Reserve trigger. This can be done with a 50% enemy damage reduction and no E-Tanks; a 75% reduction is not recommended and would require disabling and reenabling suits with a precise pause abuse. Without suits, this is possible with an E-Tank and two R-Tanks; it is sometimes possible to jump away after the Reserve trigger, but can require some luck. Entrance condition: {
"comeInWithGMode": {
"mode": "direct",
"morphed": true
},
"comesThroughToilet": "no"
}Requires: {
"or": [
{
"and": [
"Gravity",
"h_artificialMorphIBJ"
]
},
{
"and": [
"h_artificialMorphSpringBall",
{
"or": [
"Gravity",
"HiJump",
"canInsaneJump",
"h_artificialMorphSpringFling"
]
}
]
}
]
}
"h_artificialMorphRModeCrystalFlashInterrupt"
{
"ammo": {
"type": "Missile",
"count": 10
}
}
{
"or": [
{
"and": [
"h_partialEnemyDamageReduction",
{
"resourceAtMost": [
{
"type": "RegularEnergy",
"count": 19
}
]
}
]
},
{
"and": [
"canTrickyCarryFlashSuit",
{
"resourceCapacity": [
{
"type": "RegularEnergy",
"count": 199
}
]
},
{
"resourceCapacity": [
{
"type": "ReserveEnergy",
"count": 199
}
]
}
]
}
]
}Dev note: It is possible but extremely difficult to use one of the other pirates instead, but with these items, Samus can get back up from this location. FIXME: A 75% damage reduction method needs to be documented for if Samus only has Gravity and it provides 75% reduction. |
From: 3
Top Right Door
To: 7
Platform Below Top Right Door
Fall straight down to the bottom of the room, staying on the left or right side to avoid the pirate's stationary, invisible lasers. The pirate will not touch Samus if she is high enough on the sloped tiles, but move too high and it will see Samus. Time the Power Bomb to go off so that Samus starts Crystal Flashing during or before the pirate turns around, and while ensuring that Samus will get hit by the lasers that will not move from their spawned location. With Gravity equipped, Samus will need to be boosted by the Power Bomb only while the pirate is moving its head. Samus will need to be able to survive a second hit after the Reserve trigger. This can be done with a 50% enemy damage reduction and no E-Tanks; a 75% reduction is not recommended and would require disabling and reenabling suits with a precise pause abuse. Without suits, this is possible with an E-Tank and two R-Tanks; it is sometimes possible to jump away after the Reserve trigger, but can require some luck. Entrance condition: {
"comeInWithGMode": {
"mode": "direct",
"morphed": true
},
"comesThroughToilet": "no"
}Requires: {
"or": [
"Gravity",
"HiJump"
]
}
"h_artificialMorphRModeCrystalFlashInterrupt"
{
"ammo": {
"type": "Missile",
"count": 10
}
}
{
"or": [
{
"and": [
"h_partialEnemyDamageReduction",
{
"resourceAtMost": [
{
"type": "RegularEnergy",
"count": 19
}
]
}
]
},
{
"and": [
"canTrickyCarryFlashSuit",
{
"resourceCapacity": [
{
"type": "RegularEnergy",
"count": 199
}
]
},
{
"resourceCapacity": [
{
"type": "ReserveEnergy",
"count": 199
}
]
}
]
}
]
}Dev note: It is possible but extremely difficult to use one of the other pirates instead, but with these items, Samus can get back up from this location. With any fewer items, such as Spring Ball alone, it doesn't seem quite possible to use the top right pirate. FIXME: A 75% damage reduction method needs to be documented for if Samus only has Gravity and it provides 75% reduction. |
From: 4
Top Left Door
To: 2
Bottom Right Door
Reach the bottom middle of the room with an IBJ or gravity jump and avoid letting the pirate shoot any stationary, invisible lasers. The pirate will not touch Samus if she is high enough on the sloped tiles, but move too high and it will see Samus. Time the Power Bomb to go off so that Samus starts Crystal Flashing during or before the pirate turns around, and while ensuring that Samus will get hit by the lasers that will not move from their spawned location. With Gravity equipped, Samus will need to be boosted by the Power Bomb only while the pirate is moving its head. Samus will need to be able to survive a second hit after the Reserve trigger. This can be done with a 50% enemy damage reduction and no E-Tanks; a 75% reduction is not recommended and would require disabling and reenabling suits with a precise pause abuse. Without suits, this is possible with an E-Tank and two R-Tanks; it is sometimes possible to jump away after the Reserve trigger, but can require some luck. Entrance condition: {
"comeInWithGMode": {
"mode": "direct",
"morphed": true
},
"comesThroughToilet": "no"
}Requires: "Gravity"
{
"or": [
"h_artificialMorphIBJ",
{
"and": [
"h_artificialMorphSpringBall",
"canGravityJump"
]
}
]
}
"h_artificialMorphRModeCrystalFlashInterrupt"
{
"ammo": {
"type": "Missile",
"count": 10
}
}
{
"or": [
{
"and": [
"h_partialEnemyDamageReduction",
{
"resourceAtMost": [
{
"type": "RegularEnergy",
"count": 19
}
]
}
]
},
{
"and": [
"canTrickyCarryFlashSuit",
{
"resourceCapacity": [
{
"type": "RegularEnergy",
"count": 199
}
]
},
{
"resourceCapacity": [
{
"type": "ReserveEnergy",
"count": 199
}
]
}
]
}
]
}Dev note: FIXME: A 75% damage reduction method needs to be documented for if Samus only has Gravity and it provides 75% reduction. |
|
Grapple jump up through the door below. Contact the Skultera while morphing or unmorphing, to avoid knockback. Immediately after the final grapple jump, shoot Grapple to allow Samus to move left, avoiding the overhang and reaching the ledge above. Entrance condition: {
"comeInWithGrappleJump": {
"position": "left"
},
"comesThroughToilet": "no"
}Requires: "HiJump"
"canKago"
"canPreciseGrappleJump"
{
"enemyDamage": {
"enemy": "Skultera",
"type": "contact",
"hits": 1
}
}
"h_trickyToCarryFlashSuit"Dev note: It can be possible to avoid damage from the Skultera but it's very tricky. |
From: 2
Bottom Right Door
To: 9
Junction Below Speed Blocks
Arm pump as needed, to avoid bonking a floating platform above. Entrance condition: {
"comeInWithGrappleSwing": {
"blocks": [
{
"position": [
7,
3
],
"note": "The Precious Room"
},
{
"position": [
7,
2
],
"note": "The Moat"
},
{
"position": [
8,
2
],
"note": "Bowling Alley"
},
{
"position": [
7,
3
],
"obstructions": [
[
6,
10
]
],
"note": "Red Brinstar Firefleas Room"
},
{
"position": [
9,
2
],
"note": "Climb Supers Room, Bubble Mountain, Lava Grapple Tunnel"
}
]
}
}Requires: "canPreciseGrappleJump"
{
"or": [
"HiJump",
"canTrickyGrappleJump"
]
}
"h_trickyToCarryFlashSuit" |
From: 2
Bottom Right Door
To: 9
Junction Below Speed Blocks

Morph or unmorph while passing through the Skultera, to avoid taking knockback. Arm pump as needed, to move left a tile past the initial ledge, to avoid bonking a floating platform above. Grapple jump quickly to get past the second Skultera, or kago through it as well. Entrance condition: {
"comeInWithGrappleSwing": {
"blocks": [
{
"position": [
13,
5
],
"environment": "water",
"note": "Mt. Everest"
}
]
}
}Requires: "canPreciseGrappleJump"
{
"or": [
"HiJump",
"canTrickyGrappleJump"
]
}
"canKago"
{
"enemyDamage": {
"enemy": "Skultera",
"type": "contact",
"hits": 1
}
}
{
"or": [
{
"enemyDamage": {
"enemy": "Skultera",
"type": "contact",
"hits": 1
}
},
"h_trickyToCarryFlashSuit"
]
} |
From: 9
Junction Below Speed Blocks
To: 4
Top Right Door

Using the slow global crab to ascend the top section of the room requires the speed blocks to not be broken. Jump with either Springball or HiJump onto the global crab while it is climbing the section above the Speed locked item. Have Reserves set to manual and return them to auto after taking a deadly crab hit in order to gain two damage boosts. If the Speed blocks are broken, the global crab will not be able to reach this part of the room. If Morph is unavailable, then a down-grab must be done blind: buffer the down input through the reserve refill, then press forward immediately after taking damage. Requires: "canSuitlessMaridia"
{
"obstaclesNotCleared": [
"A"
]
}
{
"obstaclesNotCleared": [
"R-Mode"
]
}
"h_underwaterCrouchJump"
"canInsaneJump"
{
"or": [
"h_underwaterMaxHeightSpringBallJump",
"HiJump"
]
}
{
"or": [
"h_midAirMorphReserveDoubleDamageBoost",
{
"and": [
"canReserveDoubleDamageBoost",
"canOffScreenMovement",
"h_trickyToCarryFlashSuit"
]
}
]
}
{
"autoReserveTrigger": {
"minReserveEnergy": 85
}
}
{
"enemyDamage": {
"enemy": "Sciser",
"type": "contact",
"hits": 1
}
} |
From: 1
Left Doorway
To: 4
Top Door
Entrance condition: {
"comeInWithGrappleSwing": {
"blocks": [
{
"position": [
-1,
5
],
"environment": "water",
"note": "Mt. Everest"
},
{
"position": [
8,
3
],
"note": "Grapple Beam Room"
},
{
"position": [
7,
3
],
"note": "Colosseum"
}
]
}
}Requires: {
"or": [
"f_MaridiaTubeBroken",
{
"obstaclesCleared": [
"f_MaridiaTubeBroken"
]
}
]
}
"canPreciseGrappleJump"
"HiJump"
"h_trickyToCarryFlashSuit"Exit condition: {
"leaveWithGrappleJump": {
"position": "any"
}
}Unlocks doors: {"types":["super","powerbomb"],"requires":[]}
{"types":["missiles"],"requires":["never"]} |
|
Entrance condition: {
"comeInWithGrappleSwing": {
"blocks": [
{
"position": [
13,
5
],
"environment": "water",
"note": "Mt. Everest"
},
{
"position": [
7,
3
],
"note": "The Precious Room"
},
{
"position": [
7,
2
],
"note": "The Moat"
},
{
"position": [
8,
2
],
"note": "Bowling Alley"
},
{
"position": [
7,
3
],
"obstructions": [
[
6,
10
]
],
"note": "Red Brinstar Firefleas Room"
}
]
}
}Requires: {
"or": [
"f_MaridiaTubeBroken",
{
"obstaclesCleared": [
"f_MaridiaTubeBroken"
]
}
]
}
"canPreciseGrappleJump"
{
  "or": [
    {
      "noFlashSuit": {}
    },
    "HiJump",
    {
      "and": [
        "canTrickyCarryFlashSuit",
        "canBeExtremelyPatient"
      ]
    }
  ]
}
Exit condition: {
"leaveWithGrappleJump": {
"position": "any"
}
}Unlocks doors: {"types":["super","powerbomb"],"requires":[]}
{"types":["missiles"],"requires":["never"]} |
From: 3
Top Right Doorway
To: 4
Top Door
Entrance condition: {
"comeInWithGrappleSwing": {
"blocks": [
{
"position": [
13,
5
],
"environment": "water",
"note": "Mt. Everest"
},
{
"position": [
7,
3
],
"note": "The Precious Room"
}
]
}
}Requires: {
"or": [
"f_MaridiaTubeBroken",
{
"obstaclesCleared": [
"f_MaridiaTubeBroken"
]
}
]
}
"canPreciseGrappleJump"
"HiJump"
"h_trickyToCarryFlashSuit"Exit condition: {
"leaveWithGrappleJump": {
"position": "any"
}
}Unlocks doors: {"types":["super","powerbomb"],"requires":[]}
{"types":["missiles"],"requires":["never"]} |
From: 3
Top Right Doorway
To: 4
Top Door
Entrance condition: {
"comeInWithGrappleSwing": {
"blocks": [
{
"position": [
7,
2
],
"note": "The Moat"
},
{
"position": [
8,
2
],
"note": "Bowling Alley"
},
{
"position": [
7,
3
],
"obstructions": [
[
6,
10
]
],
"note": "Red Brinstar Firefleas Room"
}
]
}
}Requires: {
"or": [
"f_MaridiaTubeBroken",
{
"obstaclesCleared": [
"f_MaridiaTubeBroken"
]
}
]
}
"canPreciseGrappleJump"
"HiJump"
"h_trickyToCarryFlashSuit"Exit condition: {
"leaveWithGrappleJump": {
"position": "left"
}
}Unlocks doors: {"types":["super","powerbomb"],"requires":[]}
{"types":["missiles"],"requires":["never"]} |
From: 2
Bottom Left Door
To: 7
Lower Hills Junction

Jump with either Springball or HiJump onto a Sciser while it is climbing the right-most mountain. Have Reserves set to manual and return them to auto after taking a deadly crab hit in order to gain two damage boosts. This gains barely enough height to reach the ledge above. If Morph is unavailable, then a down-grab must be done blind: buffer the down input through the reserve refill, then press forward immediately after taking damage. Requires: "h_navigateUnderwater"
"h_underwaterCrouchJump"
"canInsaneJump"
{
"or": [
"h_underwaterMaxHeightSpringBallJump",
"HiJump"
]
}
{
"or": [
"h_midAirMorphReserveDoubleDamageBoost",
{
"and": [
"canReserveDoubleDamageBoost",
"canOffScreenMovement",
"h_trickyToCarryFlashSuit"
]
}
]
}
{
"autoReserveTrigger": {
"minReserveEnergy": 85
}
}
{
"enemyDamage": {
"enemy": "Sciser",
"type": "contact",
"hits": 1
}
} |
|

A charge beam shot will pass right through the dividing wall if fired diagonally from the correct 2-pixel window. Using angle up, it is where Samus' front foot is on the seam in the floor. Angle down can also be used where where Samus' front toe touches the wall. Requires: {
"notable": "Back-Side Magic Pixel Beam Fight"
}
"h_navigateUnderwater"
"Charge"
"canBeVeryPatient"
{
"or": [
"canInsaneJump",
{
"and": [
"Gravity",
"canTrickyJump",
{
"enemyDamage": {
"enemy": "Botwoon 1",
"type": "acid",
"hits": 2
}
}
]
},
{
"enemyDamage": {
"enemy": "Botwoon 1",
"type": "acid",
"hits": 6
}
}
]
}
"h_trickyToCarryFlashSuit"Clears obstacles: f_DefeatedBotwoon Sets flags: f_DefeatedBotwoon |
|
A charge beam shot will pass right through the dividing wall if fired diagonally from the correct 2-pixel window. Using angle up, it is where Samus' front foot is on the seam in the floor. Angle down can also be used where where Samus' front toe touches the wall. Requires: {
"notable": "Back-Side Magic Pixel Beam Fight"
}
"h_navigateUnderwater"
"Charge"
"Spazer"
{
"or": [
"canInsaneJump",
{
"and": [
"Gravity",
{
"or": [
"canTrickyJump",
{
"enemyDamage": {
"enemy": "Botwoon 1",
"type": "acid",
"hits": 1
}
}
]
}
]
},
{
"and": [
"canTrickyDodgeEnemies",
{
"enemyDamage": {
"enemy": "Botwoon 1",
"type": "acid",
"hits": 1
}
}
]
},
{
"enemyDamage": {
"enemy": "Botwoon 1",
"type": "acid",
"hits": 4
}
}
]
}
"h_trickyToCarryFlashSuit"Clears obstacles: f_DefeatedBotwoon Sets flags: f_DefeatedBotwoon |
From: 1
Left Door
To: 3
Top Right Door

Climb a mochtroid with ice using the wall to help guide them. Mochtroid damage is pretty hard to avoid, but it is possible. Requires: {
"notable": "Mochtroid Suitless, HiJumpless Ice Climb"
}
"canSuitlessMaridia"
"canMochtroidIceClimb"
"canPlayInSand"
"canCameraManip"
"canTrickyJump"
{
"or": [
"canInsaneJump",
{
"enemyDamage": {
"enemy": "Mochtroid",
"type": "contact",
"hits": 3
}
}
]
}
{
"or": [
"canBePatient",
"canWallJump"
]
}
"h_trickyToCarryFlashSuit" |
From: 1
Left Door
To: 3
Top Right Door


Land on each set of spikes as a way to jump to the next safe platform. The first jump can be done with a very precise damage boost to bounce forward off the spike, or using morph. Requires: {
"notable": "Spike Platforming with No Equipment"
}
"canDash"
"canWallJump"
"canInsaneJump"
"canHorizontalDamageBoost"
"canUseIFrames"
{
"spikeHits": 3
}
{
"or": [
"Morph",
{
"spikeHits": 2
}
]
}
"h_extremelyTrickyToCarryFlashSuit"Dev note: Positioning on the spikes is harder to control without morph. |
|
Crouch jump while holding shot to jump high enough to grapple horizontally to the second-lowest block. then fall, aim diagonally up, and grapple to the opposite wall after moving close enough to it, repeating this until Samus is above the water line. Grappling the same wall is also an option: in this case Samus will already be facing the wall when falling, so simply hold angle up and fire Grapple again immediately when Samus begins to fall; if done quickly, Samus will climb up to the next Grapple block. Requires: "Grapple" "canTrickyCarryFlashSuit" |
From: 3
Top Right Door
To: 1
Left Door

Jump out of the sand to lure down mochtroids to freeze. It's recommended to bring a Mochtroid into the middle section of the room. Mochtroid damage is pretty hard to avoid, but can be. Requires: {
"notable": "Mochtroid Suitless, HiJumpless Ice Climb"
}
"canSuitlessMaridia"
"canTrickyJump"
"canPlayInSand"
"canMochtroidIceClimb"
"canCameraManip"
{
"or": [
"canInsaneJump",
{
"enemyDamage": {
"enemy": "Mochtroid",
"type": "contact",
"hits": 3
}
}
]
}
{
"or": [
"canBePatient",
"canWallJump"
]
}
"h_trickyToCarryFlashSuit" |
|

Fight Draygon without Gravity, but with Morph. Requires: {
"notable": "Suitless Fight"
}
"canSuitlessMaridia"
"Morph"
{
"or": [
"canTrickyJump",
{
"enemyDamage": {
"enemy": "Draygon",
"type": "turretProjectile",
"hits": 1
}
}
]
}
"h_breakThreeDraygonTurrets"
{
"enemyKill": {
"enemies": [
[
"Draygon"
]
],
"farmableAmmo": [
"Missile",
"Super"
]
}
}
"h_trickyToCarryFlashSuit"Clears obstacles: f_DefeatedDraygon Sets flags: f_DefeatedDraygon Dev note: This will require coming into the fight with ammo to kill the turrets. Although that ammo could instead be farmed in the fight. |
|
Fight Draygon without Gravity or Morph. Requires: {
"notable": "Suitless Morphless Fight"
}
"canSuitlessMaridia"
"canTrickyDodgeEnemies"
"h_breakThreeDraygonTurrets"
{
"enemyKill": {
"enemies": [
[
"Draygon"
]
],
"farmableAmmo": [
"Missile",
"Super"
]
}
}
"h_trickyToCarryFlashSuit"Clears obstacles: f_DefeatedDraygon Sets flags: f_DefeatedDraygon Dev note: This will require coming into the fight with ammo to kill the turrets. Although that ammo could instead be farmed in the fight. FIXME: add more variants, such as pause abusing with reserves, using a blue suit to avoid damage, and/or possibly not breaking the turrets; add a draygonKill logical requirement with properties to represent various possibilities. |
|

Entrance condition: {
"comeInWithGrappleSwing": {
"blocks": [
{
"position": [
6,
2
],
"note": "Lava Grapple Tunnel"
}
]
}
}Requires: "canPreciseGrappleJump" "h_trickyToCarryFlashSuit" Clears obstacles: door_1 |
From: 2
Bottom Left Door
To: 1
Top Left Door


Underwater wall jump to the top middle platform before sparking to save Energy. Requires: "canTrickyCarryFlashSuit"
"canLongUnderwaterWallJump"
"h_storedSpark"
{
"shinespark": {
"frames": 12,
"excessFrames": 8
}
} |
|
Requires: "h_storedSpark"
{
"or": [
{
"shinespark": {
"frames": 17,
"excessFrames": 3
}
},
{
"and": [
"HiJump",
{
"shinespark": {
"frames": 7,
"excessFrames": 5
}
}
]
},
{
"and": [
"Gravity",
{
"shinespark": {
"frames": 6,
"excessFrames": 5
}
}
]
}
]
}
{
"or": [
"canTrickyCarryFlashSuit",
{
"enemyDamage": {
"enemy": "Cacatac",
"type": "spike",
"hits": 1
}
}
]
}Dev note: It is possible to kill the Cacatacs before sparking, but it's likely not worthwhile. |
From: 1
Top Sand Entrance
To: 7
Below Morph Tunnel Junction

From the bottom of the sand, shoot upwards to break the block then Shinespark up. To use a flash suit in deep sand: vertically - quickly roll the directional inputs from forward to up and jump. diagonally, with minimal horizontal speed - while holding angle, quickly tap forward then press and hold jump. Alternatively, to save Energy, shoot the block without falling into the sand, then reposition and spark up left. This can be done with a midair unmorph then shoot up, or from shooting up from the sand surface then quickly spin jumping off in order not to sink. Requires: "canPlayInSand"
"canHeroShot"
{
"useFlashSuit": {}
}
{
"or": [
{
"shinespark": {
"frames": 27,
"excessFrames": 5
}
},
{
"and": [
"canTrickyCarryFlashSuit",
{
"shinespark": {
"frames": 18,
"excessFrames": 3
}
}
]
}
]
} |
From: 1
Bottom Left Door
To: 2
Top Right Door
To save a lot of Energy, climb the room with ice before shinesparking to the door. To climb the room, stand on a frozen enemy, lure the Puyo from above and freeze it midair twice to progress. Requires: "canTrickyUseFrozenEnemies"
"canTrickyCarryFlashSuit"
{
"or": [
"Wave",
"Spazer",
"Plasma"
]
}
"h_storedSpark"
{
"shinespark": {
"frames": 13,
"excessFrames": 10
}
} |
|

Entrance condition: {
"comeInWithGrappleSwing": {
"blocks": [
{
"position": [
7,
3
],
"environment": "water",
"note": "Pants Room"
}
]
}
}Requires: "Gravity" "canTrickyGrappleJump" "h_extremelyTrickyToCarryFlashSuit" |
|
Use a 2-tap shortcharge and jump into the room with a last-frame jump, breaking the bomb block with blue speed, and making it all the way through the top door. Use angle to break spin, and do a momentum conserving turnaround either on the same frame or one frame later; this first turnaround should be done early enough that the turnaround is complete by the time Samus clears the two-tile passage in the middle of the room. Do a second momentum conserving turnaround somewhat late, and by switching from holding left to holding right one frame later (a perfect 'boomerang'). Lower run speeds are generally better, as long as the extra run speed is at least $3.2. this gives up to a 7-frame window for the first turnaround, and typically a 4-frame window for the second turnaround if the first turnaround is done early enough. A perfect boomerang is always required for the second turnaround, regardless of where in the window it is done. It is recommended to buffer the spin break, by holding angle (up or down), jump, and forward through the transition, then switching from forward to backward, with at most 1 frame of neutral in between, while still holding jump and angle. Entrance condition: {
"comeInGettingBlueSpeed": {
"length": 0,
"openEnd": 1,
"minExtraRunSpeed": "$3.2",
"maxExtraRunSpeed": "$3.F"
}
}Requires: {
"notable": "Cross Room Jump Boomerang To Top"
}
"h_blueJump"
"canInsaneJump"
"canCrossRoomJumpIntoWater"
"canMomentumConservingTurnaround"
"h_trickyToCarryFlashSuit" |
|
Use Screw Attack to break the bomb block by entering from a non-water room with a last-frame spin jump, and make it to the platform below the top door. Longer runway lengths can also work, up to 17 tiles, but will make the trick somewhat more precise. Use angle to break spin, and do a momentum conserving turnaround either on the same frame or one frame later; this first turnaround should be done early enough that the turnaround is complete by the time Samus clears the two-tile passage in the middle of the room. Do a second momentum conserving turnaround somewhat late, and by switching from holding left to holding right one frame later (a perfect 'boomerang'). The optimal amount of extra run speed is between $3.2 and $3.5, by using 13 tiles of runway or about a half tile more or less; this gives a 7-frame window for the first turnaround, and typically a 4-frame window for the second turnaround if the first turnaround is done early enough. Extra run speeds between $3.6 and $3.F can also work, but with shorter windows. A perfect boomerang is always required for the second turnaround, regardless of where in the window it is done. It is recommended to buffer the spin break, by holding angle (up or down), jump, and forward through the transition, then switching from forward to backward, with at most 1 frame of neutral in between, while still holding jump and angle. Entrance condition: {
"comeInJumping": {
"speedBooster": "yes",
"minTiles": 12.4375
}
}Requires: {
"notable": "Cross Room Jump Boomerang To Top"
}
"canInsaneJump"
"canCrossRoomJumpIntoWater"
"ScrewAttack"
"canMomentumConservingTurnaround"
"h_trickyToCarryFlashSuit"Dev note: This does not have collision oscillation. |
|
Use a 2-tap shortcharge and jump into the room with a last-frame jump, breaking the bomb block with blue speed, and making it all the way through the top door. Use angle to break spin, and do a momentum conserving turnaround either on the same frame or one frame later; this first turnaround should be done early enough that the turnaround is complete by the time Samus clears the two-tile passage in the middle of the room. Do a second momentum conserving turnaround somewhat late, and by switching from holding forward to holding backward one frame later (a perfect 'boomerang'). Lower run speeds are generally better, as long as the extra run speed is at least $3.2. this gives up to a 7-frame window for the first turnaround, and typically a 4-frame window for the second turnaround if the first turnaround is done early enough. A perfect boomerang is always required for the second turnaround, regardless of where in the window it is done. It is recommended to buffer the spin break, by holding angle (up or down), jump, and forward through the transition, then switching from forward to backward, with at most 1 frame of neutral in between, while still holding jump and angle. Entrance condition: {
"comeInGettingBlueSpeed": {
"length": 0,
"openEnd": 1,
"minExtraRunSpeed": "$3.2",
"maxExtraRunSpeed": "$3.F"
}
}Requires: {
"notable": "Cross Room Jump Boomerang To Top"
}
"h_blueJump"
"canInsaneJump"
"canCrossRoomJumpIntoWater"
"canMomentumConservingTurnaround"
"h_trickyToCarryFlashSuit" |
|
Use Screw Attack to break the bomb block by entering from a non-water room with a last-frame spin jump, and make it to the platform below the top door. Longer runway lengths can also work, up to 17 tiles, but will make the trick somewhat more precise. Use angle to break spin, and do a momentum conserving turnaround either on the same frame or one frame later; this first turnaround should be done early enough that the turnaround is complete by the time Samus clears the two-tile passage in the middle of the room. Do a second momentum conserving turnaround somewhat late, and by switching from holding forward to holding backward one frame later (a perfect 'boomerang'). The optimal amount of extra run speed is between $3.2 and $3.5, by using 13 tiles of runway or about a half tile more or less; this gives a 7-frame window for the first turnaround, and typically a 4-frame window for the second turnaround if the first turnaround is done early enough. Extra run speeds between $3.6 and $3.F can also work, but with shorter windows. A perfect boomerang is always required for the second turnaround, regardless of where in the window it is done. It is recommended to buffer the spin break, by holding angle (up or down), jump, and forward through the transition, then switching from forward to backward, with at most 1 frame of neutral in between, while still holding jump and angle. Entrance condition: {
"comeInJumping": {
"speedBooster": "yes",
"minTiles": 12.4375
}
}Requires: {
"notable": "Cross Room Jump Boomerang To Top"
}
"canInsaneJump"
"canCrossRoomJumpIntoWater"
"ScrewAttack"
"canMomentumConservingTurnaround"
"h_trickyToCarryFlashSuit"Dev note: This does not have collision oscillation. |
|
Avoid the Baby Metroid with no items at all. Jump over it many times in order to clear a path through the seaweed. With a counter clockwise setup, stand as close to the transition as possible while allowing the Baby to circle Samus. Then jump towards the transition and touch it with a walljump check. A clockwise setup is more difficult to clear the seaweed, but can jump directly into the transition. Requires: {
"notable": "Baby Skip With Nothing"
}
{
"obstaclesNotCleared": [
"A"
]
}
"canDash"
"canBabyMetroidAvoid"
"canInsaneJump"
"h_trickyToCarryFlashSuit"Dev note: FIXME: Add a Baby Skip with a flash suit. Note, however, it will only pair with rooms that have an entrance condition where Samus is sparking. In order to have it be properly implemented, all horizontal doors will need to have a shinespark entrance condition added. |
|
Avoid the Baby Metroid by jumping over it many times in order to clear a path through the seaweed. Requires: {
"notable": "Baby Skip Without Wave or Speed"
}
{
"obstaclesNotCleared": [
"A"
]
}
"canDash"
"canMidAirMorph"
"HiJump"
"canTrickyJump"
"canBabyMetroidAvoid"
"h_trickyToCarryFlashSuit" |
|

Jump over the Baby Metroid to avoid getting grabbed. Use Wave plus a Wide Beam to clear much of the seaweed with each shot. The classic counter clockwise skip ends with a mid air morph into the transition. Requires: {
"obstaclesNotCleared": [
"A"
]
}
"Wave"
{
"or": [
"Spazer",
"Plasma"
]
}
"canMidAirMorph"
"HiJump"
"canSpeedyJump"
"canTrickyJump"
"canBabyMetroidAvoid"
"h_trickyToCarryFlashSuit"Dev note: A wide beam is used to avoid picking off stray seaweeds since that is a skill used in waveless skip. |
From: 1
Left Door
To: 4
Top of Shaft Without Acid Triggered
Freeze the Pirates and use them as platforms to climb the room. Sometimes the Pirates may decide to climb the wrong way; patience may be required to wait for them to come back. If enough energy is available, it can be easier to use i-frames to jump up through a Pirate and freeze it from above, compared to jumping around it. Requires: "canBePatient"
"canTrickyUseFrozenEnemies"
"canTrickyDodgeEnemies"
{
"or": [
"Wave",
"Spazer",
{
"ammo": {
"type": "Missile",
"count": 8
}
},
"canBeVeryPatient"
]
}
{
"or": [
{
"and": [
{
"noBlueSuit": {}
},
{
"enemyDamage": {
"enemy": "Tourian Space Pirate (all)",
"type": "contact",
"hits": 4
}
}
]
},
"canInsaneJump"
]
}
"h_trickyToCarryFlashSuit"Dev note: Plasma is hard to use effectively as it's easy to accidentally kill the Pirates with it. |