canUnmorphBombBoost (Expert+)


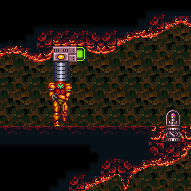
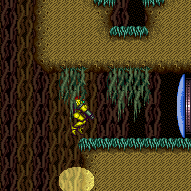
A tech that involves mid-air morphing to place a bomb or Power Bomb, then mid-air unmorphing to briefly hover above the bomb, in order to use the bomb blast to go just a bit higher than max jump height.
Dependencies: canResetFallSpeed
Strats ()
From: 5
Bottom Junction (Right of Boyons)
To: 3
Item


Requires: {
"useFlashSuit": {}
}
{
"shinespark": {
"frames": 9,
"excessFrames": 7
}
}
{
"or": [
"canConsecutiveWallJump",
"SpaceJump",
{
"and": [
"canLongIBJ",
"canUnmorphBombBoost",
"canBePatient"
]
}
]
} |
|
Jump and Morph very quickly to place a bomb to boost Samus to the right. The bomb should be as far right as possible, and just above door height. Requires: "h_bombThings"
{
"or": [
"canBeLucky",
"Bombs",
{
"ammo": {
"type": "PowerBomb",
"count": 4
}
}
]
}
{
"tech": "canUnmorphBombBoost"
}
"canResetFallSpeed"
"can4HighMidAirMorph"Collects items: 3 Dev note: canBeLucky added for difficulty placement. |
From: 1
Bottom Left Door
To: 3
Hidden Ceiling Item

Reveal the item and then setup to jump into an IBJ. As Samus starts falling, unmorph to extend Samus' hitbox high enough to reach the item after bouncing on the bomb. Requires: "canCrouchJump"
"canMidAirMorph"
{
"tech": "canJumpIntoIBJ"
}
"canUnmorphBombBoost"Dev note: It is a JumpIntoIBJ that bounces on a single bomb or Power Bomb. |
From: 10
Right Etecoon Shaft - Bottom Left Door
To: 14
Right Etecoon Shaft - Wall Jump Checkpoint
Spring ball jump then bounce on a Power Bomb in order to be able to midair spark. It is easiest to wait to turn around until after the bomb boost. With a blue suit, this requires using dash after shinecharging to be able to boost on the Power Bomb. Requires: {
"or": [
{
"useFlashSuit": {}
},
{
"and": [
"canInsaneJump",
{
"blueSuitShinecharge": {}
}
]
}
]
}
"canDash"
"canSpringBallJumpMidAir"
"canUnmorphBombBoost"
{
"shinespark": {
"frames": 18,
"excessFrames": 13
}
} |
|


Requires: {
"useFlashSuit": {}
}
{
"or": [
"canConsecutiveWallJump",
"SpaceJump",
{
"and": [
"canLongIBJ",
"canBePatient",
"canUnmorphBombBoost"
]
}
]
}
{
"shinespark": {
"frames": 9,
"excessFrames": 7
}
}Dev note: There is no point in using a blue suit to spark or sparking at the bottom if Samus can wall jump. |
|
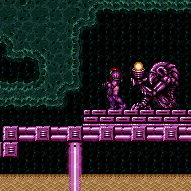
Unmorph after exiting the morph tunnel and get to the other side of the room. Killing the Dessgeegas can be done with no beam upgrades; Samus can jump over them while shooting the last few hits or retreat to the left. It is possible to kill a Sova on the door and pause abuse to grab its Energy drop on G-mode exit. Samus will likely need to wait at the door for about a minute for the global Sova gets there. Entrance condition: {
"comeInWithGMode": {
"mode": "any",
"morphed": true
}
}Requires: "h_artificialMorphMovement"
{
"or": [
"canTrickyJump",
"h_artificialMorphPowerBomb",
"h_hasBeamUpgrade",
{
"enemyKill": {
"enemies": [
[
"Sm. Dessgeega",
"Sm. Dessgeega"
]
],
"explicitWeapons": [
"Missile",
"Super",
"ScrewAttack"
]
}
},
{
"enemyDamage": {
"enemy": "Sm. Dessgeega",
"type": "contact",
"hits": 1
}
}
]
}
{
"or": [
"HiJump",
"SpaceJump",
"canSpringBallJumpMidAir",
"canIBJ",
"canTrickyDashJump",
{
"and": [
"canTrickyUseFrozenEnemies",
"canWallJump"
]
},
{
"and": [
{
"canShineCharge": {
"usedTiles": 43,
"openEnd": 0
}
},
{
"shinespark": {
"frames": 9,
"excessFrames": 5
}
}
]
},
{
"and": [
"canInsaneWallJump",
"canWallJumpInstantMorph",
"canUnmorphBombBoost",
"canDownGrab"
]
}
]
}
{
"or": [
{
"and": [
"h_heatedGModePauseAbuse",
"canBePatient"
]
},
"h_heatedGModeOpenDifferentDoor"
]
}Dev note: FIXME: Methods that require a Sova damage boost could be added |
From: 5
Bottom Right Junction
To: 2
Right Door
Use a fully delayed walljump to gain enough horizontal distance to place a bomb past the lip of the overhang. Unmorph to hover in the air above the bomb while it explodes. Ride the explosion into a down-grab to reach the ledge. Requires: "h_heatProof"
"canInsaneWallJump"
"canWallJumpInstantMorph"
"canUnmorphBombBoost"
"canDownGrab"
{
"heatFrames": 215
}Dev note: FIXME: this should probably have extra Power Bomb lenience. |
From: 5
Bottom Floating Platform Junction
To: 4
Top Floating Platform Junction
Bring up the Gamets to the platform above, in order to delay farming them. If not enough big energy drops spawn, go back down, farm up, and try again. Requires: "canFarmWhileShooting"
"canBePatient"
{
"or": [
"canWallJump",
{
"and": [
"HiJump",
"canCameraManip",
"canInsaneJump"
]
},
"SpaceJump",
"h_crouchJumpDownGrab",
"canTrickySpringBallJump",
{
"and": [
"h_useMorphBombs",
{
"tech": "canUnmorphBombBoost"
}
]
}
]
}
{
"heatFrames": 35
} |
From: 5
Bottom Floating Platform Junction
To: 4
Top Floating Platform Junction
Requires: "canUnmorphBombBoost"
{
"heatFrames": 160
} |
From: 2
Right Door
To: 1
Left Door

Entrance condition: {
"comeInWithGMode": {
"mode": "indirect",
"morphed": false
}
}Requires: {
"or": [
"SpaceJump",
{
"and": [
"HiJump",
"canSpeedyJump",
"canWallJump"
]
},
{
"and": [
"HiJump",
"canSpringBallJumpMidAir",
{
"or": [
{
"noBlueSuit": {}
},
{
"and": [
"Gravity",
{
"lavaFrames": 25
}
]
}
]
}
]
},
{
"and": [
{
"notable": "Spring Ball Bomb Boost"
},
{
"noBlueSuit": {}
},
"canSpringBallJumpMidAir",
"canUnmorphBombBoost",
"h_crouchJumpDownGrab",
{
"or": [
"canInsaneJump",
"h_additionalBomb"
]
}
]
},
{
"and": [
{
"or": [
{
"canShineCharge": {
"usedTiles": 15,
"openEnd": 2
}
},
"h_storedSpark"
]
},
"canShinechargeMovementComplex",
{
"or": [
{
"shinespark": {
"frames": 12,
"excessFrames": 2
}
},
{
"and": [
"h_speedJump",
{
"shinespark": {
"frames": 9,
"excessFrames": 3
}
}
]
}
]
}
]
},
{
"and": [
{
"notable": "Ceiling Mockball Spring Fling"
},
"h_speedJump",
"canInsaneJump",
"canMomentumConservingMorph",
"canSpringFling"
]
}
]
}
"h_heatedGModeOpenDifferentDoor" |
From: 2
Right Door
To: 2
Right Door


Touch the item as little as possible in order to prevent PLMs from being overloaded, so the platforms below remain solid. Entrance condition: {
"comeInWithGMode": {
"mode": "direct",
"morphed": false
}
}Requires: "canRemoteAcquire"
{
"or": [
"SpaceJump",
{
"and": [
"HiJump",
"canSpeedyJump",
"canWallJump"
]
},
{
"and": [
"HiJump",
"canSpringBallJumpMidAir",
{
"or": [
{
"noBlueSuit": {}
},
{
"and": [
"Gravity",
{
"lavaFrames": 25
}
]
}
]
}
]
},
{
"and": [
{
"notable": "Spring Ball Bomb Boost"
},
{
"noBlueSuit": {}
},
"canSpringBallJumpMidAir",
"canUnmorphBombBoost",
"h_crouchJumpDownGrab",
"canInsaneJump"
]
},
{
"and": [
{
"or": [
{
"canShineCharge": {
"usedTiles": 15,
"openEnd": 2
}
},
"h_storedSpark"
]
},
"canShinechargeMovementComplex",
{
"or": [
{
"shinespark": {
"frames": 12,
"excessFrames": 2
}
},
{
"and": [
"h_speedJump",
{
"shinespark": {
"frames": 9,
"excessFrames": 3
}
}
]
}
]
}
]
},
{
"and": [
{
"notable": "Ceiling Mockball Spring Fling"
},
"h_speedJump",
"canInsaneJump",
"canMomentumConservingMorph",
"canSpringFling"
]
}
]
}
"h_heatedDirectGModeLeaveSameDoor"Collects items: 3 Dev note: There is no leniency option for using an extra Power Bomb, because it will contribute to PLM overload. (2 PBs is technically barely possible) |
|
Entrance condition: {
"comeInWithGMode": {
"mode": "indirect",
"morphed": false
}
}Requires: "h_heatedGMode"
{
"or": [
"SpaceJump",
{
"and": [
"HiJump",
"canSpeedyJump",
"canWallJump"
]
},
{
"and": [
"HiJump",
"canSpringBallJumpMidAir",
{
"or": [
{
"noBlueSuit": {}
},
{
"and": [
"Gravity",
{
"lavaFrames": 25
}
]
}
]
}
]
},
{
"and": [
{
"notable": "Spring Ball Bomb Boost"
},
{
"noBlueSuit": {}
},
"canSpringBallJumpMidAir",
"canUnmorphBombBoost",
"h_crouchJumpDownGrab",
{
"or": [
"canInsaneJump",
"h_additionalBomb"
]
}
]
},
{
"and": [
{
"or": [
{
"canShineCharge": {
"usedTiles": 15,
"openEnd": 2
}
},
"h_storedSpark"
]
},
"canShinechargeMovementComplex",
{
"or": [
{
"shinespark": {
"frames": 12,
"excessFrames": 2
}
},
{
"and": [
"h_speedJump",
{
"shinespark": {
"frames": 9,
"excessFrames": 3
}
}
]
}
]
}
]
},
{
"and": [
{
"notable": "Ceiling Mockball Spring Fling"
},
"h_speedJump",
"canInsaneJump",
"canMomentumConservingMorph",
"canSpringFling"
]
}
]
}
{
"heatFrames": 90
}Clears obstacles: A Dev note: Goes to 3 because opening the gate mostly only makes sense when going back to the right for a longer runway or obtaining the item. FIXME: Variants with shinesparking or Geruta damage boost can be added. (Energy from immobile, CF, or energy free sparks) |
|
Entrance condition: {
"comeInWithGMode": {
"mode": "any",
"morphed": false
}
}Requires: "h_heatedGMode"
{
"or": [
"SpaceJump",
{
"and": [
"HiJump",
"canSpeedyJump",
"canWallJump"
]
},
{
"and": [
"HiJump",
"canSpringBallJumpMidAir",
{
"or": [
"canDash",
{
"and": [
{
"haveBlueSuit": {}
},
"Gravity"
]
}
]
}
]
},
{
"and": [
"canDash",
{
"notable": "Spring Ball Bomb Boost"
},
"canSpringBallJumpMidAir",
"canUnmorphBombBoost",
"h_crouchJumpDownGrab",
{
"or": [
"canInsaneJump",
"h_additionalBomb"
]
}
]
},
{
"and": [
{
"canShineCharge": {
"usedTiles": 15,
"openEnd": 2
}
},
"canShinechargeMovementComplex",
{
"or": [
{
"shinespark": {
"frames": 12,
"excessFrames": 2
}
},
{
"and": [
"h_speedJump",
{
"shinespark": {
"frames": 9,
"excessFrames": 3
}
}
]
}
]
}
]
},
{
"and": [
{
"notable": "Ceiling Mockball Spring Fling"
},
"h_speedJump",
"canInsaneJump",
"canMomentumConservingMorph",
"canSpringFling"
]
}
]
}
{
"heatFrames": 0
}Dev note: FIXME: Variants with Geruta damage boost can be added. (Energy from immobile or CF) |
|
Uses a bomb boost at the end of a mid-air SpringBall jump. Also requires a crouch jump and down-grab to complete the maneuver. Requires: "canDash"
{
"notable": "Spring Ball Bomb Boost"
}
"canSpringBallJumpMidAir"
"canUnmorphBombBoost"
"h_crouchJumpDownGrab"
{
"heatFrames": 800
}
{
"or": [
"canInsaneJump",
{
"and": [
{
"heatFrames": 250
},
"h_additionalBomb"
]
}
]
} |
From: 5
Small Platforms Junction
To: 1
Left Door
Use an unmorph bomb boost at the end of a mid-air SpringBall jump. Also requires a crouch-jump and down-grab to complete the maneuver. A spring fling can help add some lenience to the bomb placement and unmorph timing; it requires pausing early, before jumping, in order to be able to initiate another pause immediately before placing a Power Bomb. Requires: {
"notable": "Spring Ball Unmorph Bomb Boost"
}
"canSpringBallJumpMidAir"
"canUnmorphBombBoost"
"h_crouchJumpDownGrab" |
|
Cross the room with Bombs and minimal damage. Some acid damage is expected, but any mistakes greatly increases the time spent in acid. Entrance condition: {
"comeInRunning": {
"speedBooster": "any",
"minTiles": 1
}
}Requires: {
"notable": "Bombs"
}
"h_useMorphBombs"
"canWallJumpInstantMorph"
"canInsaneJump"
"canResetFallSpeed"
"canUnmorphBombBoost"
"canSuitlessLavaDive"
{
"heatFrames": 1320
}
{
"acidFrames": 128
}Unlocks doors: {"types":["missiles","super"],"requires":[]}
{"types":["powerbomb"],"requires":[{"heatFrames":50},{"acidFrames":50}]} |
|
Cross the room with Bombs and minimal damage. Some acid damage is expected, but any mistakes greatly increases the time spent in acid. Entrance condition: {
"comeInRunning": {
"speedBooster": "any",
"minTiles": 3
}
}Requires: {
"notable": "Bombs"
}
"canWallJumpInstantMorph"
"canInsaneJump"
"canResetFallSpeed"
"canUnmorphBombBoost"
"canHBJ"
"canSuitlessLavaDive"
{
"heatFrames": 1320
}
{
"acidFrames": 128
}Unlocks doors: {"types":["missiles","super"],"requires":[]}
{"types":["powerbomb"],"requires":[{"heatFrames":50},{"acidFrames":50}]} |
|


If Phantoon is killed, hold right while wall jumping, jump just before the spikes and after them. Don't release jump while passing the spikes to prevent taking a hit. Requires: {
"or": [
{
"obstaclesCleared": [
"A"
]
},
"h_usePowerBomb"
]
}
{
"useFlashSuit": {}
}
{
"shinespark": {
"frames": 5,
"excessFrames": 3
}
}
{
"or": [
"canConsecutiveWallJump",
"SpaceJump",
{
"and": [
"canLongIBJ",
"canUnmorphBombBoost"
]
}
]
}Clears obstacles: A |
From: 2
Right Door
To: 4
Top Right Ledge Junction
Use the bomb boost as Samus is going through the doorway, then spring ball after breaking the water, then IBJ or use an unmorph bomb boost. Entrance condition: {
"comeInWithBombBoost": {}
}Requires: "canSpringBallBombJump"
"canCrossRoomJumpIntoWater"
"canInsaneJump"
{
"or": [
"canJumpIntoIBJ",
"canUnmorphBombBoost"
]
}Dev note: This strat requires a minimum of 2 bombs or Power Bombs. This strat requires fairly high precision in order to jump out of the water, particularly if using a Power Bomb and down grab. It is also not particularly useful, as a normal Spring Ball jump is easier and can be done with a single tile runway. It seems like the only real uses of this strat would then be to prevent a pause (maintain a blue suit without speedbooster), or a cross room artificial morph with no doorcap in the previous room (cross room + g-mode strats haven't been added to logic yet). |
From: 7
Below Morph Tunnel Junction
To: 5
Morph Tunnel Junction
Spring Ball bounce on top of the crumble blocks. Land on a well-timed Power Bomb to boost up into the tunnel. There is a 4-frame window to land on the Power Bomb, only the first frame will boost Samus high enough. Requires: "Gravity"
"h_useSpringBall"
{
"tech": "canJumpIntoIBJ"
}
"canTrickyJump"
"h_usePowerBomb"
{
"or": [
{
"tech": "canUnmorphBombBoost"
},
"h_additionalBomb"
]
} |
|
Requires: "canUnmorphBombBoost" "canDownGrab" |
From: 3
Middle Right Door
To: 4
Top Right Door
Requires: "canTrickyUseFrozenEnemies" "HiJump" "canSpringBallJumpMidAir" "canUnmorphBombBoost" "h_complexToCarryFlashSuit" |
|
It may be necessary to turn off Gravity Suit in order have more time to jump and morph underwater. Requires: "Gravity"
{
"or": [
"canIBJ",
"canSpringBallBombJump",
"canSpringBallJumpMidAir",
{
"and": [
"canMidAirMorph",
{
"or": [
"canWallJump",
"HiJump",
"canGravityJump",
"SpaceJump",
{
"and": [
"canUnmorphBombBoost",
"canTrickyJump"
]
}
]
}
]
},
{
"and": [
"h_useSpringBall",
{
"or": [
"HiJump",
"canGravityJump"
]
}
]
}
]
} |