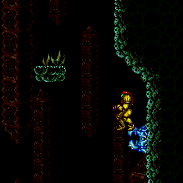
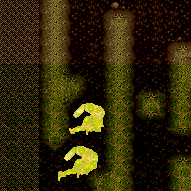
canSunkenTileWideWallClimb (Hard)
Using two walls spaced 1 tile apart to climb upward underwater. Samus will not be able to move away from the wall while wall jumping and so will be able to continuously gain height with fast jump presses.
Dependencies: canConsecutiveWallJump, canSuitlessMaridia
Strats ()
From: 1
Top Door
To: 2
Left Door
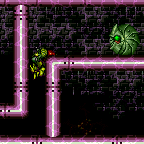
Take the first left above the waterline. Place bombs in the single tile nook on the left to overload PLMs. Evade the Sciser and either go through the rest of the Morph maze or an overloaded crumble block, and navigate to the bomb block shortcut tunnel. Crystal Flash under the bomb block; Samus can then no longer use X-Ray. Jump through, and drop through to the other side. Avoid the Scisers, and manipulate one to the far right. Shinecharge and windup near the Sciser to interrupt. Entrance condition: {
"comeInWithGMode": {
"mode": "direct",
"morphed": true
},
"comesThroughToilet": "no"
}Requires: "h_artificialMorphBombs"
"h_artificialMorphMovement"
"h_artificialMorphCrystalFlash"
{
"or": [
{
"and": [
{
"or": [
"HiJump",
"canSunkenTileWideWallClimb"
]
},
"canWaterShineCharge"
]
},
"Gravity"
]
}
{
"canShineCharge": {
"usedTiles": 20,
"openEnd": 0
}
}
{
"autoReserveTrigger": {}
}
"canRModeSparkInterrupt"
{
"partialRefill": {
"type": "Energy",
"limit": 65
}
}Dev note: Also possible to escape with Space Jump + frame perfect downgrab |
|
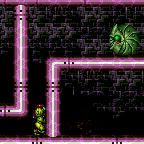
Overload PLMs by placing Bombs at the far right, against the bottom of the crumble block, at the right of the low underwater ceiling. With artificial morph, safely bomb the fast crab by waiting just left of where it falls. Lure a crab to the top door or wait for the global crab to come back around, which can take up to 2.5 minutes. Shoot a Super to knock the crab off, then quickly freeze it at the right height and use it to clip up past the door shell. Knock it off while it is on the sloped tiles near the top door, not on the door itself, otherwise it will never be in the correct height. Because of the shot firing rate, it can help to crouch and shoot the Super to the side to give it a bit more time to knock the crab off. Entrance condition: {
"comeInWithGMode": {
"mode": "any",
"morphed": true
}
}Requires: "canBeVeryPatient"
"canTrickyGMode"
"h_artificialMorphBombs"
{
"or": [
{
"and": [
"Morph",
{
"or": [
"HiJump",
"canSpringBallJumpMidAir",
"canSunkenTileWideWallClimb"
]
}
]
},
{
"and": [
"Gravity",
"h_artificialMorphIBJ"
]
},
{
"and": [
"h_artificialMorphSpringBall",
"HiJump"
]
}
]
}
"h_preciseIceClip"
{
"ammo": {
"type": "Super",
"count": 1
}
}Exit condition: {
"leaveWithGMode": {
"morphed": false
}
}Bypasses door shell: true |
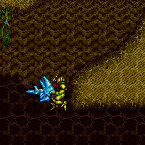
From: 3
Middle Right Door
To: 9
Junction Below Speed Blocks

Use the slow global crab and Skulteras to get up. The last part, just below the item is the hardest. Get onto the global crab on the right wall. Either freeze the Skultera close to the wall and wall jump between them. or, a harder option without wall jumps is to refreeze the crab again, higher on the wall, while being careful not to clip through it. Freeze the Skultera at the left, near its minimum and jump to it, then the solid ground. Note that the fish will be pushed down slightly over time because of the sloped tiles, but it will be at its minimum by the time the global crab has arrived. Requires: {
"notable": "Crab Climb with Only Ice"
}
"canSuitlessMaridia"
"canCrazyCrabClimb"
"canBeVeryPatient"
{
"or": [
"canSunkenTileWideWallClimb",
"canTrickyJump"
]
} |
|


Wait a long time for the slow global crab. Freeze it when it comes around on the left, one tile above the bottom slope. Freeze the fish, get on the frozen crab, and wall jump between the fish and the wall and the wall. Wall jump towards the fish to gain height faster. Requires: {
"notable": "Crab Climb with Only Ice"
}
"canSuitlessMaridia"
"canCrazyCrabClimb"
"canSunkenTileWideWallClimb"
"canBeVeryPatient"
"canMidairWiggle"
{
"obstaclesNotCleared": [
"A"
]
}Dev note: The global crab will fall if the speed blocks are broken, although it is a relatively useless consideration for this link. |
|
Freeze a crab multiple times to climb the upper section. It may be easier to climb the left shaft by knocking the crab off the wall, or by bringing up a crab from the lower area. Requires: {
"notable": "Ice Only Crab Climb"
}
"h_navigateUnderwater"
"canTrickyUseFrozenEnemies"
"canCarefulJump"
{
"or": [
"canSunkenTileWideWallClimb",
"canTrickyJump",
"canTrickySpringBallJump",
{
"ammo": {
"type": "Super",
"count": 1
}
}
]
} |
|

Similar to naked Watering Hole escape. Freeze a crab under the gap above, do a stationary spinjump facing right, then walljump until you're up. Another frozen crab can help complete the way up. Requires: {
"notable": "Ice Only Crab Climb"
}
"canSunkenTileWideWallClimb"
"canUseFrozenEnemies"
"canStationarySpinJump" |
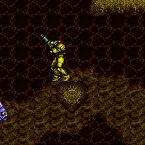
From: 1
Top Sand Entrance
To: 4
Right Item
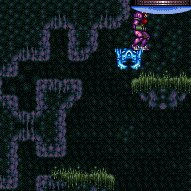
Shinespark vertically from the sand to get onto the first ledge. Carefully get to the second ledge and return to lure the Boulder, or shoot it with a Super. Entrance condition: {
"comeInShinecharged": {},
"comesThroughToilet": "any"
}Requires: {
"shineChargeFrames": 140
}
"canSuitlessMaridia"
"Morph"
"canPlayInSand"
"canShinechargeMovementComplex"
{
"shinespark": {
"frames": 12
}
}
{
"or": [
"HiJump",
"canSpringBallJumpMidAir",
"canSunkenTileWideWallClimb"
]
}
{
"or": [
"canTrickyJump",
{
"ammo": {
"type": "Super",
"count": 1
}
},
{
"enemyDamage": {
"enemy": "Boulder",
"type": "contact",
"hits": 1
}
}
]
} |
|
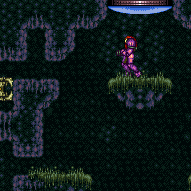
Shinespark to the first ledge. To use a flash suit in deep sand: vertically - quickly roll the directional inputs from forward to up and jump. diagonally, with minimal horizontal speed - while holding angle, quickly tap forward then press and hold jump. Requires: "Morph"
"canPlayInSand"
{
"useFlashSuit": {}
}
{
"shinespark": {
"frames": 17,
"excessFrames": 4
}
}
{
"or": [
"HiJump",
"canSpringBallJumpMidAir",
"canSunkenTileWideWallClimb"
]
} |
From: 1
Top Sand Entrance
To: 5
Junction Below Left Item

Entrance condition: {
"comeInWithGMode": {
"mode": "any",
"morphed": false
},
"comesThroughToilet": "any"
}Requires: "h_maybeCrystalFlash"
{
"blueSuitShinecharge": {}
}
{
"or": [
{
"shinespark": {
"frames": 13,
"excessFrames": 3
}
},
{
"and": [
"canSunkenTileWideWallClimb",
{
"shinespark": {
"frames": 13,
"excessFrames": 9
}
}
]
}
]
} |
|

Jump out of the sand before Shinesparking. Entrance condition: {
"comeInShinecharged": {},
"comesThroughToilet": "any"
}Requires: {
"shineChargeFrames": 105
}
"canPlayInSand"
"canSunkenTileWideWallClimb"
"canShinechargeMovementComplex"
{
"shinespark": {
"frames": 11
}
} |
|

Requires: "canSuitlessMaridia"
"HiJump"
{
"or": [
"canPlayInSand",
{
"and": [
"canPrepareForNextRoom",
"h_useSpringBall"
]
}
]
}
{
"or": [
"canDownGrab",
"canSunkenTileWideWallClimb",
"canSpringBallJumpMidAir"
]
} |
|
While against the left wall, crouch jump and spark diagonally at the top of the jump. The easiest way to crouch jump without using the flash suit is to hold shot. Requires: "h_underwaterCrouchJump"
{
"useFlashSuit": {}
}
{
"or": [
{
"shinespark": {
"frames": 13,
"excessFrames": 3
}
},
{
"and": [
"canSunkenTileWideWallClimb",
{
"shinespark": {
"frames": 13,
"excessFrames": 9
}
}
]
}
]
} |
|
Touch the Oum to get it to start moving then retreat down to the left; they will roll into the wall and then move to the right, clearing the path forward. Alternatively, it is possible to clip through them by jumping and quickly aiming down before hitting the ceiling, while the Oum is rolling into Samus. It is much easier to clip through them with Gravity disabled, otherwise it requires a very quick down input after jumping. Requires: "Morph"
"canSuitlessMaridia"
{
"or": [
"canSpringBallJumpMidAir",
"HiJump",
"canSunkenTileWideWallClimb"
]
} |
From: 5
G-Mode Morph, In Morph Tunnel
To: 3
Bottom Right Door

Roll through the camera scroll blocks in the morph tunnel to overload PLMs then the speed blocks can be walked through. Note that the Oums are still active and dangerous off screen. The right shot block wall can be broken with a wide beam, otherwise it is important to crouch to shoot the bottom block. Requires: "canGMode"
"canOffScreenMovement"
{
"or": [
"Gravity",
"HiJump",
"canSunkenTileWideWallClimb"
]
} |
|
Use the Skultera to get onto the top right platform. There are two distinct ways to get up using the top Skultera. 1. Freeze it at the bottom of its path to the left. Crouch jump and down grab to get onto it. The positioning is very precise. 2. Freeze it about a half-tile from the right wall and very quickly stationary spin jump and quickly walljump mash to get up before it thaws. This may be easier by jumping away from the wall, towards the fish, to gain height faster. Requires: {
"notable": "Frozen Fish Climb"
}
"canSuitlessMaridia"
"canTrickyUseFrozenEnemies"
{
"or": [
{
"and": [
"canTrickyJump",
"h_underwaterCrouchJumpDownGrab"
]
},
{
"and": [
"canStationarySpinJump",
"canSunkenTileWideWallClimb"
]
}
]
} |
|

A stationary spinjump can fit into the 1 tile wide hole where Samus can slowly infinite walljump to freedom. Requires: "canSuitlessMaridia" "canStationarySpinJump" "canSunkenTileWideWallClimb" |
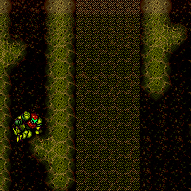
From: 1
West Leg Left Door
To: 5
Junction Above Grapple Block

Use a flatley turnaround jump to get Samus inside the gap during a spinjump. Samus must jump from the left side platform. Requires: {
"notable": "Suitless Flatley Turnaround Climb"
}
"Grapple"
"canSuitlessMaridia"
"HiJump"
"canFlatleyJump"
"canSunkenTileWideWallClimb" |
|

Perform a canSunkenTileWideWallClimb to get to the water surface, then use space jump at the water surface. Then either use space jump when the water is low then a spring ball jump to escape, or space jump when the water is high into a tight midair morph. Requires: {
"notable": "Escape - Suitless, Bootless, Space Jump"
}
"canSpringBallJumpMidAir"
"canSunkenTileWideWallClimb"
"canTrickyJump"
"can4HighMidAirMorph"
"canSpaceJumpWaterBounce"Dev note: The canSpringBallJumpMidAir is for the bottom left part of the room. The can4HighMidAirMorph is to represent the quick morph during the escape. |
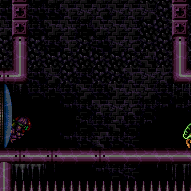
From: 2
Item
To: 1
Left Door


Wall jump until Samus is just below the water line and then morph and place a Bomb Use the brief moment during the Bomb explosion that knocks Samus upwards to setup a Springball jump to jump out of the water. Requires: "canSunkenTileWideWallClimb" "canUnderwaterBombIntoSpringBallJump" "canWallJumpInstantMorph" Dev note: FIXME: This can also be done with a double Spring Ball jump (using Bombs) without wall jumping, but it seems more difficult than Statues Room and West Cac Alley, because of the water tide. |
|
Fall into the sand and roll all the way to the left, through an invisible tile and under the door platform. Shoot upwards to break part of the platform, then perform a crouch jump and down grab or a tile-wide wall jump climb to escape. Requires: "canSuitlessMaridia"
"Morph"
{
"or": [
"canSunkenTileWideWallClimb",
"h_underwaterCrouchJumpDownGrab"
]
}
{
"noBlueSuit": {}
} |