canUnderwaterBombIntoSpringBallJump (Extreme+)
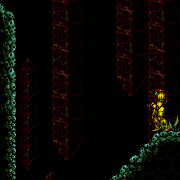
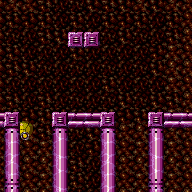
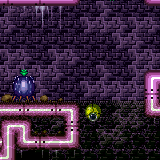
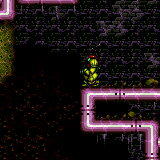
Use the tiny amount of height gain from an underwater Bomb explosion to re-equip Spring Ball and perform a mid-air Spring Ball jump. This is most often used to get a second Spring Ball jump when underwater without Hi-Jump. Bombs are required since Power Bombs will prevent pausing. This is typically used after a midair Spring Ball jump, but it can also be used from the ground in G-mode with artificial morph, or rarely at the top of a cross room jump into water.
The standard variant: crouch, pause, then delay the jump as long as possible. Perform a very quick mid-air morph; it can help to keep holding down when crouching, to buffer the aim-down input. For the second jump, pause should ideally be pressed slightly before the mid-air jump. When exiting that pause, with Spring Ball unequipped, lay a Bomb slightly after regaining control. This Bomb should not be buffered, but should be placed between 5 frames and about 10 frames after regaining control, while the screen is still fairly dark. The end of the frame window for when to place the Bomb is more or less lenient, depending on the precision of the earlier steps of the Spring Ball jump. After laying the bomb, there is a 3-frame window for when to perform the final Spring Ball jump relative to when the Bomb was laid. Usually this will be done as a pause-buffered Spring Ball jump, in which case pause must be pressed between 23 and 25 frames after laying the Bomb. The artificial morph variant: This is very similar, except Samus will only have a total of two jumps instead of three, so it is a bit simpler to perform. Pause and jump just before the fade out finishes. Turn off Spring Ball and place a Bomb about 8 pixels below the maximum possible height (there is an 11 frame window for placing the Bomb). Pause again between 23-25 frames after placing the bomb and equip Spring Ball, then buffer the jump in the unpause.
Dependencies: canIBJ, canTrickySpringBallJump, canSuitlessMaridia, canTrivialMidAirMorph, canMidAirMorph, canJumpIntoIBJ, canDoubleSpringBallJumpMidAir, canDisableEquipment, canSpringBallJumpMidAir
Strats ()
|
From a crouch jump, perform a double Spring Ball jump, using a precisely timed bomb boost to propel Samus upward just long enough to get the second mid-air Spring Ball jump. Requires: "f_TourianOpen" "canUnderwaterBombIntoSpringBallJump" |
|
Perform a double Spring Ball jump using a precisely timed bomb boost to propel Samus upward just long enough to get the mid-air Spring Ball jump. This needs to be done multiple times to cross the room with no other items; using Spring Flings to cross from peak to peak can reduce the required number of bomb into Spring Ball jumps to two or three. Entrance condition: {
"comeInWithGMode": {
"mode": "any",
"morphed": true
}
}Requires: "h_artificialMorphUnderwaterBombIntoSpringBallJump"
{
"or": [
"h_artificialMorphSpringFling",
"canBeVeryPatient"
]
} |
From: 2
Right Door
To: 3
Junction (Left side Pit)
Perform a double Spring Ball jump using a precisely timed bomb boost to propel Samus upward just long enough to get the mid-air Spring Ball jump. This needs to be done multiple times to cross the room with no other items; using Spring Flings to cross from peak to peak can reduce the required number of bomb into Spring Ball jumps to just one or two. To Crystal Flash interrupt, it is required to avoid double hitting the Skultera with the Power Bomb, and to position the Crystal Flash so that the Skultera can hit Samus from above so it avoids the light orb. To do this, use the bottom-left Skultera, and move it off-camera at the far left end of its cycle. Go to the far right end of it's cycle and on the Crystal Flash on the sloped tile just below where it ends. Once the Skultera gets hit by the Power Bomb explosion, it will start moving, even while off-camera. Entrance condition: {
"comeInWithGMode": {
"mode": "direct",
"morphed": true
}
}Requires: "h_artificialMorphUnderwaterBombIntoSpringBallJump"
{
"or": [
"h_artificialMorphSpringFling",
"canBeVeryPatient"
]
}
"h_artificialMorphComplexRModeCrystalFlashInterrupt"
"canCameraManip"
{
"ammo": {
"type": "Missile",
"count": 10
}
}
{
"ammo": {
"type": "Super",
"count": 10
}
}
{
"ammo": {
"type": "PowerBomb",
"count": 5
}
}
{
"or": [
"h_partialEnemyDamageReduction",
{
"resourceAtMost": [
{
"type": "RegularEnergy",
"count": 19
}
]
},
{
"and": [
{
"resourceCapacity": [
{
"type": "RegularEnergy",
"count": 199
}
]
},
{
"resourceCapacity": [
{
"type": "ReserveEnergy",
"count": 199
}
]
}
]
}
]
}Dev note: Methods with more flexible movement items will instead be done at node 4, after which, they can be used to get here. FIXME: Add variants that can farm enough Energy to choot damage boost without enemy damage reduction or tanks. |
From: 3
Top Right Door
To: 3
Top Right Door
Perform a double Spring Ball jump using a precisely timed bomb boost to propel Samus upward just long enough to get the mid-air Spring Ball jump. Unmorph at the top of the jump to touch the transition blocks. Entrance condition: {
"comeInWithGMode": {
"mode": "direct",
"morphed": true
},
"comesThroughToilet": "any"
}Requires: "h_artificialMorphUnderwaterBombIntoSpringBallJump" Exit condition: {
"leaveWithGMode": {
"morphed": false
}
} |
From: 2
Bottom Right Door
To: 1
Left Doorway
Perform a double Spring Ball jump using a precisely timed bomb boost to propel Samus upward just long enough to get the mid-air Spring Ball jump. Entrance condition: {
"comeInWithGMode": {
"mode": "any",
"morphed": true
}
}Requires: {
"or": [
"f_MaridiaTubeBroken",
{
"obstaclesCleared": [
"f_MaridiaTubeBroken"
]
}
]
}
"h_artificialMorphUnderwaterBombIntoSpringBallJump"Exit condition: {
"leaveWithGMode": {
"morphed": true
}
} |
From: 2
Bottom Right Door
To: 3
Top Right Doorway
Perform a double Spring Ball jump using a precisely timed bomb boost to propel Samus upward just long enough to get the mid-air Spring Ball jump. This must be done twice to climb the room. Entrance condition: {
"comeInWithGMode": {
"mode": "any",
"morphed": true
}
}Requires: {
"or": [
"f_MaridiaTubeBroken",
{
"obstaclesCleared": [
"f_MaridiaTubeBroken"
]
}
]
}
"h_artificialMorphUnderwaterBombIntoSpringBallJump"Exit condition: {
"leaveWithGMode": {
"morphed": true
}
} |
From: 2
Bottom Left Door
To: 7
Lower Hills Junction
From a crouch jump, perform a double Spring Ball jump, using a precisely timed bomb boost to propel Samus upward just long enough to get the second mid-air Spring Ball jump. Requires: "canUnderwaterBombIntoSpringBallJump" |
From: 3
Bottom Right Door
To: 7
Lower Hills Junction
From a crouch jump, perform a double Spring Ball jump, using a precisely timed bomb boost to propel Samus upward just long enough to get the second mid-air Spring Ball jump. Requires: "canUnderwaterBombIntoSpringBallJump" |
From: 8
Higher Hill Junction
To: 11
Upper Left Ledge Junction
From a crouch jump, perform a double Spring Ball jump, using a precisely timed bomb boost to propel Samus upward just long enough to get the second mid-air Spring Ball jump. In order to cover the horizontal distance, it is necessary to do at least one of the following: 1) begin with a stationary lateral mid-air morph, 2) move slightly left before the bomb boost to get boosted horizontally, 3) perform a spring fling by pausing near the peak of the second mid-air Spring Ball jump to unequip Spring Ball. Requires: "canUnderwaterBombIntoSpringBallJump"
{
"or": [
"canStationaryLateralMidAirMorph",
"canSpringFling",
"canBombHorizontally"
]
} |
From: 1
Left Door
To: 5
Item
Use Bombs to kill the Puyos. Then gain speed by rolling from left to right. Press pause and use Spring Ball to jump before the down slope, on the last possible frame before the pause hits. Unequip Spring Ball, hold right until Samus is about halfway to the morph tunnel, lay a Bomb, then pause again, and perform a mid-air Spring Ball jump into the tunnel. The frame-perfect jump allows Samus to maintain much higher horizontal speed, without which it is not possible to reach the morph tunnel. Entrance condition: {
"comeInWithGMode": {
"mode": "any",
"morphed": true
}
}Requires: "h_artificialMorphUnderwaterBombIntoSpringBallJump" "canTrickyGMode" Collects items: 5 |
From: 1
Left Door
To: 5
Item
Use Bombs to kill the Puyos. Then gain speed by rolling from left to right. Press pause and use Spring Ball to jump before the down slope, on the last possible frame before the pause hits. Unequip Spring Ball, hold right until Samus is about halfway to the morph tunnel, lay a Bomb, then pause again, and perform a mid-air Spring Ball jump into the tunnel. The frame-perfect jump allows Samus to maintain much higher horizontal speed, without which it is not possible to reach the morph tunnel. Entrance condition: {
"comeInWithGMode": {
"mode": "direct",
"morphed": true
}
}Requires: "h_artificialMorphUnderwaterBombIntoSpringBallJump" "canTrickyGMode" Clears obstacles: B Collects items: 5 |
From: 4
Right Door
To: 5
Item
Use Bombs to kill the Zoas. Then gain speed by rolling from right to left. Press pause and use Spring Ball to jump near the start of the down slope. Unequip Spring Ball, hold left until Samus is about halfway to the morph tunnel, lay a Bomb, then pause again, and perform a mid-air Spring Ball jump into the tunnel. Entrance condition: {
"comeInWithGMode": {
"mode": "any",
"morphed": true
}
}Requires: "h_artificialMorphUnderwaterBombIntoSpringBallJump" "canInsaneJump" Collects items: 5 |
From: 4
Right Door
To: 5
Item
Use Bombs to kill the Zoas. Then gain speed by rolling from right to left. Press pause and use Spring Ball to jump near the start of the down slope. Unequip Spring Ball, hold left until Samus is about halfway to the morph tunnel, lay a Bomb, then pause again, and perform a mid-air Spring Ball jump into the tunnel. Entrance condition: {
"comeInWithGMode": {
"mode": "direct",
"morphed": true
}
}Requires: "h_artificialMorphUnderwaterBombIntoSpringBallJump" "canInsaneJump" Clears obstacles: B Collects items: 5 |
From: 1
Left Door
To: 4
Platform Below Top Door
Use a platform below the door in the other room to jump through the door while aiming down, carrying upward momentum into this room. Hold down and back through the transition, to perform a momentum-conserving turnaround past the corner. Perform a mid-air Spring Ball jump, timing a pause to hit soon after the mid-air jump. Unequip Spring Ball, lay a Bomb about half a tile below the peak of the jump. Press pause at the peak of the jump, to reequip Spring Ball immediately after Samus is boosted by the bomb. Buffer a jump out of the unpause, to get a second Spring Ball jump and make it up. Entrance condition: {
"comeInWithSidePlatform": {
"platforms": [
{
"minHeight": 1,
"maxHeight": 1,
"minTiles": 7.4375,
"speedBooster": "yes",
"obstructions": [
[
1,
0
]
],
"requires": [],
"note": [
"This applies to Warehouse Entrance."
]
}
]
}
}Requires: "canCrossRoomJumpIntoWater" "canTrickyDashJump" "canMomentumConservingTurnaround" "canUnderwaterBombIntoSpringBallJump" |
From: 3
Bottom Right Door
To: 3
Bottom Right Door
Climb up and lure and Oum to the right pit, then time the Crystal Flash so that the Oum can hit Samus. This is fairly lenient, but one method is to Crystal Flash near the shot block pillar while the Oum is to the right of Samus moving right. With some testing, it seemed like the Oum was more likely to hit Samus when it is moving to the left. This is possible with a Bomb into Spring Ball jump using a precisely timed bomb boost to propel Samus upward just long enough to get the mid-air Spring Ball jump. Entrance condition: {
"comeInWithGMode": {
"mode": "direct",
"morphed": true
}
}Requires: {
"or": [
{
"and": [
"HiJump",
"h_artificialMorphSpringBall"
]
},
{
"and": [
"Gravity",
"h_artificialMorphIBJ"
]
},
"h_artificialMorphUnderwaterBombIntoSpringBallJump"
]
}
"h_artificialMorphRModeCrystalFlashInterrupt"
{
"ammo": {
"type": "Missile",
"count": 10
}
}
{
"or": [
{
"tech": "canComplexRModeCrystalFlashInterrupt"
},
{
"ammo": {
"type": "Super",
"count": 10
}
}
]
}
{
"or": [
"h_fullEnemyDamageReduction",
{
"and": [
"h_partialEnemyDamageReduction",
{
"resourceAtMost": [
{
"type": "RegularEnergy",
"count": 49
}
]
}
]
},
{
"and": [
{
"resourceCapacity": [
{
"type": "RegularEnergy",
"count": 199
}
]
},
{
"resourceCapacity": [
{
"type": "ReserveEnergy",
"count": 199
}
]
}
]
}
]
}Dev note: It is possible to enter with G-mode for the left side of the room and do this off-camera, but it is unreasonably difficult. |
From: 3
Bottom Right Door
To: 5
G-Mode Morph, In Morph Tunnel
Perform a double Spring Ball jump using a precisely timed bomb boost to propel Samus upward just long enough to get the mid-air Spring Ball jump. This needs to be done twice to cross the room and get through the morph tunnel. Entrance condition: {
"comeInWithGMode": {
"mode": "any",
"morphed": true
}
}Requires: "h_artificialMorphUnderwaterBombIntoSpringBallJump" |
From: 2
Bottom Left Door
To: 1
Top Left Door
Only requires a runway of approximately 0.5 tiles in the adjacent room. SpringBall jump once on the way up, then use a Bomb to buy just enough time for a second SpringBall jump. Entrance condition: {
"comeInJumping": {
"speedBooster": "no",
"minTiles": 1
}
}Requires: "canCrossRoomJumpIntoWater" "canUnderwaterBombIntoSpringBallJump" "canDoubleSpringBallJumpMidAir" |
From: 1
Bottom Left Door
To: 2
Top Right Door
From a crouch jump, perform a double Spring Ball jump, using a precisely timed bomb boost to propel Samus upward just long enough to get the second mid-air Spring Ball jump. Requires: "canDoubleSpringBallJumpMidAir" "canUnderwaterBombIntoSpringBallJump" |
|
Perform a double Spring Ball jump using a precisely timed bomb boost to propel Samus upward just long enough to get the mid-air Spring Ball jump. Unmorph at the top of the jump to touch the transition blocks. Entrance condition: {
"comeInWithGMode": {
"mode": "direct",
"morphed": true
},
"comesThroughToilet": "any"
}Requires: "h_artificialMorphUnderwaterBombIntoSpringBallJump" Exit condition: {
"leaveWithGMode": {
"morphed": false
}
} |
From: 2
Item
To: 1
Left Door
Wall jump until Samus is just below the water line and then morph and place a Bomb Use the brief moment during the Bomb explosion that knocks Samus upwards to setup a Springball jump to jump out of the water. Requires: "canSunkenTileWideWallClimb" "canUnderwaterBombIntoSpringBallJump" "canWallJumpInstantMorph" Dev note: FIXME: This can also be done with a double Spring Ball jump (using Bombs) without wall jumping, but it seems more difficult than Statues Room and West Cac Alley, because of the water tide. |
