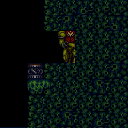
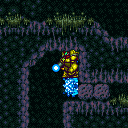
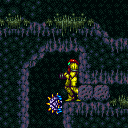
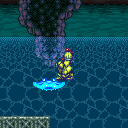
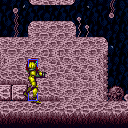
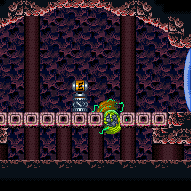
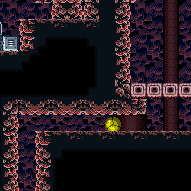
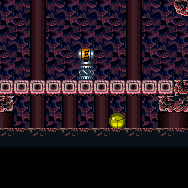
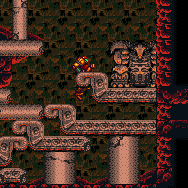
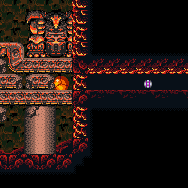
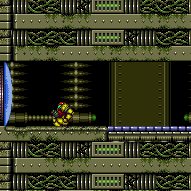
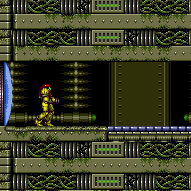
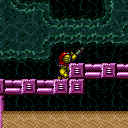
canXRayStandUp (Hard)
Force Samus to stand up from a crouching position by canceling the use of the X-Ray Scope while turning around.
Strats ()
|
Requires: "HiJump"
{
"or": [
{
"obstaclesCleared": [
"A"
]
},
"h_bombThings",
{
"and": [
"h_avoidScrewStuck",
{
"or": [
"canTunnelCrawl",
"canSpeedyJump",
{
"and": [
"canXRayStandUp",
"Morph"
]
}
]
}
]
}
]
}Clears obstacles: A Dev note: HiJump alone can only reach the lower bomb block. |
From: 5
Alcatraz Door
To: 8
Central Junction
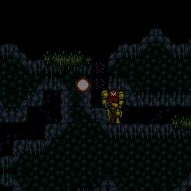
Wait for a global Geemer to make the long trip along the map, or shoot a Super 20 to 30 seconds after entering the room to knock it off the ceiling and save a lot of time. Freeze it just after it starts climbing the bomb blocks. Spin-jump above it, which will put Samus into a forced crouch where X-Ray cannot be used. Use Grapple to kill a second Geemer, restoring the ability to use X-Ray. Use X-Ray to stand up, then jump up through the ceiling. Requires: {
"notable": "Alcatraz Escape with Grapple X-Ray Ceiling Clip"
}
"h_ZebesIsAwake"
"canBePatient"
{
"or": [
"canBeVeryPatient",
{
"ammo": {
"type": "Super",
"count": 1
}
}
]
}
"h_preciseIceClip"
"canUseGrapple"
"canXRayStandUp"Dev note: Morph could also be used instead of Grapple, but with Morph there is an easier strat that goes up through the tunnel to the left. |
From: 3
Junction (Left side Pit)
To: 2
Right Door
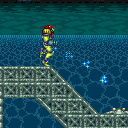
Freeze the right-most ramp Choot in a way where Samus can climb on top of it and use Space Jump to escape the water. Use a turn around to avoid knockback when making contact with the Choot to better time the use of Ice. Freeze the Choot as far to the right (on its lowest swoop), but this method is less precise than the alternatives. If Samus is inside the Choot when it is frozen, she can continuing moving freely. Jump on top either in spinjump or in Morph Ball Use XRay to standup, clipping partially into the above slope. Use a flately jump to fall out of the wall while still keeping enough height to spacejump on top of the water and escape. Requires: {
"notable": "Space Jump Water Escape with Ice and X-Ray"
}
{
"enemyDamage": {
"enemy": "Choot",
"type": "contact",
"hits": 1
}
}
"canTrickyUseFrozenEnemies"
"Morph"
"canXRayStandUp"
"canSpaceJumpWaterBounce"
"canFlatleyJump"
"canKago" |
From: 6
Middle Right Door (By Zeb Farm)
To: 12
Top Junction
It is possible to bomb boost from the door runway over the Zeb and onto the first step. Without doing this, the Zeb will likely touch Samus, as it will start moving if Samus goes down a single step. At the left end of the tunnel, roll against the lower left corner, exit G-mode, and X-Ray standup, shoot the block, partial floor clip, then jump and down grab to the ledge. Wiggle to escape. A failed jump will result in a forced crouch, which is likely a soft lock. Entrance condition: {
"comeInWithGMode": {
"mode": "any",
"morphed": true
}
}Requires: "canComplexGMode"
"canXRayStandUp"
"canPartialFloorClip"
"canDownGrab"
{
"or": [
"h_artificialMorphSpringBall",
{
"and": [
"h_artificialMorphBombHorizontally",
"h_additionalBomb"
]
}
]
} |
From: 6
Middle Right Door (By Zeb Farm)
To: 12
Top Junction
Farm up on the Zeb, then lead one, frozen, to the upper portion. Freeze it again get shinecharge, then wait for it to unfreeze (or turn off Ice to force) and get hit by it to interrupt. Requires: {
"obstaclesCleared": [
"R-Mode"
]
}
{
"or": [
"h_bombThings",
"h_useSpringBall",
{
"and": [
"Morph",
"canXRayStandUp",
"canPartialFloorClip",
"canDownGrab"
]
}
]
}
"canTrickyUseFrozenEnemies"
{
"refill": [
"Energy"
]
}
"h_shinechargeMaxRunway"
{
"autoReserveTrigger": {}
}
"canRModeSparkInterrupt"Resets obstacles: R-Mode |
|
Requires: "Morph" "canXRayStandUp" "canPartialFloorClip" "canDownGrab" |
From: 3
Middle Visible Item
To: 4
Right Hidden Item
Use Screw Attack to break the first block, roll in against the second block, X-Ray standup, then spin jump right to break the second block. Requires: "Morph" "canXRayStandUp" "ScrewAttack" Collects items: 3 |
From: 9
Left Side - Bottom Door
To: 13
Central Junction
Farm the Zeb pipe just above the 'main' left door. Shinecharge on the ledge below, then hop back up and get interrupted by a Zeb. Entrance condition: {
"comeInWithRMode": {}
}Requires: "Morph"
"h_usePowerBomb"
{
"or": [
"canTwoTileSqueeze",
{
"and": [
"Morph",
"canXRayStandUp"
]
}
]
}
"canPartialFloorClip"
"canCeilingClip"
{
"refill": [
"Energy"
]
}
{
"canShineCharge": {
"usedTiles": 25,
"openEnd": 1
}
}
{
"autoReserveTrigger": {
"maxReserveEnergy": 95
}
}
"canRModeSparkInterrupt"Clears obstacles: E |
|
Partially floor clip into the left side of the bomb block above the charge beam location. Then jump to clip through the above tile. Requires: {
"obstaclesNotCleared": [
"D"
]
}
{
"or": [
"canTwoTileSqueeze",
{
"and": [
"Morph",
"canXRayStandUp"
]
}
]
}
"canPartialFloorClip"
"canCeilingClip" |
From: 1
Top Left Door
To: 2
Middle Left Door (Behind Power Bomb Blocks)
Get grabbed by the Beetom and carry it to the 4-tile high gap one screen above the bottom-left door. Position Samus one pixel to the right of being against the wall. Jump and freeze the Beetom mid-air in as high a position as possible, such that Samus can get on top of it, morph, and barely have enough space to unmorph. Use X-Ray to stand up, turn around just before the Beetom thaws, then freeze it as high as possible. A Flatley jump may help with freezing the Beetom in a high enough position but is not required. Use a Ripper to get knocked back onto the frozen Beetom. This will clip Samus into the wall, making it possible to X-Ray climb. X-Ray climb up 2 screens. Requires: {
"notable": "Frozen Beetom X-Ray Climb with Morph"
}
{
"noBlueSuit": {}
}
{
"enemyDamage": {
"enemy": "Beetom",
"type": "contact",
"hits": 1
}
}
"Morph"
"canXRayStandUp"
{
"enemyDamage": {
"enemy": "Ripper",
"type": "contact",
"hits": 1
}
}
"canWallIceClip"
"canLongXRayClimb" |
From: 5
Junction Below Right Item
To: 3
Top Right Item
Roll under the right-most single tile ceiling, X-Ray standup, then turnaround spin jump to break the Bomb block. Requires: "Morph" "canXRayStandUp" "ScrewAttack" |
From: 5
Junction Below Right Item
To: 3
Top Right Item
Requires: "Morph" "canXRayStandUp" "canPartialFloorClip" "canCeilingClip" |
From: 6
Inside Morph Tunnel (Right of Left Bomb Blocks)
To: 7
Middle Right Door With Bottom Kihunter Cleared
Requires: {
"haveBlueSuit": {}
}
"Morph"
{
"heatFrames": 260
}
{
"or": [
"h_useSpringBall",
{
"and": [
"h_bombThings",
{
"heatFrames": 60
}
]
},
{
"and": [
"canXRayStandUp",
"canPartialFloorClip",
"canCeilingClip",
{
"heatFrames": 50
}
]
}
]
} |
From: 6
Inside Morph Tunnel (Right of Left Bomb Blocks)
To: 7
Middle Right Door With Bottom Kihunter Cleared
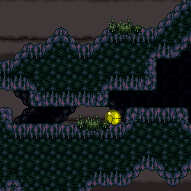
Use X-Ray to stand up. Jump to clip into the floor. Then another jump to clip through the ceiling block. Watch for the Kihunter to move right before jumping up to get a safe predictable swoop. Requires: "h_usePowerBomb"
"canXRayStandUp"
"canPartialFloorClip"
"canCeilingClip"
"canDash"
{
"or": [
"ScrewAttack",
{
"and": [
"canTrickyJump",
{
"heatFrames": 90
}
]
},
"canInsaneJump",
{
"enemyDamage": {
"enemy": "Kihunter (red)",
"type": "contact",
"hits": 1
}
}
]
}
{
"heatFrames": 380
}Dev note: This requires Power Bombs because it saves neither energy nor ammo using Bombs. It's slower than Spring Ball mainly because X-Ray scope won't activate during the Power Bomb explosion. |
|
The shot blocks must be broken using Bombs or Power Bombs because Beams will instantly despawn. Use X-Ray or a Crystal Flash to stand up, followed by a Partial Floor clip to jump through the Crumble blocks. Requires: {
"obstaclesCleared": [
"A",
"B"
]
}
"h_bombThings"
"canOffScreenMovement"
{
"or": [
{
"and": [
"canXRayStandUp",
"canPartialFloorClip",
"h_additionalBomb"
]
},
{
"and": [
{
"or": [
{
"and": [
{
"canShineCharge": {
"usedTiles": 35,
"openEnd": 1
}
},
"h_ShinesparksCostEnergy",
{
"shinespark": {
"frames": 0,
"excessFrames": 0
}
}
]
},
"f_DefeatedPhantoon"
]
},
"h_CrystalFlash"
]
}
]
}Dev note: FIXME: This can be done with a blue suit as well, but it still requires one Power Bomb, and falling in the spikes is extra deadly. |
|
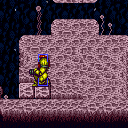
Perform an X-Ray Standup next to the pedestal item. To collect the item, either face away from it and spin jump into it, or while facing the item, jump, aim down and press forward. Requires: {
"notable": "Right Item Turn Around Collection"
}
"canXRayStandUp" |
|
Roll all the way right before using Xray to stand up, aligned with the right side tiles. Partially clip into the floor to enable the next jump. Use an R-Jump to morph into the tunnel. The second morph ball sized hole can be passed by simply jumping out of the floor clip position with diagonal held. Requires: "canXRayStandUp" "canPartialFloorClip" "canRJump" |
