canGateGlitch (Hard)
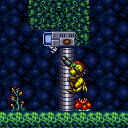
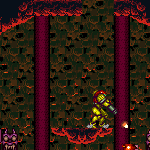
The ability to open a left-facing blue or green gate from the right, using Missiles or Supers. The generally applicable method to do this is to stand some distance away from the gate, hold angle-up, jump, press and hold forward, then frame-perfectly fire a shot just before Samus would bonk the gate.
It is recommended to stand 2 pixels away from the gate. From this position, the shot will always clip through the gate as long as shot is pressed 2 frames after forward. This remains true regardless of whether Samus is in air or underwater physics. The height at which the shot is fired does not matter, as long as it is high enough to not pass under the switch on the other side of the gate. The shot can be fired either before or after Samus bonks the ceiling, but there is an advantage to waiting until after bonking, because 1) this puts the shot closer to the center of the frame window that works, and 2) it allows the player to focus on the critical timing, which is between the forward and shot press, without being distracted by the jump.
Dev note: Standing 0 or 1 pixels from the gate never works. Standing 3 pixels away, some subpixels fail to work at all. Standing 4 pixels away, the required timing between forward and shot depends on subpixels. Standing 5 pixels away, some subpixels fail to work at all. A number of tries can't be applied as leniency within this tech's requirements, because the resource cost is not included in the tech (it varies with circumstances). There is a helper for each combination of circumstances, and it's recommended to apply a number of tries as leniency on all such helpers that use this tech.
Strats ()
|
Requires: "h_blueGateGlitch" Clears obstacles: B |
|


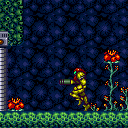
Open the gate (Wave Beam or gate glitch) and clear the Small Sidehoppers for a runway. Use respawning Geegas for energy. Entrance condition: {
"comeInWithRMode": {}
}Requires: {
"or": [
"Wave",
"h_blueGateGlitch",
{
"and": [
{
"notable": "Grapple Gate Glitch"
},
"canPreciseGrapple",
"h_speedJump",
"canTrickyJump"
]
}
]
}
{
"refill": [
"Energy"
]
}
{
"canShineCharge": {
"usedTiles": 30,
"openEnd": 0
}
}
{
"autoReserveTrigger": {}
}
"canRModeSparkInterrupt"Clears obstacles: B |
|
Charge a spark along the bottom of the room and use it to spark through the right side door. Requires opening the door and shutter first. Requires: "canShinechargeMovementComplex"
"HiJump"
{
"or": [
"SpaceJump",
"Grapple"
]
}
{
"or": [
{
"obstaclesCleared": [
"A"
]
},
"Wave",
{
"and": [
"h_heatedBlueGateGlitch",
{
"heatFrames": 60
}
]
}
]
}
{
"or": [
{
"and": [
"canTrickyDashJump",
"canWallJump"
]
},
"SpaceJump"
]
}
{
"canShineCharge": {
"usedTiles": 28,
"gentleUpTiles": 3,
"gentleDownTiles": 3,
"openEnd": 0
}
}
{
"heatFrames": 780
}
{
"shinespark": {
"frames": 57,
"excessFrames": 0
}
}Exit condition: {
"leaveWithSpark": {}
}Dev note: A hero shot variation of this strat might be possible, starting from a node to the left; if nothing else it could be done with a shortcharge on the 12-tile platform to the left. |
|
Requires: {
"heatFrames": 250
}
"h_heatedBlueGateGlitch"
{
"or": [
"canDash",
{
"heatFrames": 85
}
]
}Clears obstacles: A |
|


Requires: "Morph"
{
"heatFrames": 260
}
"h_heatedBlueGateGlitch"Clears obstacles: A |
From: 5
Middle Junction (Ledge Right of Morph Tunnel)
To: 2
Middle Left Door
Requires: "Morph"
{
"heatFrames": 150
}
"h_heatedBlueGateGlitch"
{
"or": [
"canDash",
{
"heatFrames": 65
}
]
}Clears obstacles: A |
From: 5
Middle Junction (Ledge Right of Morph Tunnel)
To: 2
Middle Left Door
Requires: "canDash"
"Morph"
{
"heatFrames": 150
}
"h_heatedBlueGateGlitch"Exit condition: {
"leaveWithRunway": {
"length": 11,
"openEnd": 0,
"gentleDownTiles": 4
}
}Unlocks doors: {"types":["missiles"],"requires":[{"heatFrames":90}]}
{"types":["super"],"requires":[]}
{"types":["powerbomb"],"requires":[{"heatFrames":110}]} |
From: 5
Bottom Floating Platform Junction
To: 5
Bottom Floating Platform Junction


Requires: {
"heatFrames": 135
}
"h_heatedBlueGateGlitch"Clears obstacles: A |
From: 5
Bottom Floating Platform Junction
To: 5
Bottom Floating Platform Junction

Farm before, during, and after the gate glitch in order to open the gate without wasting ammo or Energy. Requires: {
"notable": "Gate Glitch With Farming"
}
{
"heatFrames": 300
}
"h_gateGlitch"
{
"or": [
{
"ammo": {
"type": "Missile",
"count": 1
}
},
{
"ammo": {
"type": "Super",
"count": 1
}
}
]
}
{
"or": [
"h_heatResistant",
"canTrickyJump",
{
"resourceCapacity": [
{
"type": "RegularEnergy",
"count": 199
}
]
}
]
}Clears obstacles: A Dev note: There is still some leniency built in, so that perfect execution is not required, but Samus ends without losing resources. Without leniency, this can be done with about 235 heatFrames. |
|


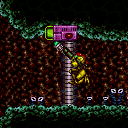
Build up 34 tiles worth of run speed and jump into the door on the last frame. Hold angle up through the transition but also aim down to duck below the ceiling until Samus is past it. Fire the Super Missile frame perfectly to open the gate. Entrance condition: {
"comeInRunning": {
"speedBooster": "yes",
"minTiles": 34
}
}Requires: {
"notable": "High Speed Gate Glitch"
}
"h_speedJump"
"h_heatedGreenGateGlitch"
{
"ammo": {
"type": "Super",
"count": 1
}
}
"canInsaneJump"
{
"noFlashSuit": {}
}Clears obstacles: A Dev note: 1 extra tile is added so that you can jump into the door, simplifying the inputs a bit. |
|
Requires: {
"or": [
"h_greenGateGlitch",
{
"obstaclesCleared": [
"A"
]
}
]
}Clears obstacles: A |
|
Requires: {
"or": [
"h_heatedGreenGateGlitch",
{
"obstaclesCleared": [
"A"
]
}
]
}
{
"enemyDamage": {
"enemy": "Ripper 2 (red)",
"type": "contact",
"hits": 2
}
}Exit condition: {
"leaveWithRunway": {
"length": 29,
"openEnd": 1
}
} |
|

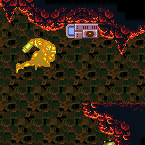
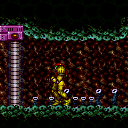
You can Crystal Flash first, then open the gate, dodge the bottom most rippers that come across the platform, and pick up their Super drops when they hit the light orb. Alternatively, open the gate first, farm the bottom two Rippers with Power Bombs or Screw Attack to get your Supers back and Crystal Flash afterwards. The runway is now clear to shinecharge. Alternatively, you can farm with Screw Attack or Power Bombs. Kill the bottom two Rippers first, then the one bouncing between platforms. Keep the third Ripper from the top alive for the best interrupt. With high reserve energy, take the interrupt close to the right door and with the Ripper moving right - it will not come back in time to hit you again. Once you have blue suit, you cannot kill any more Rippers with Screw Attack, but you are still invulnerable to contact hits. Entrance condition: {
"comeInWithRMode": {}
}Requires: "h_heatedGreenGateGlitch"
{
"or": [
{
"and": [
{
"or": [
{
"resourceAvailable": [
{
"type": "Super",
"count": 10
}
]
},
{
"and": [
{
"resourceAvailable": [
{
"type": "Super",
"count": 8
}
]
},
{
"resourceAvailable": [
{
"type": "Energy",
"count": 51
}
]
},
{
"or": [
"ScrewAttack",
{
"enemyKill": {
"enemies": [
[
"Ripper 2 (red)",
"Ripper 2 (red)"
]
],
"explicitWeapons": [
"PowerBomb"
]
}
}
]
},
{
"heatFrames": 600
},
{
"partialRefill": {
"type": "Super",
"limit": 10
}
}
]
}
]
},
"h_heatedCrystalFlashForReserveEnergy"
]
},
{
"and": [
{
"or": [
"ScrewAttack",
{
"enemyKill": {
"enemies": [
[
"Ripper 2 (red)",
"Ripper 2 (red)"
],
[
"Ripper 2 (red)"
]
],
"explicitWeapons": [
"PowerBomb"
]
}
}
]
},
"h_heatProof",
"h_RModeCanRefillReserves",
{
"resourceMissingAtMost": [
{
"type": "Super",
"count": 2
}
]
},
{
"partialRefill": {
"type": "ReserveEnergy",
"limit": 60
}
}
]
},
{
"and": [
{
"or": [
"ScrewAttack",
{
"enemyKill": {
"enemies": [
[
"Ripper 2 (red)"
]
],
"explicitWeapons": [
"PowerBomb"
]
}
}
]
},
"h_heatProof",
"h_RModeCanRefillReserves",
{
"resourceMissingAtMost": [
{
"type": "Super",
"count": 4
}
]
},
{
"partialRefill": {
"type": "ReserveEnergy",
"limit": 20
}
}
]
}
]
}
{
"canShineCharge": {
"usedTiles": 28,
"openEnd": 0
}
}
{
"autoReserveTrigger": {}
}
{
"or": [
{
"and": [
"h_heatProof",
{
"autoReserveTrigger": {}
},
"canRModeSparkInterrupt"
]
},
"h_heatTriggerRModeSparkInterrupt"
]
}Clears obstacles: A, B |
From: 2
Right Door
To: 3
Junction Left of Green Gate


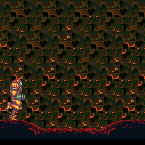
Enter the room with full Supers. Wait for a couple of seconds and lay a Power Bomb by the gate. Wait for the Rippers to be destroyed and for their drops to spawn. Then perform the gate glitch and collect the drops, which should all be big energy. Requires: {
"notable": "First-Try Gate Glitch"
}
{
"resourceMissingAtMost": [
{
"type": "Super",
"count": 0
}
]
}
{
"tech": "canGateGlitch"
}
{
"noFlashSuit": {}
}
"h_usePowerBomb"
{
"heatFramesWithEnergyDrops": {
"frames": 430,
"drops": [
{
"enemy": "Ripper 2 (red)",
"count": 5
}
]
}
}
{
"ammo": {
"type": "Super",
"count": 1
}
}
{
"heatFrames": 40
}Clears obstacles: A, B Dev note: This strat could be adapted to work with more than one try of the gate glitch, but the requirements would be awkward to represent. FIXME: This strat logically ends at the gate but could be refined to end about a screen to the left, if we added a new node there. |
From: 2
Right Door
To: 3
Junction Left of Green Gate


Enter the room with between about 75 and 110 energy. Perform the gate glitch on the first attempt. Then lay a Power Bomb as soon as possible when Samus' energy is below 60. After collecting the first one or two drops, wait a moment before collecting the rest, to ensure that Samus remains in health bomb range until all drops have spawned. Requires: {
"notable": "First-Try Gate Glitch"
}
{
"resourceAtMost": [
{
"type": "Energy",
"count": 110
}
]
}
{
"tech": "canGateGlitch"
}
{
"noFlashSuit": {}
}
"h_usePowerBomb"
{
"heatFramesWithEnergyDrops": {
"frames": 300,
"drops": [
{
"enemy": "Ripper 2 (red)",
"count": 5
}
]
}
}
{
"ammo": {
"type": "Super",
"count": 1
}
}
{
"heatFrames": 20
}Clears obstacles: A, B Dev note: FIXME: This strat logically ends at the gate but could be refined to end about a screen to the left, if we added a new node there. |
|
Requires: {
"or": [
"h_heatedGreenGateGlitch",
{
"obstaclesCleared": [
"A"
]
}
]
}
{
"heatFrames": 50
}
{
"or": [
"canDash",
{
"heatFrames": 15
}
]
}Clears obstacles: A Dev note: FIXME: A strat could be added that runs into the room and shoots directly at the gate, instead of stopping in front of it. |
|


Requires: "Gravity"
{
  "or": [
    "h_greenGateGlitch",
    {
      "obstaclesCleared": [
        "A"
      ]
    }
  ]
}
Clears obstacles: A |
|
Perform the Gate Glitch by moving towards the gate and firing the super on the correct frame for it to pass through and reach the button on the other side. Due to the water physics, many traditional setups for the glitch will not work. Requires: {
"notable": "Suitless Green Gate Glitch"
}
{
"or": [
"h_underwaterGreenGateGlitch",
{
"obstaclesCleared": [
"A"
]
}
]
}Clears obstacles: A |
|

Wait for the one pattern (bottom->right) where Botwoon's head passes through the dividing barrier briefly. The extent Botwoon's head passes through the wall varies ranging from almost no damage window up to enough time for 2 missiles. By jumping there is a doppler effect allowing up to 2 more missiles to hit Botwoon. The fight can be sped up by Gate Glitching through the wall and landing lucky hits throughout the fight. Requires: {
"notable": "Back-Side Super Only Fight"
}
"h_navigateUnderwater"
{
"ammo": {
"type": "Missile",
"count": 30
}
}
{
"or": [
"canBeExtremelyPatient",
{
"and": [
"canBeVeryPatient",
"canBeVeryLucky",
"canGateGlitch",
{
"noFlashSuit": {}
},
{
"ammo": {
"type": "Missile",
"count": 30
}
}
]
}
]
}
{
"or": [
"canInsaneJump",
{
"and": [
"Gravity",
"canTrickyJump"
]
},
{
"enemyDamage": {
"enemy": "Botwoon 1",
"type": "acid",
"hits": 6
}
}
]
}
{
"ammo": {
"type": "Missile",
"count": 10
}
}Clears obstacles: f_DefeatedBotwoon Sets flags: f_DefeatedBotwoon Dev note: It is much easier to miss with missiles, so 10 leniency missiles are added. |