canHBJ (Expert)
A Horizontal Bomb Jump (HBJ) uses three bombs to execute. Place a bomb to get boosted horizontally; place a second bomb immediately as Samus is propelled. Place a third bomb, mid-air, as far horizontally as possible while still being able to return and get propelled by the second and then third bombs.
Dependencies: canBombHorizontally
Dev note: This can be done from a wall jump or from a mid-air morph, eliminating the need for the first bomb, but these are very situational and should be described in a notable strat.
Strats ()
|
Entrance condition: {
"comeInWithGMode": {
"mode": "indirect",
"morphed": true
}
}Requires: "h_artificialMorphHBJ" |
From: 1
Left Door
To: 2
Right Door
Entrance condition: {
"comeInWithGMode": {
"mode": "direct",
"morphed": true
}
}Requires: {
"or": [
"h_artificialMorphCeilingBombJump",
"h_artificialMorphHBJ"
]
}Collects items: 3 |
|
Entrance condition: {
"comeInWithGMode": {
"mode": "any",
"morphed": true
}
}Requires: {
"or": [
"h_artificialMorphCeilingBombJump",
"h_artificialMorphHBJ"
]
}Collects items: 3 |
|
Requires: "canHBJ" Collects items: 3 |
|
Entrance condition: {
"comeInWithGMode": {
"mode": "direct",
"morphed": true
}
}Requires: "canRemoteAcquire" "h_artificialMorphHBJ" Collects items: 3 |
|
Entrance condition: {
"comeInWithGMode": {
"mode": "any",
"morphed": true
}
}Requires: {
"or": [
"h_artificialMorphCeilingBombJump",
"h_artificialMorphHBJ"
]
}Collects items: 3 |
|
Requires: "canHBJ" Collects items: 3 |
|
Requires: "canHBJ"
{
"obstaclesNotCleared": [
"A",
"B",
"C"
]
} |
From: 4
Lower Section - Top Right Door
To: 15
G-Mode Morph Junction (By Left Door)
Entrance condition: {
"comeInWithGMode": {
"mode": "any",
"morphed": true
}
}Requires: {
"or": [
"Morph",
{
"and": [
"Gravity",
"h_artificialMorphIBJ"
]
},
"h_artificialMorphSpringBall",
"h_artificialMorphHBJ",
"h_artificialMorphDiagonalBombJump"
]
} |
From: 4
Lower Section - Top Right Door
To: 17
G-Mode Morph Junction Direct (By Left Door)
Entrance condition: {
"comeInWithGMode": {
"mode": "direct",
"morphed": true
}
}Requires: {
"or": [
"Morph",
{
"and": [
"Gravity",
"h_artificialMorphIBJ"
]
},
"h_artificialMorphSpringBall",
"h_artificialMorphHBJ",
"h_artificialMorphDiagonalBombJump"
]
}Clears obstacles: R-Mode |
From: 5
Lower Section - Bottom Right Door
To: 15
G-Mode Morph Junction (By Left Door)
Entrance condition: {
"comeInWithGMode": {
"mode": "any",
"morphed": true
}
}Requires: {
"or": [
"Morph",
{
"and": [
"Gravity",
"h_artificialMorphIBJ"
]
},
"h_artificialMorphSpringBall",
"h_artificialMorphHBJ",
"h_artificialMorphDiagonalBombJump"
]
} |
From: 5
Lower Section - Bottom Right Door
To: 17
G-Mode Morph Junction Direct (By Left Door)
Entrance condition: {
"comeInWithGMode": {
"mode": "direct",
"morphed": true
}
}Requires: {
"or": [
"Morph",
{
"and": [
"Gravity",
"h_artificialMorphIBJ"
]
},
"h_artificialMorphSpringBall",
"h_artificialMorphHBJ",
"h_artificialMorphDiagonalBombJump"
]
}Clears obstacles: R-Mode |
From: 13
Bottom Junction
To: 5
Lower Section - Bottom Right Door
Use multiple HBJs or extremely precise walljump in bomb boosts to cross the room without dashing. Requires: {
"or": [
"canHBJ",
{
"and": [
"canBeVeryPatient",
"canWallJumpBombBoost",
"h_additionalBomb",
"h_additionalBomb"
]
}
]
}Dev note: canBeVeryPatient added for difficulty placement |
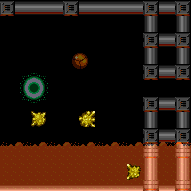
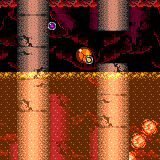
From: 7
Junction (Bottom of Room)
To: 6
Junction (Above Bottom Rippers)
Starting on the right ledge at the bottom of Red Tower, wall jump just below the middle plant, just above the top ripper. Place two bombs out of the wall jump landing on the first bomb and getting boosted by both. While rising, place two more bombs for a second HBJ. Colliding with the side of the ledge after the third bomb can help. Requires: {
"notable": "Midair HBJ"
}
"canWallJumpBombBoost"
"canHBJ" |
|
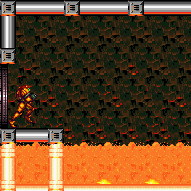
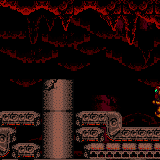
Getting across the lava while artificially morphed requires an HBJ or Spring Fling. For the Spring Fling, jump immediately before the pause triggers. To save Energy, it is possible to kill to the Ripper at the far right, stand over where the drop will spawn and pause abuse to grab its Energy drop on G-mode exit. With a Power Bomb, place on the left edge when the Ripper is moving left, 2/3 of the way to the left edge. It is also possible to kill it with Screw Attack and a precise wall jump. Entrance condition: {
"comeInWithGMode": {
"mode": "any",
"morphed": true
}
}Requires: {
"or": [
{
"and": [
"h_artificialMorphSpringFling",
"canTrickyJump"
]
},
"h_artificialMorphHBJ",
{
"and": [
"Gravity",
"h_artificialMorphIBJ",
"h_artificialMorphBombHorizontally",
{
"lavaFrames": 160
}
]
},
{
"and": [
"Gravity",
"h_artificialMorphSpringBall",
{
"lavaFrames": 40
}
]
}
]
}
{
"or": [
"h_heatedGModeOpenDifferentDoor",
{
"and": [
"h_heatedGModePauseAbuse",
{
"or": [
{
"ammo": {
"type": "Super",
"count": 1
}
},
"h_artificialMorphPowerBomb",
{
"and": [
"ScrewAttack",
{
"or": [
"h_lavaProof",
"SpaceJump",
"canWallJump"
]
}
]
}
]
}
]
}
]
} |
|
Getting across the lava while artificially morphed requires an HBJ or Bomb boosting out and freezing a Boyon below. Entrance condition: {
"comeInWithGMode": {
"mode": "any",
"morphed": true
}
}Requires: {
"or": [
{
"and": [
"h_artificialMorphMovement",
"h_lavaProof"
]
},
{
"and": [
"Morph",
"canTrickyUseFrozenEnemies"
]
},
{
"and": [
"h_artificialMorphIBJ",
"h_artificialMorphBombHorizontally",
"canTrickyUseFrozenEnemies"
]
},
{
"and": [
"canInsaneJump",
{
"or": [
"h_artificialMorphHBJ",
"h_artificialMorphDiagonalBombJump"
]
}
]
}
]
}
"h_heatedGModeOpenDifferentDoor"Dev note: FIXME: It is also possible with a rolling speed bomb boost down back. |
|
Cross the room with Bombs and minimal damage. Some acid damage is expected, but any mistakes greatly increases the time spent in acid. Entrance condition: {
"comeInRunning": {
"speedBooster": "any",
"minTiles": 3
}
}Requires: {
"notable": "Bombs"
}
"canWallJumpInstantMorph"
"canInsaneJump"
"canResetFallSpeed"
"canUnmorphBombBoost"
"canHBJ"
"canSuitlessLavaDive"
{
"heatFrames": 1320
}
{
"acidFrames": 128
}Unlocks doors: {"types":["missiles","super"],"requires":[]}
{"types":["powerbomb"],"requires":[{"heatFrames":50},{"acidFrames":50}]} |
From: 1
Left Door
To: 4
Top Right Ledge Junction
Hug the right wall after killing the first Cacatac in order to avoid its invisible, stationary projectiles. After getting to the small island platform, diagonal IBJ up while avoiding the top Cacatac. Alternatively HBJ to the next platform and Spring Ball from the right edge of this platform into an IBJ above the spikes. Entrance condition: {
"comeInWithGMode": {
"mode": "any",
"morphed": true
}
}Requires: "Gravity"
{
"or": [
"h_artificialMorphDiagonalBombJump",
{
"and": [
"h_artificialMorphHBJ",
"h_artificialMorphJumpIntoIBJ"
]
}
]
} |
|
This requires multiple HBJ to get over spike pits. The first one, by the right door, must be started at the top of an IBJ. Entrance condition: {
"comeInWithGMode": {
"mode": "any",
"morphed": true
}
}Requires: {
"notable": "G-Mode Morph, IBJ, HBJ"
}
"Gravity"
{
"or": [
"h_artificialMorphLongIBJ",
"h_artificialMorphJumpIntoIBJ"
]
}
"h_artificialMorphDiagonalBombJump"
"h_artificialMorphHBJ" |
|
Requires: "Gravity"
{
"or": [
"SpaceJump",
"canHBJ",
{
"and": [
"canDash",
{
"or": [
"canTrickyJump",
"canResetFallSpeed",
{
"enemyDamage": {
"enemy": "Cacatac",
"type": "spike",
"hits": 1
}
}
]
}
]
}
]
}
{
"or": [
"SpaceJump",
"canWallJump",
"HiJump",
"canIBJ",
"canHBJ",
"canSpringBallBombJump",
{
"spikeHits": 1
}
]
} |
From: 6
Junction Right of Morph Tunnel
To: 5
Bottom Middle Junction
Requires: "Gravity"
{
"or": [
"SpaceJump",
"canHBJ",
{
"spikeHits": 1
}
]
} |
|

Bomb Jump between the two floating platforms. Requires: "canDash"
{
"or": [
{
"obstaclesCleared": [
"A"
]
},
{
"and": [
"canCameraManip",
"canMetroidAvoid"
]
}
]
}
{
"or": [
{
"and": [
"canHBJ",
"canResetFallSpeed"
]
},
{
"and": [
{
"obstaclesCleared": [
"A"
]
},
"canDiagonalBombJump"
]
},
"canCeilingBombJump"
]
} |
|
Walljump into a midair Horizontal Bomb Jump from just above the acid to reach the first platform. HBJ from the ground to reach the second platform. Then simply jump to reach the far runway. Requires: "canInsaneWallJump"
"canWallJumpBombBoost"
"canHBJ"
{
"or": [
{
"obstaclesCleared": [
"B"
]
},
{
"and": [
"canBeLucky",
"canCameraManip",
"canMetroidAvoid"
]
}
]
} |
|

Jump to the first platform. Walljump low off the platform into a midair horizontal bomb jump. Finally, either jump into a horizontal bomb boost, or use another horizontal bomb jump to reach the far runway. Unmorph to clear the rinka while falling. Requires: "canInsaneWallJump"
"canWallJumpBombBoost"
"canHBJ"
{
"or": [
{
"obstaclesCleared": [
"A",
"B"
]
},
{
"and": [
"canTrickyDodgeEnemies",
"canCameraManip",
"canMetroidAvoid"
]
}
]
} |