canFastWallJumpClimb (Expert)

Climbing a wall with consecutive wall jumps very quickly, e.g. for setting up a full halfie.
Dependencies: canConsecutiveWallJump
Strats ()
|
Quickly Walljump to conserve health on the shinespark. Requires: "canTrivialUseFrozenEnemies"
"canShinechargeMovementComplex"
"canFastWallJumpClimb"
"h_shinechargeMaxRunway"
{
"or": [
{
"shinespark": {
"frames": 93,
"excessFrames": 6
}
},
{
"and": [
"HiJump",
{
"shinespark": {
"frames": 83,
"excessFrames": 6
}
}
]
}
]
} |
|
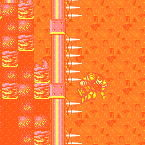
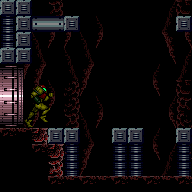
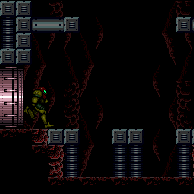
Use the runway to the right of the Boyons to gain a shinecharge. If the rightmost Boyon is cleared, an extra half tile of runway is available. Requires: {
"or": [
{
"canShineCharge": {
"usedTiles": 14,
"openEnd": 0
}
},
{
"and": [
{
"or": [
{
"enemyKill": {
"enemies": [
[
"Boyon"
]
]
}
},
{
"obstaclesCleared": [
"A"
]
}
]
},
{
"canShineCharge": {
"usedTiles": 14,
"openEnd": 1
}
}
]
}
]
}
"canMidairShinespark"
{
"or": [
{
"shinespark": {
"frames": 121,
"excessFrames": 6
}
},
{
"and": [
{
"shinespark": {
"frames": 117,
"excessFrames": 6
}
},
"HiJump"
]
},
{
"and": [
{
"shinespark": {
"frames": 112,
"excessFrames": 6
}
},
"HiJump",
"canSpeedyJump"
]
},
{
"and": [
"canFastWallJumpClimb",
{
"shinespark": {
"frames": 93,
"excessFrames": 6
}
}
]
},
{
"and": [
"HiJump",
"canFastWallJumpClimb",
{
"shinespark": {
"frames": 83,
"excessFrames": 6
}
}
]
}
]
} |
From: 13
Bottom Junction
To: 4
Lower Section - Top Right Door

Spacejump out of the water then use walljumps up to the gravity suit room door. Requires: "canShinechargeMovementTricky"
"canFastWallJumpClimb"
"HiJump"
"Gravity"
"SpaceJump"
"h_shinechargeMaxRunway"
{
"shineChargeFrames": 145
}Exit condition: {
"leaveShinecharged": {}
}Unlocks doors: {"types":["ammo"],"requires":[]} |
From: 13
Bottom Junction
To: 4
Lower Section - Top Right Door


Use walljumps to climb from the ocean floor up to the gravity suit room door. Requires: "canShinechargeMovementTricky"
"canFastWallJumpClimb"
"HiJump"
"Gravity"
"h_shinechargeMaxRunway"
{
"shineChargeFrames": 162
}Exit condition: {
"leaveShinecharged": {}
}Unlocks doors: {"types":["ammo"],"requires":[]} |
From: 2
Top Left Door
To: 2
Top Left Door
Requires: {
"notable": "Leave With Spark (Fast Wall Climb)"
}
{
"obstaclesCleared": [
"A",
"C"
]
}
"HiJump"
{
"canShineCharge": {
"usedTiles": 35,
"openEnd": 1
}
}
"canShinechargeMovementTricky"
"canFastWallJumpClimb"
{
"shinespark": {
"frames": 8,
"excessFrames": 0
}
}Exit condition: {
"leaveWithSpark": {
"position": "top"
}
} |
From: 4
Right Item
To: 2
Top Left Door

By wall jumping fast enough and sparking close to the block, it can be broken even on low energy (29 or less). Requires: {
"notable": "Fast Wall Jump Spark"
}
{
"or": [
"h_usePowerBomb",
{
"obstaclesCleared": [
"C"
]
}
]
}
{
"canShineCharge": {
"usedTiles": 42,
"openEnd": 0
}
}
"canShinechargeMovementComplex"
"canFastWallJumpClimb"
{
"shinespark": {
"frames": 9,
"excessFrames": 9
}
}Clears obstacles: A, B, C |
|
Shinespark to the upper section, then quick run through the bomb blocks to get to the Zeelas and Reos. Farm for reserves or Crystal Flash, then get the shinecharge and use any remaining enemy to interrupt. Te Metarees are still available if you don't go too far right during the setup. Entrance condition: {
"comeInWithRMode": {}
}Requires: {
"or": [
"h_CrystalFlashForReserveEnergy",
"free"
]
}
"h_shinechargeMaxRunway"
{
"or": [
{
"and": [
"HiJump",
"canMidairShinespark",
"canSpeedyJump",
{
"shinespark": {
"frames": 85,
"excessFrames": 3
}
}
]
},
{
"and": [
"canFastWallJumpClimb",
"canMidairShinespark",
{
"or": [
{
"and": [
"HiJump",
{
"shinespark": {
"frames": 67,
"excessFrames": 3
}
}
]
},
{
"shinespark": {
"frames": 73,
"excessFrames": 3
}
}
]
}
]
},
{
"shinespark": {
"frames": 110,
"excessFrames": 3
}
}
]
}
{
"or": [
{
"resourceAvailable": [
{
"type": "ReserveEnergy",
"count": 1
}
]
},
{
"and": [
"h_RModeCanRefillReserves",
{
"resourceMissingAtMost": [
{
"type": "Missile",
"count": 0
}
]
},
{
"partialRefill": {
"type": "ReserveEnergy",
"limit": 20
}
}
]
}
]
}
"h_shinechargeMaxRunway"
{
"autoReserveTrigger": {}
}
"canRModeSparkInterrupt"Clears obstacles: A Dev note: With Disable E-Tanks or Energy-Free Shinesparks, the Reo/Zeela farm remains viable. Without either QoL option, however, the Crystal Flash will be expected (not enough enemies with good drops to guarantee a full e-tank's worth). When using disable E-Tanks the player must be able to disable to 99 *after* the shinespark. |
|
Requires: "HiJump"
"canFastWallJumpClimb"
"canShinechargeMovementComplex"
"h_shinechargeMaxRunway"
{
"shinespark": {
"frames": 67,
"excessFrames": 3
}
} |
|

Quickly wall jump up the right wall and shinespark up to barely get above the speed blocks without any tanks. Requires: {
"notable": "Tankless Bootless Shinespark"
}
"canFastWallJumpClimb"
"canShinechargeMovementComplex"
"h_shinechargeMaxRunway"
{
"shinespark": {
"frames": 73,
"excessFrames": 3
}
}Dev note: At no etanks, the spark will always be cut short barely above the speed blocks. |
|
Wall jump up the left wall, perform a delayed wall jump on the Fune to reach the door. Entrance condition: {
"comeInJumping": {
"speedBooster": "any",
"minTiles": 0
}
}Requires: "canPrepareForNextRoom"
"canTrickyWallJump"
"canConsecutiveWallJump"
"canTrickyJump"
"canFastWallJumpClimb"
"canUseEnemies"
{
"heatFrames": 120
}
{
"or": [
"canDash",
{
"heatFrames": 5
}
]
}Dev note: This differs from the canPrepareForNextRoom option of the previous strat only in requiring an air entry. FIXME: canFastWallJumpClimb is for difficulty placement. |
From: 4
Lava, Left Wall
To: 3
Above Lava Junction
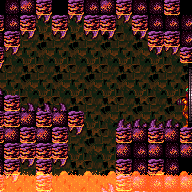
Enter the bottom-left Namihe by kagoing inside of it. Wait for a second hit to gain i-frames and then very quickly walljump up the spikes and across to the right side wall. Requires: {
"notable": "HiJumpless Nahime Morph Kago"
}
{
"noBlueSuit": {}
}
"canSuitlessLavaDive"
"canInsaneWallJump"
"canInsaneJump"
"canUseIFrames"
"canTrickyWallJump"
"canFastWallJumpClimb"
"canUseEnemies"
"canKago"
{
"heatFrames": 510
}
{
"gravitylessLavaFrames": 480
}
{
"enemyDamage": {
"enemy": "Namihe",
"type": "kago",
"hits": 2
}
} |
|

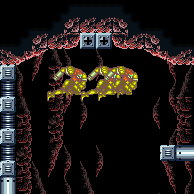
Use the bottom-most right-side Namihe to generate a flame and walk with it to the bottom-most left Namihe head. Use a turnaround animation as Samus is hit by the flame to cancel out knockback frames. While invulnerability frames are active, walljump up the spikes either 2 or 3 times and jump accross to catch the middle wall and climb from there. Requires: {
"notable": "HiJumpless Dive"
}
{
"noBlueSuit": {}
}
"canSuitlessLavaDive"
"canUseIFrames"
"canTrickyWallJump"
"canFastWallJumpClimb"
"canUseEnemies"
"canCameraManip"
{
"heatFrames": 600
}
{
"gravitylessLavaFrames": 500
}
{
"enemyDamage": {
"enemy": "Namihe",
"type": "fireball",
"hits": 1
}
} |
From: 5
Lava, Center Namihe
To: 3
Above Lava Junction

Use the bottom-most right-side Namihe to generate a flame and walk with it to the bottommost left Namihe head. Pause and use a turnaround animation as Samus is hit by the flame to cancel out knockback frames. Manually refill energy from reserves. While invulnerability frames are active, wall jump up the spikes either 2 or 3 times and jump accross to catch the middle wall and climb from there. Requires: {
"notable": "HiJumpless Dive"
}
{
"noBlueSuit": {}
}
"canSuitlessLavaDive"
"canUseIFrames"
"canTrickyWallJump"
"canFastWallJumpClimb"
"canUseEnemies"
"canCameraManip"
{
"heatFrames": 175
}
{
"gravitylessLavaFrames": 175
}
"h_pauseAbuseMinimalReserveRefill"
{
"heatFrames": 375
}
{
"gravitylessLavaFrames": 300
} |
From: 2
Bottom Right Door
To: 1
Top Right Door
Entrance condition: {
"comeInShinecharging": {
"length": 0,
"openEnd": 1
}
}Requires: "canShinechargeMovementTricky"
"canFastWallJumpClimb"
"canInsaneJump"
{
"shinespark": {
"frames": 5,
"excessFrames": 0
}
}Exit condition: {
"leaveWithSpark": {}
}Unlocks doors: {"types":["super"],"requires":[]}
{"types":["missiles","powerbomb"],"requires":["never"]} |
Come In Shinecharging, Leave With Spark (HiJump Wall Climb, Full Runway)
(Extreme)
Grapple Beam Room
From: 2
Bottom Right Door
To: 1
Top Right Door

Entrance condition: {
"comeInShinecharging": {
"length": 9,
"openEnd": 0
}
}Requires: "HiJump"
"canShinechargeMovementTricky"
"canFastWallJumpClimb"
"canInsaneJump"
{
  "shinespark": {
    "frames": 5,
    "excessFrames": 0
  }
}
Exit condition: {
"leaveWithSpark": {}
}Unlocks doors: {"types":["super"],"requires":[]}
{"types":["missiles","powerbomb"],"requires":["never"]} |
Come In Shinecharging, Leave With Spark (HiJump Wall Climb, Partial Runway)
(Expert)
Grapple Beam Room
From: 2
Bottom Right Door
To: 1
Top Right Door
Entrance condition: {
"comeInShinecharging": {
"length": 5,
"openEnd": 0
}
}Requires: "HiJump"
"canShinechargeMovementTricky"
"canFastWallJumpClimb"
{
"shinespark": {
"frames": 5,
"excessFrames": 0
}
}Exit condition: {
"leaveWithSpark": {}
}Unlocks doors: {"types":["super"],"requires":[]}
{"types":["missiles","powerbomb"],"requires":["never"]} |
Come In Shinecharging, Leave With Spark (Bootless Wall Climb, Bottom Position)
(Extreme)
Grapple Tutorial Room 2
From: 1
Left Door
To: 2
Right Door
Entrance condition: {
"comeInShinecharging": {
"length": 3,
"openEnd": 0
}
}Requires: "canShinechargeMovementTricky"
"canFastWallJumpClimb"
"canInsaneJump"
{
"shinespark": {
"frames": 20,
"excessFrames": 0
}
}Exit condition: {
"leaveWithSpark": {
"position": "bottom"
}
}Unlocks doors: {"types":["super"],"requires":[]}
{"types":["missiles","powerbomb"],"requires":["never"]} |
From: 1
Left Door
To: 2
Right Door
Entrance condition: {
"comeInShinecharging": {
"length": 3,
"openEnd": 0
}
}Requires: "HiJump"
"canShinechargeMovementTricky"
"canFastWallJumpClimb"
{
"shinespark": {
"frames": 19,
"excessFrames": 0
}
}Exit condition: {
"leaveWithSpark": {}
}Unlocks doors: {"types":["super"],"requires":[]}
{"types":["missiles","powerbomb"],"requires":["never"]} |
From: 3
Bottom Right Door
To: 4
Top Right Door
Entrance condition: {
"comeInShinecharging": {
"length": 7,
"openEnd": 1,
"gentleDownTiles": 3
}
}Requires: "canWallJump"
"canFastWallJumpClimb"
"canShinechargeMovementComplex"
{
"shineChargeFrames": 165
}Exit condition: {
"leaveShinecharged": {}
}Unlocks doors: {"types":["super"],"requires":[]}
{"types":["missiles","powerbomb"],"requires":["never"]} |
From: 2
Bottom Left Door
To: 4
Junction Above Bomb Blocks
Ignore the Yellow Pirates by walljumping up the left side to start a diagonal bomb jump from the wall, including a power bomb to clear the bomb blocks. Two quick walljumps upon entering the room can position Samus to get the left pirate to jump to the right and jump over the right pirate's lazer attack. Jump up the left wall and begin bomb jumping starting with a power bomb. Requires: {
"notable": "Power Bomb Diagonal Bomb Jump"
}
"canFastWallJumpClimb"
"canWallJumpBombBoost"
"canDiagonalBombJump"
"h_usePowerBomb"
{
"heatFrames": 930
}
{
"or": [
"h_heatResistant",
{
"and": [
"canInsaneJump",
"canPauseAbuse"
]
},
{
"resourceCapacity": [
{
"type": "RegularEnergy",
"count": 149
}
]
}
]
}Clears obstacles: A Dev note: There is a very similar strat using an HBJ that is a little faster but more precise and overall harder. With Reserves only, this strat requires much more precise movement and either pause abuse or optimal reserve management. |
|
Wall jump repeatedly off of the left wall, jump before the spikes and hold jump while passing them to avoid wall jump checking them. Requires: {
"or": [
{
"obstaclesCleared": [
"A"
]
},
"h_usePowerBomb"
]
}
{
"or": [
{
"canShineCharge": {
"usedTiles": 35,
"openEnd": 1
}
},
{
"and": [
"f_DefeatedPhantoon",
"h_shinechargeMaxRunway"
]
}
]
}
"canShinechargeMovementComplex"
"canConsecutiveWallJump"
{
"or": [
{
"shinespark": {
"frames": 17,
"excessFrames": 2
}
},
{
"and": [
"HiJump",
{
"shinespark": {
"frames": 10,
"excessFrames": 2
}
}
]
},
{
"and": [
"canShinechargeMovementTricky",
"canFastWallJumpClimb",
{
"or": [
{
"shinespark": {
"frames": 10,
"excessFrames": 2
}
},
{
"and": [
"HiJump",
{
"shinespark": {
"frames": 6,
"excessFrames": 2
}
}
]
}
]
}
]
}
]
}Clears obstacles: A |
|
Requires: "h_spikeXModeShinecharge"
"canShinechargeMovementTricky"
"canTrickyJump"
"Gravity"
{
"or": [
{
"and": [
"HiJump",
"canTrickyDashJump"
]
},
{
"and": [
"canFastWallJumpClimb",
"canPreciseWallJump"
]
},
{
"and": [
"SpaceJump",
"canInsaneJump",
{
"shinespark": {
"frames": 3
}
}
]
}
]
}
{
"shinespark": {
"frames": 5
}
}Exit condition: {
"leaveWithSpark": {}
}Dev note: Two spike hits are expected per attempt (with any additional leniency hits being multiplied by this amount). |
From: 2
Bottom Left Door
To: 1
Top Left Door

Entrance condition: {
"comeInShinecharged": {}
}Requires: {
"shineChargeFrames": 120
}
"Gravity"
"canFastWallJumpClimb"
"canShinechargeMovementComplex"Exit condition: {
"leaveShinecharged": {}
}Unlocks doors: {"types":["super"],"requires":[]}
{"types":["missiles","powerbomb"],"requires":["never"]} |
From: 2
Bottom Left Door
To: 1
Top Left Door

Entrance condition: {
"comeInShinecharged": {}
}Requires: {
"shineChargeFrames": 100
}
"Gravity"
"canFastWallJumpClimb"
"canShinechargeMovementComplex"
{
"shinespark": {
"frames": 4,
"excessFrames": 0
}
}Exit condition: {
"leaveWithSpark": {}
}Unlocks doors: {"types":["super"],"requires":[]}
{"types":["missiles","powerbomb"],"requires":["never"]} |
Come in Shinecharging, Leave Shinecharged (Full Runway, Bootless, Walljump)
(Expert)
Halfie Climb Room
From: 2
Bottom Left Door
To: 1
Top Left Door
Entrance condition: {
"comeInShinecharging": {
"length": 12,
"openEnd": 0
}
}Requires: "Gravity"
"canWallJump"
"canFastWallJumpClimb"
"canShinechargeMovementComplex"
{
"shineChargeFrames": 145
}Exit condition: {
"leaveShinecharged": {}
}Unlocks doors: {"types":["super"],"requires":[]}
{"types":["missiles","powerbomb"],"requires":["never"]} |
From: 2
Bottom Left Door
To: 4
Top Right Door
Entrance condition: {
"comeInShinecharging": {
"length": 8,
"openEnd": 1
}
}Requires: "Gravity"
"HiJump"
"canShinechargeMovementTricky"
"canFastWallJumpClimb"
{
"shineChargeFrames": 165
}Exit condition: {
"leaveShinecharged": {}
}Unlocks doors: {"types":["super"],"requires":[]}
{"types":["missiles","powerbomb"],"requires":["never"]} |
From: 2
Bottom Left Door
To: 4
Top Right Door

Entrance condition: {
"comeInShinecharging": {
"length": 8,
"openEnd": 1
}
}Requires: "Gravity"
"canShinechargeMovementTricky"
"canFastWallJumpClimb"
{
"shineChargeFrames": 150
}
{
"or": [
"HiJump",
{
"shineChargeFrames": 27
}
]
}
{
"shinespark": {
"frames": 5,
"excessFrames": 0
}
}Exit condition: {
"leaveWithSpark": {}
}Unlocks doors: {"types":["super"],"requires":[]}
{"types":["missiles","powerbomb"],"requires":["never"]} |
|
Entrance condition: {
"comeInShinecharged": {}
}Requires: "canShinechargeMovementTricky"
{
"or": [
{
"and": [
"HiJump",
{
"shineChargeFrames": 125
}
]
},
{
"and": [
"canFastWallJumpClimb",
{
"shineChargeFrames": 145
}
]
}
]
}Exit condition: {
"leaveShinecharged": {}
}Unlocks doors: {"types":["super"],"requires":[]}
{"types":["missiles","powerbomb"],"requires":["never"]} |
From: 1
Bottom Left Door
To: 2
Right Door

Entrance condition: {
"comeInShinecharging": {
"length": 1,
"openEnd": 0
}
}Requires: "canShinechargeMovementTricky"
{
"or": [
{
"and": [
"HiJump",
{
"shineChargeFrames": 130
}
]
},
{
"and": [
"canFastWallJumpClimb",
{
"shineChargeFrames": 150
}
]
}
]
}Exit condition: {
"leaveShinecharged": {}
}Unlocks doors: {"types":["super"],"requires":[]}
{"types":["missiles","powerbomb"],"requires":["never"]} |
From: 3
Bottom of Shaft
To: 1
Left Door
Requires: "canFastWallJumpClimb"
{
"canShineCharge": {
"usedTiles": 21,
"openEnd": 1
}
}
"canChainTemporaryBlue"Exit condition: {
"leaveWithTemporaryBlue": {}
}Unlocks doors: {"types":["ammo"],"requires":[]} |