canXModeMovement (Extreme)
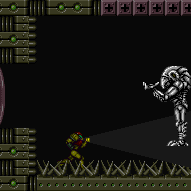

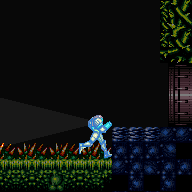
Ability to apply various movement techniques in X-mode, including 1) releasing forward in order to move forward (with loss of dash speed) 2) arm-pumping to move forward while maintaining dash speed 3) holding an angle button to turn around while maintaining dash speed 4) timing the X-mode release after i-frames refresh in thorns to avoid an additional thorn hit.
Dependencies: canXMode
Strats ()
From: 3
Bottom Left Door
To: 2
Top Right Door


By bouncing far enough left, it is possible to get a 2-frame window for the X-mode. Requires: {
"or": [
"h_thornDoubleXModeBlueSuit",
{
"and": [
"h_thornDoubleXModeBlueSuitWithoutLenience",
{
"or": [
{
"obstaclesCleared": [
"A"
]
},
"canTrickyDodgeEnemies",
{
"enemyKill": {
"enemies": [
[
"Beetom",
"Beetom"
]
],
"excludedWeapons": [
"Bombs"
]
}
}
]
}
]
}
]
}
"canSuperjump"
{
"shinespark": {
"frames": 4,
"excessFrames": 0
}
} |
From: 3
Bottom Left Door
To: 3
Bottom Left Door


By bouncing far enough left, it is possible to get a 2-frame window for the X-mode. Requires: {
"or": [
"h_thornDoubleXModeBlueSuit",
{
"and": [
"h_thornDoubleXModeBlueSuitWithoutLenience",
{
"or": [
{
"obstaclesCleared": [
"A"
]
},
"canTrickyDodgeEnemies",
{
"enemyKill": {
"enemies": [
[
"Beetom",
"Beetom"
]
],
"excludedWeapons": [
"Bombs"
]
}
}
]
}
]
}
]
}
{
"shinespark": {
"frames": 0,
"excessFrames": 0
}
} |
From: 3
Bottom Left Door
To: 3
Bottom Left Door
By bouncing far enough left, it is possible to get a 2-frame window for the X-mode. Requires: {
"or": [
"h_thornXModeSpikeSuit",
{
"and": [
"h_thornXModeSpikeSuitWithoutLenience",
{
"or": [
{
"obstaclesCleared": [
"A"
]
},
"canTrickyDodgeEnemies",
{
"enemyKill": {
"enemies": [
[
"Beetom",
"Beetom"
]
],
"excludedWeapons": [
"Bombs"
]
}
}
]
}
]
}
]
}
{
"shinespark": {
"frames": 12,
"excessFrames": 12
}
} |
From: 3
Bottom Left Door
To: 3
Bottom Left Door

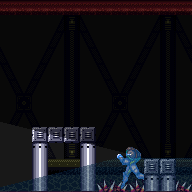
With some dash speed, bounce into the opening of the spikeway, and enter X-mode. The spike knockback will push Samus back out of the spikeway. By bouncing far enough left, it is possible to get a 2-frame window for the X-mode. By holding an angle button, it is possible turn around in X-mode without losing dash speed. Arm pumps can be used to get close to the ledge before shinecharging, to leave with more frames remaining. Requires: "h_XModeShinecharge"
{
"thornHits": 1
}
{
"or": [
{
"thornHits": "n_thornXModeLenience"
},
{
"obstaclesCleared": [
"A"
]
},
"canTrickyDodgeEnemies",
{
"enemyKill": {
"enemies": [
[
"Beetom",
"Beetom"
]
],
"excludedWeapons": [
"Bombs"
]
}
}
]
}
{
"shineChargeFrames": 60
}
{
"or": [
"canXModeMovement",
{
"shineChargeFrames": 15
}
]
}Exit condition: {
"leaveShinecharged": {}
} |
From: 4
Bottom Right Door
To: 4
Bottom Right Door

Requires: {
"or": [
"h_thornXModeShinecharge",
{
"and": [
"h_thornXModeShinechargeWithoutLenience",
{
"or": [
{
"obstaclesCleared": [
"A"
]
},
"canTrickyDodgeEnemies",
{
"enemyKill": {
"enemies": [
[
"Beetom"
]
],
"excludedWeapons": [
"Bombs"
]
}
}
]
}
]
}
]
}
{
"shinespark": {
"frames": 62,
"excessFrames": 0
}
}Exit condition: {
"leaveWithSpark": {}
} |
From: 7
Junction (Zebbo Farms)
To: 7
Junction (Zebbo Farms)
After entering with R-Mode, clear or trap the Beetom(s) and use any Zebbo pipe to setup Energy. Bounce into the thorns with dash speed and enter X-Mode to gain shinecharge. Timing the shinecharge and X-Ray release to happen soon after i-frames refresh avoids a second thorn hit. Then get back to the Zebbo pipe and get the blue suit. Requires: {
"obstaclesCleared": [
"R-Mode"
]
}
{
"or": [
{
"obstaclesCleared": [
"A"
]
},
{
"enemyKill": {
"enemies": [
[
"Beetom"
]
],
"excludedWeapons": [
"Bombs"
]
}
},
"canTrickyDodgeEnemies"
]
}
{
"refill": [
"Energy"
]
}
"h_thornXModeShinechargeWithoutLenience"
{
"autoReserveTrigger": {
"maxReserveEnergy": 95
}
}
"canRModeSparkInterrupt"Resets obstacles: R-Mode |
From: 1
Left Door
To: 1
Left Door
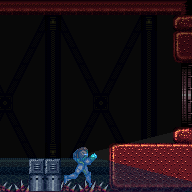
Jump into the large patch of thorns from below, bouncing on the thorns. After entering X-mode, turn around to the left while holding an angle button to maintain dash speed, then arm pump to the left to get closer to the door and avoid a third thorn hit. Requires: "canXModeMovement"
"h_XModeShinecharge"
{
"or": [
{
"thornHits": {
"mul": [
"n_thornXModeAttempts",
2
]
}
},
{
"and": [
{
"resetRoom": {
"nodes": [
1,
2
]
}
},
{
"thornHits": 2
}
]
}
]
}
{
"shineChargeFrames": 60
}Exit condition: {
"leaveShinecharged": {}
}Dev note: Assuming the room can be reset, lenience is not included because a farm is available. |
|


Requires: "Gravity"
{
"ammo": {
"type": "Super",
"count": 1
}
}
"h_thornDoubleXModeFramePerfectExtraLeniency"
"h_thornDoubleXModeBlueSuit"
{
"shinespark": {
"frames": 1
}
} |
|

Requires: "Gravity"
{
"ammo": {
"type": "Super",
"count": 1
}
}
"h_thornXModeFramePerfectExtraLeniency"
"h_thornXModeSpikeSuit"
{
"shinespark": {
"frames": 5,
"excessFrames": 5
}
} |
|
While in X-mode on the thorns, Samus' will be flashing as i-frames periodically refresh; by timing the shinecharge and X-Ray release to happen soon after i-frames refresh, a second thorn hit can be avoided. Requires: "Gravity"
{
"enemyKill": {
"enemies": [
[
"Yapping Maw"
]
],
"explicitWeapons": [
"Super"
]
}
}
"h_thornXModeShinecharge"
"h_thornXModeFramePerfectExtraLeniency"
{
"shineChargeFrames": 75
}Exit condition: {
"leaveShinecharged": {}
} |
|
While in X-mode on the thorns, Samus' will be flashing as i-frames periodically refresh; by timing the shinecharge and X-Ray release to happen soon after i-frames refresh, a second thorn hit can be avoided. Requires: "Gravity"
{
"enemyKill": {
"enemies": [
[
"Yapping Maw"
]
],
"explicitWeapons": [
"Super"
]
}
}
"h_thornXModeShinecharge"
"h_thornXModeFramePerfectExtraLeniency"
{
"shineChargeFrames": 65
}Exit condition: {
"leaveShinecharged": {}
} |
|
While in X-mode on the thorns, Samus' will be flashing as i-frames periodically refresh; by timing the shinecharge and X-Ray release to happen soon after i-frames refresh, a second thorn hit can be avoided. Requires: "Gravity"
"h_thornXModeShinecharge"
"h_thornXModeFramePerfectExtraLeniency"
{
"shineChargeFrames": 145
}Exit condition: {
"leaveShinecharged": {}
} |
|


Requires: "Gravity"
"h_thornDoubleXModeBlueSuit"
"h_thornDoubleXModeFramePerfectExtraLeniency"
{
"shinespark": {
"frames": 1
}
} |
From: 2
Right Door
To: 2
Right Door

Requires: "Gravity"
"h_thornXModeSpikeSuit"
"h_thornXModeFramePerfectExtraLeniency"
{
"shinespark": {
"frames": 7,
"excessFrames": 7
}
} |
|
While in X-mode on the thorns, Samus' will be flashing as i-frames periodically refresh; by timing the shinecharge and X-Ray release to happen soon after i-frames refresh, a second thorn hit can be avoided. Requires: "Gravity"
"h_thornXModeShinecharge"
"h_thornXModeFramePerfectExtraLeniency"
{
"shineChargeFrames": 70
}Exit condition: {
"leaveShinecharged": {}
} |
|
Requires: "h_thornDoubleXModeBlueSuitWithoutLenience"
{
"shinespark": {
"frames": 0,
"excessFrames": 0
}
} |
|

A 1-frame dash jump will give more leniency to land in the thorns. Requires: "canBeVeryPatient"
"h_thornXModeSpikeSuit"
{
"shinespark": {
"frames": 4,
"excessFrames": 4
}
} |
From: 1
Left Door
To: 1
Left Door

A 1-frame dash jump will give more leniency to land in the thorns. Unmorphing on the first possible frame leaves in top position; second frame leaves in middle position. Requires: "canBeVeryPatient"
"canUseFlashSuitInitialSpark"
"h_thornXModeSpikeSuit"
{
"shinespark": {
"frames": 19,
"excessFrames": 0
}
}Exit condition: {
"leaveWithSpark": {
"position": "top"
}
} |
|


A very precise bounce is needed in order to enter X-mode with dash speed. Requires: "h_thornXModeShinecharge"
{
"shineChargeFrames": 110
}Exit condition: {
"leaveShinecharged": {}
}Dev note: Two thorn hits are expected. Lenience is not included because there is a farm available. |
From: 3
Bottom Right Door
To: 3
Bottom Right Door

Use the thorns on the left side of the room. A 1-frame dash jump will give more leniency to land in the thorns. Only unmorphing on the first possible frame will work; second frame will bonk the pillar. Requires: "canUseFlashSuitInitialSpark"
"canBeVeryPatient"
"h_thornXModeSpikeSuit"
{
"shinespark": {
"frames": 31,
"excessFrames": 0
}
}Exit condition: {
"leaveWithSpark": {
"position": "top"
}
} |
From: 3
Bottom Right Door
To: 3
Bottom Right Door
A very precise bounce is needed in order to enter X-mode with dash speed. Requires: "h_thornXModeShinecharge"
{
"shineChargeFrames": 155
}Exit condition: {
"leaveShinecharged": {}
}Dev note: Two thorn hits are expected. Lenience is not included because there is a farm available. |
From: 1
Left Door
To: 1
Left Door
Crystal Flash upon entering the room, then use the thorns to damage down and perform Spike X-Mode. Once shinecharge is gained, get Kraid to charge or spit at Samus and use that for R-Mode interrupt. Entrance condition: {
"comeInWithRMode": {}
}Requires: {
"not": "f_DefeatedKraid"
}
"canRiskPermanentLossOfAccess"
"h_CrystalFlashForReserveEnergy"
"h_thornXModeShinecharge"
{
"autoReserveTrigger": {
"maxReserveEnergy": 95
}
}
"canRModeSparkInterrupt"Clears obstacles: door_1 Dev note: In randomizers that do not initially lock the boss door, the player can escape once blue suit is gained. |
From: 1
Left Door
To: 1
Left Door
Force Kraid to stand up and farm his nails for energy, then perform a Spike X-Mode on the thorns to get shinecharge. Get interrupted by Kraid for blue suit. You will be forced to defeat Kraid afterward. Entrance condition: {
"comeInWithRMode": {}
}Requires: {
"not": "f_DefeatedKraid"
}
"canRiskPermanentLossOfAccess"
{
"or": [
"canBeVeryPatient",
{
"disableEquipment": "ETank"
}
]
}
{
"refill": [
"Energy"
]
}
{
"or": [
"Charge",
{
"ammo": {
"type": "Missile",
"count": 2
}
},
{
"ammo": {
"type": "Super",
"count": 1
}
}
]
}
{
"or": [
"HiJump",
"canWallJump",
"SpaceJump",
"canSpringBallJumpMidAir",
{
"and": [
"canDodgeWhileShooting",
{
"or": [
"canCarefulJump",
"h_crouchJumpDownGrab"
]
}
]
}
]
}
"h_thornXModeShinecharge"
{
"autoReserveTrigger": {
"maxReserveEnergy": 95
}
}
"canRModeSparkInterrupt"Clears obstacles: f_DefeatedKraid, door_1 Sets flags: f_DefeatedKraid |
From: 1
Left Door
To: 1
Left Door
If Kraid is alive, use X-mode on the thorns to gain blue speed. Hold an angle button to turn around while retaining blue. If needed, arm pump to get close to the ledge without touching it. While in X-mode on the thorns, Samus' will be flashing as i-frames periodically refresh; by timing the shinecharge and X-Ray release to happen soon after i-frames refresh, a second thorn hit can be avoided. Requires: "h_thornXModeShinecharge"
{
"or": [
{
"canShineCharge": {
"usedTiles": 22,
"openEnd": 0
}
},
{
"and": [
{
"not": "f_DefeatedKraid"
},
"canRiskPermanentLossOfAccess"
]
}
]
}
{
"shineChargeFrames": 45
}
{
"or": [
"canBeVeryPatient",
{
"and": [
"h_XModeThornHit",
{
"shineChargeFrames": 20
}
]
}
]
}Exit condition: {
"leaveShinecharged": {}
}Dev note: If Kraid is alive, leaving with a horizontal damage boost is also possible, but not easy to model. |
From: 2
Right Door
To: 2
Right Door
If Kraid is alive, use X-mode on the thorns to gain blue speed. Hold an angle button to turn around while retaining blue. If needed, arm pump to get close to the ledge without touching it. While in X-mode on the thorns, Samus' will be flashing as i-frames periodically refresh; by timing the shinecharge and X-Ray release to happen soon after i-frames refresh, a second thorn hit can be avoided. Requires: "h_KraidCameraFix"
"h_thornXModeShinecharge"
"h_thornXModeFramePerfectExtraLeniency"
{
"or": [
{
"canShineCharge": {
"usedTiles": 22,
"openEnd": 0
}
},
{
"and": [
{
"not": "f_DefeatedKraid"
},
"canRiskPermanentLossOfAccess"
]
}
]
}
{
"shineChargeFrames": 45
}
{
"or": [
"canBeVeryPatient",
{
"and": [
"h_XModeThornHit",
{
"shineChargeFrames": 20
}
]
}
]
}Exit condition: {
"leaveShinecharged": {}
}Dev note: If Kraid is alive, leaving with a horizontal damage boost is also possible, but not easy to model. |
From: 1
Right Door
To: 1
Right Door

Requires: {
"or": [
"Gravity",
{
"and": [
{
"not": "f_DefeatedPhantoon"
},
"canRiskPermanentLossOfAccess"
]
}
]
}
"h_thornDoubleXModeBlueSuit"
{
"shinespark": {
"frames": 0,
"excessFrames": 0
}
} |
From: 1
Right Door
To: 1
Right Door

Requires: {
"or": [
"Gravity",
{
"and": [
{
"not": "f_DefeatedPhantoon"
},
"canRiskPermanentLossOfAccess"
]
}
]
}
"h_thornXModeSpikeSuit"
{
"shinespark": {
"frames": 2,
"excessFrames": 2
}
} |
From: 1
Right Door
To: 1
Right Door
Power Off: Crystal Flash, enter X-Mode using the bottom spikes and shinecharge, then pause abuse from the spikes to interrupt. Power On: Crystal Flash or farm Skultera. Enter X-Mode using the bottom spikes and shinecharge, then pause abuse from the spikes to interrupt. Entrance condition: {
"comeInWithRMode": {}
}Requires: {
"or": [
"Gravity",
{
"and": [
{
"not": "f_DefeatedPhantoon"
},
"canRiskPermanentLossOfAccess"
]
}
]
}
{
"or": [
"h_CrystalFlashForReserveEnergy",
{
"and": [
"f_DefeatedPhantoon",
"h_RModeCanRefillReserves",
"canBeLucky",
{
"resourceMissingAtMost": [
{
"type": "Missile",
"count": 0
}
]
},
{
"or": [
{
"partialRefill": {
"type": "ReserveEnergy",
"limit": 5
}
},
{
"and": [
{
"partialRefill": {
"type": "ReserveEnergy",
"limit": 20
}
},
"canBeVeryLucky"
]
}
]
}
]
}
]
}
"canBeVeryPatient"
"h_thornXModeShinecharge"
"h_thornXModeFramePerfectExtraLeniency"
{
"autoReserveTrigger": {}
}
"canRModePauseAbuseSparkInterrupt" |
From: 1
Right Door
To: 1
Right Door
Requires: "h_thornXModeShinecharge"
"h_thornXModeFramePerfectExtraLeniency"
"SpaceJump"
"HiJump"
"canShinechargeMovementComplex"
{
"shinespark": {
"frames": 21,
"excessFrames": 0
}
}
{
"or": [
"Gravity",
{
"and": [
{
"not": "f_DefeatedPhantoon"
},
"canRiskPermanentLossOfAccess"
]
}
]
}Exit condition: {
"leaveWithSpark": {}
}Dev note: Two thorn hits are expected per attempt (with any additional leniency hits being multiplied by this amount). FIXME: There is likely a fast wall jump climb strat with more spark frames. |
|

Arm pump until samus starts to move again. If the power is on, regular platforming can be used instead. Requires: "h_thornXModeShinecharge"
{
"shinespark": {
"frames": 19,
"excessFrames": 4
}
} |
From: 7
Bottom Door
To: 7
Bottom Door


Requires: "f_DefeatedPhantoon"
"h_thornDoubleXModeBlueSuit"
"h_thornDoubleXModeFramePerfectExtraLeniency"
{
"shinespark": {
"frames": 0,
"excessFrames": 0
}
} |
From: 7
Bottom Door
To: 7
Bottom Door


Requires: "f_DefeatedPhantoon"
"h_thornXModeSpikeSuit"
"h_thornXModeFramePerfectExtraLeniency"
{
"shinespark": {
"frames": 1,
"excessFrames": 1
}
} |