canAwakenZebes (Medium)

Understanding game behavior related to how the planet is awakened. The planet is awakened by unlocking any gray door locked by killing enemies in the room (not including bosses or minibosses). Pit Room, Baby Kraid Room, Metal Pirates Room, and Plasma Room are the places where this can be done in the randomizer. Awakening the planet causes enemies to spawn in Parlor, Climb, Morph Ball Room, Construction Zone, and Blue Brinstar Energy Tank Room. It also causes the item in the left side of Morph Ball Room and in The Final Missile to spawn. The item and enemies in Pit Room do not spawn until entering with Morph and Missiles collected, regardless of whether the planet is awake. If the quality-of-life option 'All items spawn from start' is enabled, as it is by default, then the items will already be spawned anyway, but awakening the planet can still matter because of its effects on enemies.
Dev note: This tech is for understanding how the planet is awakened and how to utilize that. As such, strats that require the planet to not be awakened, with canRiskPermanentLossOfAccess, are also not in logic without this tech.
Strats ()
|
Farm wall pirates while leaving one left. Lead it to the bottom of the shaft, get shine charge, then windup in front of it to get shot and interrupted. Entrance condition: {
"comeInWithRMode": {},
"comesThroughToilet": "no"
}Requires: {
"not": "f_ZebesSetAblaze"
}
"h_ZebesIsAwake"
{
"or": [
"h_CrystalFlashForReserveEnergy",
{
"and": [
"h_RModeCanRefillReserves",
{
"resourceMissingAtMost": [
{
"type": "Missile",
"count": 0
}
]
},
{
"partialRefill": {
"type": "ReserveEnergy",
"limit": 20
}
}
]
}
]
}
{
"or": [
{
"and": [
"h_destroyBombWalls",
{
"canShineCharge": {
"usedTiles": 28,
"openEnd": 0
}
}
]
},
{
"and": [
{
"doorUnlockedAtNode": 5
},
{
"canShineCharge": {
"usedTiles": 13,
"openEnd": 0
}
}
]
},
{
"canShineCharge": {
"usedTiles": 12,
"openEnd": 0
}
}
]
}
{
"autoReserveTrigger": {
"maxReserveEnergy": 95
}
}
"canRModeSparkInterrupt"Clears obstacles: A Unlocks doors: {"nodeId":5,"types":["ammo"],"requires":[]} |
|
Farm wall pirates while leaving one of the bottom ones alive. Lead it to the bottom of the shaft, shinecharge, then windup in front of it to get shot and interrupted. Entrance condition: {
"comeInWithRMode": {}
}Requires: "h_ClimbWithoutLava"
{
"or": [
"h_destroyBombWalls",
{
"getBlueSpeed": {
"usedTiles": 14,
"openEnd": 0
}
},
{
"and": [
{
"getBlueSpeed": {
"usedTiles": 15,
"openEnd": 0
}
},
{
"doorUnlockedAtNode": 2
}
]
}
]
}
{
"not": "f_ZebesSetAblaze"
}
"h_ZebesIsAwake"
{
"or": [
"h_CrystalFlashForReserveEnergy",
{
"and": [
"h_RModeCanRefillReserves",
{
"resourceMissingAtMost": [
{
"type": "Missile",
"count": 0
}
]
},
{
"partialRefill": {
"type": "ReserveEnergy",
"limit": 20
}
}
]
}
]
}
{
"canShineCharge": {
"usedTiles": 28,
"openEnd": 0
}
}
{
"autoReserveTrigger": {
"maxReserveEnergy": 95
}
}
"canRModeSparkInterrupt"Clears obstacles: A, B Unlocks doors: {"nodeId":2,"types":["ammo"],"requires":[]}
{"nodeId":5,"types":["ammo"],"requires":[]}Dev note: This door triggers the rising lava, which will prevent gaining a shinecharge. |
|
Overload PLMs using the scroll block at the top of the stairs next to the bomb blocks. With PLMs still overloaded, Samus can simply Crystal Flash and run through the bomb wall at the bottom to shinecharge. When damaging down, note that Pirates will place invisible, stationary lasers that will damage Samus: these can help with wasting energy, but remaining unused lasers must be kept in mind. Lead a wall pirate to the bottom of the shaft, shinecharge, and windup in front of it to get interrupted by a shot. Entrance condition: {
"comeInWithGMode": {
"mode": "direct",
"morphed": true
}
}Requires: {
"not": "f_ZebesSetAblaze"
}
"h_ZebesIsAwake"
{
"or": [
"h_artificialMorphSpringBall",
"h_artificialMorphBombs",
{
"and": [
"Morph",
"h_fourTileJumpMorph"
]
}
]
}
"h_artificialMorphCrystalFlash"
{
"canShineCharge": {
"usedTiles": 28,
"openEnd": 0
}
}
{
"autoReserveTrigger": {
"maxReserveEnergy": 95
}
}
"canRModeSparkInterrupt"
{
"partialRefill": {
"type": "Energy",
"limit": 50
}
} |
|
Farm wall pirates while leaving one left. Lead it to the bottom of the shaft, get shine charge, then windup in front of it to get shot and interrupted. Entrance condition: {
"comeInWithRMode": {}
}Requires: {
"not": "f_ZebesSetAblaze"
}
"h_ZebesIsAwake"
"h_bombThings"
{
"or": [
"h_CrystalFlashForReserveEnergy",
{
"and": [
"h_RModeCanRefillReserves",
{
"resourceMissingAtMost": [
{
"type": "Missile",
"count": 0
}
]
},
{
"partialRefill": {
"type": "ReserveEnergy",
"limit": 20
}
}
]
}
]
}
{
"or": [
{
"and": [
"h_destroyBombWalls",
{
"canShineCharge": {
"usedTiles": 28,
"openEnd": 0
}
}
]
},
{
"and": [
{
"doorUnlockedAtNode": 5
},
{
"canShineCharge": {
"usedTiles": 13,
"openEnd": 0
}
}
]
},
{
"canShineCharge": {
"usedTiles": 12,
"openEnd": 0
}
}
]
}
{
"autoReserveTrigger": {
"maxReserveEnergy": 95
}
}
"canRModeSparkInterrupt"Clears obstacles: A Unlocks doors: {"nodeId":5,"types":["ammo"],"requires":[]} |
|
Overload PLMs using the scroll block at the top of the stairs next to the bomb blocks. If Morph is not available, careful movement is needed with SpringBall to reach the top without taking a hit from a pirate or its stationary, invisible lasers. Entrance condition: {
"comeInWithGMode": {
"mode": "any",
"morphed": true
}
}Requires: {
"or": [
"h_artificialMorphSpringBall",
"h_artificialMorphBombs",
"h_fourTileJumpMorph"
]
}
{
"or": [
"Morph",
"h_ZebesNotAwake",
{
"and": [
"h_artificialMorphSpringBall",
{
"or": [
"HiJump",
"canTrickyDodgeEnemies"
]
}
]
}
]
} |
|
Overload PLMs using the scroll block at the top of the stairs next to the bomb blocks. With PLMs still overloaded, Samus can simply Crystal Flash and run through the bomb wall at the bottom to shinecharge. When damaging down, note that Pirates will place invisible, stationary lasers that will damage Samus: these can help with wasting energy, but remaining unused lasers must be kept in mind. Lead a wall pirate to the bottom of the shaft, shinecharge, and windup in front of it to get interrupted by a shot. Entrance condition: {
"comeInWithGMode": {
"mode": "direct",
"morphed": true
}
}Requires: {
"not": "f_ZebesSetAblaze"
}
"h_ZebesIsAwake"
{
"or": [
"h_artificialMorphSpringBall",
"h_artificialMorphBombs",
{
"and": [
"Morph",
"h_fourTileJumpMorph"
]
}
]
}
"h_artificialMorphCrystalFlash"
{
"canShineCharge": {
"usedTiles": 28,
"openEnd": 0
}
}
{
"autoReserveTrigger": {
"maxReserveEnergy": 95
}
}
"canRModeSparkInterrupt"
{
"partialRefill": {
"type": "Energy",
"limit": 50
}
} |
|
Farm wall pirates while leaving one left. Lead it to the bottom of the shaft, get shine charge, then windup in front of it to get shot and interrupted. Entrance condition: {
"comeInWithRMode": {}
}Requires: {
"not": "f_ZebesSetAblaze"
}
"h_bombThings"
"h_ZebesIsAwake"
{
"or": [
"h_CrystalFlashForReserveEnergy",
{
"and": [
"h_RModeCanRefillReserves",
{
"resourceMissingAtMost": [
{
"type": "Missile",
"count": 0
}
]
},
{
"partialRefill": {
"type": "ReserveEnergy",
"limit": 20
}
}
]
}
]
}
{
"or": [
{
"and": [
"h_destroyBombWalls",
{
"canShineCharge": {
"usedTiles": 28,
"openEnd": 0
}
}
]
},
{
"and": [
{
"doorUnlockedAtNode": 5
},
{
"canShineCharge": {
"usedTiles": 13,
"openEnd": 0
}
}
]
},
{
"canShineCharge": {
"usedTiles": 12,
"openEnd": 0
}
}
]
}
{
"autoReserveTrigger": {
"maxReserveEnergy": 95
}
}
"canRModeSparkInterrupt"Clears obstacles: A Unlocks doors: {"nodeId":5,"types":["ammo"],"requires":[]} |
|
Overload PLMs using the scroll block next to any of the bomb blocks in the room, allowing passage through the bomb blocks at the top by making them become air. If Morph is not available, careful movement is needed with SpringBall to reach the top without taking a hit from the pirates or their stationary, invisible lasers. Entrance condition: {
"comeInWithGMode": {
"mode": "any",
"morphed": true
}
}Requires: {
"or": [
"Morph",
{
"and": [
"h_artificialMorphSpringBall",
{
"or": [
"HiJump",
"canTrickyDodgeEnemies"
]
}
]
},
{
"and": [
"h_ZebesNotAwake",
"h_artificialMorphMovement"
]
}
]
} |
|
Overload PLMs using the scroll block next to the bottom right bomb blocks, allowing passage through them by making them become air. If Morph is unavailable, then careful movement will be required to get past the Pirates without taking a hit from them or their stationary, invisible lasers. If using a PB to kill the pirates, overload the PLMs at the bottom. If the top bomb block is hit with a PB before PLMs are overloaded, they will remain solid. Entrance condition: {
"comeInWithGMode": {
"mode": "any",
"morphed": true
}
}Requires: {
"or": [
"Morph",
{
"and": [
"h_artificialMorphSpringBall",
{
"or": [
"HiJump",
"canTrickyDodgeEnemies"
]
}
]
},
{
"and": [
"h_artificialMorphIBJ",
"canTrickyGMode"
]
},
{
"and": [
"h_artificialMorphMovement",
"h_artificialMorphPowerBomb"
]
},
{
"and": [
"h_ZebesNotAwake",
"h_artificialMorphMovement"
]
}
]
} |
|
Farm wall pirates while leaving one left. Lead it to the bottom of the shaft, get shine charge, then windup in front of it to get shot and interrupted. Entrance condition: {
"comeInWithRMode": {}
}Requires: {
"not": "f_ZebesSetAblaze"
}
"h_ZebesIsAwake"
{
"or": [
"h_CrystalFlashForReserveEnergy",
{
"and": [
"h_RModeCanRefillReserves",
{
"resourceMissingAtMost": [
{
"type": "Missile",
"count": 0
}
]
},
{
"partialRefill": {
"type": "ReserveEnergy",
"limit": 20
}
}
]
}
]
}
{
"or": [
{
"and": [
"h_destroyBombWalls",
{
"canShineCharge": {
"usedTiles": 28,
"openEnd": 0
}
}
]
},
{
"and": [
{
"doorUnlockedAtNode": 5
},
{
"canShineCharge": {
"usedTiles": 13,
"openEnd": 0
}
}
]
},
{
"canShineCharge": {
"usedTiles": 12,
"openEnd": 0
}
}
]
}
{
"autoReserveTrigger": {
"maxReserveEnergy": 95
}
}
"canRModeSparkInterrupt"Clears obstacles: A Unlocks doors: {"nodeId":5,"types":["ammo"],"requires":[]} |
|


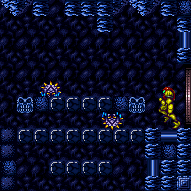
Manipulate the Pirates to the right wall while climbing the room. Kill all the Pirates while moonfalling down the right side. Then quickly gain a shinecharge, crouch, and perform a diagonal shinespark to the top, collecting the drops along the way. Requires: {
"notable": "Behemoth Shinespark"
}
"h_ZebesIsAwake"
"canTrickyDodgeEnemies"
"canFarmWhileShooting"
"Morph"
"canMoonfall"
{
"or": [
"Plasma",
"ScrewAttack",
"canInsaneJump"
]
}
{
"resourceMissingAtMost": [
{
"type": "Missile",
"count": 0
}
]
}
{
"canShineCharge": {
"usedTiles": 28,
"openEnd": 0
}
}
{
"shinespark": {
"frames": 50,
"excessFrames": 3
}
}
{
"obstaclesCleared": [
"A"
]
}
{
"or": [
"h_ClimbWithoutLava",
{
"obstaclesNotCleared": [
"B"
]
}
]
} |
|
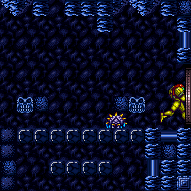
Diagonal shinespark up the climb to break the bomb blocks to the morph tunnels on the right. A frozen Pirate can be used to stop the spark just above the bottom tunnel. Requires: {
"notable": "Behemoth Shinespark"
}
"Morph"
{
"canShineCharge": {
"usedTiles": 28,
"openEnd": 0
}
}
{
"or": [
{
"shinespark": {
"frames": 147,
"excessFrames": 124
}
},
{
"and": [
"h_ZebesIsAwake",
"canTrickyUseFrozenEnemies",
{
"shinespark": {
"frames": 24,
"excessFrames": 1
}
}
]
}
]
}
{
"obstaclesCleared": [
"A"
]
}
{
"or": [
"h_ClimbWithoutLava",
{
"obstaclesNotCleared": [
"B"
]
}
]
}Dev note: FIXME: if Zebes is awake, it is possible to farm the Pirates in the room after breaking the blocks; this also applies to the other forms of Behemoth spark in this room (as long as the lava is not active). |
|


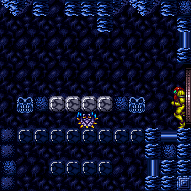
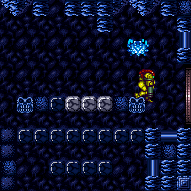
Diagonal shinespark to break the bomb blocks to the morph tunnel on the right. Spark from the lowest platform that is only one tile from the right wall (part of the bottom right door will be on screen). From this platform, the shinespark must be done from a crouch; or, to save some energy, angle-down jump and spark at the peak of the jump (with Hi-Jump unequipped). It is possible to set up a frozen pirate on the right wall to stop the shinespark early. If the positioning is ideal, Samus will bonk the platform at the top-right of the room, saving a bit of energy. With Hi-Jump equipped, this is still possible (and with 1 less energy needed): by sparking after bonking the platform and descending a few pixels (a 3-frame window); or, more easily but requiring slightly more energy, by aiming down and sparking at the maximum height (which will result in clipping through the platform at the top-right of the room if the spark is not interrupted by running low on energy before that point). Requires: {
"notable": "Behemoth Shinespark"
}
"Morph"
{
"useFlashSuit": {}
}
{
"or": [
{
"and": [
{
"disableEquipment": "HiJump"
},
{
"shinespark": {
"frames": 127,
"excessFrames": 124
}
}
]
},
{
"and": [
"HiJump",
{
"shinespark": {
"frames": 130,
"excessFrames": 129
}
}
]
},
{
"and": [
"HiJump",
"canInsaneJump",
{
"shinespark": {
"frames": 126,
"excessFrames": 124
}
}
]
},
{
"and": [
{
"shinespark": {
"frames": 1,
"excessFrames": 1
}
},
"canTrickyUseFrozenEnemies",
"h_ZebesIsAwake"
]
}
]
}
{
"or": [
"h_ClimbWithoutLava",
"h_lavaProof",
{
"obstaclesNotCleared": [
"B"
]
}
]
}Dev note: For the frozen pirate strat, it is assumed that Samus can farm the energy after the spark, resulting in no damaging shinespark frames. FIXME: It is still possible to set up a frozen pirate, even when shinecharging on the floor. |
|
Requires: "h_ZebesIsAwake"
{
"or": [
"h_ClimbWithoutLava",
"h_lavaProof",
{
"obstaclesNotCleared": [
"B"
]
}
]
}
{
"or": [
{
"and": [
{
"resetRoom": {
"nodes": [
1
]
}
},
{
"cycleFrames": 2350
}
]
},
{
"and": [
{
"resetRoom": {
"nodes": [
2
]
}
},
{
"or": [
"h_useMorphBombs",
"ScrewAttack"
]
},
{
"cycleFrames": 2270
}
]
},
{
"and": [
{
"resetRoom": {
"nodes": [
3
]
}
},
"h_useMorphBombs",
{
"cycleFrames": 2695
}
]
},
{
"and": [
{
"resetRoom": {
"nodes": [
4
]
}
},
"h_useMorphBombs",
{
"cycleFrames": 2480
}
]
},
{
"and": [
{
"resetRoom": {
"nodes": [
5
]
}
},
{
"cycleFrames": 1905
}
]
}
]
}Resets obstacles: A, B Farm cycle drops: 11 Grey Space Pirate (wall) Dev note: FIXME: Shinesparking can also be a viable option, in case it is patched to not cost energy. |
From: 1
Top Left Door
To: 1
Top Left Door
Destroy the bomb wall to open a path for the Geemer to hit Samus through the transition. If using a Power Bomb be careful not to kill the Geemer. Place the Power Bomb far left, next to the door, as the Geemer is leaving the flat part of the ceiling. Requires: "h_ZebesIsAwake" "h_destroyBombWalls" Exit condition: {
"leaveWithGModeSetup": {}
} |
From: 1
Top Left Door
To: 5
Alcatraz Door
There are scroll PLMs one tile to the left of the bomb blocks which can be used to overload PLMs. The bomb blocks then become air and can be passed through. Use Bombs, Spring Ball, or a Geemer damage boost to get across the gap without unmorphing. To survive a Geemer hit, you will need Varia or Gravity or to come in with more than 4 energy (e.g. by coming in with indirect G-mode after leaving with G-mode immobile). Entrance condition: {
"comeInWithGMode": {
"mode": "any",
"morphed": true
}
}Requires: {
"or": [
"h_artificialMorphMovement",
"h_artificialMorphBombHorizontally",
{
"and": [
"canTrickyGMode",
"h_stationaryNeutralDamageBoost",
"h_ZebesIsAwake",
{
"enemyDamage": {
"enemy": "Geemer (blue)",
"type": "contact",
"hits": 1
}
}
]
}
]
} |
From: 1
Top Left Door
To: 8
Central Junction
There are scroll PLMs one tile to the left of the bomb blocks which can be used to overload PLMs. The bomb blocks then become air and can be passed through. Crystal Flash, then use the runway to shinecharge and shinespark towards the left door to waste energy. After 29 energy, the Geemers will be needed to finish damaging down. Shinecharge and get interrupted by any Geemer. Entrance condition: {
"comeInWithGMode": {
"mode": "direct",
"morphed": true
}
}Requires: "h_ZebesIsAwake"
{
"not": "f_ZebesSetAblaze"
}
"h_artificialMorphCrystalFlash"
{
"canShineCharge": {
"usedTiles": 25,
"steepUpTiles": 3,
"steepDownTiles": 3,
"openEnd": 0
}
}
{
"autoReserveTrigger": {}
}
"canRModeSparkInterrupt"
{
"partialRefill": {
"type": "Energy",
"limit": 50
}
} |
From: 1
Top Left Door
To: 8
Central Junction
There are scroll PLMs one tile to the left of the bomb blocks which can be used to overload PLMs. The bomb blocks then become air and can be passed through. After doing so, use X-Ray until the beam fully widens to exit G-Mode and remain in R-Mode. Kill the Skree while in health-bomb range, then the Geemers until Samus has Reserve Energy. Shinecharge and interrupt on a remaining Geemer or the Ripper on the left. Entrance condition: {
"comeInWithGMode": {
"mode": "direct",
"morphed": false
}
}Requires: "h_ZebesIsAwake"
{
"not": "f_ZebesSetAblaze"
}
{
"or": [
"canRiskPermanentLossOfAccess",
{
"disableEquipment": "ETank"
}
]
}
{
"partialRefill": {
"type": "ReserveEnergy",
"limit": 20
}
}
{
"canShineCharge": {
"usedTiles": 25,
"steepUpTiles": 3,
"steepDownTiles": 3,
"openEnd": 0
}
}
{
"autoReserveTrigger": {}
}
"canRModeSparkInterrupt" |
From: 2
Middle Left Door
To: 2
Middle Left Door
Wait 75 seconds for a global Geemer. Requires: {
"enemyDamage": {
"enemy": "Geemer (blue)",
"type": "contact",
"hits": 1
}
}
"h_ZebesIsAwake" |
From: 2
Middle Left Door
To: 2
Middle Left Door
Wait 75 seconds for a global Geemer, or use a Super to grab a closer one. Requires: "h_ZebesIsAwake" Exit condition: {
"leaveWithGModeSetup": {}
} |
From: 3
Bottom Left Horizontal Door
To: 3
Bottom Left Horizontal Door
Wait 90 seconds for a global Geemer. Requires: {
"enemyDamage": {
"enemy": "Geemer (blue)",
"type": "contact",
"hits": 1
}
}
"h_ZebesIsAwake"
"canBePatient" |
From: 3
Bottom Left Horizontal Door
To: 3
Bottom Left Horizontal Door
There is a Geemer just below the door that only moves while on camera. Requires: "h_ZebesIsAwake" Exit condition: {
"leaveWithGModeSetup": {}
} |
From: 3
Bottom Left Horizontal Door
To: 3
Bottom Left Horizontal Door


There is a Geemer just below the door that only moves while on camera. Requires: "h_frozenEnemyRunway" "h_ZebesIsAwake" Exit condition: {
"leaveWithRunway": {
"length": 6,
"openEnd": 1,
"steepUpTiles": 1
}
} |
|
Requires: {
"enemyDamage": {
"enemy": "Geemer (blue)",
"type": "contact",
"hits": 1
}
}
"h_ZebesIsAwake" |
From: 4
Top Right Door
To: 4
Top Right Door

Requires: "h_ZebesIsAwake" Exit condition: {
"leaveWithGModeSetup": {}
} |
From: 4
Top Right Door
To: 4
Top Right Door

Requires: "h_ZebesIsAwake"
{
"canShineCharge": {
"usedTiles": 17,
"steepUpTiles": 3,
"steepDownTiles": 3,
"openEnd": 2
}
}
{
"or": [
"canBeVeryPatient",
{
"ammo": {
"type": "Super",
"count": 1
}
}
]
}
{
"enemyDamage": {
"enemy": "Geemer (blue)",
"type": "contact",
"hits": 1
}
}
"canSlopeSpark"
{
"shinespark": {
"frames": 5,
"excessFrames": 5
}
} |
From: 4
Top Right Door
To: 4
Top Right Door

Requires: "h_ZebesIsAwake"
{
"canShineCharge": {
"usedTiles": 17,
"steepUpTiles": 3,
"steepDownTiles": 3,
"openEnd": 2
}
}
{
"or": [
"canBeVeryPatient",
{
"ammo": {
"type": "Super",
"count": 1
}
}
]
}
{
"enemyDamage": {
"enemy": "Geemer (blue)",
"type": "contact",
"hits": 1
}
}
"canSlopeSpark"
{
"shinespark": {
"frames": 15,
"excessFrames": 0
}
}Exit condition: {
"leaveWithSpark": {
"position": "bottom"
}
} |
|
There are scroll PLMs one tile to the right of the bomb blocks which can be used to overload PLMs, turning the bomb blocks to air. However, if Zebes is awake, two Geemers block the way. The Geemer hits can be avoided with Bombs or Spring Ball. Alternatively, use a Power Bombs, to kill the Geemers and another to boost over to the left Alcatraz entrance, as the Power Bomb blast will render the bomb blocks solid, unable to be turned to air. This is possible but tricky to do with a single Power Bomb: In direct G-mode, use Samus' i-frames to roll through the first Geemer and horizontally bomb boost onto the ledge. In indirect G-mode, roll immediately and place the Power Bomb just after the first downward slope to jump over both Geemers. Entrance condition: {
"comeInWithGMode": {
"mode": "any",
"morphed": true
}
}Requires: {
"or": [
"h_artificialMorphMovement",
{
"and": [
"h_artificialMorphPowerBomb",
{
"or": [
"h_additionalBomb",
"canTrickyGMode"
]
}
]
},
{
"enemyDamage": {
"enemy": "Geemer (blue)",
"type": "contact",
"hits": 1
}
},
"h_ZebesNotAwake"
]
} |
From: 4
Top Right Door
To: 5
Alcatraz Door


There are scroll PLMs one tile to the right of the bomb blocks which can be used to overload PLMs, turning the bomb blocks to air. Take a Geemer hit to regain mobility, then roll through the second with i-frames. Entrance condition: {
"comeInWithGMode": {
"mode": "direct",
"morphed": true,
"mobility": "immobile"
}
}Requires: "h_ZebesIsAwake" |
From: 5
Alcatraz Door
To: 1
Top Left Door
There are scroll PLMs next to the bomb blocks and on the ledge below the Alcatraz exit, which will overload PLMs when going through them. Samus will need to briefly navigate off-screen while to the right of Alcatraz before coming back left. Note that the global Geemer may still be in this area if traversing the room quickly, and can hit Samus off-screen. Entrance condition: {
"comeInWithGMode": {
"mode": "any",
"morphed": true
}
}Requires: "h_artificialMorphMovement"
{
"or": [
"canTrickyDodgeEnemies",
"canOffScreenMovement",
{
"and": [
"h_artificialMorphSpringBall",
{
"haveBlueSuit": {}
}
]
},
{
"enemyDamage": {
"enemy": "Geemer (blue)",
"type": "contact",
"hits": 1
}
},
"h_ZebesNotAwake"
]
} |
|
It takes approximately 3.5 minutes for a global Geemer to reach this location. If using a Super, fire between 19 and 33 seconds after entering the room, then wait approximately 30 more seconds to be hit. Requires: {
"enemyDamage": {
"enemy": "Geemer (blue)",
"type": "contact",
"hits": 1
}
}
"h_ZebesIsAwake"
{
"or": [
"canBeVeryPatient",
{
"and": [
"canComplexGMode",
{
"ammo": {
"type": "Super",
"count": 1
}
}
]
}
]
}Dev note: FIXME: Should manipulating global enemies off screen be a tech? |
From: 5
Alcatraz Door
To: 5
Alcatraz Door
It takes approximately 3.5 minutes for a global Geemer to reach this location, but this can be reduced by using a Super between 19 and 33 seconds after entering the room, to make a Geemer fall and take a shorter path. It is possible to climb the room and watch for the Geemer instead of timing it. Requires: "h_ZebesIsAwake"
{
"or": [
"canBeVeryPatient",
{
"ammo": {
"type": "Super",
"count": 1
}
}
]
}Exit condition: {
"leaveWithGModeSetup": {}
} |
From: 5
Alcatraz Door
To: 8
Central Junction

Wait 3 minutes for a global Geemer to waddle over, or shoot a Super 20 to 30 seconds after entering the room to knock it off the ceiling and save a lot of time. Damage down until Samus is one Geemer hit away from running out of energy, and set reserves to manual. Crouch jump at a very precise time and mid-air morph to contact the Geemer at the peak of the jump, pressing pause to be in the fade-out while getting hit and reaching 0 energy. Set reserves to auto, unpause, and hold left. While reserves are auto-refilling, Samus' i-frames will run out, allowing Samus to be hit by the Geemer again and be boosted high enough to reach the ledge. The screen will be black, which can be fixed by pausing and unpausing again. Requires: {
"obstaclesNotCleared": [
"R-Mode"
]
}
{
"notable": "Alcatraz Escape Double Damage Boost"
}
"h_ZebesIsAwake"
"HiJump"
"Morph"
{
"or": [
"canBeVeryPatient",
{
"ammo": {
"type": "Super",
"count": 1
}
}
]
}
"canCrouchJump"
"canInsaneJump"
"canReserveDoubleDamageBoost"
{
"autoReserveTrigger": {
"minReserveEnergy": 85
}
}
{
"enemyDamage": {
"enemy": "Geemer (blue)",
"type": "contact",
"hits": 1
}
} |
From: 5
Alcatraz Door
To: 8
Central Junction

Enter with direct G-Mode artificial morph, and perform a Crystal Flash to refill reserve energy. Do this all the way to the left, to prevent the Geemer from being destroyed by the lingering light orb. Wait for a global Geemer to make the long trip along the map, or shoot a Super 20 to 30 seconds after entering the room to knock it off the ceiling and save a lot of time. Either way, after the Geemer comes down into Alcatraz, shoot a Super to knock it off the ledge to make it bypass the light orb. Damage down until one Geemer hit away from running out of energy. If Samus has at least one Energy Tank, it will take longer to damage down, in which case an additional Super can be used to knock the Geemer onto the floating platform, to allow unlimited time for damaging down. A final Super can be used to knock the Geemer off the floating platform. Set reserves to manual, stand next to the bomb blocks, and wait for the Geemer to approach. Just before taking a hit, press pause. During the fade-out, hold forward to land quickly after knockback. At a precise moment just before the pause hits, jump and aim down; the aim-down can be buffered before jumping, e.g. by rolling from forward to down through a diagonal input. Set reserves to auto, then unpause while continuing to hold jump. If successful, the forced stand-up will occur close to the ceiling and while Samus still has upward momentum, allowing Samus to clip through. Entrance condition: {
"comeInWithGMode": {
"mode": "direct",
"morphed": true
}
}Requires: "canTrickyGMode"
{
"notable": "Alcatraz Escape G-Mode Crystal Flash Then Forced Standup"
}
"h_ZebesIsAwake"
"canBeVeryPatient"
{
"ammo": {
"type": "Super",
"count": 3
}
}
"h_artificialMorphCrystalFlash"
"canPauseAbuse"
{
"autoReserveTrigger": {}
}
"canRModeStandupClip"
{
"enemyDamage": {
"enemy": "Geemer (blue)",
"type": "contact",
"hits": 1
}
}Dev note: FIXME: A version of this strat could be added with canRiskPermanentLossOfAccess requiring fewer Supers and time, if Samus has no tanks. |
From: 5
Alcatraz Door
To: 8
Central Junction

Wait for a global Geemer to make the long trip along the map, or shoot a Super 20 to 30 seconds after entering the room to knock it off the ceiling and save a lot of time. Freeze it just after it starts climbing the bomb blocks. Spin-jump above it, which will put Samus into a forced crouch where X-Ray cannot be used. Use Grapple to kill a second Geemer, restoring the ability to use X-Ray. Use X-Ray to stand up, then jump up through the ceiling. Requires: {
"notable": "Alcatraz Escape with Grapple X-Ray Ceiling Clip"
}
"h_ZebesIsAwake"
"canBePatient"
{
"or": [
"canBeVeryPatient",
{
"ammo": {
"type": "Super",
"count": 1
}
}
]
}
"h_preciseIceClip"
"canUseGrapple"
"canXRayStandUp"Dev note: Morph could also be used instead of Grapple, but with Morph there is an easier strat that goes up through the tunnel to the left. |
From: 5
Alcatraz Door
To: 8
Central Junction

Wait for a global Geemer to make the long trip along the map, or shoot a Super 20 to 30 seconds after entering the room to knock it off the ceiling and save a lot of time. Hold right against the bomb blocks, take damage from the Geemer, jump, aim-down, and shoot the Geemer shortly before landing. Samus should end up standing on the ground with the Geemer frozen on the wall with a 4-8 pixel gap between it and the ground (overlapping Samus' hitbox). Facing the bomb blocks and pressed against them, jump while holding down (but not crouched) and then hold forward (or forward and down) 5 frames later to break the aim-down pose. If successful, Samus will clip up through the ceiling. This can be attempted several times before the Geemer thaws. Requires: {
"notable": "Alcatraz Escape with HiJump Ceiling Clip"
}
"HiJump"
"h_ZebesIsAwake"
{
  "or": [
    "canBeVeryPatient",
    {
      "ammo": {
        "type": "Super",
        "count": 1
      }
    }
  ]
}
{
"tech": "canPreciseCeilingClip"
}
"canTrickyUseFrozenEnemies"
{
"enemyDamage": {
"enemy": "Geemer (blue)",
"type": "contact",
"hits": 1
}
}
"canInsaneJump"
{
"noBlueSuit": {}
} |
From: 5
Alcatraz Door
To: 8
Central Junction
There are scroll PLMs next to the bomb blocks and on the ledge below the Alcatraz exit, which will overload PLMs when going through them. Samus will need to briefly navigate off-screen while to the right of Alcatraz before coming back left. With Spring Ball or fast IBJ, watch the ceiling to wait for the two global Geemers to pass. Once out of the area, roll over the hill away from the global Geemers and Crystal Flash. Use the runway to shinecharge and shinespark towards the left door to waste energy, careful not to hit the global Geemer(s) with speed echoes. After 29 energy, the Geemer will be needed to finish damaging down. Shinecharge and get interrupted by the Geemer. Entrance condition: {
"comeInWithGMode": {
"mode": "direct",
"morphed": true
}
}Requires: "h_ZebesIsAwake"
{
"not": "f_ZebesSetAblaze"
}
"h_artificialMorphMovement"
"h_artificialMorphCrystalFlash"
{
"canShineCharge": {
"usedTiles": 25,
"steepUpTiles": 3,
"steepDownTiles": 3,
"openEnd": 0
}
}
{
"autoReserveTrigger": {}
}
"canRModeSparkInterrupt"
{
"partialRefill": {
"type": "Energy",
"limit": 50
}
} |
From: 5
Alcatraz Door
To: 8
Central Junction
There are scroll PLMs next to the bomb blocks and on the ledge below the Alcatraz exit, which will overload PLMs when going through them. Samus will need to briefly navigate off-screen while to the right of Alcatraz before coming back left. With a fast ascent, the global Geemers may still be in the top right section and can hit Samus off-screen. Use X-Ray until the beam reaches full width to exit G-mode and remain in R-mode. Kill the Skree while in health-bomb range, then the Geemers until Samus has Reserve Energy. Shinecharge and interrupt on a Geemer or the Ripper on the left. With unlucky drops, it is possible to not get Reserve Energy. It is possible to farm the top right off-screen Geemer to help reduce the chance. With Morph, partially enter the Alcatraz morph tunnel in order to fix the camera. Without Morph, kill the Geemer with a Power Bomb once in this section after overloading PLMs and before unmorphing and exiting G-mode. Entrance condition: {
"comeInWithGMode": {
"mode": "direct",
"morphed": true
}
}Requires: "h_ZebesIsAwake"
{
"not": "f_ZebesSetAblaze"
}
"h_artificialMorphMovement"
{
"or": [
{
"and": [
{
"or": [
"canRiskPermanentLossOfAccess",
{
"disableEquipment": "ETank"
}
]
},
{
"or": [
{
"partialRefill": {
"type": "ReserveEnergy",
"limit": 5
}
},
{
"and": [
{
"or": [
"Morph",
"canBeLucky",
"h_artificialMorphPowerBomb"
]
},
{
"partialRefill": {
"type": "ReserveEnergy",
"limit": 20
}
}
]
}
]
}
]
},
{
"and": [
"canRiskPermanentLossOfAccess",
{
"resourceMissingAtMost": [
{
"type": "RegularEnergy",
"count": 5
}
]
},
{
"partialRefill": {
"type": "ReserveEnergy",
"limit": 50
}
}
]
},
{
"and": [
{
"disableEquipment": "ETank"
},
{
"resourceAvailable": [
{
"type": "RegularEnergy",
"count": 94
}
]
},
{
"partialRefill": {
"type": "ReserveEnergy",
"limit": 50
}
}
]
}
]
}
{
"canShineCharge": {
"usedTiles": 25,
"steepUpTiles": 3,
"steepDownTiles": 3,
"openEnd": 0
}
}
{
"autoReserveTrigger": {}
}
"canRModeSparkInterrupt" |
From: 5
Alcatraz Door
To: 8
Central Junction
Wait 3 minutes for a global Geemer to waddle over, or shoot a Super 20 to 30 seconds after entering the room to knock it off the ceiling and save a lot of time. Freeze the Geemer as it turns onto the middle slope of the left wall to escape - it helps to freeze the Geemer from below. Alternatively, use a Super to knock it off the wall and freeze it mid-air. Requires: "h_ZebesIsAwake"
"canMidAirMorph"
"canTrickyUseFrozenEnemies"
{
"or": [
"canBeVeryPatient",
{
"ammo": {
"type": "Super",
"count": 1
}
}
]
}
{
"or": [
{
"and": [
"canTrickyDodgeEnemies",
{
"or": [
"canDash",
"h_crouchJumpDownGrab",
"canInsaneJump"
]
}
]
},
{
"and": [
"HiJump",
"canTrickyJump",
{
"ammo": {
"type": "Super",
"count": 1
}
}
]
}
]
} |
From: 5
Alcatraz Door
To: 8
Central Junction
There are scroll PLMs next to the bomb blocks and on the ledge below the Alcatraz exit, which will overload PLMs when going through them. Samus will need to briefly navigate off-screen while to the right of Alcatraz before coming back left. Note that the global Geemer may still be in this area if traversing the room quickly, and can hit Samus off-screen. Entrance condition: {
"comeInWithGMode": {
"mode": "any",
"morphed": true
}
}Requires: "h_artificialMorphMovement"
{
"or": [
"canTrickyDodgeEnemies",
"canOffScreenMovement",
{
"and": [
"h_artificialMorphSpringBall",
{
"haveBlueSuit": {}
}
]
},
{
"enemyDamage": {
"enemy": "Geemer (blue)",
"type": "contact",
"hits": 1
}
},
"h_ZebesNotAwake"
]
} |
From: 6
Bottom Right Door (On the Left Shaft)
To: 6
Bottom Right Door (On the Left Shaft)
Wait 2 minutes for a global Geemer. Requires: {
"enemyDamage": {
"enemy": "Geemer (blue)",
"type": "contact",
"hits": 1
}
}
"h_ZebesIsAwake"
{
  "or": [
    "canBePatient",
    {
      "ammo": {
        "type": "Super",
        "count": 1
      }
    }
  ]
} |
From: 6
Bottom Right Door (On the Left Shaft)
To: 6
Bottom Right Door (On the Left Shaft)
Wait 2 minutes for a global Geemer, or use a Super to grab a closer one. Requires: "h_ZebesIsAwake"
{
"or": [
"canBePatient",
{
"ammo": {
"type": "Super",
"count": 1
}
}
]
}Exit condition: {
"leaveWithGModeSetup": {}
} |
From: 6
Bottom Right Door (On the Left Shaft)
To: 6
Bottom Right Door (On the Left Shaft)


Wait 2 minutes for a global Geemer, or use a Super to grab a closer one. Requires: "h_frozenEnemyRunway"
"h_ZebesIsAwake"
{
"or": [
"canBePatient",
{
"ammo": {
"type": "Super",
"count": 1
}
}
]
}Exit condition: {
"leaveWithRunway": {
"length": 5,
"openEnd": 1,
"steepUpTiles": 1
}
} |
From: 7
Bottom Left Vertical Door
To: 7
Bottom Left Vertical Door
Freeze a Geemer on the bottom of the overhang just below the door to Final Missile Bombway. Freeze a second Geemer on the top left of its platform and setup a moonfall between them. Fall off the Geemers and clip into the tile left of the door. Press up to get out of crouch and lose the stored vertical speed (so that X-Ray works). Then turn-around, open the door, and go into the door transition as the third Geemer hits you. Falling off the frozen Geemers requires relatively high precision: This setup is a 4 frame window, not too far left, so you can get to the door transition, not too far right such that you enter the transition when falling. Requires: {
"notable": "Downward G-Mode Setup with Ice"
}
"h_ZebesIsAwake"
"canEnemyStuckMoonfall"
"canFreeFallClip"
"canTrickyUseFrozenEnemies"
"canDownwardGModeSetup"Exit condition: {
"leaveWithGModeSetup": {}
} |
From: 7
Bottom Left Vertical Door
To: 7
Bottom Left Vertical Door
Line up with the far right or left side of doorframe in the room below, to be able to not fall back through after entry, as the door remains open. Be careful not to fall into the door while being hit by the Geemer. Requires: {
"enemyDamage": {
"enemy": "Geemer (blue)",
"type": "contact",
"hits": 1
}
}
"h_ZebesIsAwake"
{
"or": [
"canBePatient",
{
"ammo": {
"type": "Super",
"count": 1
}
}
]
} |
From: 7
Bottom Left Vertical Door
To: 7
Bottom Left Vertical Door
Use a Super to bring a Geemer down to the bottom floating platform. Freeze this Geemer along with a Geemer on the floor and use them to perform an enemy-stuck moonfall. After gaining sufficient speed, move toward the door and clip through the door shell. Falling with too much speed can cause Samus to go out of bounds. Requires: "h_ZebesIsAwake"
{
"ammo": {
"type": "Super",
"count": 1
}
}
"canEnemyStuckMoonfall"
"canFreeFallClip"
"canTrickyUseFrozenEnemies"Bypasses door shell: true |
From: 7
Bottom Left Vertical Door
To: 7
Bottom Left Vertical Door

Freeze a Geemer on the right of the overhang just below the door to Final Missile Bombway. Freeze a second Geemer on the top left of its platform and setup a moonfall between them. Fall off the Geemers and clip past the floating platform below, past the door shell, and into the transition. This setup is highly precise; if you do not have the right speed you may land on the platform below or the door shell. Falling with too much speed can also cause Samus to go out of bounds. Requires: {
"notable": "Ice Moonfall Door Lock Skip Without Supers"
}
"h_ZebesIsAwake"
"canEnemyStuckMoonfall"
"canTrickyUseFrozenEnemies"
"canFreeFallClip"Bypasses door shell: true |
From: 8
Central Junction
To: 1
Top Left Door
Place the Power Bomb below the bomb blocks as the Geemer is leaving the flat part of the ceiling to break it and let the Geemer through. This opens a path for the Geemer to hit Samus through the transition. Requires: "h_ZebesIsAwake" "h_usePowerBomb" Exit condition: {
"leaveWithGModeSetup": {}
}Unlocks doors: {"types":["ammo"],"requires":[]} |
From: 8
Central Junction
To: 1
Top Left Door
After the Geemer is near, destroy the bomb wall using blue speed from the right. This opens a path for the Geemer to hit Samus through the transition. Requires: "h_ZebesIsAwake"
{
"or": [
{
"haveBlueSuit": {}
},
{
"and": [
{
"getBlueSpeed": {
"usedTiles": 25,
"steepUpTiles": 3,
"steepDownTiles": 3,
"openEnd": 1
}
},
"h_blueJump"
]
},
{
"and": [
{
"or": [
{
"canShineCharge": {
"usedTiles": 25,
"steepUpTiles": 3,
"steepDownTiles": 3,
"openEnd": 1
}
},
{
"useFlashSuit": {}
}
]
},
{
"shinespark": {
"frames": 2,
"excessFrames": 2
}
}
]
}
]
}Exit condition: {
"leaveWithGModeSetup": {}
}Unlocks doors: {"types":["ammo"],"requires":[]} |
|
Requires: "h_ZebesIsAwake"
{
"cycleFrames": 1860
}
{
"or": [
{
"resetRoom": {
"nodes": [
3,
4,
6,
7
]
}
},
{
"and": [
{
"resetRoom": {
"nodes": [
1
]
}
},
{
"cycleFrames": 420
},
{
"or": [
"ScrewAttack",
"h_useMorphBombs",
{
"and": [
{
"getBlueSpeed": {
"usedTiles": 25,
"steepUpTiles": 3,
"steepDownTiles": 3,
"openEnd": 1
}
},
"canCarefulJump",
"h_blueJump"
]
}
]
}
]
},
{
"and": [
{
"resetRoom": {
"nodes": [
2
]
}
},
{
"cycleFrames": 240
},
"Morph"
]
},
{
"and": [
"Morph",
{
"resetRoom": {
"nodes": [
5
]
}
},
{
"cycleFrames": 420
},
{
"or": [
"h_bombThings",
{
"and": [
"SpaceJump",
"canMidAirMorph",
"canCarefulJump"
]
},
{
"and": [
{
"notable": "Alcatraz Escape"
},
"canPreciseWallJump",
"canConsecutiveWallJump",
"canWallJumpInstantMorph"
]
},
{
"and": [
"canTrickySpringBallJump",
"canTrickyJump"
]
},
{
"and": [
"HiJump",
"canTrickyDashJump",
"canMidAirMorph"
]
}
]
}
]
}
]
}Resets obstacles: R-Mode Farm cycle drops: 11 Geemer (blue) Dev note: A two-way farming strat could be added, e.g. if it is possible to reset the room at both the top-right and the bottom. |
From: 8
Central Junction
To: 8
Central Junction


Farm Geemers and Skree for energy or else Crystal Flash. The bomb wall respawns so Crystal Flash can't be used to clear it. Shinecharge and get interrupted by the Ripper by the save room door, or leave a Geemer alive. Requires: "h_ZebesIsAwake"
{
"not": "f_ZebesSetAblaze"
}
{
"obstaclesCleared": [
"R-Mode"
]
}
{
"or": [
"h_CrystalFlashForReserveEnergy",
{
"and": [
"h_RModeCanRefillReserves",
{
"resourceMissingAtMost": [
{
"type": "Missile",
"count": 0
}
]
},
{
"partialRefill": {
"type": "ReserveEnergy",
"limit": 100
}
}
]
}
]
}
{
"canShineCharge": {
"usedTiles": 25,
"steepUpTiles": 3,
"steepDownTiles": 3,
"openEnd": 0
}
}
{
"autoReserveTrigger": {}
}
"canRModeSparkInterrupt"Resets obstacles: R-Mode |
|
Shoot a Super at the wall, while the Sciser is directly above Samus. If Samus is on the right side of the door, it will require two Supers, one to knock it down to the platform above her, then another to drop it on her. Requires: {
"enemyDamage": {
"enemy": "Sciser",
"type": "contact",
"hits": 1
}
}
"h_ZebesIsAwake"
{
"ammo": {
"type": "Super",
"count": 2
}
}Dev note: This is just requiring 2 Supers, since the horizontal positioning of Samus is not modeled. |
From: 1
Bottom Left Door
To: 1
Bottom Left Door

Requires: {
"enemyDamage": {
"enemy": "Geemer (blue)",
"type": "contact",
"hits": 1
}
}
"h_ZebesIsAwake" |
From: 1
Bottom Left Door
To: 1
Bottom Left Door


Requires: "h_ZebesIsAwake" Exit condition: {
"leaveWithGModeSetup": {}
} |
From: 1
Bottom Left Door
To: 1
Bottom Left Door
Requires: "h_ZebesIsAwake"
{
"resetRoom": {
"nodes": [
1
]
}
}
{
"cycleFrames": 400
}
{
"or": [
"canDash",
{
"and": [
{
"haveBlueSuit": {}
},
{
"cycleFrames": 80
}
]
}
]
}Resets obstacles: A, B, C Farm cycle drops: 2 Geemer (blue), 2 Skree, 1 Reo |
From: 1
Bottom Left Door
To: 1
Bottom Left Door

Lure the Reo from the right and freeze it in the correct position when it swoops down. Note that using a frozen Geemer may be useful and is easier to setup, particularly if shortcharging out the door. Requires: "h_ZebesIsAwake"
"h_frozenEnemyRunway"
{
"enemyDamage": {
"enemy": "Reo",
"type": "contact",
"hits": 1
}
}Exit condition: {
"leaveWithRunway": {
"length": 6,
"openEnd": 0
}
}Dev note: The Reo can be set up flush with the runway or 3 pixels higher. FIXME: Find and add a description for a normalized setup for this and possibly remove the Reo hit, especially with using the Geemer to extend the runway. |
From: 1
Bottom Left Door
To: 1
Bottom Left Door


Entrance condition: {
"comeInWithRMode": {}
}Requires: "h_ZebesIsAwake"
{
"or": [
"h_CrystalFlashForReserveEnergy",
{
"and": [
"h_RModeCanRefillReserves",
{
"resourceMissingAtMost": [
{
"type": "Missile",
"count": 0
}
]
},
{
"partialRefill": {
"type": "ReserveEnergy",
"limit": 20
}
}
]
}
]
}
{
"canShineCharge": {
"usedTiles": 30,
"openEnd": 0
}
}
{
"autoReserveTrigger": {
"maxReserveEnergy": 95
}
}
"canRModeSparkInterrupt"Dev note: Kill the Geemers for Reserves, or else Crystal Flash. Damage down and use the Reo to interrupt a shinespark wind-up. |
From: 1
Bottom Left Door
To: 3
Hidden Ceiling Item
Have Samus shoot the shot block revealing the item and then quickly get hit by an enemy at the peak of her jump in order to reach the item. No directional inputs should be held while getting hit by the enemy in order to have a neutral boost and reach the item. This is traditionally done with the swooping Reo; after a few failed tries, it may help to reset the room to reposition it. The global Geemer may be easier to use, although it takes longer to get there; jump as it starts moving horizontally again while it is 3 tiles away from the item. Requires: {
"notable": "Ceiling Damage Boost"
}
"h_ZebesIsAwake"
"canNeutralDamageBoost"
{
"enemyDamage": {
"enemy": "Geemer (blue)",
"type": "contact",
"hits": 1
}
}Dev note: Although the Reo is traditionally used for the boost, the Geemer does less damage and should still put this in logic with low energy. |
From: 1
Bottom Left Door
To: 3
Hidden Ceiling Item
While carrying a blue suit, take damage from the Reo after mid-air morphing, to get a boost from it. It helps to crouch jump, using X-Ray to cancel the shinecharge if needed. A standing jump can also work, but with more precision. It is best to unmorph as soon as possible after taking damage, while Samus still has knockback. A slightly later unmorph, after knockback expires, can also work but depends on collision oscillation. Requires: {
"haveBlueSuit": {}
}
{
"notable": "Ceiling Damage Boost"
}
"h_ZebesIsAwake"
{
"tech": "canNeutralDamageBoost"
}
"canMidAirMorph"
"canTrickyDodgeEnemies"
{
"or": [
{
"and": [
"h_blueSuitXRayCancelShinecharge",
"canCrouchJump"
]
},
"canInsaneJump"
]
}
{
"enemyDamage": {
"enemy": "Reo",
"type": "contact",
"hits": 1
}
}Dev note: Technically a blue suit would not be required for this strat, so the `haveBlueSuit` requirement could be dropped, but without a blue suit there would be no reason to do it this way, and the name would be misleading. |
From: 1
Bottom Left Door
To: 3
Hidden Ceiling Item


Requires: "h_ZebesIsAwake" "canUseFrozenEnemies" |
From: 1
Bottom Left Door
To: 5
G-Mode Morph Junction (Bottom)
It is possible to roll off of the ledge and avoid the Geemers, but it is somewhat tight and the timing is likely earlier than expected. Entrance condition: {
"comeInWithGMode": {
"mode": "indirect",
"morphed": true
}
}Requires: {
"or": [
"h_ZebesNotAwake",
"Morph",
"h_artificialMorphSpringBall",
"h_artificialMorphBombThings",
"canTrickyDodgeEnemies",
"h_blueSuitGMode",
{
"enemyDamage": {
"enemy": "Geemer (blue)",
"type": "contact",
"hits": 1
}
}
]
}Dev note: It may be possible to come in indirect and still have enough i-frames to get through the Geemers, but Samus may be coming from a doorless room like Crateria Tube. This is not easy to model and isn't worth doing, because the player will almost certainly canTrickyDodgeEnemies enabled before enabling canArtificialMorph. |
From: 1
Bottom Left Door
To: 6
G-Mode Morph Junction Direct (Bottom)

It is possible to roll off of the ledge over the Geemers, but it is somewhat tight and the timing is likely earlier than expected.. Alternatively, it is possible to roll of the ledge go through the Geemers before Samus' i-frames expire. Entrance condition: {
"comeInWithGMode": {
"mode": "direct",
"morphed": true
}
}Requires: {
"or": [
"h_ZebesNotAwake",
"Morph",
"h_artificialMorphSpringBall",
"h_artificialMorphBombThings",
"canTrickyDodgeEnemies",
"h_blueSuitGMode",
{
"enemyDamage": {
"enemy": "Geemer (blue)",
"type": "contact",
"hits": 1
}
}
]
} |
From: 1
Bottom Left Door
To: 6
G-Mode Morph Junction Direct (Bottom)
Regain mobility with the first Geemer then roll through the second to avoid a second hit. Entrance condition: {
"comeInWithGMode": {
"mode": "direct",
"morphed": true,
"mobility": "immobile"
}
}Requires: "h_ZebesIsAwake" "canUseIFrames" |
From: 2
Top Left Door
To: 1
Bottom Left Door
Entrance condition: {
"comeInWithRMode": {}
}Requires: "h_ZebesIsAwake"
{
"or": [
"h_CrystalFlashForReserveEnergy",
{
"and": [
"Morph",
"h_destroyBombWalls",
"h_RModeCanRefillReserves",
{
"resourceMissingAtMost": [
{
"type": "Missile",
"count": 0
}
]
},
{
"partialRefill": {
"type": "ReserveEnergy",
"limit": 20
}
}
]
}
]
}
{
"canShineCharge": {
"usedTiles": 30,
"openEnd": 0
}
}
{
"autoReserveTrigger": {
"maxReserveEnergy": 95
}
}
"canRModeSparkInterrupt"Clears obstacles: A, B Dev note: Kill the Geemers for Reserves, or else Crystal Flash. Damage down and use the Reo to interrupt a shinespark wind-up. |
From: 2
Top Left Door
To: 2
Top Left Door
Falling down the shaft and breaking the crumble block does not require Morph. Requires: "h_ZebesIsAwake"
{
"obstaclesCleared": [
"A",
"B"
]
}Exit condition: {
"leaveWithGModeSetup": {}
} |
From: 2
Top Left Door
To: 2
Top Left Door
Falling down the shaft and breaking the crumble block does not require Morph. Requires: "h_ZebesIsAwake"
{
"or": [
"h_destroyBombWalls",
{
"obstaclesCleared": [
"A"
]
}
]
}
{
"or": [
"canConsecutiveWallJump",
"SpaceJump",
"canLongIBJ"
]
}Exit condition: {
"leaveWithGModeSetup": {}
} |
G-Mode Setup - Get Hit By Geemer - Broken Power Bomb Blocks
(Expert+)
Blue Brinstar Energy Tank Room
From: 2
Top Left Door
To: 2
Top Left Door
Falling down the shaft and breaking the crumble block does not require Morph. Requires: "h_ZebesIsAwake"
{
"or": [
"h_destroyBombWalls",
{
"obstaclesCleared": [
"A"
]
}
]
}
"h_usePowerBomb"
{
"canShineCharge": {
"usedTiles": 42,
"openEnd": 0
}
}
{
"or": [
{
"shinespark": {
"frames": 36,
"excessFrames": 3
}
},
{
"and": [
"HiJump",
{
"shinespark": {
"frames": 32,
"excessFrames": 3
}
}
]
}
]
}Exit condition: {
"leaveWithGModeSetup": {}
} |
From: 2
Top Left Door
To: 2
Top Left Door
Requires: {
"notable": "Return Through Crumble Blocks"
}
"h_ZebesIsAwake"
"Morph"
{
"or": [
"ScrewAttack",
{
"and": [
"h_useMorphBombs",
{
"cycleFrames": 80
}
]
},
{
"haveBlueSuit": {}
}
]
}
{
"or": [
"canConsecutiveWallJump",
{
"and": [
"SpaceJump",
{
"cycleFrames": 250
}
]
}
]
}
{
"resetRoom": {
"nodes": [
2
]
}
}
{
"cycleFrames": 1210
}
{
"or": [
"canDash",
{
"and": [
{
"haveBlueSuit": {}
},
{
"cycleFrames": 50
}
]
}
]
}Clears obstacles: A, B Resets obstacles: C Farm cycle drops: 2 Geemer (blue), 2 Skree, 1 Reo Dev note: Returning with an IBJ or frozen Geemer would also be possible, but these are probably too slow to model in a farm strat. |
|

Use both Geemers to climb the tall shaft by repeatedly freezing them. Note that one moves locally when on camera and the other moves globally. Requires: "h_ZebesIsAwake"
{
"or": [
"h_usePowerBomb",
{
"and": [
{
"obstaclesCleared": [
"B"
]
},
"Morph"
]
},
{
"obstaclesCleared": [
"C"
]
}
]
}
{
"or": [
{
"obstaclesCleared": [
"A"
]
},
"ScrewAttack",
{
"haveBlueSuit": {}
},
{
"and": [
"h_useMorphBombs",
"canMidAirMorph"
]
}
]
}
"canTrickyUseFrozenEnemies"
"canTrickyJump"
"canCameraManip"Clears obstacles: A, B Dev note: FIXME: It is possible to ceiling ice clip the top block. |
From: 4
Right Item
To: 2
Top Left Door

Use both Geemers to climb the tall shaft by repeatedly freezing them. Note that one moves locally when on camera and the other moves globally. Once Samus is close to the top Bomb Block, freeze one Geemer low and jump as high as possible before placing a power bomb. Continue climbing with the Geemer that survives. Requires: "h_ZebesIsAwake"
{
"or": [
"h_usePowerBomb",
{
"and": [
{
"obstaclesCleared": [
"B"
]
},
"Morph"
]
},
{
"obstaclesCleared": [
"C"
]
}
]
}
"h_usePowerBomb"
"canTrivialMidAirMorph"
"canTrickyUseFrozenEnemies"
"canTrickyJump"
"canBePatient"
"canCameraManip"Clears obstacles: A, B |
From: 4
Right Item
To: 2
Top Left Door
Keep the two Geemers on screen while moving to the right side of the room. Freeze the second Geemer as it exits the Morph Tunnel, with the Crumble block. Use a Super Missile to knock the first Geemer down and freeze it at the pixel perfect height. Become stuck in the wall after using Grapple to kill the frozen Geemer as it walks through Samus, firing to the left. This re-enables XRay climbing. Requires: {
"notable": "Geemer Ice Stuck XRay Climb"
}
"h_ZebesIsAwake"
"canWallIceClip"
"canLongXRayClimb"
"Grapple"
{
"ammo": {
"type": "Super",
"count": 1
}
}
{
"enemyDamage": {
"enemy": "Geemer (blue)",
"type": "contact",
"hits": 1
}
}Dev note: FIXME: The Reo can be used to avoid spending a Super, but it's chaotic. |
From: 5
G-Mode Morph Junction (Bottom)
To: 2
Top Left Door
Overload PLMs by repeatidly bombing the Power Bomb blocks or the side of the crumble block, then enter through the crumble block. If Samus is then going to IBJ up the shaft, and she has Morph, it is worth exiting G-mode first to allow the camera to follow her. Requires: "canGMode"
"h_artificialMorphIBJ"
{
"or": [
"canConsecutiveWallJump",
"SpaceJump",
{
"and": [
"h_artificialMorphLongIBJ",
"canOffScreenMovement"
]
},
{
"and": [
{
"blueSuitShinecharge": {}
},
{
"or": [
{
"shinespark": {
"frames": 32,
"excessFrames": 3
}
},
{
"and": [
"HiJump",
{
"shinespark": {
"frames": 29,
"excessFrames": 3
}
}
]
}
]
}
]
}
]
}
{
"or": [
"h_ZebesIsAwake",
{
"notable": "G-Mode Flashing Lights"
}
]
}Dev note: The off screen movement is just during an artificial morphed IBJ - the IBJ is long and Samus is covered for most of it. |
From: 5
G-Mode Morph Junction (Bottom)
To: 2
Top Left Door


Overload PLMs by shooting the ceiling block item many times. Because the item is in a shot block, this does not require Direct G-mode, nor does it require the item to be uncollected. Requires: "canGMode"
"Morph"
{
"or": [
"canConsecutiveWallJump",
"SpaceJump"
]
}
{
"or": [
"h_ZebesIsAwake",
{
"notable": "G-Mode Flashing Lights"
}
]
} |
From: 5
G-Mode Morph Junction (Bottom)
To: 4
Right Item
Overload PLMs by shooting the ceiling block item many times. Because the item is in a shot block, this does not require Direct G-mode, nor does it require the item to be uncollected. After PLMs are overloaded, pass through the crumble block, exit G-mode, and break the crumble block. Requires: "canGMode"
"Morph"
{
"or": [
"h_ZebesIsAwake",
{
"notable": "G-Mode Flashing Lights"
}
]
}Clears obstacles: B |
From: 6
G-Mode Morph Junction Direct (Bottom)
To: 2
Top Left Door

Touch the item to overload PLMs then go through the crumble block and bomb block at the top of the shaft before exiting G-mode. Requires: "canGMode"
{
"itemNotCollectedAtNode": 4
}
"h_artificialMorphSpringBall"
{
"or": [
"canConsecutiveWallJump",
"SpaceJump",
{
"and": [
{
"blueSuitShinecharge": {}
},
{
"or": [
{
"shinespark": {
"frames": 32,
"excessFrames": 3
}
},
{
"and": [
"HiJump",
{
"shinespark": {
"frames": 29,
"excessFrames": 3
}
}
]
}
]
}
]
}
]
}
{
"or": [
"h_ZebesIsAwake",
{
"notable": "G-Mode Flashing Lights"
}
]
}Collects items: 4 Dev note: This will force Samus to pick up the item, so it can only be done once. itemNotCollectedAtNode implicitly includes canRiskPermanentLossOfAccess. Spring Ball is required, because Morph, Bombs, or a Power Bomb will allow other strats to be used instead. |
G-Mode Morph Touch the Item, Break the Crumble, Geemer Ice Climb
(Expert+)
Blue Brinstar Energy Tank Room
From: 6
G-Mode Morph Junction Direct (Bottom)
To: 2
Top Left Door
Touch the item to overload PLMs then go through the crumble block. Use the global Geemer to climb the tall shaft by repeatedly freezing it. Use a blue suit or Screw Attack at the top to break the block Requires: "canGMode"
"h_ZebesIsAwake"
{
"itemNotCollectedAtNode": 4
}
"h_artificialMorphSpringBall"
{
"or": [
"ScrewAttack",
{
"haveBlueSuit": {}
}
]
}
"canTrickyUseFrozenEnemies"
"canTrickyJump"
"canCameraManip"Clears obstacles: A, B Collects items: 4 Dev note: This will force Samus to pick up the item, so it can only be done once. itemNotCollectedAtNode implicitly includes canRiskPermanentLossOfAccess. Spring Ball is required, because Morph, Bombs, or a Power Bomb will allow other strats to be used instead. This strat requires Zebes to be awake, so there will be no flashing lights. FIXME: It is possible to ceiling ice clip the top block. |
|

Shoot a Super at the wall, while the Geemer is moving vertically. If it is on the bottom of the shot blocks, it will not fall. Requires: {
"enemyDamage": {
"enemy": "Geemer (blue)",
"type": "contact",
"hits": 1
}
}
"h_ZebesIsAwake"
{
"ammo": {
"type": "Super",
"count": 1
}
} |
From: 1
Top Left Door
To: 1
Top Left Door
Carefully shoot the shoot blocks at the right time to knock off a Geemer without killing it. Requires: "h_ZebesIsAwake" Exit condition: {
"leaveWithGModeSetup": {}
} |
|

Requires: "h_ZebesIsAwake"
{
"or": [
{
"and": [
{
"resetRoom": {
"nodes": [
1,
2
]
}
},
{
"cycleFrames": 150
}
]
},
{
"and": [
"Morph",
{
"resetRoom": {
"nodes": [
3
]
}
},
{
"or": [
{
"cycleFrames": 510
},
{
"and": [
"Wave",
{
"cycleFrames": 340
}
]
}
]
}
]
}
]
}Farm cycle drops: 2 Geemer (blue) |
From: 1
Top Left Door
To: 1
Top Left Door
Use a Super to knock a Geemer off the ceiling, and freeze it mid-air over the Koma (face statue) on the left. Perform a moonfall between the Geemer and the Koma to leave with stored fall speed. Requires: {
"notable": "Ice Moonfall Leave with Stored Fall Speed"
}
"h_ZebesIsAwake"
{
"ammo": {
"type": "Super",
"count": 1
}
}
"canEnemyStuckMoonfall"
"canTrickyUseFrozenEnemies"Exit condition: {
"leaveWithStoredFallSpeed": {
"fallSpeedInTiles": 1
}
}Dev note: The fall speed stored is between 1 and 2 tiles. |
|


Destroy some of the shot blocks to allow a Geemer to crawl along the ceiling toward the left side of the room. When the Geemer is below the Koma (face statue) and slightly to the right, destroy the shot blocks beneath it to allow it to fall. Freeze the Geemer mid-air, spin jump and aim-down to stand on top of it, then moonfall to the left between the Geemer and the Koma. Allow Samus to automatically clip down through the Geemer after gaining enough speed. Ensure that Samus' hitbox is entirely contained below the Koma (not to the right of it). Using a second frozen Geemer to stand on to perform the moonfall can possibly make it easier to set up. Requires: {
"notable": "Ice Moonfall Clip"
}
"h_ZebesIsAwake"
"canEnemyStuckMoonfall"
"canTrickyUseFrozenEnemies" |
|
Shoot a Super at the wall, while the Geemer is moving vertically. If it is on the bottom of the shot blocks, it will not fall. Requires: {
"enemyDamage": {
"enemy": "Geemer (blue)",
"type": "contact",
"hits": 1
}
}
"h_ZebesIsAwake"
{
"ammo": {
"type": "Super",
"count": 1
}
} |
|
Carefully shoot the shoot blocks at the right time to knock off a Geemer without killing it. Requires: "h_ZebesIsAwake" Exit condition: {
"leaveWithGModeSetup": {}
} |
From: 2
Right Door
To: 2
Right Door
Use a Super to knock a Geemer off the ceiling, and freeze it mid-air over the Koma (face statue) on the right. Perform a moonfall between the Geemer and the Koma to leave with stored fall speed. Requires: {
"notable": "Ice Moonfall Leave with Stored Fall Speed"
}
"h_ZebesIsAwake"
{
"ammo": {
"type": "Super",
"count": 1
}
}
"canEnemyStuckMoonfall"
"canTrickyUseFrozenEnemies"Exit condition: {
"leaveWithStoredFallSpeed": {
"fallSpeedInTiles": 1
}
}Dev note: The fall speed stored is between 1 and 2 tiles. |
From: 3
Bottom Left Door
To: 3
Bottom Left Door

Carefully shoot the shoot blocks at the right time to knock off a Geemer without killing it. Requires: "Morph" "h_ZebesIsAwake" Exit condition: {
"leaveWithGModeSetup": {}
} |
|
Entrance condition: {
"comeInShinecharging": {
"length": 3,
"openEnd": 0
},
"comesInHeated": "no"
}Requires: "h_ZebesNotAwake" "h_CrystalSpark" |
From: 1
Left Door
To: 1
Left Door
On entry, quickly roll to the right next to the stair, while Samus is protected with i-frames. It is required to avoid double hitting the Sidehopper with the Power Bomb or it will die. It can help to place a Power Bomb and roll to the right to reduce the chance that the ceiling hopper gets double hit, and to lure the third hopper. Quickly getting back into position and Crystal Flashing will usually get Samus hit by either the ceiling or right hopper. Entrance condition: {
"comeInWithGMode": {
"mode": "direct",
"morphed": true
}
}Requires: "h_ZebesIsAwake"
"h_artificialMorphComplexRModeCrystalFlashInterrupt"
{
"ammo": {
"type": "Missile",
"count": 10
}
}
{
"or": [
"h_partialEnemyDamageReduction",
{
"resourceAtMost": [
{
"type": "RegularEnergy",
"count": 19
}
]
},
{
"and": [
{
"resourceCapacity": [
{
"type": "RegularEnergy",
"count": 199
}
]
},
{
"resourceCapacity": [
{
"type": "ReserveEnergy",
"count": 199
}
]
}
]
}
]
}
{
"obstaclesCleared": [
"C"
]
}Dev note: Killing the hoppers after this is easy, as Samus will have i-frames, the Sidehoppers will be injured, and Samus will have some extra ammo just in case. A different setup could also break A, but Samus will end with at least 10 Power Bombs, so this is ignored for simplicity. |
|
Entrance condition: {
"comeInNormally": {}
}Requires: "h_ZebesNotAwake" Clears obstacles: C Dev note: The obstacle isn't really cleared, but should enable all strats that require it to be. |
|

Requires: {
"enemyDamage": {
"enemy": "Sidehopper",
"type": "contact",
"hits": 1
}
}
"h_ZebesIsAwake" |
|

Requires: "h_ZebesIsAwake" Exit condition: {
"leaveWithGModeSetup": {}
} |
|
Immediately on room entry, the Sidehopper is going to hit Samus. Afterwards, quickly roll to the right next to the stair. It is required to avoid double hitting the Sidehopper with the Power Bomb or it will die. It can help to place a Power Bomb and roll to the right to reduce the chance that the ceiling hopper gets double hit, and to lure the third hopper. Quickly getting back into position and Crystal Flashing will usually get Samus hit by either the ceiling or right hopper. Entrance condition: {
"comeInWithRMode": {}
}Requires: "h_ZebesIsAwake"
{
"enemyDamage": {
"enemy": "Sidehopper",
"type": "contact",
"hits": 1
}
}
"canComplexRModeCrystalFlashInterrupt"
{
"ammo": {
"type": "Missile",
"count": 10
}
}
{
"or": [
"h_partialEnemyDamageReduction",
{
"resourceAtMost": [
{
"type": "RegularEnergy",
"count": 19
}
]
},
{
"and": [
{
"resourceCapacity": [
{
"type": "RegularEnergy",
"count": 199
}
]
},
{
"resourceCapacity": [
{
"type": "ReserveEnergy",
"count": 199
}
]
}
]
}
]
}
{
"obstaclesCleared": [
"C"
]
}Dev note: Killing the hoppers after this is easy, as Samus will have i-frames, the Sidehoppers will be injured, and Samus will have some extra ammo just in case. A different setup could also break A, but Samus will end with at least 10 Power Bombs, so this is ignored for simplicity. |
|

Due to R-Mode Entry, getting hit by the Sidehopper can only be avoided by a quick Screw Attack after releasing the X-Ray Scope. You can attempt to farm the two ground Sidehoppers for Reserve Energy. Otherwise, you must use a Crystal Flash. Leave the ceiling Sidehopper alive to clear the runway for a shortcharge. Initiate the shinespark in midair so that Samus is in the path to be hit. Entrance condition: {
"comeInWithRMode": {}
}Requires: "h_ZebesIsAwake"
{
"or": [
"ScrewAttack",
{
"and": [
{
"enemyDamage": {
"enemy": "Sidehopper",
"type": "contact",
"hits": 1
}
},
{
"enemyKill": {
"enemies": [
[
"Sidehopper",
"Sidehopper"
]
],
"explicitWeapons": [
"Missile",
"Super",
"PowerBomb",
"Plasma"
]
}
}
]
}
]
}
{
"or": [
"h_CrystalFlashForReserveEnergy",
{
"and": [
"h_RModeCanRefillReserves",
{
"or": [
{
"and": [
{
"resourceMissingAtMost": [
{
"type": "Missile",
"count": 0
}
]
},
{
"resourceMissingAtMost": [
{
"type": "Super",
"count": 0
}
]
}
]
},
"canBeVeryLucky"
]
},
"canBeLucky",
{
"partialRefill": {
"type": "ReserveEnergy",
"limit": 20
}
}
]
}
]
}
"canTrickyDodgeEnemies"
{
"canShineCharge": {
"usedTiles": 25,
"openEnd": 0
}
}
{
"autoReserveTrigger": {
"maxReserveEnergy": 95
}
}
"canRModeSparkInterrupt"Clears obstacles: C Dev note: FIXME: More equipment combinations can work. |
|
Requires: "h_ZebesIsAwake"
"canPrepareForNextRoom"
{
"resetRoom": {
"nodes": [
1
]
}
}
{
"or": [
{
"and": [
"Plasma",
"Charge",
{
"cycleFrames": 270
}
]
},
{
"and": [
"ScrewAttack",
{
"cycleFrames": 250
}
]
},
{
"and": [
"Plasma",
"Wave",
"canTrickyDodgeEnemies",
{
"cycleFrames": 300
}
]
},
{
"and": [
"h_PlasmaHitbox",
{
"cycleFrames": 360
}
]
},
{
"and": [
{
"haveBlueSuit": {}
},
{
"cycleFrames": 330
}
]
},
{
"and": [
"Morph",
"canTrickyDodgeEnemies",
{
"or": [
{
"and": [
"Wave",
"Spazer",
{
"cycleFrames": 600
}
]
},
{
"and": [
"Wave",
{
"cycleFrames": 840
}
]
},
{
"and": [
"Spazer",
"Ice",
{
"cycleFrames": 840
}
]
},
{
"and": [
"Spazer",
{
"cycleFrames": 960
}
]
},
{
"and": [
"Ice",
{
"cycleFrames": 1560
}
]
},
{
"and": [
"canBePatient",
{
"cycleFrames": 2320
}
]
}
]
}
]
}
]
}Clears obstacles: C Resets obstacles: A, B Farm cycle drops: 3 Sidehopper |
|
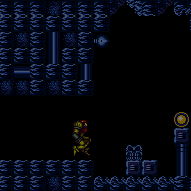
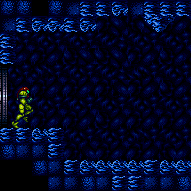
Overload the PLMs by rolling through the camera scroll blocks which are 4 tiles to the right of the stair by the door. Entrance condition: {
"comeInWithGMode": {
"mode": "any",
"morphed": true
}
}Requires: "h_ZebesNotAwake" |
From: 1
Left Door
To: 5
Left Item

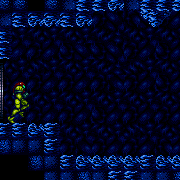
Overload the PLMs by rolling through the camera scroll blocks which are 4 tiles to the right of the stair by the door. Place a Power Bomb next to the right wall then quickly exit G-mode before it explodes to destroy the blocks. Entrance condition: {
"comeInWithGMode": {
"mode": "any",
"morphed": true
}
}Requires: "h_ZebesNotAwake"
"h_artificialMorphPowerBomb"
{
"or": [
"h_artificialMorphMovement",
"h_additionalBomb"
]
}Clears obstacles: B |
|
Cross the room then lure and kill the two floor Sidehoppers using the morph tunnel. With the ceiling Sidehopper in the top right corner, quickly roll to the left next to the stair. It is required to avoid double hitting the Sidehopper with the Power Bomb or it will die. Place a Power Bomb, Wait a second, then roll to the right to lure the hopper and quickly return and Crystal Flash. Waiting briefly will prevent the hopper from coming too soon and getting double hit. Entrance condition: {
"comeInWithRMode": {}
}Requires: "h_ZebesIsAwake"
"h_usePowerBomb"
{
"or": [
"h_bombThings",
{
"and": [
{
"getBlueSpeed": {
"usedTiles": 21,
"openEnd": 1
}
},
"canSpeedball"
]
},
"h_blueSuitGMode"
]
}
"canComplexRModeCrystalFlashInterrupt"
{
"ammo": {
"type": "Missile",
"count": 10
}
}
{
"or": [
"h_partialEnemyDamageReduction",
{
"resourceAtMost": [
{
"type": "RegularEnergy",
"count": 19
}
]
},
{
"and": [
{
"resourceCapacity": [
{
"type": "RegularEnergy",
"count": 199
}
]
},
{
"resourceCapacity": [
{
"type": "ReserveEnergy",
"count": 199
}
]
}
]
}
]
}
{
"obstaclesCleared": [
"A",
"B",
"C"
]
} |
|
The hoppers have a poor energy drop rate. The rightmost two can be killed easily for two chances at a drop, otherwise a Crystal Flash must be used to get reserves. Entrance condition: {
"comeInWithRMode": {}
}Requires: "h_ZebesIsAwake"
{
"or": [
"h_CrystalFlashForReserveEnergy",
{
"and": [
"h_usePowerBomb",
"h_RModeCanRefillReserves",
{
"or": [
{
"and": [
{
"resourceMissingAtMost": [
{
"type": "Missile",
"count": 0
}
]
},
{
"resourceMissingAtMost": [
{
"type": "Super",
"count": 0
}
]
}
]
},
"canBeVeryLucky"
]
},
"canBeLucky",
{
"partialRefill": {
"type": "ReserveEnergy",
"limit": 20
}
}
]
}
]
}
{
"or": [
{
"and": [
{
"getBlueSpeed": {
"usedTiles": 21,
"openEnd": 1
}
},
"canSpeedball"
]
},
"h_bombThings"
]
}
{
"canShineCharge": {
"usedTiles": 21,
"openEnd": 1
}
}
{
"autoReserveTrigger": {
"maxReserveEnergy": 95
}
}
"canRModeSparkInterrupt"Clears obstacles: A, B, C |