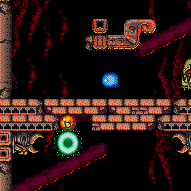
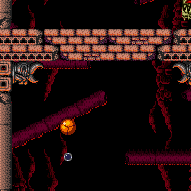
canBombAboveIBJ (Extreme)
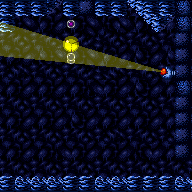
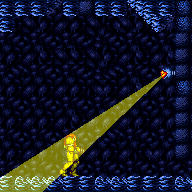
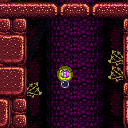
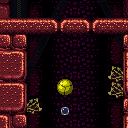
The ability to break blocks above Samus while maintaining an ongoing IBJ without falling.
Dependencies: canIBJ
Strats ()
|
Requires: "canBombAboveIBJ" |
|
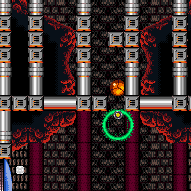
Jump into IBJ to avoid breaking the ledges. Place a Power Bomb on the ascent to break the block and continue the IBJ through it. It is possible to do without a Power Bomb with canBombAboveIBJ. Requires: {
"noBlueSuit": {}
}
"canJumpIntoIBJ"
"canLongIBJ"
{
"or": [
"canBombAboveIBJ",
"canPowerBombMidIBJ"
]
}
{
"obstaclesCleared": [
"B"
]
} |
|
Requires: {
"or": [
"f_DefeatedGoldenTorizo",
{
"obstaclesCleared": [
"f_DefeatedGoldenTorizo"
]
}
]
}
{
"or": [
{
"and": [
"canLongIBJ",
{
"heatFrames": 3000
}
]
},
{
"and": [
"canJumpIntoIBJ",
{
"heatFrames": 1860
}
]
},
{
"and": [
"HiJump",
"canJumpIntoIBJ",
{
"heatFrames": 1300
}
]
},
{
"and": [
"canJumpIntoIBJ",
"canDoubleBombJump",
{
"heatFrames": 1180
}
]
},
{
"and": [
"HiJump",
"canJumpIntoIBJ",
"canDoubleBombJump",
{
"heatFrames": 900
}
]
},
{
"and": [
"canJumpIntoIBJ",
"canDoubleBombJump",
"canBombAboveIBJ",
{
"heatFrames": 890
}
]
},
{
"and": [
"HiJump",
"canJumpIntoIBJ",
"canDoubleBombJump",
"canBombAboveIBJ",
{
"heatFrames": 700
}
]
}
]
} |
|
Requires: {
"obstaclesCleared": [
"B",
"C"
]
}
"canLongIBJ"
{
"or": [
{
"heatFrames": 2090
},
{
"and": [
"canJumpIntoIBJ",
{
"or": [
{
"heatFrames": 1510
},
{
"and": [
"canDoubleBombJump",
{
"heatFrames": 980
}
]
},
{
"and": [
"HiJump",
"canDoubleBombJump",
{
"heatFrames": 860
}
]
}
]
}
]
}
]
}
{
"or": [
{
"obstaclesCleared": [
"A"
]
},
"canPowerBombMidIBJ",
{
"haveBlueSuit": {}
},
{
"and": [
"canBombAboveIBJ",
{
"heatFrames": 60
}
]
}
]
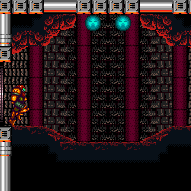
}Clears obstacles: A Dev note: This assumes the bottom bomb blocks are completely broken, making it necessary to start the IBJ from the bottom of the room. |
|
Requires: {
"obstaclesNotCleared": [
"C"
]
}
{
"noBlueSuit": {}
}
"canJumpIntoIBJ"
"canLongIBJ"
{
"or": [
{
"heatFrames": 1300
},
{
"and": [
"canDoubleBombJump",
{
"heatFrames": 690
}
]
},
{
"and": [
"HiJump",
"canDoubleBombJump",
{
"heatFrames": 590
}
]
}
]
}
{
"or": [
{
"obstaclesCleared": [
"A"
]
},
"canPowerBombMidIBJ",
{
"and": [
"canBombAboveIBJ",
{
"heatFrames": 60
}
]
}
]
}Clears obstacles: A |
|
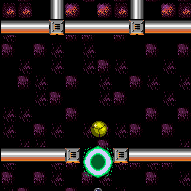
The shot block may respawn while bomb jumping and can be cleared by weaving a Power Bomb into the IBJ, or with a bomb placed overhead while bomb jumping. The Power Bomb can be placed one tile higher than the doors to also clear the Power Bomb Blocks above at the same time. Requires: "canIBJ"
{
"or": [
{
"and": [
{
"or": [
"canBombAboveIBJ",
"canPowerBombMidIBJ"
]
},
{
"heatFrames": 1000
}
]
},
{
"and": [
"canJumpIntoIBJ",
{
"heatFrames": 480
}
]
},
{
"and": [
"canDoubleBombJump",
"canJumpIntoIBJ",
{
"heatFrames": 300
}
]
}
]
}
{
"or": [
{
"and": [
"h_usePowerBomb",
{
"heatFrames": 50
}
]
},
{
"obstaclesCleared": [
"A"
]
}
]
}Clears obstacles: A Unlocks doors: {"types":["missiles"],"requires":[{"heatFrames":30}]}
{"types":["powerbomb"],"requires":[],"useImplicitRequires":false}Dev note: Placing a power bomb to break the shot block and the power bomb blocks without dropping the IBJ is the same level of control as canBombAboveIBJ. |
|
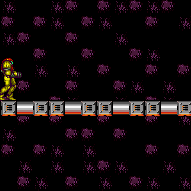
Shoot the block before starting or in mid-air, then use Spring Ball to bounce on the crumble blocks and start an IBJ. The shot block respawns quickly so it's pretty unforgiving on the IBJ executions. Conservatively placing bombs for the IBJ will not make it up in time, unless the block is broken while IBJing. Requires: {
"obstaclesCleared": [
"B"
]
}
"canJumpIntoIBJ"
"h_useSpringBall"
{
"or": [
"canTrickyJump",
"canDoubleBombJump",
"canBombAboveIBJ",
{
"ammo": {
"type": "PowerBomb",
"count": 1
}
}
]
}
{
"heatFrames": 500
} |
From: 6
Bottom Platform Junction With Pirates Killed
To: 4
Junction Above Bomb Blocks
Requires: "canLongIBJ"
{
"or": [
{
"and": [
"canJumpIntoIBJ",
{
"heatFrames": 1250
}
]
},
{
"and": [
"canJumpIntoIBJ",
"canDoubleBombJump",
{
"heatFrames": 700
}
]
},
{
"and": [
"HiJump",
"canJumpIntoIBJ",
"canDoubleBombJump",
{
"heatFrames": 630
}
]
},
{
"heatFrames": 2000
}
]
}
{
"or": [
"canPowerBombMidIBJ",
{
"and": [
"canBombAboveIBJ",
"canStaggeredIBJ",
{
"heatFrames": 220
}
]
},
{
"obstaclesCleared": [
"A"
]
},
{
"haveBlueSuit": {}
}
]
}Clears obstacles: A |


