canRJump (Expert)

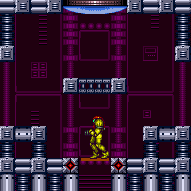
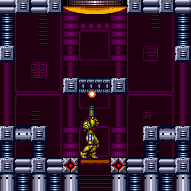
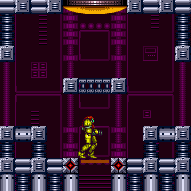
Performing a tight mid-air morph with the help of an angle-crouch jump and/or a pause buffer. This allows mid-air morphing in a 3-tile-high space in air physics, or a 2-tile-high space in water physics. "R" refers to holding an angle button while jumping from a crouch, to negate the vertical boost that a crouch jump would otherwise give: 1) Hold down to crouch, and continue to hold down. 2) Additionally hold an angle button, either angle up or angle down. 3) While crouched and holding both down and angle, pause and jump just before the pause hits (similar to a gravity jump). 4) Release all inputs during the pause screen. 5) During the unpause black screen, press and hold jump and diagonal down-forward.
While unpausing, it is important to wait for the pause menu to fade out to completely black before pressing the down input, in order for it to register as a newly pressed input and trigger Samus to morph; the other inputs (jump and forward) could be pressed and held starting at any time while unpausing; forward can even be delayed for some time after the unpause finishes. In air physics there is a 3-frame window for jumping before the pause hits (in water physics it is a 4-frame window). With greater precision the same technique can also work without crouching: e.g. if carrying a flash suit it can be done with a standing angle-down jump, and this gives a 2-frame window for the jump (a spin jump can also work, with greater difficulty). Likewise, the trick can work with an angle crouch without a pause buffer: this gives a 3-frame window within which to both release and re-press down (a 4-frame window in water physics).
Dependencies: canDisableEquipment, canMidAirMorph, canTrivialMidAirMorph
Dev note: It is also possible to morph in a 3-tile-high space (in air physics) with neither an angle-crouch nor a pause buffer: this requires a frame-perfect release of down 3 frames after jumping, followed by a frame-perfect re-press on the next frame, and would fall under the higher-difficulty tech canInsaneMidAirMorph. It could be relevant if simultaneously carrying a flash suit and a blue suit without Speed Booster.
Strats ()
|
Overload PLMs using the scroll block at the top of the stairs immediately in front of the bomb blocks. Reach the bottom and pass through the bomb blocks while still in G-mode. Entrance condition: {
"comeInWithGMode": {
"mode": "any",
"morphed": true
}
}Requires: {
"or": [
"h_artificialMorphSpringBall",
"h_artificialMorphBombs",
{
"and": [
"Morph",
"h_fourTileJumpMorph"
]
}
]
}Dev note: PBs cannot be used, as they will solidify the bomb blocks. |
|

Overload PLMs using the scroll block at the top of the stairs immediately in front of the bomb blocks. Fall down to the lower bomb blocks while still in G-mode Morph. Entrance condition: {
"comeInWithGMode": {
"mode": "any",
"morphed": true
}
}Requires: {
"or": [
"h_artificialMorphSpringBall",
"h_artificialMorphBombs",
{
"and": [
"Morph",
"h_fourTileJumpMorph"
]
}
]
}Dev note: PBs cannot be used, as they will solidify the bomb blocks. |
|
Overload PLMs using the scroll block at the top of the stairs next to the bomb blocks. With PLMs still overloaded, Samus can simply Crystal Flash and run through the bomb wall at the bottom to shinecharge. When damaging down, note that Pirates will place invisible, stationary lasers that will damage Samus: these can help with wasting energy, but remaining unused lasers must be kept in mind. Lead a wall pirate to the bottom of the shaft, shinecharge, and windup in front of it to get interrupted by a shot. Entrance condition: {
"comeInWithGMode": {
"mode": "direct",
"morphed": true
}
}Requires: {
"not": "f_ZebesSetAblaze"
}
"h_ZebesIsAwake"
{
  "or": [
    "h_artificialMorphSpringBall",
    "h_artificialMorphBombs",
    {
      "and": [
        "Morph",
        "h_fourTileJumpMorph"
      ]
    }
  ]
}
"h_artificialMorphCrystalFlash"
{
"canShineCharge": {
"usedTiles": 28,
"openEnd": 0
}
}
{
"autoReserveTrigger": {
"maxReserveEnergy": 95
}
}
"canRModeSparkInterrupt"
{
"partialRefill": {
"type": "Energy",
"limit": 50
}
} |
|
Overload PLMs using the scroll block at the top of the stairs next to the bomb blocks. Entrance condition: {
"comeInWithGMode": {
"mode": "any",
"morphed": true
}
}Requires: {
"or": [
"h_artificialMorphSpringBall",
"h_artificialMorphBombs",
{
"and": [
"Morph",
"h_fourTileJumpMorph"
]
}
]
}Dev note: PBs cannot be used, as they will solidify the bomb blocks. |
|

Overload PLMs using the scroll block at the top of the stairs next to the bomb blocks. Fall down and pass through bomb wall at the bottom while still in G-mode. Entrance condition: {
"comeInWithGMode": {
"mode": "any",
"morphed": true
}
}Requires: {
"or": [
"h_artificialMorphSpringBall",
"h_artificialMorphBombs",
{
"and": [
"Morph",
"h_fourTileJumpMorph"
]
}
]
}Dev note: PBs cannot be used, as they will solidify the bomb blocks. |
|
Overload PLMs using the scroll block at the top of the stairs next to the bomb blocks. If Morph is not available, careful movement is needed with SpringBall to reach the top without taking a hit from a pirate or its stationary, invisible lasers. Entrance condition: {
"comeInWithGMode": {
"mode": "any",
"morphed": true
}
}Requires: {
"or": [
"h_artificialMorphSpringBall",
"h_artificialMorphBombs",
"h_fourTileJumpMorph"
]
}
{
"or": [
"Morph",
"h_ZebesNotAwake",
{
"and": [
"h_artificialMorphSpringBall",
{
"or": [
"HiJump",
"canTrickyDodgeEnemies"
]
}
]
}
]
} |
|
Overload PLMs using the scroll block at the top of the stairs next to the bomb blocks. With PLMs still overloaded, Samus can simply Crystal Flash and run through the bomb wall at the bottom to shinecharge. When damaging down, note that Pirates will place invisible, stationary lasers that will damage Samus: these can help with wasting energy, but remaining unused lasers must be kept in mind. Lead a wall pirate to the bottom of the shaft, shinecharge, and windup in front of it to get interrupted by a shot. Entrance condition: {
"comeInWithGMode": {
"mode": "direct",
"morphed": true
}
}Requires: {
"not": "f_ZebesSetAblaze"
}
"h_ZebesIsAwake"
{
  "or": [
    "h_artificialMorphSpringBall",
    "h_artificialMorphBombs",
    {
      "and": [
        "Morph",
        "h_fourTileJumpMorph"
      ]
    }
  ]
}
"h_artificialMorphCrystalFlash"
{
"canShineCharge": {
"usedTiles": 28,
"openEnd": 0
}
}
{
"autoReserveTrigger": {
"maxReserveEnergy": 95
}
}
"canRModeSparkInterrupt"
{
"partialRefill": {
"type": "Energy",
"limit": 50
}
} |
|
Entrance condition: {
"comeInWithGMode": {
"mode": "any",
"morphed": true
}
}Requires: {
"or": [
"h_artificialMorphSpringBall",
"h_artificialMorphBombs",
"h_fourTileJumpMorph"
]
}Dev note: A Power Bomb cannot be used, as it will solidify the bomb block. |
From: 2
Elevator
To: 2
Elevator
In order to align and place a Power Bomb at the correct pixel, perform a stationary spin jump and hit the ceiling before starting to morph. Requires: {
"or": [
"canInsaneJump",
{
"and": [
"h_fourTileJumpMorph",
"canStationarySpinJump"
]
}
]
}
"h_elevatorCrystalFlash"Exit condition: {
"leaveNormally": {}
} |
|
Requires: {
"obstaclesCleared": [
"A"
]
}
"h_threeTileJumpMorph" |
From: 2
Bottom Left Door
To: 6
Junction Behind Fune

A paricularly precise mid-air morph can get up and over the Fune without damage. Stand a half tile away from the Fune when jump morphing for a higher ceiling. It's a 2.5 tile high mid air morph. It can be performed similar to how a 2 or 3 tile high morph is performed. Requires: {
"notable": "Morph Over the Fune"
}
{
"noFlashSuit": {}
}
"h_fourTileJumpMorph"
"canTrickyJump"
{
"or": [
"canInsaneJump",
{
"enemyDamage": {
"enemy": "Fune",
"type": "fireball",
"hits": 1
}
}
]
}Dev note: It is possible but very hard to jump morph over the fune with a flash suit. R jumping helps. |
From: 6
Junction Behind Fune
To: 2
Bottom Left Door
Requires: "canRJump" Dev note: There is a way to walljump morph over the Fune, but a pause buffer is magnitudes easier. |
From: 6
Bowling Chozo Statue
To: 1
Top Left Door
Jump or Spring Ball jump into a breakable Grapple block. The timing is precise and it can help to break two Grapple blocks to use one as a cue. Crystal Flash then X-ray climb to the region above (less than 1 screen). There is a chance that Samus will not be able to Crystal Flash unless first placing a Bomb or Power Bomb. Requires: {
"notable": "Grapple Block Crystal Flash"
}
"canUseGrapple"
"canJumpIntoRespawningBlock"
"canTrickyJump"
{
"or": [
"HiJump",
"canTrickySpringBallJump",
{
"and": [
"canSpringBallJumpMidAir",
{
"not": "f_DefeatedPhantoon"
},
"canRiskPermanentLossOfAccess"
]
}
]
}
"h_bombThings"
"h_CrystalFlash"
"canXRayClimb"
{
"or": [
"h_fourTileJumpMorph",
"h_useSpringBall",
"canIBJ",
{
"getBlueSpeed": {
"usedTiles": 16,
"steepDownTiles": 4,
"openEnd": 0
}
},
{
"and": [
{
"not": "f_DefeatedPhantoon"
},
"canRiskPermanentLossOfAccess"
]
}
]
}Exit condition: {
"leaveNormally": {}
}Unlocks doors: {"types":["ammo"],"requires":[]}Dev note: FIXME: This may be possible with a spike hit and speedy jump. |
From: 6
Bowling Chozo Statue
To: 1
Top Left Door

Use a Grapple fling to get stuck inside a breakable Grapple block. It can help to break two or more Grapple blocks in a row. Crystal Flash then X-ray climb to the region above (less than 1 screen). There is a chance that Samus will not be able to Crystal Flash unless first placing a Bomb or Power Bomb. Requires: {
"notable": "Grapple Block Crystal Flash"
}
"canPreciseGrapple"
"canJumpIntoRespawningBlock"
"canInsaneJump"
"h_bombThings"
"h_CrystalFlash"
"canXRayClimb"
{
"or": [
"h_fourTileJumpMorph",
"h_useSpringBall",
"canIBJ",
{
"getBlueSpeed": {
"usedTiles": 16,
"steepDownTiles": 4,
"openEnd": 0
}
},
{
"and": [
{
"not": "f_DefeatedPhantoon"
},
"canRiskPermanentLossOfAccess"
]
}
]
}Exit condition: {
"leaveNormally": {}
}Unlocks doors: {"types":["ammo"],"requires":[]} |
From: 3
Junction Left of Morph Tunnel
To: 6
Junction Right of Morph Tunnel

This can be done with a wall jump instant morph to prevent pausing (which can be useful to prevent losing a blue suit). An R-jump can also be used but is only useful to save time by pausing once instead of twice. Requires: "h_navigateUnderwater" "h_threeTileJumpMorph" |
|


Requires: "h_threeTileJumpMorph" |
|

Requires: {
"or": [
{
"and": [
"h_fourTileJumpMorph",
"h_complexToCarryFlashSuit"
]
},
{
"and": [
"canPreciseWallJump",
"canWallJumpInstantMorph"
]
}
]
} |
|
Requires: "h_threeTileJumpMorph" |
|

Must come in from the right door and jump at the end of the runway to scroll the camera up without bringing the menu's on screen. Requires: "HiJump"
"canCameraManip"
{
"or": [
"h_bombThings",
"h_useSpringBall",
{
"and": [
"canMidAirMorph",
"Gravity",
"canTrickyJump"
]
},
"h_threeTileJumpMorph"
]
}
{
"canShineCharge": {
"usedTiles": 22,
"openEnd": 1
}
}
{
"enemyDamage": {
"enemy": "Menu",
"type": "contact",
"hits": 1
}
}
"canSlopeSpark"
"h_XModeSpikeHitLeniency"
{
"shinespark": {
"frames": 9,
"excessFrames": 9
}
}Dev note: FIXME: implement numeric enemy damage |
From: 2
Right Door
To: 3
Junction Left of Morph Tunnel
Farm the two Owtches for energy and clear away all but one Menu from the left. Shinecharge through the tunnel and use the Menus from the left to interrupt. Entrance condition: {
"comeInWithRMode": {}
}Requires: {
"or": [
"h_bombThings",
"h_useSpringBall",
{
"and": [
"canMidAirMorph",
"Gravity",
"canTrickyJump"
]
},
"h_threeTileJumpMorph"
]
}
{
"or": [
"h_CrystalFlashForReserveEnergy",
{
"and": [
"h_RModeCanRefillReserves",
{
"or": [
{
"and": [
{
"enemyKill": {
"enemies": [
[
"Owtch",
"Owtch"
]
],
"excludedWeapons": [
"PowerBomb"
]
}
},
{
"enemyKill": {
"enemies": [
[
"Menu",
"Menu"
]
],
"explicitWeapons": [
"Missile",
"Plasma",
"Ice+Wave+Spazer"
]
}
}
]
},
"h_usePowerBomb"
]
},
{
"partialRefill": {
"type": "ReserveEnergy",
"limit": 20
}
}
]
}
]
}
{
"canShineCharge": {
"usedTiles": 22,
"openEnd": 2
}
}
{
"autoReserveTrigger": {
"maxReserveEnergy": 95
}
}
"canRModeSparkInterrupt" |
From: 2
Right Door
To: 3
Junction Left of Morph Tunnel

Requires: "h_threeTileJumpMorph"
{
"obstaclesCleared": [
"A"
]
} |
|
Roll all the way right before using Xray to stand up, aligned with the right side tiles. Partially clip into the floor to enable the next jump. Use an R-Jump to morph into the tunnel. The second morph ball sized hole can be passed by simply jumping out of the floor clip position with diagonal held. Requires: "canXRayStandUp" "canPartialFloorClip" "canRJump" |