Bubble Mountain: Side Platform Cross Room Jump
Room ID: 97
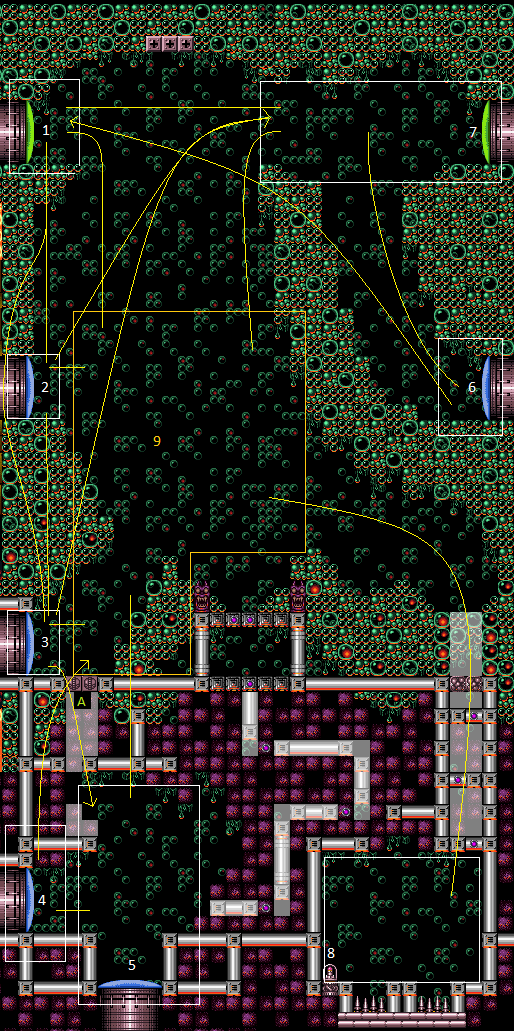
From: 2
Left Side - Top Middle Door
To: 1
Left Side - Top Door
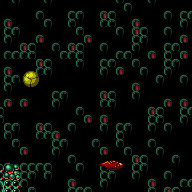

Entrance condition: "comeInWithSidePlatform": {
"platforms": [
{
"minHeight": 1,
"maxHeight": 1,
"minTiles": 13,
"speedBooster": "yes",
"obstructions": [[1, 0]],
"requires": [
{"or": [
{"and": [
"HiJump",
{"or": [
"canTrickyDodgeEnemies",
{"enemyDamage": {"enemy": "Waver", "type": "contact", "hits": 1}}
]}
]},
{"and": [
"canTrickySpringBallJump",
{"or": [
"canTrickyDashJump",
{"and": [
"canNeutralDamageBoost",
{"enemyDamage": {"enemy": "Waver", "type": "contact", "hits": 1}}
]}
]}
]}
]}
],
"note": ["This applies to Warehouse Entrance."],
"detailNote": [
"If Hi-Jump is available, it is possible to kill the Waver using angle-up shots."
]
},
{
"minHeight": 2,
"maxHeight": 2,
"minTiles": 11.4375,
"speedBooster": "yes",
"obstructions": [[1, 0]],
"requires": [
{"or": [
{"and": [
"HiJump",
"canHorizontalDamageBoost",
{"enemyDamage": {"enemy": "Waver", "type": "contact", "hits": 1}}
]},
{"and": [
"canTrickyDashJump",
"canTrickySpringBallJump"
]}
]}
],
"note": ["This applies to Ridley Tank Room, Halfie Climb Room, and Dust Torizo Room."],
"detailNote": [
"In the case of the Spring Ball mid-air jump, maintain forward momentum while entering the pause menu,",
"so that the mid-air jump gets a boost in jump height.",
"A backward input may be buffered along with the jump input during the unpause black screen."
]
},
{
"minHeight": 2,
"maxHeight": 2,
"minTiles": 27.4375,
"speedBooster": "yes",
"obstructions": [[1, 0]],
"requires": [
"canTrickyJump",
{"or": [
{"and": [
"HiJump",
{"or": [
"canTrickyDashJump",
"canTrickyDodgeEnemies",
{"enemyDamage": {"enemy": "Waver", "type": "contact", "hits": 1}}
]}
]},
"canTrickySpringBallJump"
]}
],
"note": ["This applies to Dust Torizo Room and Halfie Climb Room."],
"detailNote": [
"In the Hi-Jump case, it helps to use a little less than the full available runway,",
"in order to get a higher jump and more easily avoid the Waver."
]
},
{
"minHeight": 3,
"maxHeight": 3,
"minTiles": 10.4375,
"speedBooster": "yes",
"obstructions": [[1, 0]],
"requires": [
"canTrickyDashJump",
"canTrickySpringBallJump"
],
"note": ["This applies to Big Boy Room and Mickey Mouse Room."]
},
{
"minHeight": 2,
"maxHeight": 2,
"minTiles": 45,
"speedBooster": "yes",
"obstructions": [[2, 0]],
"requires": [
{"or": [
{"and": [
"canMomentumConservingMorph",
"canTrickySpringBallJump"
]},
{"and": [
"canInsaneJump",
{"or": [
"canHorizontalDamageBoost",
"canNeutralDamageBoost"
]},
{"enemyDamage": {"enemy": "Waver", "type": "contact", "hits": 1}}
]},
{"and": [
"canInsaneJump",
"HiJump"
]}
]}
],
"note": ["This applies to Waterway Energy Tank Room."],
"detailNote": [
"If Spring Ball is available, it is easier to use less than the full runway;",
"a momentum-conserving morph is not required but makes it more reliable.",
"Otherwise, back against the Speed blocks, and arm pump 4 times to advance 8 pixels.",
"Spin jump through the door (do not aim down), and use Hi-Jump or neutral knockback or a damage boost from a Waver to get up."
]
},
{
"minHeight": 2,
"maxHeight": 2,
"minTiles": 20,
"speedBooster": "yes",
"obstructions": [[3, 0]],
"requires": [
"canTrickyDashJump",
"canMomentumConservingMorph",
"canTrickySpringBallJump"
],
"note": ["This applies to Metroid Room 1 and Statues Hallway."]
},
{
"minHeight": 3,
"maxHeight": 3,
"minTiles": 37.4375,
"speedBooster": "yes",
"obstructions": [[3, 0]],
"requires": [
{"or": [
"canMomentumConservingMorph",
{"and": [
"canInsaneJump",
"HiJump"
]}
]}
],
"note": ["This applies to Flyway."]
},
{
"minHeight": 2,
"maxHeight": 2,
"minTiles": 45,
"speedBooster": "yes",
"obstructions": [[4, 0]],
"requires": [
"canInsaneJump",
"canMomentumConservingMorph",
"canInsaneMidAirMorph"
],
"note": ["This applies to Baby Kraid Room."]
},
{
"minHeight": 3,
"maxHeight": 3,
"minTiles": 39.4375,
"speedBooster": "yes",
"obstructions": [[3, 2]],
"requires": [
"canTrickyJump",
{"or": [
"HiJump",
"canTrickySpringBallJump"
]}
],
"note": ["This applies to Metal Pirates Room."]
}
]
} |