canWallJumpBombBoost (Expert)
The ability to accurately place a bomb or Power Bomb in mid-air following a wall jump, then using that bomb explosion to propel Samus forward. There is a timing component where the bomb is placed while rising then hit while falling, and a momentum component for maximizing horizontal distance.
Dependencies: canMidAirMorph, canTrivialMidAirMorph, canWallJumpInstantMorph
Strats ()
|
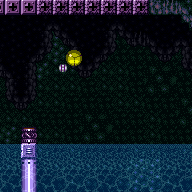
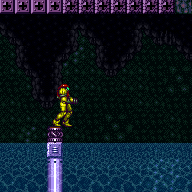
Perform a wall jump off the item pedestal while avoiding the water. Lay a Power Bomb (or Bomb) and use it to boost to the right, with a well-timed unmorph to reset fall speed. The placement of the bomb is more lenient with a CWJ. It is ideal to gain 3 frames of dash speed, the maximum possible, but lower amounts can work. It is even possible to do a regular wall jump instead of a CWJ, but the CWJ makes it significantly more lenient. It is best for the wall jump to be performed as high as possible. If Speed Booster is available, equipping it will generally be helpful, as it will increase the height of Samus' wall jump based on the amount of dash speed. Requires: {
"notable": "Walljump Bomb Boost"
}
{
"or": [
"canCWJ",
"canBePatient"
]
}
"canWallJumpBombBoost"
"canResetFallSpeed"
{
"obstaclesNotCleared": [
"A",
"B",
"C"
]
} |
From: 13
Bottom Junction
To: 5
Lower Section - Bottom Right Door
Use multiple HBJs or extremely precise walljump in bomb boosts to cross the room without dashing. Requires: {
"or": [
"canHBJ",
{
"and": [
"canBeVeryPatient",
"canWallJumpBombBoost",
"h_additionalBomb",
"h_additionalBomb"
]
}
]
}Dev note: canBeVeryPatient added for difficulty placement |
From: 3
Right Door, In the Water
To: 1
Left Door
Requires: "canWallJumpBombBoost" |
From: 7
Junction (Bottom of Room)
To: 6
Junction (Above Bottom Rippers)
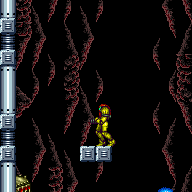
Starting on the right ledge at the bottom of Red Tower, wall jump just below the middle plant, just above the top ripper. Place two bombs out of the wall jump landing on the first bomb and getting boosted by both. While rising, place two more bombs for a second HBJ. Colliding with the side of the ledge after the third bomb can help. Requires: {
"notable": "Midair HBJ"
}
"canWallJumpBombBoost"
"canHBJ" |
|
Requires: "canWallJumpBombBoost" |
From: 2
Bottom Left Door
To: 4
Junction Above Bomb Blocks
Ignore the Yellow Pirates by walljumping up the left side to start a diagonal bomb jump from the wall. Requires: {
"haveBlueSuit": {}
}
"canWallJumpBombBoost"
"canDiagonalBombJump"
{
"heatFrames": 700
}
{
"or": [
"h_heatResistant",
{
"and": [
"canInsaneJump",
"canPauseAbuse"
]
},
{
"resourceCapacity": [
{
"type": "RegularEnergy",
"count": 149
}
]
}
]
}Clears obstacles: A Dev note: With Reserves only, this strat requires much more precise movement and either pause abuse or optimal reserve management. |
From: 2
Bottom Left Door
To: 4
Junction Above Bomb Blocks
Ignore the Yellow Pirates by walljumping up the left side to start a diagonal bomb jump from the wall, including a power bomb to clear the bomb blocks. Two quick walljumps upon entering the room can position Samus to get the left pirate to jump to the right and jump over the right pirate's lazer attack. Jump up the left wall and begin bomb jumping starting with a power bomb. Requires: {
"notable": "Power Bomb Diagonal Bomb Jump"
}
"canFastWallJumpClimb"
"canWallJumpBombBoost"
"canDiagonalBombJump"
"h_usePowerBomb"
{
"heatFrames": 930
}
{
"or": [
"h_heatResistant",
{
"and": [
"canInsaneJump",
"canPauseAbuse"
]
},
{
"resourceCapacity": [
{
"type": "RegularEnergy",
"count": 149
}
]
}
]
}Clears obstacles: A Dev note: There is a very similar strat using an HBJ that is a little faster but more precise and overall harder. With Reserves only, this strat requires much more precise movement and either pause abuse or optimal reserve management. |
|
Starting from the top left ledge, wall jump to place a bomb or Power Bomb just below and to the right of the bottom left plant on the wall. Use the bomb to boost Samus towards the item, then unmorph to reduce her fall speed and barely reach the item. Requires: "canWallJumpBombBoost" |
|
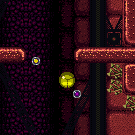
Walljump into a midair Horizontal Bomb Jump from just above the acid to reach the first platform. HBJ from the ground to reach the second platform. Then simply jump to reach the far runway. Requires: "canInsaneWallJump"
"canWallJumpBombBoost"
"canHBJ"
{
"or": [
{
"obstaclesCleared": [
"B"
]
},
{
"and": [
"canBeLucky",
"canCameraManip",
"canMetroidAvoid"
]
}
]
} |
|
Jump to the first platform. Walljump low off the platform into a midair horizontal bomb jump. Finally, either jump into a horizontal bomb boost, or use another horizontal bomb jump to reach the far runway. Unmorph to clear the rinka while falling. Requires: "canInsaneWallJump"
"canWallJumpBombBoost"
"canHBJ"
{
"or": [
{
"obstaclesCleared": [
"A",
"B"
]
},
{
"and": [
"canTrickyDodgeEnemies",
"canCameraManip",
"canMetroidAvoid"
]
}
]
} |

