canTunnelCrawl (Very Hard)

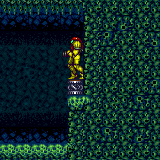
Moving along a 2-tile-high passage while standing up by repeatedly spin-jumping and then pressing down. The tech comes with softlock risks without Morph Ball or a way to wiggle to the right with canTurnaroundAimCancel With X-Ray, it may be easier to wiggle with canXRayTurnaround.
Dependencies: canTwoTileSqueeze
Strats ()
|


Requires: "HiJump"
{
"or": [
{
"obstaclesCleared": [
"A"
]
},
"h_bombThings",
{
"and": [
"h_avoidScrewStuck",
{
"or": [
"canTunnelCrawl",
"canSpeedyJump",
{
"and": [
"canXRayStandUp",
"Morph"
]
}
]
}
]
}
]
}Clears obstacles: A Dev note: HiJump alone can only reach the lower bomb block. |
|
Shinespark from the end of the entry runway, just past the down slope. Samus will crash into the last set of blocks preventing access to the opposite door. Entrance condition: {
"comeInShinecharged": {}
}Requires: {
"shineChargeFrames": 37
}
"canShinechargeMovement"
"canHorizontalShinespark"
{
"shinespark": {
"frames": 70,
"excessFrames": 0
}
}
{
"or": [
"Morph",
"canTunnelCrawl",
"canTurnaroundAimCancel",
{
"and": [
"canTwoTileSqueeze",
"canXRayTurnaround"
]
}
]
} |
|
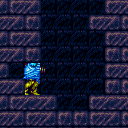
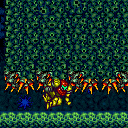
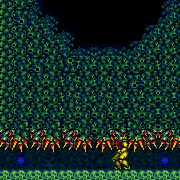
Shoot out only the lower 2 shot blocks on the side Samus will be climbing. Grab a Beetom and use Morph or a tunnel crawl to pixel align the Beetom 1 pixel deep into the wall (2 or 3 pixels can also work). If morphed, use X-Ray stand up. Shoot to the right (horizontally or diagonally down) to freeze the Beetom. Continue refreezing during the next steps. Grab the other Beetom and stand close, but not too close, to the first. Do a small jump, but not too low, and do an aim-up shot the frame before Samus lands. This second Beetom needs to be exactly 1 pixel below the first. Refreeze the first before testing the positioning. Jump onto the second Beetom, and run into the wall to clip into it (walking can also work if the Beetom is not too deep). X-Ray climb up 2.5 screens and then fire upwards to clear shot blocks. Continue climbing and finish by walking away from the crumble blocks. For freezing the second Beetom, only certain jump heights will work. Otherwise the Beetom will skip over the correct position and may be frozen too low (2 pixels below the other Beetom). From a standing position, holding jump for 5, 8, 9, or 12 frames will work; with a crouch jump, holding jump for 5, 6, or 10 frames will work. It is recommended to use a crouch jump, aiming for a 5 or 6 frame jump. Requires: {
"noBlueSuit": {}
}
{
"notable": "Beetom X-Ray Climb"
}
{
"enemyDamage": {
"enemy": "Beetom",
"type": "contact",
"hits": 6
}
}
{
"or": [
"Morph",
{
"and": [
"canTunnelCrawl",
{
"enemyDamage": {
"enemy": "Beetom",
"type": "contact",
"hits": 3
}
}
]
}
]
}
"canWallIceClip"
"canLongXRayClimb"
"canBeVeryPatient"Resets obstacles: A Dev note: 2 hits are assumed to position the two Beetoms (plus 3 more if tunnel crawling), then 1 hit for each failed clip attempt, with 4 failed attempts. With Ice, Samus would be able to slowly farm the Green Pirates. One could descend through 8 visiting one of 5 or 6 and X-Ray climb back up to the top door using the non visited node. |
From: 3
Middle Visible Item
To: 4
Right Hidden Item
Tunnel crawl with Screw Attack to break the bomb blocks. With a very precise jump and aim down, it is possible to jump deep enough into where the first block was in order to only require a turnaround jump, but it's not easier. Requires: "Morph" "ScrewAttack" "canTunnelCrawl" Collects items: 3 |
From: 3
Bottom Left Door
To: 6
Junction (Right of Tunnel)
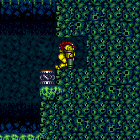
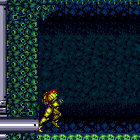
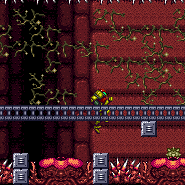
Moving left to right is a bit more tricky to get into the tunnel. Land aiming down approximately 3 pixels inside the leftmost tile. If Samus is too far left she will fall out, too far right and a thorn pushes her out, not aiming down puts her stuck in crouch. Then spinjump right to take a thorn hit and get wedged in the ceiling. Then start the crawl while taking constant thorn damage. Perform one jump per thorn hit. Note that if Samus is hit by the thorn before landing, aiming down is not necessary. Note that a moonfall may be helpful to get into the tunnel. Without moonwalk, a downback can be used instead: fall off with low speed and start a downback right away. (This doesn't always work.) Requires: {
"notable": "Spikeway Tunnel Crawl"
}
"canTunnelCrawl"
"canTrickyJump"
{
"thornHits": 31
}
{
"or": [
{
"noBlueSuit": {}
},
{
"and": [
"h_trickyToCarryBlueSuit",
{
"thornHits": 31
}
]
}
]
} |
From: 6
Junction (Right of Tunnel)
To: 3
Bottom Left Door

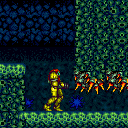
Moving right to left is a bit easier to get into the tunnel. Land aiming down approximately 3 pixels inside the rightmost tile. If Samus is too far right she will fall out, too far left and a thorn pushes her out, not aiming down puts her stuck in crouch. Then spinjump left to take a thorn hit and get wedged in the ceiling. Then start the crawl while taking constant thorn damage. Perform one jump per thorn hit. Note that if Samus is hit by the thorn before landing, aiming down is not necessary. Note that a downback may be helpful to get into the tunnel: stand fully on the left side of the nearby ledge and run off then start and hold a downback to land in position. Requires: {
"notable": "Spikeway Tunnel Crawl"
}
"canTunnelCrawl"
"canTrickyJump"
{
"thornHits": 31
}
{
"or": [
{
"noBlueSuit": {}
},
{
"and": [
"h_trickyToCarryBlueSuit",
{
"thornHits": 31
}
]
}
]
}
{
"obstaclesCleared": [
"A"
]
}Dev note: This is not feasible to do with beetoms on Samus. Fortunately avoiding the Beetoms also requires canTrickyJump. |
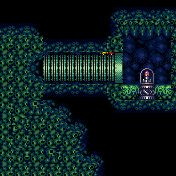
From: 4
Item (Through the Pipe)
To: 5
Junction The Left End of Morph Tube
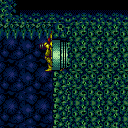
It's a long Tunnel Crawl, so there's a heavy softlock risk. Requires: {
"notable": "Tunnel Crawl"
}
"canTunnelCrawl" |
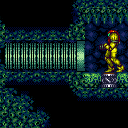
From: 5
Junction The Left End of Morph Tube
To: 4
Item (Through the Pipe)

It's a long Tunnel Crawl, so there's a heavy softlock risk. Requires: {
"notable": "Tunnel Crawl"
}
"canTunnelCrawl" |
|

Use the Solid Blocks next to the Samus Eater to clip up through the Power Bomb Blocks. The thorns do not cover the entire blocks above. Jump barely only onto the corner to avoid the damage. Carefully jump around the thorns, tunnel crawl slightly to avoid touching the thorns when partial floor clipping. Morph and x-ray can be used instead to setup the clip much easier. Requires: "canTrickyJump"
{
"or": [
"canXRayCeilingClip",
"canTunnelCrawl"
]
}
"canPartialFloorClip"
"canCeilingClip" |
|
Requires: {
"ammo": {
"type": "Super",
"count": 2
}
}
"canTunnelCrawl" |
|
Requires: {
"ammo": {
"type": "Super",
"count": 2
}
}
"canTunnelCrawl" |
|
If the tube is unbroken, this requires a tunnel crawl or unmorph at the top right of the tube in order to clip down through it. Entrance condition: {
"comeInWithGMode": {
"mode": "any",
"morphed": false
},
"comesThroughToilet": "any"
}Requires: {
"or": [
{
"or": [
"f_MaridiaTubeBroken",
{
"obstaclesCleared": [
"f_MaridiaTubeBroken"
]
}
]
},
{
"and": [
{
"notable": "Tube Clip"
},
"canTunnelCrawl"
]
}
]
}Exit condition: {
"leaveWithGMode": {
"morphed": false
}
} |