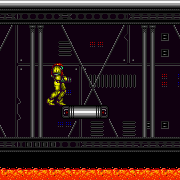
canBounceBall (Very Hard)
Using Morph to retain momentum when transitioning to water physics.
Dependencies: canLateralMidAirMorph, canMidAirMorph, canDash, canTrivialMidAirMorph
Strats ()
|
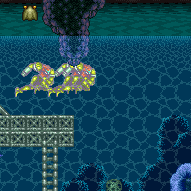
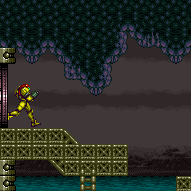
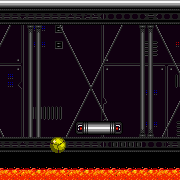
Enter the room while building a shinespark and use it on the lowest part of the ramp to cross the room and reach a raised ledge on the right side wall. From there, use SpaceJump to escape the water. Carry the shinespark to the bottom of the ramp by delaying the first Choot with two Power Beam shots, killing it, or bounceballing through it. The Choot can be shot diagonally from the middle platform, and again by running off that platform and aiming down to float above it. Entrance condition: {
"comeInShinecharging": {
"length": 6,
"openEnd": 1,
"steepDownTiles": 1
}
}Requires: "canShinechargeMovementComplex"
"canCarefulJump"
{
"or": [
{
"and": [
"canShinechargeMovementTricky",
"canTrickyDodgeEnemies"
]
},
{
"and": [
{
"enemyDamage": {
"enemy": "Choot",
"type": "contact",
"hits": 1
}
},
"canNeutralDamageBoost",
"canBounceBall"
]
},
{
"and": [
"canMockball",
{
"or": [
"canPseudoScrew",
"ScrewAttack",
"Plasma",
"Wave",
{
"ammo": {
"type": "Missile",
"count": 1
}
},
{
"ammo": {
"type": "Super",
"count": 1
}
}
]
}
]
}
]
}
{
"shinespark": {
"frames": 125,
"excessFrames": 5
}
}
"canSpaceJumpWaterBounce"
{
"or": [
{
"and": [
"canTrickyJump",
"canDownGrab"
]
},
"canWallJump"
]
}Dev note: There is 1 unusable tile in this runway. |
From: 1
Left Door
To: 2
Right Door
Enter the room while building a shinespark and use it on the lowest part of the ramp to diagonally spark up and out of the water. Unmorphing with the correct timing and positioning for the Shinespark are very precise, and there are no extra frames on the Shinespark timer to work with. Carry the shinespark to the bottom of the ramp either with a bounce ball which takes damage from the Choot, or delay the first Choot with two shots and then use a late mockball. Then shinespark up and use SpaceJump to reach the door. Entrance condition: {
"comeInShinecharging": {
"length": 6,
"openEnd": 1,
"steepDownTiles": 1
}
}Requires: {
"notable": "Shinespark Water Escape With Lower Choot Alive"
}
{
"or": [
{
"and": [
{
"enemyDamage": {
"enemy": "Choot",
"type": "contact",
"hits": 1
}
},
"canNeutralDamageBoost",
"canBounceBall"
]
},
{
"and": [
"canDodgeWhileShooting",
"canMockball"
]
}
]
}
"canShinechargeMovementComplex"
{
"shinespark": {
"frames": 14,
"excessFrames": 5
}
}
"SpaceJump"
"canTrickyJump"Dev note: There is 1 unusable tile in this runway. |
From: 2
Right Door
To: 3
Above Lava Junction
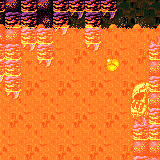
Bounceball into the Lava, unmorphing with good timing to sink faster and drift efficiently towards the bottom right Namihe. Wall jump at about eye height (4 pixel window) to gain enough height to reach the center portion of ceiling. While rising, wiggle to shrink Samus' hitbox. Some walljump positions will not need to wiggle, when wall jumping far away from the Namihe. Jumping, from the wall, around the next lowest overhang is very precise and taking any extra time to position will increase the amount of lava damage being taken. It may help to disable Hi-Jump for this part. Then wall jump again to exit the lava and reach the left ledge. Requires: {
"notable": "GT Max Suitless Right Side Climb"
}
"canSuitlessLavaDive"
"canUseEnemies"
"HiJump"
"canBounceBall"
"canMidairWiggle"
"canConsecutiveWallJump"
"canInsaneWallJump"
{
"gravitylessLavaFrames": 392
}
{
"heatFrames": 515
}Dev note: FIXME: a dashless version could be added. |
From: 2
Right Door
To: 3
Above Lava Junction
Use a flash suit to shinespark out of the lava. A diagonal spark is slightly better though Samus will barely move horizontally. Requires: "canSuitlessLavaDive"
"canDash"
{
"disableEquipment": "SpeedBooster"
}
{
"useFlashSuit": {}
}
{
"or": [
{
"and": [
"canBounceBall",
{
"lavaFrames": 270
},
{
"shinespark": {
"frames": 32
}
},
{
"heatFrames": 420
}
]
},
{
"and": [
{
"lavaFrames": 375
},
{
"shinespark": {
"frames": 27
}
},
{
"heatFrames": 525
}
]
}
]
} |
From: 2
Right Door
To: 4
Lava, Left Wall
Jump into the door frame so that Samus is falling when entering this room. Morph before reaching the lava and Bounce down to the bottom. Entrance condition: {
"comeInJumping": {
"speedBooster": "no",
"minTiles": 4
}
}Requires: {
"or": [
"h_lavaProof",
"canSuitlessLavaDive"
]
}
"canCarefulJump"
"canBounceBall"
{
"heatFrames": 330
}
{
"lavaFrames": 290
}Dev note: 4 Tile jump entry is the Normalized Kronic Boost room setup. |
From: 2
Right Door
To: 4
Lava, Left Wall
Build up a little run speed and do a small jump into the lava. Morph before reaching the lava, Bounce, and Unmorph shortly after sink slightly before floating down to the stairs. Requires: {
"or": [
"h_lavaProof",
"canSuitlessLavaDive"
]
}
"canTrickyJump"
"canBounceBall"
{
"heatFrames": 365
}
{
"lavaFrames": 305
} |
From: 2
Right Door
To: 5
Lava, Center Namihe
Jump into the door frame so that Samus is falling when entering this room. Morph before reaching the lava, Bounce, and Unmorph shortly after sink slightly before floating down to the stairs. Entrance condition: {
"comeInJumping": {
"speedBooster": "no",
"minTiles": 4
}
}Requires: {
"or": [
"h_lavaProof",
"canSuitlessLavaDive"
]
}
"canCarefulJump"
"canBounceBall"
{
"heatFrames": 230
}
{
"lavaFrames": 190
}Dev note: 4 Tile jump entry is the Normalized Kronic Boost room setup. |
From: 2
Right Door
To: 5
Lava, Center Namihe
Build up a little run speed and do a small jump into the lava. Morph before reaching the lava, Bounce, and Unmorph shortly after sink slightly before floating down to the stairs. Requires: {
"or": [
"h_lavaProof",
"canSuitlessLavaDive"
]
}
"canTrickyJump"
"canBounceBall"
{
"heatFrames": 260
}
{
"lavaFrames": 200
} |
From: 1
Left Door
To: 2
Right Door
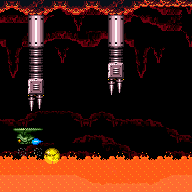
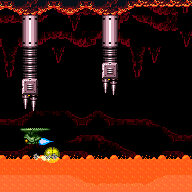
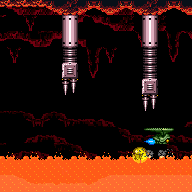
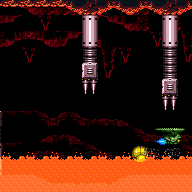
Perform a bounceball to minimize lava damage. Move quickly to reach the second Tripper on its first cycle. Ride it, morph to avoid spike damage, shoot open the door, and run off of the Tripper (rather than jumping off). Entrance condition: {
"comeInRunning": {
"speedBooster": "no",
"minTiles": 1
}
}Requires: "canBounceBall"
"canWallJump"
{
"heatFrames": 600
}
{
"lavaFrames": 70
} |
From: 1
Left Door
To: 2
Right Door
Perform a bounceball to minimize lava damage. Move quickly to reach the second Tripper on its first cycle. Ride it, morph to avoid spike damage, shoot open the door, and run off of the Tripper (rather than jumping off). Entrance condition: {
"comeInRunning": {
"speedBooster": "no",
"minTiles": 3
}
}Requires: "canBounceBall"
"canWallJump"
{
"heatFrames": 600
}
{
"lavaFrames": 60
} |
From: 1
Left Door
To: 2
Right Door
Perform a bounceball to minimize lava damage. Move quickly to reach the second Tripper on its first cycle. Ride it, morph to avoid spike damage, shoot open the door, and run off of the Tripper (rather than jumping off). Requires: "canBounceBall"
"canInsaneJump"
"canWallJump"
{
"heatFrames": 600
}
{
"lavaFrames": 80
} |
From: 2
Right Door
To: 1
Left Door
Entrance condition: {
"comeInRunning": {
"speedBooster": "no",
"minTiles": 1
}
}Requires: "canBounceBall"
"canWallJump"
{
"heatFrames": 590
}
{
"lavaFrames": 70
} |
From: 2
Right Door
To: 1
Left Door
Entrance condition: {
"comeInRunning": {
"speedBooster": "no",
"minTiles": 3
}
}Requires: "canBounceBall"
"canWallJump"
{
"heatFrames": 590
}
{
"lavaFrames": 60
} |
From: 2
Right Door
To: 1
Left Door
Requires: "canInsaneJump"
"canBounceBall"
"canWallJump"
{
"heatFrames": 590
}
{
"lavaFrames": 80
} |
|
Jump from the left platform and mid air morph to bounce through the lava quickly. This is only useful when morphing before reaching the ceiling. Requires: {
"acidFrames": 45
}
"canBounceBall"
"canLateralMidAirMorph"
"can4HighMidAirMorph"
{
"or": [
{
"obstaclesCleared": [
"A",
"B"
]
},
{
"and": [
"canTrickyDodgeEnemies",
"canMetroidAvoid",
{
"acidFrames": 5
}
]
}
]
}Dev note: Freezing a Metroid while exiting the acid is difficult but manageable. |
