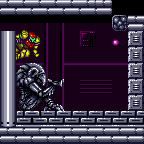
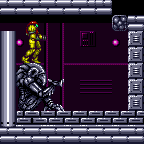
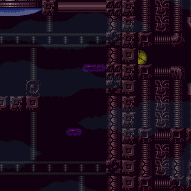
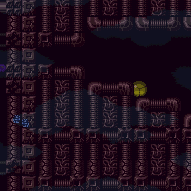
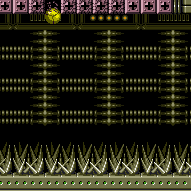
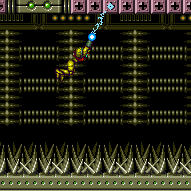
can3HighWallMidAirMorph (Expert)
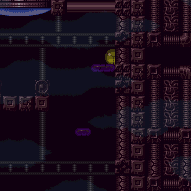
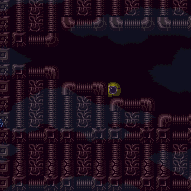
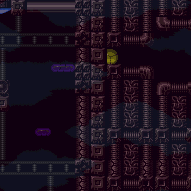
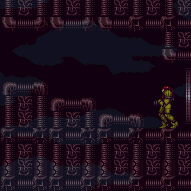
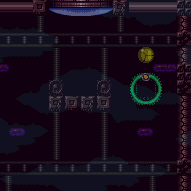
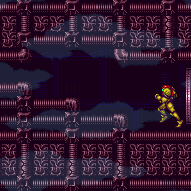
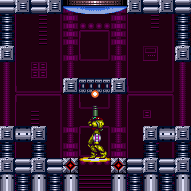
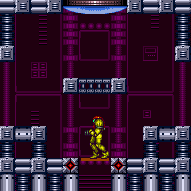
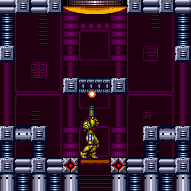
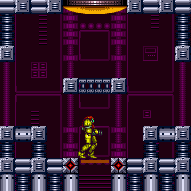
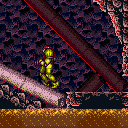
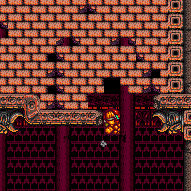
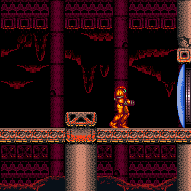
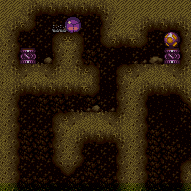
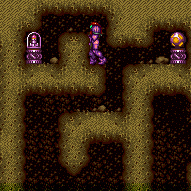
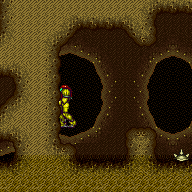
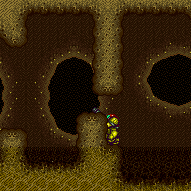
Getting up into a morph passage from a 3-tile-high space by mid-air morphing off of a wall jump. This is easier from an opposite wall. After the wall jump, continue holding jump in order to only need to press down a single time to morph.
Dependencies: canTrivialMidAirMorph, canPreciseWallJump, canMidAirMorph, canWallJumpInstantMorph, canDisableEquipment
Strats ()
|
Overload PLMs using the scroll block at the top of the stairs immediately in front of the bomb blocks. Reach the bottom and pass through the bomb blocks while still in G-mode. Entrance condition: {
"comeInWithGMode": {
"mode": "any",
"morphed": true
}
}Requires: {
"or": [
"h_artificialMorphSpringBall",
"h_artificialMorphBombs",
{
"and": [
"Morph",
"h_fourTileJumpMorph"
]
}
]
}Dev note: PBs cannot be used, as they will solidify the bomb blocks. |
|
Overload PLMs using the scroll block at the top of the stairs immediately in front of the bomb blocks. Fall down to the lower bomb blocks while still in G-mode Morph. Entrance condition: {
"comeInWithGMode": {
"mode": "any",
"morphed": true
}
}Requires: {
"or": [
"h_artificialMorphSpringBall",
"h_artificialMorphBombs",
{
"and": [
"Morph",
"h_fourTileJumpMorph"
]
}
]
}Dev note: PBs cannot be used, as they will solidify the bomb blocks. |
|
Overload PLMs using the scroll block at the top of the stairs next to the bomb blocks. With PLMs still overloaded, Samus can simply Crystal Flash and run through the bomb wall at the bottom to shinecharge. When damaging down, note that Pirates will place invisible, stationary lasers that will damage Samus: these can help with wasting energy, but remaining unused lasers must be kept in mind. Lead a wall pirate to the bottom of the shaft, shinecharge, and windup in front of it to get interrupted by a shot. Entrance condition: {
"comeInWithGMode": {
"mode": "direct",
"morphed": true
}
}Requires: {
"not": "f_ZebesSetAblaze"
}
"h_ZebesIsAwake"
{
  "or": [
    "h_artificialMorphSpringBall",
    "h_artificialMorphBombs",
    {
      "and": [
        "Morph",
        "h_fourTileJumpMorph"
      ]
    }
  ]
}
"h_artificialMorphCrystalFlash"
{
"canShineCharge": {
"usedTiles": 28,
"openEnd": 0
}
}
{
"autoReserveTrigger": {
"maxReserveEnergy": 95
}
}
"canRModeSparkInterrupt"
{
"partialRefill": {
"type": "Energy",
"limit": 50
}
} |
|
Entrance condition: {
"comeInWithGMode": {
"mode": "any",
"morphed": true
}
}Requires: {
"or": [
"h_artificialMorphSpringBall",
"h_artificialMorphBombs",
{
"and": [
"Morph",
"h_fourTileJumpMorph"
]
}
]
}Dev note: PBs cannot be used, as they will solidify the bomb blocks. |
|
Overload PLMs using the scroll block at the top of the stairs next to the bomb blocks. Fall down and pass through bomb wall at the bottom while still in G-mode. Entrance condition: {
"comeInWithGMode": {
"mode": "any",
"morphed": true
}
}Requires: {
"or": [
"h_artificialMorphSpringBall",
"h_artificialMorphBombs",
{
"and": [
"Morph",
"h_fourTileJumpMorph"
]
}
]
}Dev note: PBs cannot be used, as they will solidify the bomb blocks. |
|
Overload PLMs using the scroll block at the top of the stairs next to the bomb blocks. If Morph is not available, careful movement is needed with SpringBall to reach the top without taking a hit from a pirate or its stationary, invisible lasers. Entrance condition: {
"comeInWithGMode": {
"mode": "any",
"morphed": true
}
}Requires: {
"or": [
"h_artificialMorphSpringBall",
"h_artificialMorphBombs",
"h_fourTileJumpMorph"
]
}
{
"or": [
"Morph",
"h_ZebesNotAwake",
{
"and": [
"h_artificialMorphSpringBall",
{
"or": [
"HiJump",
"canTrickyDodgeEnemies"
]
}
]
}
]
} |
|
Overload PLMs using the scroll block at the top of the stairs next to the bomb blocks. With PLMs still overloaded, Samus can simply Crystal Flash and run through the bomb wall at the bottom to shinecharge. When damaging down, note that Pirates will place invisible, stationary lasers that will damage Samus: these can help with wasting energy, but remaining unused lasers must be kept in mind. Lead a wall pirate to the bottom of the shaft, shinecharge, and windup in front of it to get interrupted by a shot. Entrance condition: {
"comeInWithGMode": {
"mode": "direct",
"morphed": true
}
}Requires: {
"not": "f_ZebesSetAblaze"
}
"h_ZebesIsAwake"
{
  "or": [
    "h_artificialMorphSpringBall",
    "h_artificialMorphBombs",
    {
      "and": [
        "Morph",
        "h_fourTileJumpMorph"
      ]
    }
  ]
}
"h_artificialMorphCrystalFlash"
{
"canShineCharge": {
"usedTiles": 28,
"openEnd": 0
}
}
{
"autoReserveTrigger": {
"maxReserveEnergy": 95
}
}
"canRModeSparkInterrupt"
{
"partialRefill": {
"type": "Energy",
"limit": 50
}
} |
|
Entrance condition: {
"comeInWithGMode": {
"mode": "any",
"morphed": true
}
}Requires: {
"or": [
"h_artificialMorphSpringBall",
"h_artificialMorphBombs",
"h_fourTileJumpMorph"
]
}Dev note: A Power Bomb cannot be used, as it will solidify the bomb block. |
From: 2
Elevator
To: 2
Elevator
In order to align and place a Power Bomb at the correct pixel, perform a stationary spin jump and hit the ceiling before starting to morph. Requires: {
"or": [
"canInsaneJump",
{
"and": [
"h_fourTileJumpMorph",
"canStationarySpinJump"
]
}
]
}
"h_elevatorCrystalFlash"Exit condition: {
"leaveNormally": {}
} |
From: 16
G-Mode Morph Overloaded PLMs (By Left Door)
To: 14
Morph Maze Junction (Below Super Block)
Shinespark vertically through the crumble block and quickly morph and move left into the bomb block just below. Align Samus on the second downward slope in front of the door before sparking. Requires: "canComplexGMode"
{
"or": [
{
"canShineCharge": {
"usedTiles": 23,
"steepUpTiles": 6,
"steepDownTiles": 1,
"openEnd": 1
}
},
{
"blueSuitShinecharge": {}
}
]
}
{
"shinespark": {
"frames": 23,
"excessFrames": 0
}
}
"can4HighMidAirMorph"
{
"or": [
"h_artificialMorphBombThings",
"h_artificialMorphSpringBall",
"can3HighWallMidAirMorph"
]
}Dev note: FIXME: This can't be used if going 17->16 and Power Bombing the item with canRiskPermanentLossOfAccess, because the block will remain solid. |
|
Requires: {
"obstaclesCleared": [
"A"
]
}
"h_threeTileJumpMorph" |
|
A particularly precise springwall. Aim the walljump at the bottom of the second sloped wall fixture, where it looks like you cant jump off of. Optimize pause timing, use an instant morph, and get a max height springball jump. A delayed wall jump helps. Requires: {
"notable": "Springwall"
}
"HiJump"
"h_trickySpringwall"
"canPreciseWallJump"
"can3HighWallMidAirMorph" |
From: 2
Right Door
To: 4
Hidden Right Item
Walljump up to reach the left ledge below the bomb blocks then perform an instant morph to place a bomb. Walljump up a second time and again instant morph off that left ledge to enter the 1 tile hole created by the bomb. Requires: "h_useMorphBombs"
"can3HighWallMidAirMorph"
"canConsecutiveWallJump"
{
"heatFrames": 650
} |
From: 2
Bottom Left Door
To: 6
Junction Behind Fune
A paricularly precise mid-air morph can get up and over the Fune without damage. Stand a half tile away from the Fune when jump morphing for a higher ceiling. It's a 2.5 tile high mid air morph. It can be performed similar to how a 2 or 3 tile high morph is performed. Requires: {
"notable": "Morph Over the Fune"
}
{
"noFlashSuit": {}
}
"h_fourTileJumpMorph"
"canTrickyJump"
{
"or": [
"canInsaneJump",
{
"enemyDamage": {
"enemy": "Fune",
"type": "fireball",
"hits": 1
}
}
]
}Dev note: It is possible but very hard to jump morph over the fune with a flash suit. R jumping helps. |
From: 6
Bowling Chozo Statue
To: 1
Top Left Door
Jump or Spring Ball jump into a breakable Grapple block. The timing is precise and it can help to break two Grapple blocks to use one as a cue. Crystal Flash then X-ray climb to the region above (less than 1 screen). There is a chance that Samus will not be able to Crystal Flash unless first placing a Bomb or Power Bomb. Requires: {
"notable": "Grapple Block Crystal Flash"
}
"canUseGrapple"
"canJumpIntoRespawningBlock"
"canTrickyJump"
{
"or": [
"HiJump",
"canTrickySpringBallJump",
{
"and": [
"canSpringBallJumpMidAir",
{
"not": "f_DefeatedPhantoon"
},
"canRiskPermanentLossOfAccess"
]
}
]
}
"h_bombThings"
"h_CrystalFlash"
"canXRayClimb"
{
"or": [
"h_fourTileJumpMorph",
"h_useSpringBall",
"canIBJ",
{
"getBlueSpeed": {
"usedTiles": 16,
"steepDownTiles": 4,
"openEnd": 0
}
},
{
"and": [
{
"not": "f_DefeatedPhantoon"
},
"canRiskPermanentLossOfAccess"
]
}
]
}Exit condition: {
"leaveNormally": {}
}Unlocks doors: {"types":["ammo"],"requires":[]}Dev note: FIXME: This may be possible with a spike hit and speedy jump. |
From: 6
Bowling Chozo Statue
To: 1
Top Left Door
Use a Grapple fling to get stuck inside a breakable Grapple block. It can help to break two or more Grapple blocks in a row. Crystal Flash then X-ray climb to the region above (less than 1 screen). There is a chance that Samus will not be able to Crystal Flash unless first placing a Bomb or Power Bomb. Requires: {
"notable": "Grapple Block Crystal Flash"
}
"canPreciseGrapple"
"canJumpIntoRespawningBlock"
"canInsaneJump"
"h_bombThings"
"h_CrystalFlash"
"canXRayClimb"
{
"or": [
"h_fourTileJumpMorph",
"h_useSpringBall",
"canIBJ",
{
"getBlueSpeed": {
"usedTiles": 16,
"steepDownTiles": 4,
"openEnd": 0
}
},
{
"and": [
{
"not": "f_DefeatedPhantoon"
},
"canRiskPermanentLossOfAccess"
]
}
]
}Exit condition: {
"leaveNormally": {}
}Unlocks doors: {"types":["ammo"],"requires":[]} |
|
Walljump up and instant morph with exact timing and positioning so as to enter the Power Bomb location through the maze's exit. Requires: {
"notable": "Insane Walljump Morph"
}
"canSuitlessMaridia"
"canConsecutiveWallJump"
"canPlayInSand"
"HiJump"
"canInsaneWallJump"
"can3HighWallMidAirMorph" |
|
Requires: "h_threeTileJumpMorph" |
|
Requires: {
"or": [
{
"and": [
"h_fourTileJumpMorph",
"h_complexToCarryFlashSuit"
]
},
{
"and": [
"canPreciseWallJump",
"canWallJumpInstantMorph"
]
}
]
} |
|
Requires: "h_threeTileJumpMorph" |
|
Must come in from the right door and jump at the end of the runway to scroll the camera up without bringing the menu's on screen. Requires: "HiJump"
"canCameraManip"
{
"or": [
"h_bombThings",
"h_useSpringBall",
{
"and": [
"canMidAirMorph",
"Gravity",
"canTrickyJump"
]
},
"h_threeTileJumpMorph"
]
}
{
"canShineCharge": {
"usedTiles": 22,
"openEnd": 1
}
}
{
"enemyDamage": {
"enemy": "Menu",
"type": "contact",
"hits": 1
}
}
"canSlopeSpark"
"h_XModeSpikeHitLeniency"
{
"shinespark": {
"frames": 9,
"excessFrames": 9
}
}Dev note: FIXME: implement numeric enemy damage |
From: 2
Right Door
To: 3
Junction Left of Morph Tunnel
Farm the two Owtches for energy and clear away all but one Menu from the left. Shinecharge through the tunnel and use the Menus from the left to interrupt. Entrance condition: {
"comeInWithRMode": {}
}Requires: {
"or": [
"h_bombThings",
"h_useSpringBall",
{
"and": [
"canMidAirMorph",
"Gravity",
"canTrickyJump"
]
},
"h_threeTileJumpMorph"
]
}
{
"or": [
"h_CrystalFlashForReserveEnergy",
{
"and": [
"h_RModeCanRefillReserves",
{
"or": [
{
"and": [
{
"enemyKill": {
"enemies": [
[
"Owtch",
"Owtch"
]
],
"excludedWeapons": [
"PowerBomb"
]
}
},
{
"enemyKill": {
"enemies": [
[
"Menu",
"Menu"
]
],
"explicitWeapons": [
"Missile",
"Plasma",
"Ice+Wave+Spazer"
]
}
}
]
},
"h_usePowerBomb"
]
},
{
"partialRefill": {
"type": "ReserveEnergy",
"limit": 20
}
}
]
}
]
}
{
"canShineCharge": {
"usedTiles": 22,
"openEnd": 2
}
}
{
"autoReserveTrigger": {
"maxReserveEnergy": 95
}
}
"canRModeSparkInterrupt" |
From: 2
Right Door
To: 3
Junction Left of Morph Tunnel
Requires: "h_threeTileJumpMorph"
{
"obstaclesCleared": [
"A"
]
} |
