canBlueSuitSpikeJump (Extreme)


The ability to navigate spikes while carrying a blue suit in the presence of active enemies. In this situation, Samus' i-frames are instantly eliminated whenever Samus falls or walks forward, To avoid a rapid chain of spike hits, hold forward while landing on the spikes so that Samus is boosted downward, and release forward before knockback ends, so that Samus does not walk forward. If successful, Samus will be standing on the spikes, with 60 frames of invulnerability. From here, Samus can jump straight up out of the spikes, or spin jump by turning around with a buffered jump.
It is also possible to spin jump without a buffered jump, but it requires pressing jump exactly one frame after the directional input (forward or backward).
Dependencies: canCarryBlueSuit
Strats ()
|
Requires: {
"spikeHits": 1
}
{
"or": [
{
"noBlueSuit": {}
},
"canBlueSuitSpikeJump"
]
} |
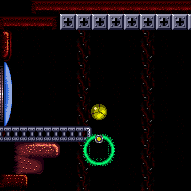
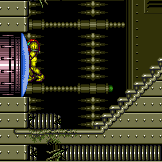
From: 2
Right Door
To: 3
Safe Block in the Middle of the Room
Crouch jump and Spring Ball near the peak of the jump to hit the side of the spikes and boost up onto them. This is also possible from standing on the spikes to avoid the crouch jump. With a very precise spring ball jump, it can also be done without a crouch jump. After getting up onto the spikes, take a second hit from the spikes, hold left, then face right, unmorph, and use either a horizontal damage boost or a couple of blue suit spike jumps to reach the safe platform. Requires: {
"or": [
{
"and": [
"h_maxHeightSpringBallJump",
"canNeutralDamageBoost"
]
},
{
"and": [
"canInsaneJump",
"canTrickySpringBallJump",
"canNeutralDamageBoost"
]
},
{
"and": [
{
"spikeHits": 1
},
"canTrickySpringBallJump",
"canTrickyJump",
"canNeutralDamageBoost"
]
}
]
}
{
"or": [
{
"and": [
{
"tech": "canHorizontalDamageBoost"
},
{
"noFlashSuit": {}
},
{
"spikeHits": 3
}
]
},
{
"and": [
"canBlueSuitSpikeJump",
{
"spikeHits": 4
}
]
}
]
} |
From: 2
Right Door
To: 3
Safe Block in the Middle of the Room


Requires: "HiJump"
"canSpringBallJumpMidAir"
{
"or": [
{
"spikeHits": 1
},
{
"and": [
"canHorizontalDamageBoost",
{
"enemyDamage": {
"enemy": "Fireflea",
"type": "contact",
"hits": 1
}
}
]
}
]
}
{
"or": [
{
"noBlueSuit": {}
},
"canBlueSuitSpikeJump"
]
} |
From: 2
Right Door
To: 3
Safe Block in the Middle of the Room


Jump from on top of the lower spikes, wall jump on the overhang, and land on the upper spikes. Requires: "HiJump"
"canPreciseWallJump"
"canUseIFrames"
{
"spikeHits": 2
}
{
"or": [
{
"noBlueSuit": {}
},
"canBlueSuitSpikeJump"
]
} |
|


Requires: "canLongIBJ"
{
"or": [
{
"spikeHits": 2
},
{
"and": [
"canBombHorizontally",
{
"spikeHits": 1
}
]
},
{
"and": [
"canHorizontalDamageBoost",
{
"enemyDamage": {
"enemy": "Fireflea",
"type": "contact",
"hits": 1
}
}
]
}
]
}
{
"or": [
{
"noBlueSuit": {}
},
"canBlueSuitSpikeJump"
]
} |
From: 2
Right Door
To: 3
Safe Block in the Middle of the Room
Freeze a Waver and Fireflea to cross the gap. Refreeze the Fireflea to get closer to the spikes before jumping over to them. Requires: {
"haveBlueSuit": {}
}
"canTrickyUseFrozenEnemies"
"canTrickyDodgeEnemies"
{
"or": [
{
"and": [
{
"tech": "canHorizontalDamageBoost"
},
{
"noFlashSuit": {}
},
{
"spikeHits": 1
}
]
},
{
"and": [
"canBlueSuitSpikeJump",
{
"spikeHits": 2
}
]
}
]
} |
From: 2
Right Door
To: 3
Safe Block in the Middle of the Room
Use the Fireflea when it moves to the right to cross the first gap. Requires: "canTrickyUseFrozenEnemies"
"HiJump"
"canCarefulJump"
{
"or": [
"canTrickyJump",
{
"and": [
"canDash",
"canWallJump"
]
}
]
}
{
"or": [
{
"spikeHits": 1
},
{
"and": [
"canHorizontalDamageBoost",
{
"enemyDamage": {
"enemy": "Fireflea",
"type": "contact",
"hits": 1
}
}
]
}
]
}
{
"or": [
{
"noBlueSuit": {}
},
"canBlueSuitSpikeJump"
]
} |
From: 3
Safe Block in the Middle of the Room
To: 2
Right Door
Requires: {
"spikeHits": 1
}
{
"or": [
{
"noBlueSuit": {}
},
"canBlueSuitSpikeJump"
]
} |
From: 3
Safe Block in the Middle of the Room
To: 4
Small Ledge Below Left Door
Requires: {
"haveBlueSuit": {}
}
{
"tech": "canHorizontalDamageBoost"
}
{
"noFlashSuit": {}
}
"canBlueSuitSpikeJump"
{
"or": [
{
"and": [
"canInsaneJump",
{
"spikeHits": 3
}
]
},
{
"spikeHits": 4
}
]
} |
From: 3
Safe Block in the Middle of the Room
To: 4
Small Ledge Below Left Door
Requires: {
"haveBlueSuit": {}
}
"canBlueSuitSpikeJump"
{
"spikeHits": 6
} |
|
Requires: "h_IBJFromSpikes"
"canLongIBJ"
{
"or": [
{
"noBlueSuit": {}
},
"canBlueSuitSpikeJump"
]
} |
From: 4
Small Ledge Below Left Door
To: 1
Left Door
Requires: "h_SpringwallOverSpikes"
{
"or": [
{
"spikeHits": 1
},
{
"and": [
"canDash",
"canInsaneJump"
]
}
]
}
{
"or": [
{
"noBlueSuit": {}
},
"canBlueSuitSpikeJump"
]
} |
From: 4
Small Ledge Below Left Door
To: 3
Safe Block in the Middle of the Room
Requires: {
"haveBlueSuit": {}
}
"canBlueSuitSpikeJump"
{
"or": [
{
"and": [
{
"tech": "canHorizontalDamageBoost"
},
{
"noFlashSuit": {}
},
{
"spikeHits": 5
}
]
},
{
"and": [
{
"spikeHits": 7
},
"canBeVeryPatient"
]
},
{
"spikeHits": 8
}
]
} |
|
Overload PLMs by shooting the gate, then go through the crumble blocks below and get to the door. Entrance condition: {
"comeInWithGMode": {
"mode": "direct",
"morphed": false
}
}Requires: "Morph"
{
"or": [
"SpaceJump",
{
"and": [
"canPreciseGrapple",
"canUseEnemies"
]
},
{
"and": [
"HiJump",
"canSpringBallJumpMidAir"
]
},
{
"and": [
"canDash",
"HiJump",
"canWallJump",
"canTrickyJump"
]
},
{
"and": [
"canWallJump",
"canUseIFrames",
{
"spikeHits": 1
},
"h_spikeJumpWithActiveEnemies"
]
},
{
"and": [
"h_IBJFromSpikes",
"h_spikeJumpWithActiveEnemies"
]
}
]
}
"h_heatedGModeOpenDifferentDoor" |
|
With Grapple, a running jump then single Grapple swing can be used before PLMs are overloaded, alternatively jump on the crumble blocks and Grapple the Ripper. Entrance condition: {
"comeInWithGMode": {
"mode": "indirect",
"morphed": false
}
}Requires: {
"or": [
"SpaceJump",
"canTrickySpringBallJump",
{
"and": [
"canWallJump",
{
"or": [
"canDash",
"HiJump",
{
"and": [
"canBlueSuitSpikeJump",
{
"spikeHits": 1
}
]
}
]
}
]
},
{
"and": [
"HiJump",
"canSpeedyJump"
]
},
{
"and": [
"canPreciseGrapple",
{
"or": [
"canDash",
"canUseEnemies",
"canInsaneJump"
]
}
]
}
]
}
"h_heatedGModeOpenDifferentDoor" |
From: 2
Bottom Left Door
To: 3
Right Door
Overload PLMs by shooting the gate, then go through the crumble blocks below and get to the door. The gate can be shot while precisely positioned from below without requiring any items. The positioning is precise and off camera; while facing left, position Samus front foot barely on the flat part after the slope. Entrance condition: {
"comeInWithGMode": {
"mode": "direct",
"morphed": false
}
}Requires: "Morph"
{
"or": [
"SpaceJump",
{
"and": [
"canPreciseGrapple",
{
"or": [
"canDash",
"canUseEnemies",
"canInsaneJump"
]
}
]
},
{
"and": [
"HiJump",
"canSpringBallJumpMidAir"
]
},
{
"and": [
"canDash",
"HiJump",
"canWallJump",
"canTrickyJump"
]
},
{
"and": [
"canWallJump",
"canUseIFrames",
{
"spikeHits": 1
},
"h_spikeJumpWithActiveEnemies"
]
},
{
"and": [
"h_IBJFromSpikes",
"h_spikeJumpWithActiveEnemies"
]
}
]
}
"h_heatedGModeOpenDifferentDoor" |
|
It is possible to climb the left side of the room with SpeedBooster alone, with either a tricky dash jump or a vertical shinespark, then Grapple the Ripper or ceiling blocks. With Grapple, a running jump then single Grapple swing can be used before PLMs are overloaded, alternatively jump on the crumble blocks and Grapple the Ripper. Entrance condition: {
"comeInWithGMode": {
"mode": "indirect",
"morphed": false
}
}Requires: {
"or": [
"SpaceJump",
"canTrickySpringBallJump",
{
"and": [
"canWallJump",
{
"or": [
"canDash",
"HiJump",
{
"and": [
"canBlueSuitSpikeJump",
{
"spikeHits": 1
}
]
}
]
}
]
},
{
"and": [
"HiJump",
"canSpeedyJump"
]
},
{
"and": [
"canTrickyDashJump",
"canPreciseGrapple"
]
},
{
"and": [
"canPreciseGrapple",
{
"canShineCharge": {
"usedTiles": 28,
"gentleUpTiles": 3,
"gentleDownTiles": 3,
"openEnd": 0
}
},
{
"or": [
{
"shinespark": {
"frames": 18,
"excessFrames": 8
}
},
{
"and": [
"canSpeedyJump",
{
"shinespark": {
"frames": 16,
"excessFrames": 10
}
}
]
}
]
}
]
}
]
}
"h_heatedGModeOpenDifferentDoor" |
|
Requires: "canCrumbleJump"
"canBlueSuitSpikeJump"
{
"spikeHits": 1
}
"canWallJump"
{
"heatFrames": 420
} |
From: 1
Left Door
To: 2
Right Door

The presence of the Yapping Maws causes Samus to immediately lose i-frames while moving; so the damage boosts must be chained directly from one to the next. This can be done by holding jump the entire time, and releasing right at the end of each boost, to fall straight down for the next boost, facing left the whole time. At the end of the final boost, hold left to boost downward, wait for knockback to expire, then press right to do a buffered turnaround spin jump out of the lava. Requires: {
"haveBlueSuit": {}
}
{
"noFlashSuit": {}
}
"Gravity"
{
"tech": "canHorizontalDamageBoost"
}
"canBlueSuitSpikeJump"
{
"heatFrames": 320
}
{
"spikeHits": 5
}
{
"lavaFrames": 40
} |
From: 1
Left Door
To: 2
Right Door

The presence of the Yapping Maws causes Samus to immediately lose i-frames while moving; so the damage boosts must be chained directly from one to the next, with the exception of the first. Do the first damage boost from far enough left that Samus can land without bringing the first Yapping Maw on camera; use i-frames to do a spin jump, then chain 4 more damage boosts to cross the room. This can be done by holding jump the entire time, and releasing right at the end of each boost, to fall straight down for the next boost, facing left the whole time. At the end of the final boost, hold left to boost downward, wait for knockback to expire, then press right to do a buffered turnaround spin jump out of the lava. Requires: {
"haveBlueSuit": {}
}
{
"noFlashSuit": {}
}
{
"notable": "Blue Suit Rapid Suitless Damage Boosts"
}
"canBlueSuitSpikeJump"
{
"tech": "canHorizontalDamageBoost"
}
{
"heatFrames": 425
}
{
"spikeHits": 6
}
{
"lavaFrames": 70
} |
|
With each jump, turn and hold left just before landing on the spikes, to get knocked back and down to the right, without damage boosting. Then turnaround spin jump to the right for the next jump. Jump can be held the entire time, to buffer the jumps. This method can be used while simultaneously carrying a blue suit and flash suit. Requires: {
"haveBlueSuit": {}
}
"canBlueSuitSpikeJump"
"h_complexToCarryFlashSuit"
{
"heatFrames": 740
}
{
"spikeHits": 6
}
{
"lavaFrames": 110
} |
From: 2
Right Door
To: 1
Left Door

The presence of the Yapping Maws causes Samus to immediately lose i-frames while moving; so the damage boosts must be chained directly from one to the next. This can be done by holding jump the entire time, and releasing left at the end of each boost to fall straight down for next boost, facing right the whole time. At the end of the final boost, Samus should be out of range of the Yapping Maws, and so should have i-frames to jump normally out of the lava. Requires: {
"haveBlueSuit": {}
}
{
"noFlashSuit": {}
}
"Gravity"
{
"tech": "canHorizontalDamageBoost"
}
"canBlueSuitSpikeJump"
{
"heatFrames": 320
}
{
"spikeHits": 4
}
{
"or": [
{
"spikeHits": 1
},
"canInsaneJump"
]
}
{
"lavaFrames": 30
} |
From: 2
Right Door
To: 1
Left Door

The presence of the Yapping Maws causes Samus to immediately lose i-frames while moving; so the damage boosts must be chained directly from one to the next. This can be done by holding jump the entire time, and releasing left at the end of each boost, to fall straight down for the next boost, facing right the whole time. At the end of the final boost, Samus should be out of range of the Yapping Maws, and so should have i-frames to jump normally out of the lava. Requires: {
"haveBlueSuit": {}
}
{
"noFlashSuit": {}
}
{
"notable": "Blue Suit Rapid Suitless Damage Boosts"
}
"canBlueSuitSpikeJump"
{
"tech": "canHorizontalDamageBoost"
}
{
"heatFrames": 340
}
{
"spikeHits": 6
}
{
"lavaFrames": 70
} |
|
With each jump, turn and hold right just before landing on the spikes, to get knocked back and down to the left, without damage boosting. Then turnaround spin jump to the left for the next jump. Jump can be held the entire time, to buffer the jumps. This method can be used while simultaneously carrying a blue suit and flash suit. Requires: {
"haveBlueSuit": {}
}
"canBlueSuitSpikeJump"
"h_complexToCarryFlashSuit"
{
"heatFrames": 740
}
{
"spikeHits": 6
}
{
"lavaFrames": 110
} |
From: 4
Firefleas Item
To: 5
Firefleas Bottom Left Platform Junction
Requires: {
"spikeHits": 1
}
{
"or": [
{
"noBlueSuit": {}
},
{
"and": [
"canBlueSuitSpikeJump",
{
"spikeHits": 1
}
]
}
]
} |
From: 5
Firefleas Bottom Left Platform Junction
To: 4
Firefleas Item
Requires: {
"spikeHits": 1
}
{
"or": [
{
"noBlueSuit": {}
},
{
"and": [
"canBlueSuitSpikeJump",
{
"spikeHits": 1
}
]
}
]
} |
|
Requires: {
"haveBlueSuit": {}
}
{
"tech": "canHorizontalDamageBoost"
}
"canBlueSuitSpikeJump"
{
"noFlashSuit": {}
}
{
"spikeHits": 6
} |
|
Requires: {
"haveBlueSuit": {}
}
"canBlueSuitSpikeJump"
{
"spikeHits": 8
} |
|
Ride the statue, which will not take Samus down, and will instead drop her off in the spike pit somewhat near the door. Entrance condition: {
"comeInWithGMode": {
"mode": "any",
"morphed": false
}
}Requires: "canComplexGMode"
"f_DefeatedPhantoon"
"Morph"
{
"or": [
"SpaceJump",
{
"and": [
"canDash",
"canUseIFrames",
{
"spikeHits": 2
},
{
"or": [
"canHorizontalDamageBoost",
"canInsaneJump",
"h_speedJump",
{
"spikeHits": 1
}
]
}
]
},
{
"and": [
{
"haveBlueSuit": {}
},
{
"tech": "canHorizontalDamageBoost"
},
"canBlueSuitSpikeJump",
{
"spikeHits": 6
}
]
},
{
"and": [
{
"blueSuitShinecharge": {}
},
"canDash",
{
"shinespark": {
"frames": 80,
"excessFrames": 7
}
}
]
}
]
} |
|
Climb up about half a screen. If Phantoon is dead, the last part of the climb should be done carefully to avoid triggering collision with the spikes: Do not press forward or turn-around except while X-Ray is active. For each X-ray stand-up, release the turn-around input quickly to make sure that it is not still held after X-Ray deactivates; alternatively, hold both angle up and angle down to prevent Samus from touching the spikes (though this no longer gives protection if climbing so high that the bottom of Samus' hitbox reaches the spikes). Once Samus is high enough, unequip X-Ray, jump up (from either standing or crouch) to clip past the spikes, and land, taking a single spike hit. Then use the i-frames from the spike hit to run and jump to the left to make it to the door. Samus is high enough after the top of her arm cannon first becomes visible at the bottom of the screen; or up to 3 additional climbs can be performed after that point. In case of an accidental spike collision, it is possible to recover: Unless Samus climbed higher than needed, she will still be stuck in the wall, will take a single spike hit, and be able to continue climbing. With Grapple it is possible to swing on the Grapple blocks, avoiding all spike damage. Spike damage can also be avoided with Space Jump, by doing a stationary turn-around spin jump, which is very precise. With a blue suit, Samus will instantly lose i-frames, making the spikes very dangerous. Entrance condition: {
"comeInWithDoorStuckSetup": {}
}Requires: {
"notable": "X-Ray Climb"
}
"canXRayClimb"
{
"or": [
{
"and": [
{
"spikeHits": 3
},
{
"resourceCapacity": [
{
"type": "RegularEnergy",
"count": 199
}
]
}
]
},
{
"and": [
{
"not": "f_DefeatedPhantoon"
},
"canRiskPermanentLossOfAccess"
]
},
{
"and": [
"canOffScreenMovement",
{
"or": [
{
"and": [
"canDash",
{
"spikeHits": 1
},
"canUseIFrames"
]
},
{
"and": [
"canBlueSuitSpikeJump",
{
"spikeHits": 2
}
]
},
{
"and": [
"canBlueSuitSpikeJump",
"canWallJump",
"canBeVeryPatient",
{
"spikeHits": 1
}
]
},
"Grapple",
{
"and": [
"SpaceJump",
"canInsaneJump",
"canBeVeryPatient"
]
}
]
}
]
}
]
}Exit condition: {
"leaveNormally": {}
}Unlocks doors: {"types":["ammo"],"requires":[]}Dev note: FIXME: The canBeVeryPatient is for difficulty placement, as the damageless Space Jump version would likely require many attempts. The resourceCapacity requirement is to ensure that reserve energy management will not be needed for the lower-difficulty version of the strat; this could be refined since suits can affect spike damage, but we don't yet have a good way to represent that cleanly, given that randomizers are likely to modify suit damage protection. The leaveNormally is because the camera will be broken and we don't want to require unreasonable things without being able to reset it. |
|
When the power is on, the floor has spikes (not thorns), and Samus will quickly lose i-frames. Requires: {
"haveBlueSuit": {}
}
"canBlueSuitSpikeJump"
{
"or": [
{
"and": [
"canGravityJump",
{
"spikeHits": 1
}
]
},
{
"and": [
{
"disableEquipment": "Gravity"
},
{
"spikeHits": 2
}
]
},
{
"and": [
"Gravity",
"HiJump",
{
"spikeHits": 2
}
]
},
{
"and": [
"Gravity",
{
"tech": "canHorizontalDamageBoost"
},
{
"noFlashSuit": {}
},
{
"spikeHits": 2
}
]
},
{
"spikeHits": 3
}
]
} |
From: 2
Right Door
To: 4
Top Right Ledge Junction
Take a spike hit and pause just after getting hit. Quickly crouch and jump just before the fade out ends. With a precise Gravity jump, it is possible to not need a crouch jump or down grab. Requires: "canGravityJump"
"HiJump"
{
"spikeHits": 1
}
"canUseIFrames"
"canTrickyJump"
{
"or": [
"canInsaneJump",
"canCrouchJump",
"canDownGrab"
]
}
{
"or": [
"canInsaneJump",
{
"spikeHits": 1
}
]
}
{
"or": [
{
"noBlueSuit": {}
},
"canBlueSuitSpikeJump"
]
}Dev note: The canCrouchJump is not a h_underwaterCrouchJump, because Gravity is required. |
From: 5
Bottom Middle Junction
To: 6
Junction Right of Morph Tunnel
Horizontal damage boost using the spikes. Spin jump to get off the spikes before the leftmost Cacatac comes on-camera. Requires: "Gravity"
{
"spikeHits": 1
}
{
"tech": "canHorizontalDamageBoost"
}
"h_complexToCarryBlueSuit"
"canBlueSuitSpikeJump" |
|
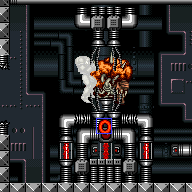
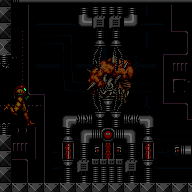
When the glass is broken, touching Mother Brain from the left will instantly transport Samus to the right. This gives Samus i-frames and knockback but does not cause damage. Requires: {
"notable": "Reverse Mother Brain"
}
"f_MotherBrainGlassBroken"
{
"or": [
{
"noBlueSuit": {}
},
"canBlueSuitSpikeJump"
]
} |