canWallJumpWithCharge (Very Hard)
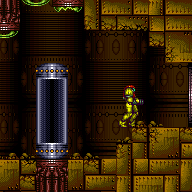
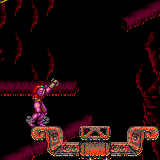
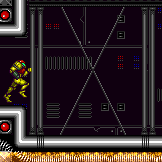
The ability to store charge beam and continue wall jumping. This is done by releasing the shoot button when trying to walljump, otherwise Samus will stop spinning. This can be used to store a charge shot or to pseudo screw through enemy projectiles.
Dependencies: canPseudoScrew
Strats ()
From: 2
Left Side - Top Middle Door
To: 7
Top Right Door
Entrance condition: {
"comeInRunning": {
"speedBooster": "no",
"minTiles": 2.4375
}
}Requires: "canTrickyJump"
"canConsecutiveWallJump"
"canPreciseWallJump"
{
"or": [
"canTrickyWallJump",
"ScrewAttack",
"canWallJumpWithCharge",
{
"and": [
"canWallJumpInstantMorph",
{
"enemyDamage": {
"enemy": "Cacatac",
"type": "spike",
"hits": 1
}
}
]
}
]
} |
From: 2
Left Side - Top Middle Door
To: 7
Top Right Door
Entrance condition: {
"comeInRunning": {
"speedBooster": "no",
"minTiles": 4
}
}Requires: "canCarefulJump"
"canConsecutiveWallJump"
{
"or": [
"canTrickyWallJump",
"ScrewAttack",
"canWallJumpWithCharge",
{
"and": [
"canWallJumpInstantMorph",
{
"enemyDamage": {
"enemy": "Cacatac",
"type": "spike",
"hits": 1
}
}
]
}
]
} |
From: 2
Left Side - Top Middle Door
To: 7
Top Right Door
Entrance condition: {
"comeInRunning": {
"speedBooster": "any",
"minTiles": 5
}
}Requires: "canCarefulJump"
"canConsecutiveWallJump"
{
"or": [
"canTrickyWallJump",
"ScrewAttack",
"canWallJumpWithCharge",
{
"and": [
"canWallJumpInstantMorph",
{
"enemyDamage": {
"enemy": "Cacatac",
"type": "spike",
"hits": 1
}
}
]
}
]
} |
From: 2
Bottom Left Door
To: 4
Junction Above Bomb Blocks
Deal an exact amount of damage to a wall pirate to freeze it while breaking the bomb blocks with a power bomb without taking damage. Quickly move to the right side and walljump up to the right height to power bomb out the bomb blocks, double hitting the top wall pirate. Wait for the full power bomb effect to end and wall jump once on the right wall and hit top pirate with 1 missile and 1 super. Jump and shoot the top pirate with a charge+ice shot. Hold a charge and walljump up the left wall and freeze the top pirate when it jumps across. Use the pirate to jump to the higher area. Requires: {
"notable": "Low Ice Pirate Freeze"
}
"canTrickyUseFrozenEnemies"
"Charge"
"canPreciseWallJump"
"canWallJumpWithCharge"
"canTrivialMidAirMorph"
"canTrickyDodgeEnemies"
{
"ammo": {
"type": "Missile",
"count": 1
}
}
{
"ammo": {
"type": "Super",
"count": 1
}
}
{
"ammo": {
"type": "PowerBomb",
"count": 1
}
}
{
"heatFrames": 870
}
{
"or": [
"h_heatResistant",
{
"and": [
"canInsaneJump",
"canPauseAbuse"
]
},
{
"resourceCapacity": [
{
"type": "RegularEnergy",
"count": 149
}
]
}
]
}Clears obstacles: A Dev note: With Reserves only, this strat requires much more precise movement and either pause abuse or optimal reserve management. |
From: 2
Bottom Left Door
To: 4
Junction Above Bomb Blocks
Deal an exact amount of damage to a wall pirate to freeze it while breaking the bomb blocks with a power bomb without taking damage. Wait briefly on the left side of the center platform, then jump and shoot 4 missiles at the top pirate. Walljump up the left wall such that the lower pirates are on screen long enough to jump accross to the left. Place a Bomb on the left wall to hit the top pirate when it jumps over, followed by a power bomb. Unmorph precisely below the middle pirate so both top pirates will jump back to the right, and begin charging Ice. Walljump up the left wall with charge held and freeze the top pirate when it jumps over and use it to reach the upper region. Requires: {
"notable": "New Low Ice Pirate Freeze"
}
"canTrickyUseFrozenEnemies"
"Charge"
"canPreciseWallJump"
"canResetFallSpeed"
"canWallJumpWithCharge"
"h_useMorphBombs"
"canWallJumpInstantMorph"
"canTrickyDodgeEnemies"
{
"ammo": {
"type": "Missile",
"count": 4
}
}
{
"ammo": {
"type": "PowerBomb",
"count": 1
}
}
{
"heatFrames": 900
}
{
"or": [
"h_heatResistant",
{
"and": [
"canInsaneJump",
"canPauseAbuse"
]
},
{
"resourceCapacity": [
{
"type": "RegularEnergy",
"count": 149
}
]
}
]
}Clears obstacles: A Dev note: With Reserves only, this strat requires much more precise movement and either pause abuse or optimal reserve management. |
|
Requires: {
"or": [
"canConsecutiveWallJump",
"SpaceJump"
]
}
{
"or": [
{
"enemyKill": {
"enemies": [
[
"Choot"
]
],
"explicitWeapons": [
"ScrewAttack"
]
}
},
{
"and": [
{
"or": [
"SpaceJump",
{
"and": [
"canConsecutiveWallJump",
"canWallJumpWithCharge"
]
}
]
},
{
"enemyKill": {
"enemies": [
[
"Choot"
]
],
"explicitWeapons": [
"PseudoScrew"
]
}
}
]
}
]
} |
|
The swarm of Menus will attack Samus at the top of the room. Tank them, carefully dodge them, or kill them with Screw or Pseudo Screw. Requires: "Gravity"
"canConsecutiveWallJump"
{
"or": [
"ScrewAttack",
{
"haveBlueSuit": {}
},
"canTrickyWallJump",
"canWallJumpWithCharge",
{
"enemyDamage": {
"enemy": "Menu",
"type": "contact",
"hits": 1
}
}
]
}Dev note: The Menus prevent a reliable IBJ. |
|
Requires: "canDash"
{
"or": [
{
"and": [
"Gravity",
{
"acidFrames": 10
}
]
},
{
"and": [
{
"or": [
"canPreciseWallJump",
"HiJump"
]
},
{
"acidFrames": 20
}
]
}
]
}
{
"or": [
{
"obstaclesCleared": [
"A",
"B"
]
},
"Ice",
"ScrewAttack",
{
"and": [
"canPseudoScrew",
{
"or": [
"canTrickyJump",
"canWallJumpWithCharge",
"HiJump",
"Gravity"
]
}
]
},
"canMetroidAvoid",
{
"metroidFrames": 150
}
]
} |
From: 3
Bottom of Shaft
To: 1
Left Door
Use Pseudo Screw to avoid Space Pirate attacks while climbing the central shaft. The Screw Attack effect is not active when Samus is preparing to Walljump. Requires: {
"or": [
{
"and": [
"canConsecutiveWallJump",
"canWallJumpWithCharge"
]
},
{
"and": [
"SpaceJump",
"HiJump",
"canPseudoScrew"
]
}
]
}
{
"or": [
{
"enemyDamage": {
"enemy": "Tourian Space Pirate (all)",
"type": "contact",
"hits": 2
}
},
"canTrickyJump"
]
} |
