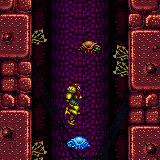
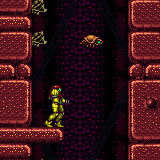
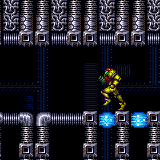
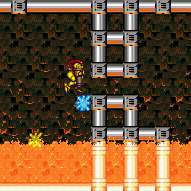
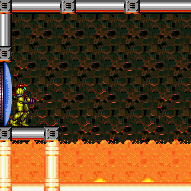
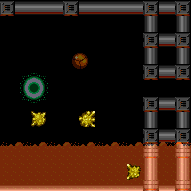
canTrivialUseFrozenEnemies (Implicit)
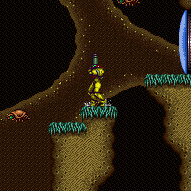
Can use Ice Beam to freeze enemies to use as platforms. This only includes the most basic examples, where enemies can be easily positioned and refrozen without risk of killing them.
Dependencies: canUseEnemies
Strats ()
From: 2
Bottom Left Door
To: 2
Bottom Left Door
Crystal Flash then Shinespark up to the item, touch it, and return through the speed block that is now air. Use the Boyons and acid to reserve trigger to exit G-mode below to collect the item. Entrance condition: {
"comeInWithGMode": {
"mode": "direct",
"morphed": true
}
}Requires: "canComplexGMode"
"canRemoteAcquire"
"h_artificialMorphCrystalFlash"
{
"or": [
{
"and": [
"canTrivialUseFrozenEnemies",
"h_shinechargeMaxRunway",
"canMidairShinespark",
{
"shinespark": {
"frames": 118,
"excessFrames": 6
}
}
]
},
{
"and": [
"canShinechargeMovementComplex",
{
"canShineCharge": {
"usedTiles": 34,
"openEnd": 0
}
},
{
"shinespark": {
"frames": 128,
"excessFrames": 6
}
}
]
},
{
"and": [
{
"blueSuitShinecharge": {}
},
{
"shinespark": {
"frames": 121,
"excessFrames": 5
}
}
]
}
]
}
{
"autoReserveTrigger": {
"minReserveEnergy": 1
}
}Collects items: 3 Dev note: These shinespark frames could be reduced with more items or tech, but in direct G-mode, Samus will need to Crystal Flash and reserve trigger to collect the item. |
From: 2
Bottom Left Door
To: 2
Bottom Left Door
Requires: "canTrivialUseFrozenEnemies" Exit condition: {
"leaveWithRunway": {
"length": 45,
"openEnd": 1
}
} |
|
Kill all three Boyons for energy, or Crystal Flash. If you need to freeze Boyons for extra runway, disable Ice Beam to force them to unfreeze so you can interrupt spark. If you end up killing all four Boyons, you can also dip in the acid for the spark interrupt. Entrance condition: {
"comeInWithRMode": {}
}Requires: {
"or": [
"h_CrystalFlashForReserveEnergy",
{
"and": [
"h_RModeCanRefillReserves",
{
"resourceMissingAtMost": [
{
"type": "Missile",
"count": 0
}
]
},
{
"enemyKill": {
"enemies": [
[
"Boyon",
"Boyon",
"Boyon"
]
],
"excludedWeapons": [
"PseudoScrew"
]
}
},
{
"or": [
{
"and": [
"canBeLucky",
{
"partialRefill": {
"type": "ReserveEnergy",
"limit": 5
}
}
]
},
{
"and": [
"canBeVeryLucky",
{
"partialRefill": {
"type": "ReserveEnergy",
"limit": 20
}
}
]
}
]
}
]
}
]
}
{
"or": [
{
"canShineCharge": {
"usedTiles": 25,
"openEnd": 0
}
},
{
"and": [
"canTrivialUseFrozenEnemies",
{
"canShineCharge": {
"usedTiles": 31,
"openEnd": 0
}
},
{
"disableEquipment": "Ice"
}
]
}
]
}
{
"autoReserveTrigger": {}
}
"canRModeSparkInterrupt"Clears obstacles: A |
|
Requires: "canTrivialUseFrozenEnemies"
"h_shinechargeMaxRunway"
{
"shinespark": {
"frames": 128,
"excessFrames": 6
}
} |
|
Requires: "canTrivialUseFrozenEnemies"
"canShinechargeMovementComplex"
"canFastWallJumpClimb"
"h_shinechargeMaxRunway"
{
"or": [
{
"shinespark": {
"frames": 93,
"excessFrames": 6
}
},
{
"and": [
"HiJump",
{
"shinespark": {
"frames": 83,
"excessFrames": 6
}
}
]
}
]
} |
|
Requires: "canTrivialUseFrozenEnemies"
"h_shinechargeMaxRunway"
"canMidairShinespark"
{
"or": [
{
"shinespark": {
"frames": 118,
"excessFrames": 6
}
},
{
"and": [
"HiJump",
{
"shinespark": {
"frames": 113,
"excessFrames": 6
}
}
]
}
]
} |
From: 2
Bottom Left Door
To: 3
Item
Requires: "canTrivialUseFrozenEnemies"
"h_shinechargeMaxRunway"
"canSpeedyJump"
"canShinechargeMovementComplex"
{
"or": [
{
"shinespark": {
"frames": 111,
"excessFrames": 6
}
},
{
"and": [
"HiJump",
{
"shinespark": {
"frames": 103,
"excessFrames": 6
}
}
]
}
]
} |
From: 2
Bottom Left Door
To: 5
Bottom Junction (Right of Boyons)
Shinespark up to the item, touch it, and return through the speed block that is now air. Exit G-mode below to collect the item. Entrance condition: {
"comeInWithGMode": {
"mode": "direct",
"morphed": false
}
}Requires: "canComplexGMode"
"canRemoteAcquire"
{
"or": [
{
"and": [
"canTrivialUseFrozenEnemies",
"h_shinechargeMaxRunway"
]
},
{
"and": [
"canShinechargeMovementComplex",
{
"getBlueSpeed": {
"usedTiles": 34,
"openEnd": 0
}
},
"h_blueJump",
{
"canShineCharge": {
"usedTiles": 34,
"openEnd": 0
}
}
]
},
{
"and": [
{
"canShineCharge": {
"usedTiles": 25,
"openEnd": 2
}
},
{
"enemyKill": {
"enemies": [
[
"Boyon",
"Boyon",
"Boyon",
"Boyon"
]
],
"excludedWeapons": [
"Bombs"
]
}
}
]
},
{
"blueSuitShinecharge": {}
},
{
"and": [
"canInsaneJump",
{
"canShineCharge": {
"usedTiles": 14,
"openEnd": 0
}
}
]
},
{
"and": [
"canInsaneJump",
{
"canShineCharge": {
"usedTiles": 14,
"openEnd": 1
}
},
{
"enemyKill": {
"enemies": [
[
"Boyon"
]
]
}
}
]
}
]
}
{
"shinespark": {
"frames": 121,
"excessFrames": 5
}
}Collects items: 3 Dev note: The shinespark frames could be reduced with more items or tech, but in direct G-mode, Samus will be at low Energy and need an energy free shinespark. The out-of-order requirements in the blue jump case are to work around the tests' assumption that a getBlueSpeed would lose the shinecharge. |
|
Fill up with the respawning Geegas. Climb to the top of the tower without killing the Rippers. Let the shot block respawn then shinecharge across it. Then quickly jump down into a Ripper to interrupt. Entrance condition: {
"comeInWithRMode": {}
}Requires: {
"refill": [
"Energy"
]
}
{
"or": [
"canTrivialUseFrozenEnemies",
{
"and": [
{
"notable": "Hero Shot"
},
"canHeroShot",
"canTrickyWallJump"
]
},
{
"and": [
"SpaceJump",
"HiJump",
"h_midAirShootUp",
"canTrickyJump"
]
},
{
"and": [
"canPreciseSpaceJump",
"canTrickyDodgeEnemies",
"h_midAirShootUp"
]
}
]
}
{
"or": [
{
"canShineCharge": {
"usedTiles": 12,
"openEnd": 0
}
},
{
"and": [
{
"doorUnlockedAtNode": 5
},
{
"canShineCharge": {
"usedTiles": 13,
"openEnd": 0
}
}
]
}
]
}
{
"autoReserveTrigger": {
"maxReserveEnergy": 95
}
}
"canRModeSparkInterrupt"Clears obstacles: B Unlocks doors: {"nodeId":5,"types":["ammo"],"requires":[]} |
From: 2
Middle Left Door (Behind Power Bomb Blocks)
To: 5
Top Right Door
Fill up with the respawning Geegas. Climb to the top of the tower without killing the Rippers. Let the shot block respawn then shinecharge across it. Then quickly jump down into a Ripper to interrupt. Entrance condition: {
"comeInWithRMode": {}
}Requires: "h_usePowerBomb"
{
  "refill": [
    "Energy"
  ]
}
{
  "or": [
    "canTrivialUseFrozenEnemies",
    {
      "and": [
        {
          "notable": "Hero Shot"
        },
        "canHeroShot",
        "canTrickyWallJump"
      ]
    },
    {
      "and": [
        "SpaceJump",
        "HiJump",
        "h_midAirShootUp",
        "canTrickyJump"
      ]
    },
    {
      "and": [
        "canPreciseSpaceJump",
        "canTrickyDodgeEnemies",
        "h_midAirShootUp"
      ]
    }
  ]
}
{
  "or": [
    {
      "canShineCharge": {
        "usedTiles": 12,
        "openEnd": 0
      }
    },
    {
      "and": [
        {
          "doorUnlockedAtNode": 5
        },
        {
          "canShineCharge": {
            "usedTiles": 13,
            "openEnd": 0
          }
        }
      ]
    }
  ]
}
{
  "autoReserveTrigger": {
    "maxReserveEnergy": 95
  }
}
"canRModeSparkInterrupt"
Clears obstacles: B Unlocks doors: {"nodeId":5,"types":["ammo"],"requires":[]} |
|
Fill up with the respawning Geegas. Climb back to the top of the tower without killing the Rippers. Let the shot block respawn then shinecharge across it. Then quickly jump down into a Ripper to interrupt. Entrance condition: {
"comeInWithRMode": {}
}Requires: {
"refill": [
"Energy"
]
}
{
"or": [
"canTrivialUseFrozenEnemies",
{
"and": [
{
"notable": "Hero Shot"
},
"canHeroShot",
"canTrickyWallJump"
]
},
{
"and": [
"SpaceJump",
"HiJump",
"h_midAirShootUp",
"canTrickyJump"
]
},
{
"and": [
"canPreciseSpaceJump",
"canTrickyDodgeEnemies",
"h_midAirShootUp"
]
}
]
}
{
"or": [
{
"canShineCharge": {
"usedTiles": 12,
"openEnd": 0
}
},
{
"and": [
{
"doorUnlockedAtNode": 5
},
{
"canShineCharge": {
"usedTiles": 13,
"openEnd": 0
}
}
]
}
]
}
{
"autoReserveTrigger": {
"maxReserveEnergy": 95
}
}
"canRModeSparkInterrupt"Clears obstacles: B Unlocks doors: {"nodeId":5,"types":["ammo"],"requires":[]} |
From: 7
Junction (Bottom of Room)
To: 6
Junction (Above Bottom Rippers)
Requires: "canTrivialUseFrozenEnemies"
{
"or": [
"HiJump",
"canWallJump",
"canSpringBallJumpMidAir",
"canIBJ"
]
} |
From: 7
Junction (Bottom of Room)
To: 6
Junction (Above Bottom Rippers)
Requires: "h_storedSpark"
{
"or": [
{
"shinespark": {
"frames": 37,
"excessFrames": 6
}
},
{
"and": [
"HiJump",
{
"shinespark": {
"frames": 33,
"excessFrames": 6
}
}
]
},
{
"and": [
"canConsecutiveWallJump",
{
"shinespark": {
"frames": 13,
"excessFrames": 6
}
}
]
},
{
"and": [
"canTrivialUseFrozenEnemies",
{
"shinespark": {
"frames": 8,
"excessFrames": 6
}
}
]
}
]
} |
|
Requires: "canTrivialUseFrozenEnemies"
{
"obstaclesNotCleared": [
"B"
]
} |
|
Requires: "Morph"
"canTrivialUseFrozenEnemies"
{
"or": [
{
"and": [
"canDash",
{
"heatFrames": 240
}
]
},
{
"heatFrames": 350
}
]
} |
|
Getting across the lava while artificially morphed requires an HBJ or Spring Fling. For the Spring Fling, jump immediately before the pause triggers. With Morph, Samus can air ball across. Entrance condition: {
"comeInWithGMode": {
"mode": "any",
"morphed": true
}
}Requires: {
"or": [
{
"and": [
"Morph",
{
"or": [
"SpaceJump",
"canTrivialUseFrozenEnemies"
]
}
]
},
{
"and": [
"canLateralMidAirMorph",
"canTrickyJump"
]
},
{
"and": [
"h_artificialMorphSpringFling",
"canTrickyJump"
]
},
"h_artificialMorphHBJ",
{
"and": [
"Gravity",
"h_artificialMorphIBJ",
"h_artificialMorphBombHorizontally",
{
"lavaFrames": 160
}
]
},
{
"and": [
"Gravity",
"h_artificialMorphSpringBall",
{
"lavaFrames": 40
}
]
},
{
"and": [
"Gravity",
"Morph",
{
"lavaFrames": 24
}
]
}
]
}
"h_heatedGModeOpenDifferentDoor" |
From: 1
Bottom Left Door
To: 4
G-Mode Junction (Top by Elevator)
Entrance condition: {
"comeInWithGMode": {
"mode": "any",
"morphed": false
}
}Requires: {
"or": [
"canTrivialUseFrozenEnemies",
"canTrickyWallJump"
]
} |
|
Requires: "canTrivialUseFrozenEnemies" |
|
Entrance condition: {
"comeInWithGMode": {
"mode": "any",
"morphed": false
}
}Requires: {
"or": [
"canTrivialUseFrozenEnemies",
"canTrickyWallJump",
{
"and": [
"SpaceJump",
"canTrickyJump"
]
}
]
} |
