Post Crocomire Farming Room: Insane, Damageless, Continuous Wall Jump
Room ID: 123
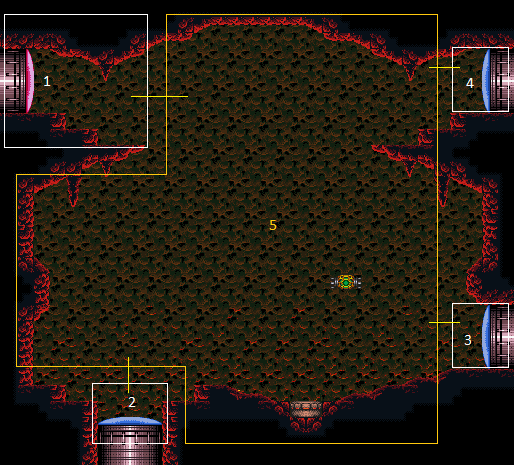
From: 4
Top Right Door
To: 1
Top Left Door


Kill the Ripper then back against the door transition and use the majority but not all of the runway to get enough speed to CWJ far enough to the left. Depending on the setup, most CWJ frames will not work, by either not giving the wall jump or not getting far enough left. This may be easier with a small jump into CWJ. With a full-height jump, there is a sub-pixel-dependent starting positon, a frame-perfect jump and frame-perfect CWJ (where another CWJ frame doesn't get Samus far enough), then an extremely precise wall jump on the left edge. Requires: {"doorUnlockedAtNode": 4},
{"disableEquipment": "HiJump"},
{"disableEquipment": "SpeedBooster"},
"canCWJ",
"canInsaneJump",
"canInsaneWallJump",
"canBeVeryPatient",
{"or": [
{"enemyKill": {
"enemies": [["Ripper 2 (green)"]]
}},
{"and": [
"h_enemyDrops",
{"or": [
{"resourceCapacity": [{"type": "Missile", "count": 2}]},
{"resourceCapacity": [{"type": "Super", "count": 1}]},
{"and": [
"Morph",
{"resourceCapacity": [{"type": "PowerBomb", "count": 1}]}
]}
]}
]}
]}Dev note: This is only useful to avoid the Ripper hit. It could also be possible to kill the Gamets near the top left, then boost off of the Ripper and collect the drops. canBeVeryPatient is used for difficulty placement, assuming this will require many retries. |