canCWJ (Very Hard)
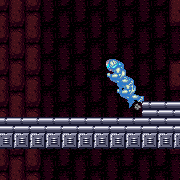
A continuous wall jump (CWJ) consists of a wall jump without turning around. It can be done by spinjumping forward and then wall jump off a solid object to retain all forward momentum. The more speed Samus has, the smaller the frame window for the CWJ. A slow CWJ uses a wall or ledge near the initial jump point, while a fast CWJ will wall jump using the opposite side of a more distant platform.
Dependencies: canCarefulJump, canDash, canTrickyJump
Strats ()
|
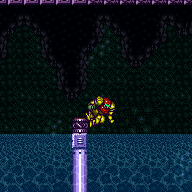
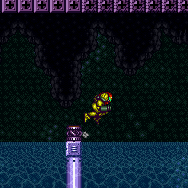
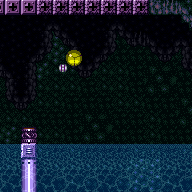
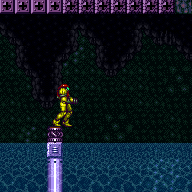
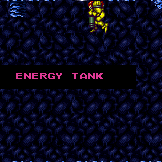
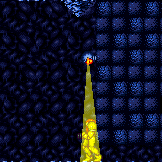
Stand on the farthest pixel into the door possible using moonwalk, X-Ray, or morphball turn around. Run towards the water and jump on the last possible frame. Perform the CWJ off of the item pedestal to cross to the other side. This requires running and jumping on the last possible frame before Samus would run off into the water. There is either a 1-frame or 2-frame window for the wall jump, depending on Samus' X subpixel position. To get a 2-frame window, Samus must start in the leftmost 75% of the pixel next to the transition. One method to guarantee that Samus gets a good subpixel is to jump and press against the overhang to align with it, then land, turn around, and moonwalk back into position. Requires: {
"or": [
{
"notable": "First-Try CWJ"
},
{
"and": [
"h_bombThings",
"h_additionalBomb",
"h_additionalBomb"
]
}
]
}
"canCWJ"
{
"disableEquipment": "HiJump"
}
{
"disableEquipment": "SpeedBooster"
}
{
"doorUnlockedAtNode": 1
}
"h_backIntoCorner"Collects items: 3 |
|
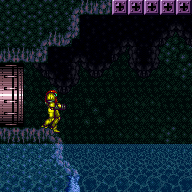
Align against the closed door shell on the other side of the transition. Run towards the water and jump on the last possible frame. Perform the CWJ off of the item pedestal to cross to the other side. This requires running and jumping on the last possible frame before Samus would run off into the water. If the setup is done correctly, there will then be a 2-frame window for the wall jump. Entrance condition: {
"comeInRunning": {
"speedBooster": "no",
"minTiles": 1.4
}
}Requires: {
"or": [
{
"notable": "First-Try CWJ"
},
{
"and": [
"h_bombThings",
"h_additionalBomb",
"h_additionalBomb"
]
}
]
}
"canCWJ"
{
"disableEquipment": "HiJump"
}
{
"disableEquipment": "SpeedBooster"
}Collects items: 3 |
|
Perform a wall jump off the item pedestal while avoiding the water. Lay a Power Bomb (or Bomb) and use it to boost to the right, with a well-timed unmorph to reset fall speed. The placement of the bomb is more lenient with a CWJ. It is ideal to gain 3 frames of dash speed, the maximum possible, but lower amounts can work. It is even possible to do a regular wall jump instead of a CWJ, but the CWJ makes it significantly more lenient. It is best for the wall jump to be performed as high as possible. If Speed Booster is available, equipping it will generally be helpful, as it will increase the height of Samus' wall jump based on the amount of dash speed. Requires: {
"notable": "Walljump Bomb Boost"
}
{
"or": [
"canCWJ",
"canBePatient"
]
}
"canWallJumpBombBoost"
"canResetFallSpeed"
{
"obstaclesNotCleared": [
"A",
"B",
"C"
]
} |
From: 1
Bottom Left Door
To: 3
Hidden Ceiling Item
Samus must start pressed against the wall, facing left. Start by performing a dashing stationary spinjump. The initial left press needs to be exactly 3 or 4 frames. Jump needs to be pressed exactly 3 frames after the inital left press. Samus then needs to quickly walljump off the wall at a precise height. While spin jumping in the air, break spin with angle or shot and hold down to reduce the size of the hitbox. If the initial jump and subsequent walljump were performed correctly, depending on walljump height and the number of pixels away from the wall, Samus will have between 1-3 frames where it is possible to collect the tank Release down just as Samus is about to collide with the tank to collect. Even if the previous steps were performed correctly and down was released on the correct frame to collect the tank, there is a 50% chance of failure. The game will check if Samus is in contact with the wall or the item on alternating frames. If the item collection happens on a frame where the game is checking for a wall collision then the item will not be acquired. Requires: {
"notable": "Taco Tank"
}
"canCWJ"
"canInsaneWallJump"
"canStationarySpinJump" |
|
In the previous room, gain low-momentum blue speed and jump, bonking the top of the doorway. After the transition, perform a CWJ off the ledge, then fire a shot and speedball through the tunnel. Entrance condition: {
"comeInBlueSpinning": {
"minExtraRunSpeed": "$1.3",
"maxExtraRunSpeed": "$1.8",
"unusableTiles": 0
}
}Requires: {
"notable": "CWJ Jump Shot Speedball"
}
"canInsaneJump"
"canCWJ"
"canSpeedball"Dev note: Higher speeds could probably also work, but depending on the geometry in the previous room it may require a precise release of jump to avoid bonking the wall above the door. |
|
Position Samus in the doorway a few pixels from the edge. Dashing stationary spinjump into a delayed CWJ and hopefully catch the upper ledge with a walljump. Requires: {
"notable": "Doorway CWJ"
}
{
"obstaclesCleared": [
"A"
]
}
"h_heatProof"
"HiJump"
"canCWJ"
"canStationarySpinJump"
"canInsaneJump"
"canInsaneWallJump"
{
"doorUnlockedAtNode": 2
}Unlocks doors: {"nodeId":2,"types":["missiles"],"requires":[{"heatFrames":50}]}
{"nodeId":2,"types":["super"],"requires":[]}
{"nodeId":2,"types":["powerbomb"],"requires":[{"heatFrames":110}]} |
|
Perform a running stationary spinjump from a precise spot, with 3 frames of dash speed (the maximum possible); then do a CWJ off the wall above, one tile further out. This makes it possible to just barely walljump off the grapple block. Requires: {
"notable": "Insane Walljump"
}
"HiJump"
"canInsaneJump"
"canStationarySpinJump"
"canInsaneWallJump"
"canCWJ"Clears obstacles: B |
From: 2
Bottom Left Door
To: 11
Upper Left Ledge Junction
Continuous WallJump as close as possible to the transition after running briefly to gain slightly higher jump height Entrance condition: {
"comeInWithWallJumpBelow": {
"minHeight": 2
},
"comesThroughToilet": "any"
}Requires: "canCrossRoomJumpIntoWater" "HiJump" "canTrickyDashJump" "canCWJ" "canStationarySpinJump" |
|
Align with the wall below the door while facing left. Hold dash, turn around, start running and arm pump once. Jump from the rightmost 'X' in the background. Release forward at some point while airborne, but repress it again before the CWJ. Immediately after the CWJ, shoot the Metroid to avoid getting grabbed. Requires: {
"notable": "Acid Skip CWJ"
}
"canCWJ"
"canInsaneWallJump"
{
"or": [
{
"obstaclesCleared": [
"A",
"B"
]
},
"canDodgeWhileShooting"
]
} |
