canPowerBombMidIBJ (Hard)
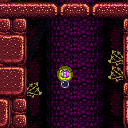
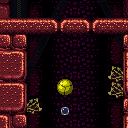
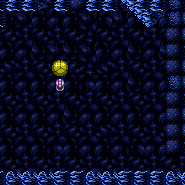
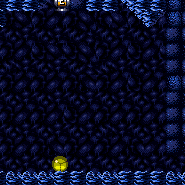
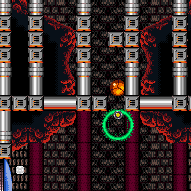
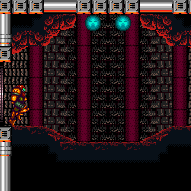
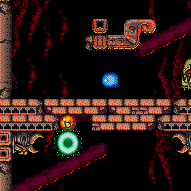
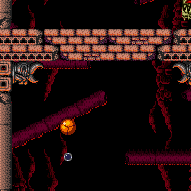
The ability to place a single Power Bomb while climbing during an IBJ, and then switch back to Bombs to continuing the climb without falling. This is often used to break a block that respawns where breaking it before the IBJ would be too slow, or to break a block in a heated environment that is too high to reach from the ground and a second IBJ would waste Energy.
Dependencies: canIBJ
Strats ()
From: 1
Bottom Left Door
To: 3
Hidden Ceiling Item
Requires: "canPowerBombMidIBJ" Clears obstacles: C |
|
Jump into IBJ to avoid breaking the ledges. Place a Power Bomb on the ascent to break the block and continue the IBJ through it. It is possible to do without a Power Bomb with canBombAboveIBJ. Requires: {
"noBlueSuit": {}
}
"canJumpIntoIBJ"
"canLongIBJ"
{
"or": [
"canBombAboveIBJ",
"canPowerBombMidIBJ"
]
}
{
"obstaclesCleared": [
"B"
]
} |
|
With a blue suit or without canJumpIntoIBJ, Samus will need to kill the Rippers while breaking the bomb blocks then start from the platforms below. Place a Power Bomb on the ascent to break the block and continue the IBJ through it. Requires: "canBeVeryPatient"
"canPowerBombMidIBJ"
"canLongIBJ"
{
"or": [
{
"obstaclesCleared": [
"B"
]
},
{
"ammo": {
"type": "PowerBomb",
"count": 2
}
}
]
} |
|
Requires: {
"obstaclesCleared": [
"B",
"C"
]
}
"canLongIBJ"
{
"or": [
{
"heatFrames": 2090
},
{
"and": [
"canJumpIntoIBJ",
{
"or": [
{
"heatFrames": 1510
},
{
"and": [
"canDoubleBombJump",
{
"heatFrames": 980
}
]
},
{
"and": [
"HiJump",
"canDoubleBombJump",
{
"heatFrames": 860
}
]
}
]
}
]
}
]
}
{
"or": [
{
"obstaclesCleared": [
"A"
]
},
"canPowerBombMidIBJ",
{
"haveBlueSuit": {}
},
{
"and": [
"canBombAboveIBJ",
{
"heatFrames": 60
}
]
}
]
}Clears obstacles: A Dev note: This assumes the bottom bomb blocks are completely broken, making it necessary to start the IBJ from the bottom of the room. |
|
Requires: {
"obstaclesNotCleared": [
"C"
]
}
{
"noBlueSuit": {}
}
"canJumpIntoIBJ"
"canLongIBJ"
{
"or": [
{
"heatFrames": 1300
},
{
"and": [
"canDoubleBombJump",
{
"heatFrames": 690
}
]
},
{
"and": [
"HiJump",
"canDoubleBombJump",
{
"heatFrames": 590
}
]
}
]
}
{
"or": [
{
"obstaclesCleared": [
"A"
]
},
"canPowerBombMidIBJ",
{
"and": [
"canBombAboveIBJ",
{
"heatFrames": 60
}
]
}
]
}Clears obstacles: A |
|
The shot block may respawn while bomb jumping and can be cleared by weaving a Power Bomb into the IBJ, or with a bomb placed overhead while bomb jumping. The Power Bomb can be placed one tile higher than the doors to also clear the Power Bomb Blocks above at the same time. Requires: "canIBJ"
{
"or": [
{
"and": [
{
"or": [
"canBombAboveIBJ",
"canPowerBombMidIBJ"
]
},
{
"heatFrames": 1000
}
]
},
{
"and": [
"canJumpIntoIBJ",
{
"heatFrames": 480
}
]
},
{
"and": [
"canDoubleBombJump",
"canJumpIntoIBJ",
{
"heatFrames": 300
}
]
}
]
}
{
"or": [
{
"and": [
"h_usePowerBomb",
{
"heatFrames": 50
}
]
},
{
"obstaclesCleared": [
"A"
]
}
]
}Clears obstacles: A Unlocks doors: {"types":["missiles"],"requires":[{"heatFrames":30}]}
{"types":["powerbomb"],"requires":[],"useImplicitRequires":false}Dev note: Placing a power bomb to break the shot block and the power bomb blocks without dropping the IBJ is the same level of control as canBombAboveIBJ. |
From: 6
Bottom Platform Junction With Pirates Killed
To: 4
Junction Above Bomb Blocks
Requires: "canLongIBJ"
{
"or": [
{
"and": [
"canJumpIntoIBJ",
{
"heatFrames": 1250
}
]
},
{
"and": [
"canJumpIntoIBJ",
"canDoubleBombJump",
{
"heatFrames": 700
}
]
},
{
"and": [
"HiJump",
"canJumpIntoIBJ",
"canDoubleBombJump",
{
"heatFrames": 630
}
]
},
{
"heatFrames": 2000
}
]
}
{
"or": [
"canPowerBombMidIBJ",
{
"and": [
"canBombAboveIBJ",
"canStaggeredIBJ",
{
"heatFrames": 220
}
]
},
{
"obstaclesCleared": [
"A"
]
},
{
"haveBlueSuit": {}
}
]
}Clears obstacles: A |
