canShinesparkSlopeClip (Expert+)
The ability to clip into a slope-type wall by shinesparking into it. In some cases this may require activating the spark at a precise horizontal position. Clipping into a wall in this way can be used to set up an X-Ray climb.
Dependencies: canHorizontalShinespark, canShinespark
Strats ()
From: 2
Bottom Right Door
To: 1
Top Right Door


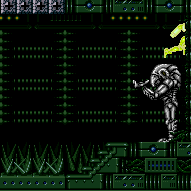
Gain a shinecharge and spark into the wall at the left side of the room to clip into it. From there, X-Ray climb to the top portion of the room (about 0.75 screens). Samus will be visible but off-camera, making the movement tricky. Only certain horizontal positions for the spark will work. There are periodic windows of approximately 4 good pixels followed by 8 bad pixels. Moonwalking back against the ledge below the door will put Samus into a good position. Being centered over this two-tile ledge is another position that works. Entrance condition: {
"comeInShinecharged": {}
}Requires: {
"shineChargeFrames": 35
}
{
  "shinespark": {
    "frames": 33,
    "excessFrames": 0
  }
}
"canShinesparkSlopeClip"
"canXRayClimb"
"canOffScreenMovement"
{
  "heatFrames": 1020
} |
From: 2
Bottom Right Door
To: 1
Top Right Door
Gain a shinecharge and spark into the wall at the left side of the room to clip into it. From there, X-Ray climb to the top portion of the room (about 0.75 screens). Samus will be visible but off-camera, making the movement tricky. Only certain horizontal positions for the spark will work. There are periodic windows of approximately 4 good pixels followed by 8 bad pixels. Moonwalking back against the ledge below the door will put Samus into a good position. Being centered over this two-tile ledge is another position that works. Entrance condition: {
"comeInShinecharging": {
"length": 3,
"openEnd": 1
}
}Requires: {
"shinespark": {
"frames": 33,
"excessFrames": 0
}
}
"canShinesparkSlopeClip"
"canXRayClimb"
"canOffScreenMovement"
{
"heatFrames": 1020
} |
From: 2
Bottom Right Door
To: 3
Acid Chozo Statue
Gain a shinecharge and spark into the wall at the left side of the room to clip into it. From there, X-Ray climb to the top portion of the room (about 0.75 screens). Samus will be visible but off-camera, making the movement tricky. Only certain horizontal positions for the spark will work. There are periodic windows of approximately 4 good pixels followed by 8 bad pixels. Moonwalking back against the ledge below the door will put Samus into a good position. Being centered over this two-tile ledge is another position that works. Entrance condition: {
"comeInShinecharged": {}
}Requires: {
"shineChargeFrames": 35
}
{
  "shinespark": {
    "frames": 33,
    "excessFrames": 0
  }
}
"canShinesparkSlopeClip"
"canXRayClimb"
"canOffScreenMovement"
{
  "or": [
    "canPreciseWallJump",
    "SpaceJump",
    "HiJump",
    "canTrickySpringBallJump"
  ]
}
{
  "heatFrames": 970
} |
From: 2
Bottom Right Door
To: 3
Acid Chozo Statue
Gain a shinecharge and spark into the wall at the left side of the room to clip into it. From there, X-Ray climb to the top portion of the room (about 0.75 screens). Samus will be visible but off-camera, making the movement tricky. Only certain horizontal positions for the spark will work. There are periodic windows of approximately 4 good pixels followed by 8 bad pixels. Moonwalking back against the ledge below the door will put Samus into a good position. Being centered over this two-tile ledge is another position that works. Entrance condition: {
"comeInShinecharging": {
"length": 3,
"openEnd": 1
}
}Requires: {
"shinespark": {
"frames": 33,
"excessFrames": 0
}
}
"canShinesparkSlopeClip"
"canXRayClimb"
"canOffScreenMovement"
{
"or": [
"canPreciseWallJump",
"SpaceJump",
"HiJump",
"canTrickySpringBallJump"
]
}
{
"heatFrames": 970
} |
From: 5
Bottom Junction Right of Morph Tunnel
To: 1
Top Right Door


Jump, press against the wall, and use a flash suit or blue suit to spark into it, clipping inside of it. From there, X-Ray climb to the top portion of the room (about 0.75 screens). Samus will be visible but off-camera, making the movement tricky. Requires: "h_storedSpark"
{
"shinespark": {
"frames": 1,
"excessFrames": 1
}
}
"canShinesparkSlopeClip"
"canXRayClimb"
"canOffScreenMovement"
{
"heatFrames": 1020
} |
From: 6
Junction Below Acid Plug
To: 4
Junction Above Acid Plug, Without Acid


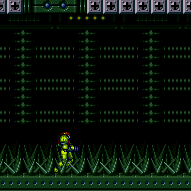
Jump a high as possible, and use a flash suit or blue suit to diagonally spark either to the right or left to reach the top of the room. If heat protection is available, sparking diagonally left uses less energy; in this case, Samus will end lodged inside the wall but can use Morph to escape. Alternatively, spark horizontally left to clip into the wall; turn back and forth 3 times to wiggle most of the way out, then turn-around spin jump up to the ledge; clipping into the right wall can also work but requires much greater precision in the spark position. Requires: {
"or": [
"f_UsedAcidChozoStatue",
{
"obstaclesCleared": [
"f_UsedAcidChozoStatue"
]
}
]
}
"h_storedSpark"
{
"or": [
{
"and": [
{
"heatFrames": 210
},
{
"shinespark": {
"frames": 28,
"excessFrames": 0
}
}
]
},
{
"and": [
"h_heatProof",
{
"shinespark": {
"frames": 16,
"excessFrames": 13
}
}
]
},
{
"and": [
"h_heatProof",
"canShinesparkSlopeClip",
{
"shinespark": {
"frames": 1,
"excessFrames": 1
}
}
]
}
]
} |
From: 2
Middle Left Door
To: 1
Top Left Door


Jump close to ceiling, and activate a shinespark to the right. If successful, Samus will clip into the wall behind the Chozo statue and be able to X-Ray climb up. Only certain horizontal positions will cause Samus to clip into the wall. It will work to activate the spark while Samus is centered under the second Grapple block or slightly to the left. Entrance condition: {
"comeInShinecharged": {}
}Requires: {
"shineChargeFrames": 50
}
"canShinechargeMovementTricky"
{
"shinespark": {
"frames": 88,
"excessFrames": 0
}
}
"canShinesparkSlopeClip"
"canXRayClimb"
{
"or": [
{
"getBlueSpeed": {
"usedTiles": 16,
"steepDownTiles": 4,
"openEnd": 0
}
},
"can4HighMidAirMorph"
]
}Exit condition: {
"leaveNormally": {}
}Unlocks doors: {"types":["ammo"],"requires":[]}Dev note: The leaveNormally is to ensure it won't be required to do the Speed block moondance blind up there. |
From: 2
Middle Left Door
To: 1
Top Left Door
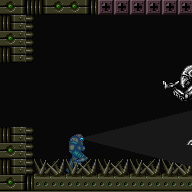
Gain a shinecharge near the Chozo statue, jump on top of it, press against the wall to the right, and activate a horizontal shinespark to the right. Samus will clip into the wall and be able to X-Ray climb to the space above. This trick works because the wall is made of half-tile slopes, rather than regular solid tiles. Requires: {
"not": "f_DefeatedPhantoon"
}
"canRiskPermanentLossOfAccess"
{
"or": [
"h_shinechargeMaxRunway",
"h_storedSpark"
]
}
"canShinechargeMovement"
{
"shinespark": {
"frames": 1,
"excessFrames": 1
}
}
"canShinesparkSlopeClip"
"canXRayClimb"
{
"or": [
{
"getBlueSpeed": {
"usedTiles": 16,
"steepDownTiles": 4,
"openEnd": 0
}
},
"can4HighMidAirMorph"
]
}Exit condition: {
"leaveNormally": {}
}Unlocks doors: {"types":["ammo"],"requires":[]}Dev note: The leaveNormally is to ensure it won't be required to do the Speed block moondance blind up there. |
From: 2
Middle Left Door
To: 1
Top Left Door


Jump close to ceiling, and activate a shinespark to the right. If successful, Samus will clip into the wall behind the Chozo statue and be able to X-Ray climb up. Only certain horizontal positions will cause Samus to clip into the wall. It will work to activate the spark while Samus is centered under the second Grapple block or slightly to the left. Requires: "h_storedSpark"
"canDash"
"canShinechargeMovementTricky"
{
"shinespark": {
"frames": 88,
"excessFrames": 0
}
}
"canShinesparkSlopeClip"
"canXRayClimb"
{
"or": [
{
"getBlueSpeed": {
"usedTiles": 16,
"steepDownTiles": 4,
"openEnd": 0
}
},
"can4HighMidAirMorph"
]
}Exit condition: {
"leaveNormally": {}
}Unlocks doors: {"types":["ammo"],"requires":[]}Dev note: The leaveNormally is to ensure it won't be required to do the Speed block moondance blind up there. |
From: 2
Middle Left Door
To: 1
Top Left Door

Arm pump slowly after the Chozo statue comes on screen, when the camera locks and Samus starts to move again, armpump only 3 or 4 more times to clear the last spike and avoid an extra spike hit. Requires: {
"doorUnlockedAtNode": 2
}
"canXMode"
"h_XModeSpikeHit"
"h_shinechargeMaxRunway"
"canShinechargeMovement"
{
  "shinespark": {
    "frames": 1,
    "excessFrames": 1
  }
}
"canShinesparkSlopeClip"
"canXRayClimb"
{
  "or": [
    {
      "getBlueSpeed": {
        "usedTiles": 16,
        "steepDownTiles": 4,
        "openEnd": 0
      }
    },
    "can4HighMidAirMorph"
  ]
}
Exit condition: {
"leaveNormally": {}
}Unlocks doors: {"types":["ammo"],"requires":[]}Dev note: The leaveNormally is to ensure it won't be required to do the Speed block moondance blind up there. |
From: 6
Bowling Chozo Statue
To: 1
Top Left Door
Jump onto the Chozo statue, press against the wall, and shinespark into it to clip in, then X-Ray climb up.. Requires: "h_storedSpark"
{
"shinespark": {
"frames": 1,
"excessFrames": 1
}
}
"canShinesparkSlopeClip"
"canXRayClimb"
{
"or": [
{
"getBlueSpeed": {
"usedTiles": 16,
"steepDownTiles": 4,
"openEnd": 0
}
},
"can4HighMidAirMorph"
]
}Exit condition: {
"leaveNormally": {}
}Unlocks doors: {"types":["ammo"],"requires":[]}Dev note: The leaveNormally is to ensure it won't be required to do the Speed block moondance blind up there. |
From: 6
Bowling Chozo Statue
To: 1
Top Left Door


Use X-mode to gain a shinecharge near the Chozo statue. Jump onto the Chozo statue, press against the wall, and shinespark into it to clip in, then X-Ray climb up. A second spike hit can be avoided by holding an angle button to turn around while in X-mode; arm pump to move out of the spikes before activating the shinecharge and exiting X-mode. Requires: "canXMode"
"h_XModeSpikeHit"
"h_shinechargeMaxRunway"
"canShinechargeMovement"
{
"shinespark": {
"frames": 1,
"excessFrames": 1
}
}
"canShinesparkSlopeClip"
"canXRayClimb"
{
"or": [
{
"getBlueSpeed": {
"usedTiles": 16,
"steepDownTiles": 4,
"openEnd": 0
}
},
"can4HighMidAirMorph"
]
}Exit condition: {
"leaveNormally": {}
}Unlocks doors: {"types":["ammo"],"requires":[]}Dev note: The leaveNormally is to ensure it won't be required to do the Speed block moondance blind up there. |