canInsaneMidAirMorph (Insane)
Performing a mid-air morph exceptionally quickly or precisely.
Dependencies: can4HighMidAirMorph, canDisableEquipment, canMidAirMorph, canTrivialMidAirMorph
Strats ()
|


Jump, aim up, and fire Grapple mid-air to clip the beam through the ceiling. Requires: {
"resetRoom": {
"nodes": [
1,
2
]
}
}
"canUseGrapple"
"canTrickyJump"
{
"cycleFrames": 150
}
{
"or": [
{
"noFlashSuit": {}
},
{
"and": [
"canComplexCarryFlashSuit",
"h_useSpringBall",
{
"cycleFrames": 60
}
]
},
{
"and": [
"canTrickyCarryFlashSuit",
"canInsaneMidAirMorph",
"canBeExtremelyPatient",
{
"cycleFrames": 200
}
]
}
]
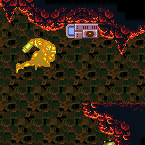
}Farm cycle drops: 1 Geemer (orange) |
|
Requires: "h_blueGateGlitch" Clears obstacles: B |
|


Open the gate (Wave Beam or gate glitch) and clear the Small Sidehoppers for a runway. Use respawning Geegas for energy. Entrance condition: {
"comeInWithRMode": {}
}Requires: {
"or": [
"Wave",
"h_blueGateGlitch",
{
"and": [
{
"notable": "Grapple Gate Glitch"
},
"canPreciseGrapple",
"h_speedJump",
"canTrickyJump"
]
}
]
}
{
"refill": [
"Energy"
]
}
{
"canShineCharge": {
"usedTiles": 30,
"openEnd": 0
}
}
{
"autoReserveTrigger": {}
}
"canRModeSparkInterrupt"Clears obstacles: B |
|
Charge a spark along the bottom of the room and use it to spark through the right side door. Requires opening the door and shutter first. Requires: "canShinechargeMovementComplex"
"HiJump"
{
"or": [
"SpaceJump",
"Grapple"
]
}
{
"or": [
{
"obstaclesCleared": [
"A"
]
},
"Wave",
{
"and": [
"h_heatedBlueGateGlitch",
{
"heatFrames": 60
}
]
}
]
}
{
"or": [
{
"and": [
"canTrickyDashJump",
"canWallJump"
]
},
"SpaceJump"
]
}
{
"canShineCharge": {
"usedTiles": 28,
"gentleUpTiles": 3,
"gentleDownTiles": 3,
"openEnd": 0
}
}
{
"heatFrames": 780
}
{
"shinespark": {
"frames": 57,
"excessFrames": 0
}
}Exit condition: {
"leaveWithSpark": {}
}Dev note: A hero shot variation of this strat might be possible, starting from a node to the left; if nothing else it could be done with a shortcharge on the 12-tile platform to the left. |
|
Requires: {
"heatFrames": 250
}
"h_heatedBlueGateGlitch"
{
"or": [
"canDash",
{
"heatFrames": 85
}
]
}Clears obstacles: A |
|


Requires: "Morph"
{
"heatFrames": 260
}
"h_heatedBlueGateGlitch"Clears obstacles: A |
From: 5
Middle Junction (Ledge Right of Morph Tunnel)
To: 2
Middle Left Door
Requires: "Morph"
{
"heatFrames": 150
}
"h_heatedBlueGateGlitch"
{
"or": [
"canDash",
{
"heatFrames": 65
}
]
}Clears obstacles: A |
From: 5
Middle Junction (Ledge Right of Morph Tunnel)
To: 2
Middle Left Door
Requires: "canDash"
"Morph"
{
"heatFrames": 150
}
"h_heatedBlueGateGlitch"Exit condition: {
"leaveWithRunway": {
"length": 11,
"openEnd": 0,
"gentleDownTiles": 4
}
}Unlocks doors: {"types":["missiles"],"requires":[{"heatFrames":90}]}
{"types":["super"],"requires":[]}
{"types":["powerbomb"],"requires":[{"heatFrames":110}]} |
From: 5
Bottom Floating Platform Junction
To: 5
Bottom Floating Platform Junction


Requires: {
"heatFrames": 135
}
"h_heatedBlueGateGlitch"Clears obstacles: A |
From: 5
Bottom Floating Platform Junction
To: 5
Bottom Floating Platform Junction

Farm before, during, and after the gate glitch in order to open the gate without wasting ammo or Energy. Requires: {
"notable": "Gate Glitch With Farming"
}
{
"heatFrames": 300
}
"h_gateGlitch"
{
"or": [
{
"ammo": {
"type": "Missile",
"count": 1
}
},
{
"ammo": {
"type": "Super",
"count": 1
}
}
]
}
{
"or": [
"h_heatResistant",
"canTrickyJump",
{
"resourceCapacity": [
{
"type": "RegularEnergy",
"count": 199
}
]
}
]
}Clears obstacles: A Dev note: There is still some leniency built in, so that perfect execution is not required, but Samus ends without losing resources. Without leniency, this can be done with about 235 heatFrames. |
|


Build up 34 tiles worth of run speed and jump into the door on the last frame. Hold angle up through the transition but also aim down to duck below the ceiling until Samus is past it. Fire the Super Missile frame perfectly to open the gate. Entrance condition: {
"comeInRunning": {
"speedBooster": "yes",
"minTiles": 34
}
}Requires: {
"notable": "High Speed Gate Glitch"
}
"h_speedJump"
"h_heatedGreenGateGlitch"
{
"ammo": {
"type": "Super",
"count": 1
}
}
"canInsaneJump"
{
"noFlashSuit": {}
}Clears obstacles: A Dev note: 1 extra tile is added so that you can jump into the door, simplifying the inputs a bit. |
|
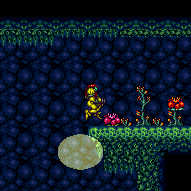
Crouch jump and let the Sova move into Samus from the right, to get a upward boost, then hold left to boost horizontally to the ledge. Then crouch jump from the slope on the left, and morph into a neutral damage boost. Requires: {
"notable": "Sova Boost"
}
"Morph"
"canCrouchJump"
"canTrickyJump"
{
"or": [
"canInsaneMidAirMorph",
"canHorizontalDamageBoost"
]
}
"h_midAirMorphDamageBoost"
{
"enemyDamage": {
"enemy": "Sova",
"type": "contact",
"hits": 2
}
} |
|
Requires: {
"or": [
"h_greenGateGlitch",
{
"obstaclesCleared": [
"A"
]
}
]
}Clears obstacles: A |
|
Requires: {
"or": [
"h_heatedGreenGateGlitch",
{
"obstaclesCleared": [
"A"
]
}
]
}
{
"enemyDamage": {
"enemy": "Ripper 2 (red)",
"type": "contact",
"hits": 2
}
}Exit condition: {
"leaveWithRunway": {
"length": 29,
"openEnd": 1
}
} |
|

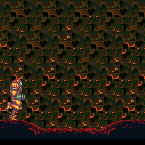
You can Crystal Flash first, then open the gate, dodge the bottom most rippers that come across the platform, and pick up their Super drops when they hit the light orb. Alternatively, open the gate first, farm the bottom two Rippers with Power Bombs or Screw Attack to get your Supers back and Crystal Flash afterwards. The runway is now clear to shinecharge. Alternatively, you can farm with Screw Attack or Power Bombs. Kill the bottom two Rippers first, then the one bouncing between platforms. Keep the third Ripper from the top alive for the best interrupt. With high reserve energy, take the interrupt close to the right door and with the Ripper moving right - it will not come back in time to hit you again. Once you have blue suit, you cannot kill any more Rippers with Screw Attack, but you are still invulnerable to contact hits. Entrance condition: {
"comeInWithRMode": {}
}Requires: "h_heatedGreenGateGlitch"
{
"or": [
{
"and": [
{
"or": [
{
"resourceAvailable": [
{
"type": "Super",
"count": 10
}
]
},
{
"and": [
{
"resourceAvailable": [
{
"type": "Super",
"count": 8
}
]
},
{
"resourceAvailable": [
{
"type": "Energy",
"count": 51
}
]
},
{
"or": [
"ScrewAttack",
{
"enemyKill": {
"enemies": [
[
"Ripper 2 (red)",
"Ripper 2 (red)"
]
],
"explicitWeapons": [
"PowerBomb"
]
}
}
]
},
{
"heatFrames": 600
},
{
"partialRefill": {
"type": "Super",
"limit": 10
}
}
]
}
]
},
"h_heatedCrystalFlashForReserveEnergy"
]
},
{
"and": [
{
"or": [
"ScrewAttack",
{
"enemyKill": {
"enemies": [
[
"Ripper 2 (red)",
"Ripper 2 (red)"
],
[
"Ripper 2 (red)"
]
],
"explicitWeapons": [
"PowerBomb"
]
}
}
]
},
"h_heatProof",
"h_RModeCanRefillReserves",
{
"resourceMissingAtMost": [
{
"type": "Super",
"count": 2
}
]
},
{
"partialRefill": {
"type": "ReserveEnergy",
"limit": 60
}
}
]
},
{
"and": [
{
"or": [
"ScrewAttack",
{
"enemyKill": {
"enemies": [
[
"Ripper 2 (red)"
]
],
"explicitWeapons": [
"PowerBomb"
]
}
}
]
},
"h_heatProof",
"h_RModeCanRefillReserves",
{
"resourceMissingAtMost": [
{
"type": "Super",
"count": 4
}
]
},
{
"partialRefill": {
"type": "ReserveEnergy",
"limit": 20
}
}
]
}
]
}
{
"canShineCharge": {
"usedTiles": 28,
"openEnd": 0
}
}
{
"autoReserveTrigger": {}
}
{
"or": [
{
"and": [
"h_heatProof",
{
"autoReserveTrigger": {}
},
"canRModeSparkInterrupt"
]
},
"h_heatTriggerRModeSparkInterrupt"
]
}Clears obstacles: A, B |
|
Requires: {
"or": [
"h_heatedGreenGateGlitch",
{
"obstaclesCleared": [
"A"
]
}
]
}
{
"heatFrames": 50
}
{
"or": [
"canDash",
{
"heatFrames": 15
}
]
}Clears obstacles: A Dev note: FIXME: A strat could be added that runs into the room and shoots directly at the gate, instead of stopping in front of it. |
|

Requires: {
"not": "f_DefeatedPhantoon"
}
"h_speedJump"
"canInsaneJump"
"canMomentumConservingMorph"
"canInsaneMidAirMorph"Exit condition: {
"leaveWithSidePlatform": {
"height": 3,
"runway": {
"length": 45,
"openEnd": 1
},
"obstruction": [
5,
0
]
}
}Dev note: Max extra run speed $7.0. The obstruction (from the Workrobot) actually extends between 4 and 5 tiles. |
From: 2
Middle Left Door
To: 6
Bowling Chozo Statue


Jump into the room and morph along the ceiling to maximize distance. Unmorph while entering the spikes to minimize knockback Then build up speed and airball again to cross the spikes. With only a short runway available, high precision is required. Entrance condition: {
"comeInRunning": {
"speedBooster": "yes",
"minTiles": 25
}
}Requires: "h_speedJump"
"canInsaneJump"
"canMomentumConservingMorph"
"canInsaneMidAirMorph"
"canUseIFrames"
{
"spikeHits": 1
} |
|
Jump, place a bomb mid-air, then jump with controlled height to precisely mid-air morph and get a horizontal boost. Requires: "canJumpIntoIBJ" "canBombHorizontally" "canInsaneJump" "canInsaneMidAirMorph" "canResetFallSpeed" |
|


Requires: "Gravity"
{
  "or": [
    "h_greenGateGlitch",
    {
      "obstaclesCleared": [
        "A"
      ]
    }
  ]
}
Clears obstacles: A |
|
Perform the Gate Glitch by moving towards the gate and firing the super on the correct frame for it to pass through and reach the button on the other side. Due to the water physics, many traditional setups for the glitch will not work. Requires: {
"notable": "Suitless Green Gate Glitch"
}
{
"or": [
"h_underwaterGreenGateGlitch",
{
"obstaclesCleared": [
"A"
]
}
]
}Clears obstacles: A |
|


Requires: "Gravity" "h_speedJump" "canInsaneJump" "canMomentumConservingMorph" "canInsaneMidAirMorph" Exit condition: {
"leaveWithSidePlatform": {
"height": 3,
"runway": {
"length": 17,
"openEnd": 0,
"steepDownTiles": 2,
"startingSteepDownTiles": 1
},
"obstruction": [
4,
0
]
}
}Dev note: Max extra run speed $3.9. This strat is included for completeness, though it apparently doesn't have any applications. |
|
Requires: {
"obstaclesCleared": [
"A"
]
}
"Gravity"
"h_speedJump"
"canInsaneJump"
{
"or": [
{
"and": [
"canMomentumConservingMorph",
"canInsaneMidAirMorph"
]
},
"canMomentumConservingTurnaround"
]
}Exit condition: {
"leaveWithSidePlatform": {
"height": 1,
"runway": {
"length": 36,
"openEnd": 1,
"gentleUpTiles": 2
},
"obstruction": [
3,
0
]
}
}Dev note: Max extra run speed $6.3. |
From: 2
Right Door
To: 3
Elevator
This strat is included for completeness, though generally it would be easier to do a spring ball bounce instead. Entrance condition: {
"comeInWithSidePlatform": {
"platforms": [
{
"minHeight": 2,
"maxHeight": 2,
"minTiles": 45,
"speedBooster": "yes",
"obstructions": [
[
1,
0
]
],
"note": [
"This applies to Noob Bridge."
]
},
{
"minHeight": 2,
"maxHeight": 2,
"minTiles": 45,
"speedBooster": "yes",
"obstructions": [
[
3,
0
]
],
"note": [
"This applies to Statues Hallway and Baby Kraid Room."
]
},
{
"minHeight": 3,
"maxHeight": 3,
"minTiles": 45,
"speedBooster": "yes",
"obstructions": [
[
3,
0
]
],
"note": [
"This applies to Bowling Alley (middle, power off) and Basement (power on)."
]
},
{
"minHeight": 3,
"maxHeight": 3,
"minTiles": 39.4375,
"speedBooster": "yes",
"obstructions": [
[
3,
2
]
],
"note": [
"This applies to Metal Pirates Room."
]
}
]
}
}Requires: "HiJump" "canInsaneJump" "canMomentumConservingMorph" "canInsaneMidAirMorph" "canTrickySpringBallJump" |