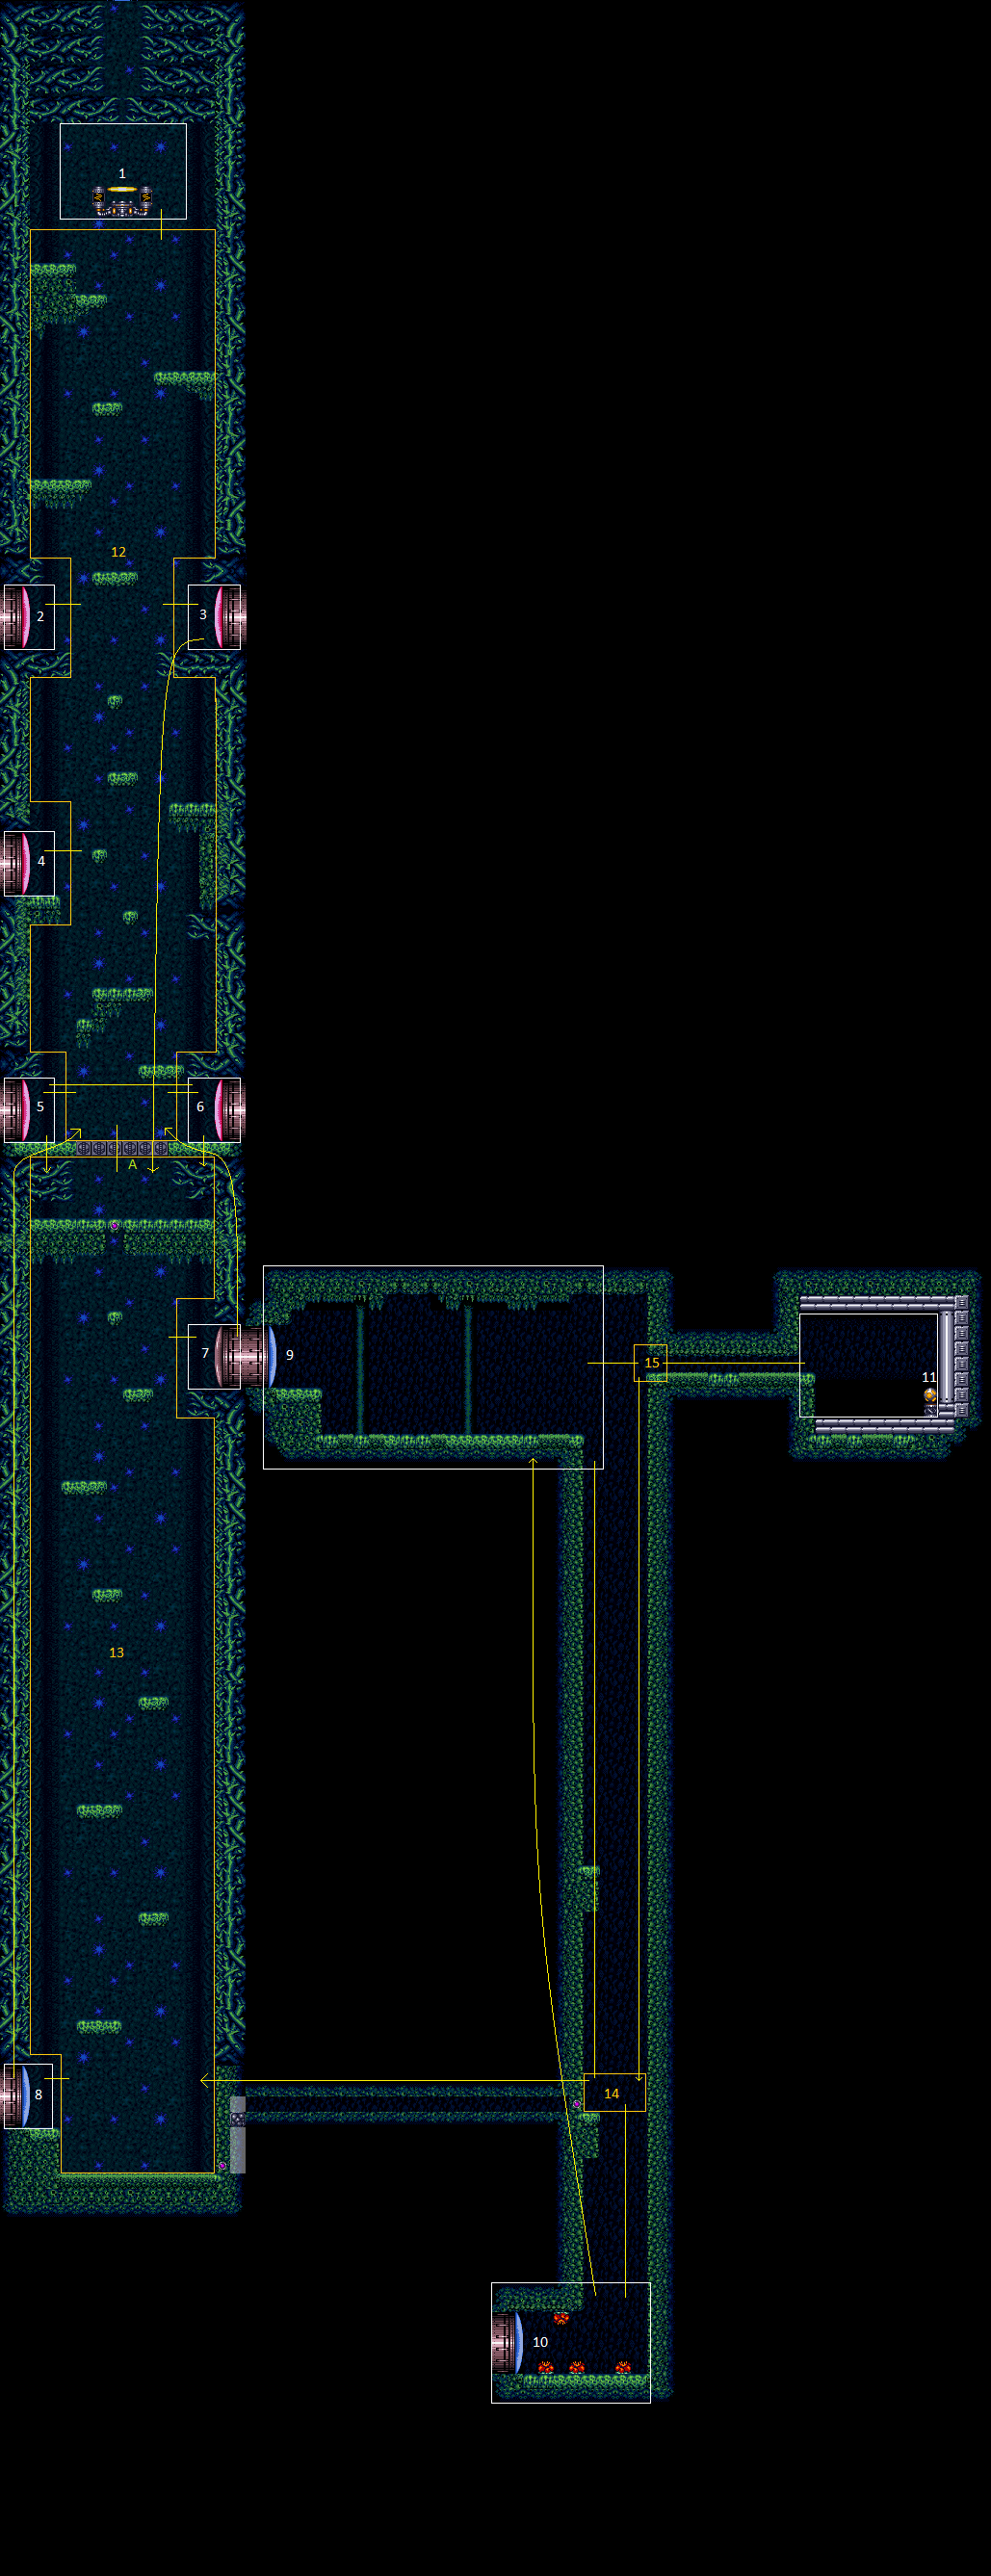
Green Brinstar Main Shaft: Direct G-Mode Spark Interrupt
Room ID: 44

From: 8
Below Power Bomb Blocks - Bottom Left Door
To: 9
Right Etecoon Shaft - Top Left Door
Enter with G-Mode. Jump to the top of the shaft. Place a Power Bomb against the ceiling next to the shot block (do not touch the scroll block). Drop back to the bottom of the shaft, roll against the bomb block until Samus passes through. Jump through the crumble block and through the morph tunnel. Once Samus can stand up, do so and use X-Ray to switch to R-Mode: be sure to hold X-Ray until it fully widens. Bomb the block, roll back through the tunnel and stop next to the crumble block. Use a Power Bomb or Five-Bomb Drop to clear the lower bomb block. Wait next to the crumble block until the global Zeela is visible coming down the right wall. Wait until the last possible moment to touch the crumbe block and allow the Zeela through, and immediately roll away to avoid getting hit by it. Lead it back through the Morph tunnel. Jump up to the box with the item. Wait for the Zeela to leave if needed, then Crystal Flash inside. Damage back down using the Zeela. If this needs multiple laps, use a Super to knock it down off the right wall before it can enter the item box. Lead it back through the Morph tunnel and into the Etecoons shaft. Let the Zeela pass going up the left wall and wait until it has moved far enough up before using a Crystal Flash. Use the Zeela to damage back down, shinecharge on the runway, and jump into the Zeela to interrupt. Entrance condition: {
"comeInWithGMode": {
"mode": "direct",
"morphed": false
}
}Requires: "Morph"
"h_usePowerBomb"
"canMidAirMorph"
"h_bombThings"
{
"or": [
"h_usePowerBomb",
{
"and": [
"Charge",
"h_useMorphBombs"
]
}
]
}
"canBeVeryPatient"
"h_CrystalFlashForReserveEnergy"
{
"or": [
{
"disableEquipment": "ETank"
},
{
"resourceAtMost": [
{
"type": "ReserveEnergy",
"count": 5
}
]
}
]
}
{
"or": [
"canConsecutiveWallJump",
"canLongIBJ",
"SpaceJump"
]
}
{
"or": [
{
"disableEquipment": "ETank"
},
{
"ammo": {
"type": "Super",
"count": 3
}
}
]
}
{
"or": [
{
"canShineCharge": {
"usedTiles": 17,
"openEnd": 1
}
},
{
"and": [
"h_frozenEnemyRunway",
{
"ammo": {
"type": "Super",
"count": 1
}
},
{
"canShineCharge": {
"usedTiles": 18,
"openEnd": 1
}
}
]
}
]
}
{
"autoReserveTrigger": {}
}
"canRModeSparkInterrupt"Clears obstacles: A |